Loading ...
Loading ...
Loading ...
en Before using for the first time
14
KBefore using for the first
time
Bef or e usi ng f or t he f i r st ti me
Before you can use your new appliance, you must
make some settings. You must also clean the cooking
compartment and accessories.
Before using for the first time
Before using the appliance for the first time, ask your
water supplier about the hardness of your tap water.
To ensure that the appliance can reliably remind you to
descale it when required, you must set your water
hardness range correctly.
Caution!
■ The appliance may become damaged due to the
use of unsuitable liquids.
Do not use distilled water, highly chlorinated tap
water (>40 mg/l) or other liquids.
Only use cold, fresh tap water, softened water or
non-carbonated mineral water.
■ Malfunctions may occur when using filtered or
demineralised water.
The appliance may request that you top up the water
tank even though it may be full, or operation with
steam is cancelled after approx. two minutes.
If required, mix filtered or demineralised water with
the bottled non-carbonated mineral water with a ratio
of one to one.
Notes
■ If your water is very hard, we recommend that you
use softened water.
■ If you only use softened water, you can set the water
hardness range to "softened".
■ If you use mineral water, set the water hardness
range to "4 very hard".
■ If you use mineral water, you must only use non-
carbonated mineral water.
Initial use
After connecting the appliance to the power or following
a power cut, the settings for initial use are shown on the
display. It may take a few seconds for the instruction to
appear.
Note: You can change these settings at any time in the
basic settings. ~ "Basic settings" on page 22
Setting the language
1. Turn the rotary selector to set the required language.
2. Touch the s field to confirm.
The next setting appears.
Setting the time
1. Set the time using the rotary selector.
2. Touch the s field to confirm.
The next setting appears.
Setting the water hardness
1. Use the rotary selector to set the water hardness.
2. Touch the s field to confirm.
A note appears in the display confirming that the initial
use has been completed. The current time is displayed.
Switch the appliance off using the ÿ On/Off button if
you do not need to use it.
Cleaning the cooking compartment and
accessories
Before using the appliance to prepare food for the first
time, you must clean the cooking compartment and
accessories.
Cleaning the cooking compartment
To eliminate the new-appliance smell, heat up the
cooking compartment without anything in it and with the
oven door closed.
1. Remove the accessories from the cooking
compartment.
2. Remove any leftover packaging, such as polystyrene
pellets, from the cooking compartment and remove
the adhesive tape that is in or on the appliance.
3. Before heating the appliance, wipe the smooth
surfaces in the cooking compartment with a soft,
damp cloth.
4. Press the on/off button ÿ to switch on the
appliance.
5. Fill the water tank. ~ "Filling the water tank"
on page 19
6. Set the specified type of heating, temperature and
steam injection, then start the appliance. ~ "Steam
baking – Steam-assisted cooking" on page 18
7. Keep the kitchen ventilated while the appliance is
heating.
8. Use the on/off button ÿ to switch off the appliance
once the specified time has elapsed.
9. Wait for the cooking compartment to cool down.
10. Clean the smooth surfaces with soapy water and a
dish cloth.
11. Empty the water tank and dry the cooking
compartment. ~ "After every steam operation"
on page 20
Cleaning the accessories
Clean the accessories thoroughly using soapy water
and a dish cloth or soft brush.
Water hardness range Setting
0 00 softened
1 (up to 1.3 mmol/l) 01 soft
2 (1.3 - 2.5 mmol/l) 02 medium
3 (2.5 - 3.8 mmol/l) 03 hard
4 (above 3.8 mmol/l) 04 very hard
Settings
Type of heating 4D hot air < with added steam, setting 03
(high)
Temperature Maximum
Cooking time 1 hour
Operating the appliance en
15
1Operating the appliance
Oper at i ng t he appl i anc e
You have already learnt about the controls and how
they work. Now we will explain how to set your
appliance. You will learn about what happens when you
switch the appliance on and off, and how to select the
operating mode.
Switching the appliance on and off
Before you are able to set the appliance, you must
switch it on.
Note: The childproof lock and the timer can also be set
when the appliance is switched off. Certain displays and
notes, such as those relating to the residual heat in the
cooking compartment, remain visible on the display
after the appliance has been switched off.
Switch off your appliance when you do not need to use
it. If no settings are applied for a long time, the
appliance switches itself off automatically.
Switching on the appliance
Press the ÿ On/Off button to switch on the appliance.
All touch fields light up red. The Bosch logo appears on
the display, and then the first heating type in the
selection list.
Note: In the basic settings, you can specify which
operating mode should appear after the appliance is
switched on. ~ "Basic settings" on page 22
Switching off the appliance
Press the ÿ On/Off button to switch off the appliance.
Any functions that may be running are cancelled.
The time, or if applicable, the residual heat indicator,
appears on the display.
Note: In the basic settings, you can set whether the
clock should be displayed when the appliance is
switched off. ~ "Basic settings" on page 22
Starting the operation
You must press the l Start/Stop button to start each
operation.
After starting the appliance, the time display is shown
on the display along with the settings. The display ring
and the heating line also appear.
Pausing the operation
You can also interrupt and then continue an operation
using the l Start/Stop button.
If you press and hold the l Start/Stop button for
approx. 3 seconds, the operation is cancelled and all
settings are reset.
Note: The fan may continue to run after an operation
has been paused or cancelled.
Selecting an operating mode
Once the appliance is switched on, the default
operating mode is displayed. You can start this setting
immediately using the l Start/Stop button.
If you want to select a different operating mode, you
can find detailed descriptions of these modes in the
relevant chapters.
The following always applies:
1. Touch the appropriate field.
The symbol lights up red.
2. Turn the rotary selector to change the highlighted
selection.
3. If necessary, apply other settings.
To do this, touch the appropriate field and change
the value using the rotary selector.
4. Press the l Start/Stop button to start.
The appliance starts the operation.
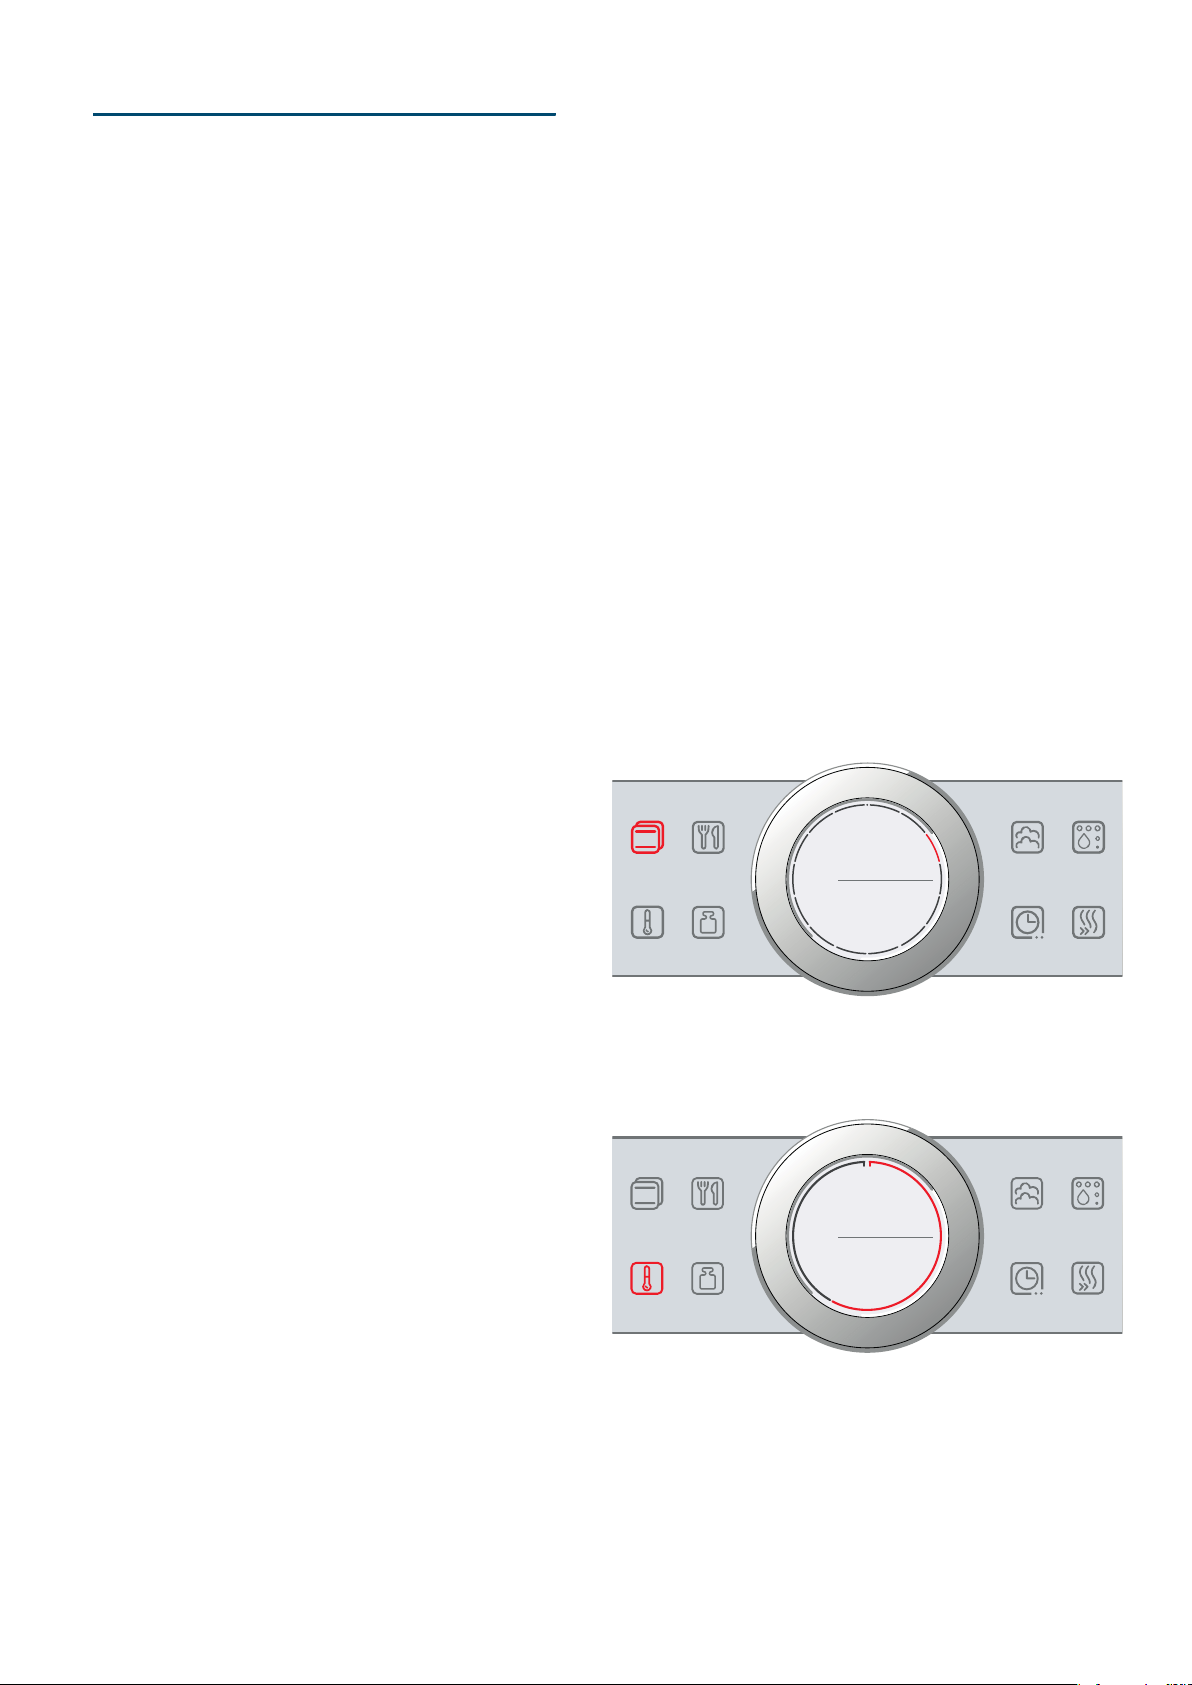
Setting the type of heating and temperature
If the "Types of heating" operating mode has not been
selected, touch the ! field. The symbol lights up red
and the first type of heating appears in the display with
a default temperature.
Example in the picture: Hot air eco . at 195 °C.
1. Turn the rotary selector to set the type of heating.
2. Touch the } field.
The temperature is highlighted in white in the
display.
3. Turn the rotary selector to set the temperature.
4. Press the l Start/Stop button to start.
The time in the display shows how long the
operation has already been running.
7\SHVRI
KHDWLQJ
+RWDLU
HFR
`
&
7HPSH
UDWXUH
Loading ...
Loading ...
Loading ...