Loading ...
Loading ...
Loading ...
26
USB
4821
Abcdefghi
Abcdefghi
6/10
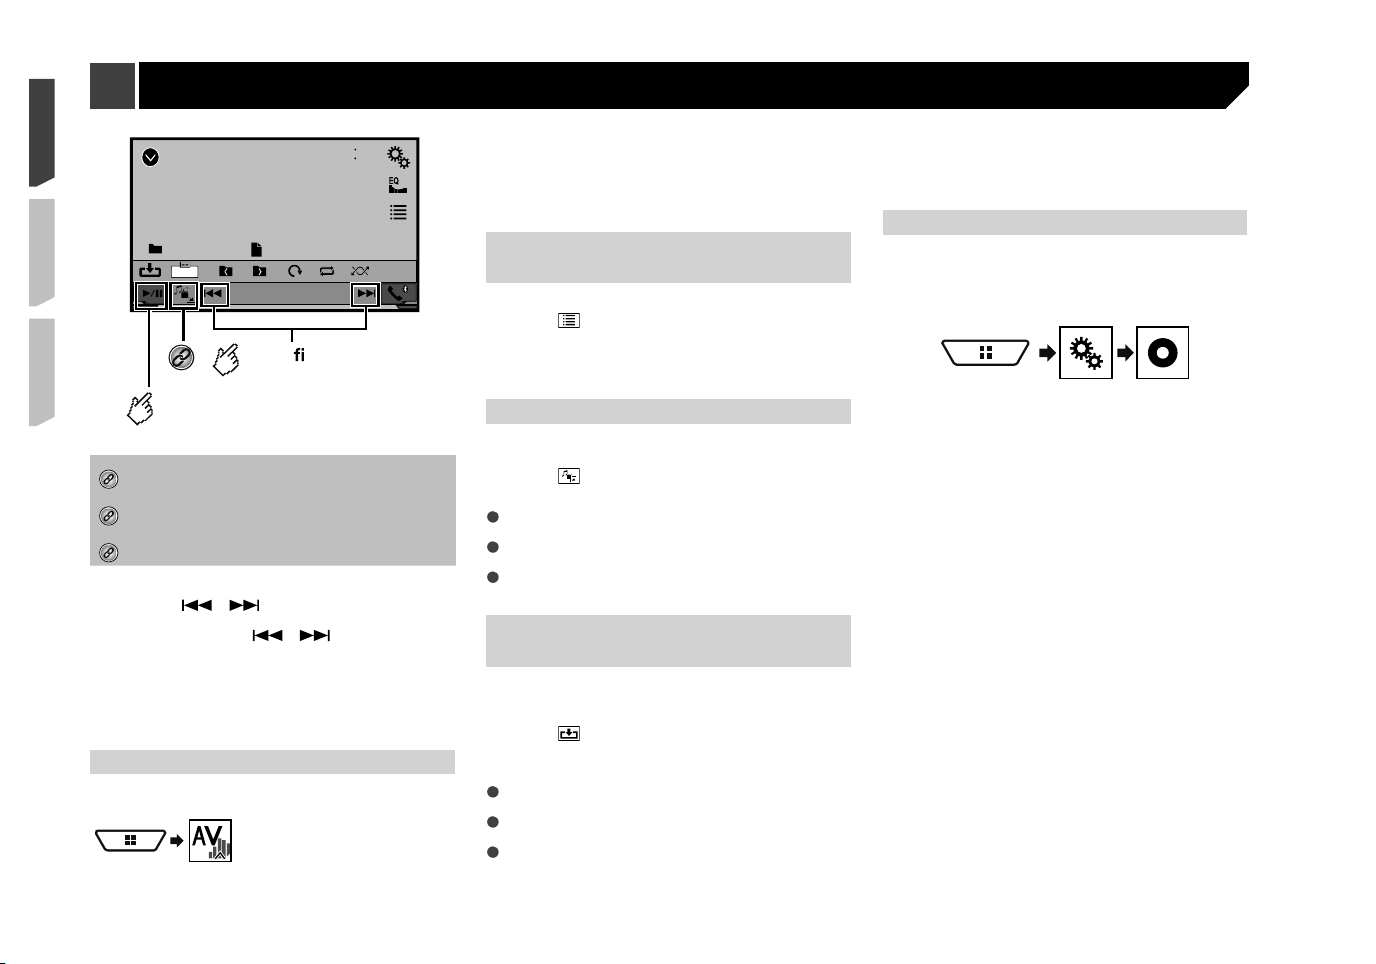
Trimming
Skips les forward
or backward.
Switches between
playback and pause.
*3
*1
Saves the current image as the wallscreen.
Saving the image as the wallscreen on page 26
*2
Selects a file from the list.
Selecting files from the file name list on page 26
*3
Switches the media file type.
Switching the media file type on page 26
p JPEG images are not displayed in the rear display.
p By pressing or , you can also skip files forward or
backward.
p By pressing and holding or , you can search 10
JPEG files at a time. If the file currently being played is the
first or last file in the folder, the search is not performed.
p Changing the wide screen mode.
Common operations on page 51
You can view still images stored in an USB storage device.
Media compatibility chart on page 64
Starting procedure
1 Display the “
AV source selection
” screen.
2 Plug the USB storage device.
Plugging and unplugging a USB storage device on page 9
p Playback is performed in order of folder numbers. Folders
are skipped if they contain no playable files.
3 Touch [
USB
].
The image is displayed on the screen.
Selecting �les from the �le
name list
You can select files to view using the file name list.
1 Touch .
2 Touch a file on the list to play back.
p Touching a folder on the list shows its contents. You can play
a file on the list by touching it.
Switching the media �le type
When playing a digital media containing a mixture of various
media file types you can switch between media file types to play.
1 Touch .
2 Touch the item you want to set.
Music
:
Switches the media file type to music (compressed audio).
Video
:
Switches the media file type to video.
Photo
:
Switches the media file type to still image (JPEG data).
Saving the image as the
wallscreen
You can save the current displayed image in the memory of this
unit and set as the wallscreen as the AV screen or the Home
screen.
1 Touch on the image that you want to save.
2 Touch the following items to set as the
wallscreen.
As AVScreen
:
Saves the image as the wallscreen of AV screen.
As HomeScreen
:
Saves the image as the wallscreen of Home screen.
As Both
:
Saves the image as the both wallscreen of AV screen and
Home screen.
3 Touch “
Yes
” to overwrite the image.
p Each one image can be saved for AV screen or Home
screen. If you save the other image, the current wallscreen is
overwritten.
Setting the slideshow interval
JPEG files can be viewed as a slideshow on this product. In this
setting, the interval between each image can be set.
p This setting is available during playback of the JPEG files.
1 Display the “
Video Setup
” screen.
2 Touch [
Time Per Photo Slide
].
3 Touch the item you want to set.
The following items are available:
“
10sec
” (default), “
5sec
”, “
15sec
”, “
Manual
”.
Still image �les
Loading ...
Loading ...
Loading ...