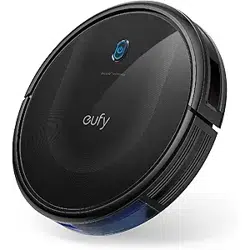
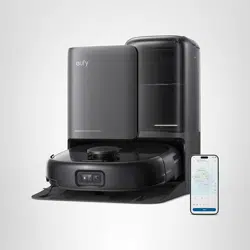
eufy T2104 ROBOVAC 11+ Vacuum Cleaner
Product's Documents
Below are documents related to this product, you can read online or download:
- Owner's manual - (English) Read Online | Download pdf
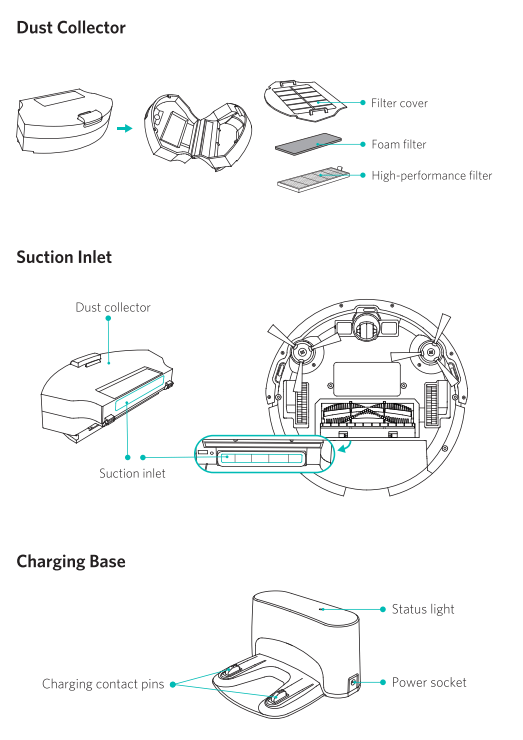
RoboVac Anatomy

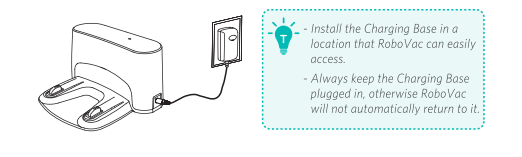
Install the Charging Base
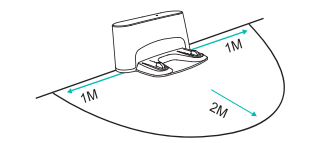
1. Place the Charging Base on a hard, level surface and against a wall.

2. Remove objects within 3 ft/1 m of the left and right side and within 6 ft/2 m of the front of the charging base.
4. Connect the round connector of the adapter into the power socket on the Charging Base and the other end into a wall outlet.
Method 1: Attach RoboVac to the Charging Base by aligning its charging pins with the charging pins on the base.
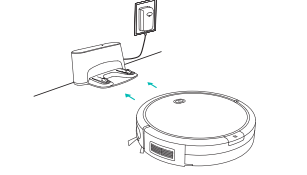
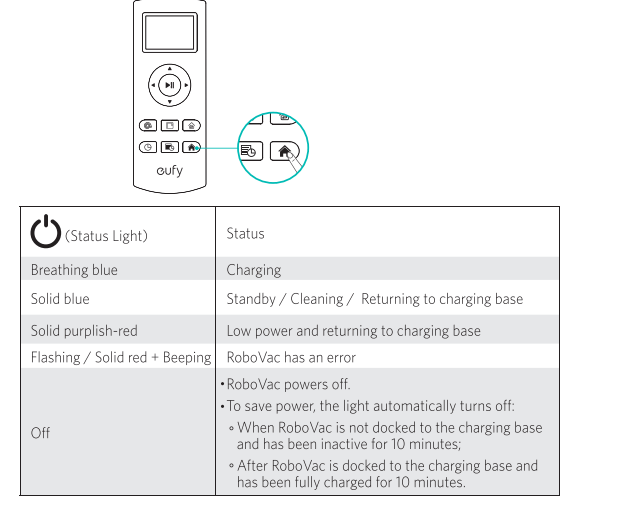
Method 2: Press  on the remote control to return RoboVac to the Charging Base.
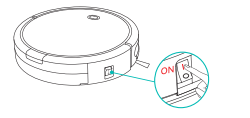
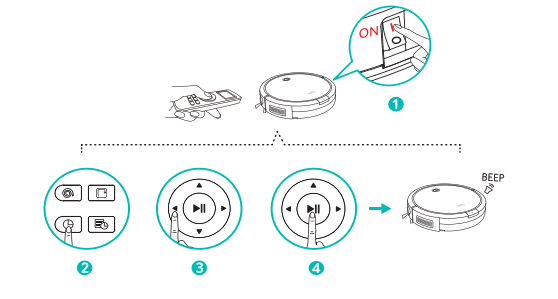
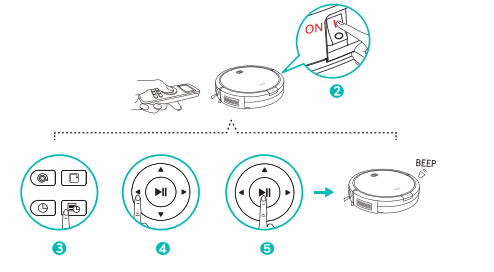
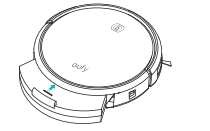
1.Turn on the main power supply
Press the main power switch on the side of RoboVac to turn on the main power supply.
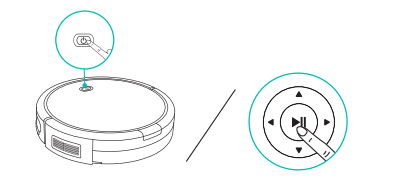
2. Start cleaning
Press  on RoboVac or
  on the remote control to start cleaning in Auto mode.
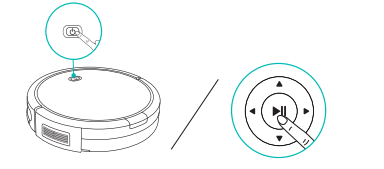
3. Stop cleaning
Press on RoboVac or on the remote control to stop cleaning.
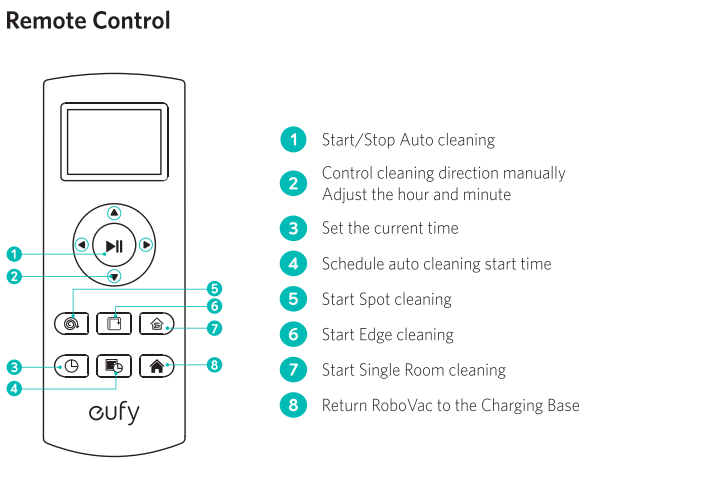
1. Auto cleaning
RoboVac automatically cleans in a back-and-forth, straight-line pattern. This is the most
commonly used cleaning mode.
Press on RoboVac or on the remote control to start cleaning in Auto Mode.
Power Boost Feature (Model T2104 only)
When the Power Boost feature is enabled, RoboVac will automatically increase the suction power if it detects stronger power is needed to ensure the best clean. Power Boost is ideal for cleaning thicker carpets and hard-to-sweep messes, which will reduce the cleaning
time, but increase the noise level. If the vacuuming noise caused by Power Boost disturbs you, you can disable this feature. This feature only works in Auto cleaning mode.
To a the default suction power in Auto Cleaning Mode, simultaneously press and hold the  and
and  buttons for 2 seconds; you will hear a series of beeps that correspond to the suction power selected. Repeat to adjust the suction power level.

2. Spot cleaning
RoboVac intensively cleans a specific area in a spiral, useful if there is a concentrated area of dust or debris. In Spot mode, RoboVac will stop cleaning after 2 minutes.
Press  on the remote control to start cleaning in Spot mode.
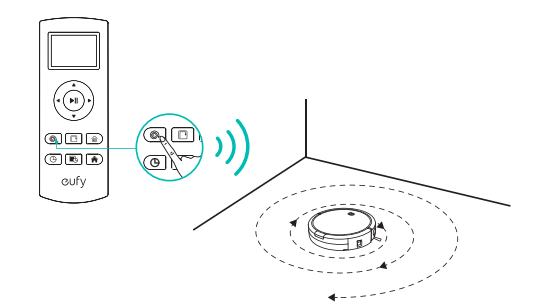
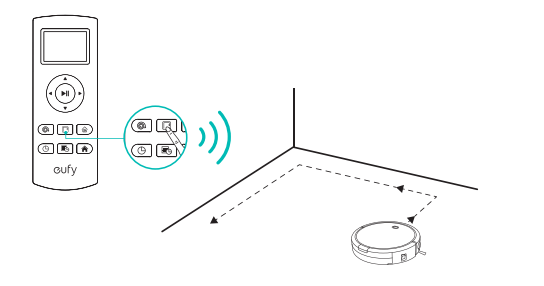
3. Edge cleaning
RoboVac reduces its speed when it detects a wall and then follows the wall to ensure the edge is cleaned thoroughly. In Edge mode, RoboVac will clean for 20 minutes and return to the Charging Base.
Press  on the remote control to start cleaning in Edge mode.
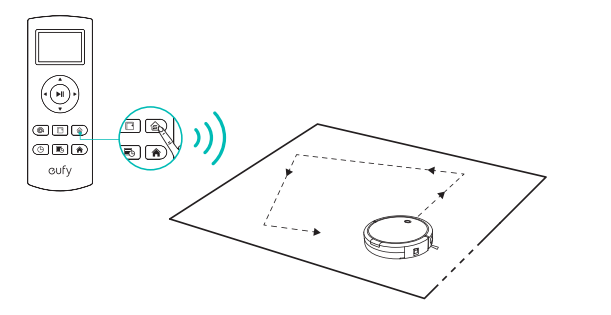
4. Single Room cleaning
RoboVac intensively cleans one single room and stops after 30 minutes. Select this mode only when one specific room needs to be cleaned. Make sure to confine RoboVac to the room by closing the door.
Press  on the remote control to start cleaning in Single Room Mode.
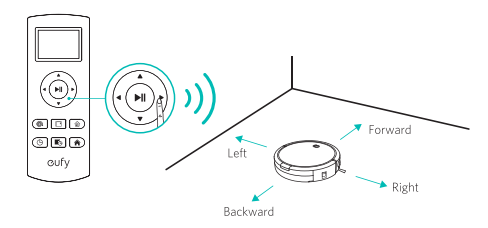
5. Manual cleaning
You can direct RoboVac to clean a particular area by using the directional buttons on the remote control.
1 Make sure the main power switch on the bottom of RoboVac is turned on.
2 Press  on the remote control. will blink on the display.
3 Press  to set the “hour” and “minute”.
Note: Make sure AM/PM is set correctly.
4 Press or to save the setting. RoboVac will BEEP ONCE to indicate the time has been set.
2. Schedule Cleaning
You can schedule RoboVac to start cleaning at a specified time. To cancel a previously scheduled cleaning, press and hold  for 3 seconds until RoboVac beeps twice and disappears.
Note: Before setting a scheduled cleaning, make sure the time has been set correctly to your local time; refer to the previous section “Set Time” for how to set the time.
1 Make sure the main power switch on the bottom of RoboVac is turned on.
2 Press on the remote control. will blink on the display
3 Press to set the “hour” and “minute”. Note: Make sure AM/PM is set correctly.
4 Press or to save the setting. RoboVac will BEEP ONCE to indicate the scheule has been set.
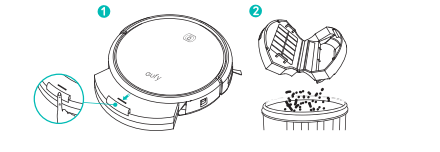
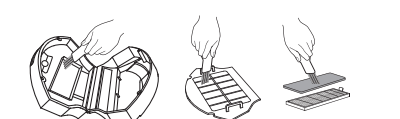
Clean the Dust Collector and Filters
1. Press the dust collector release button to pull the dust collector out.
2. Open and empty the dust collector.
3. Remove the pre-filter by pulling the hooks as shown.
4. Take out the foam filter and high-performance filter.
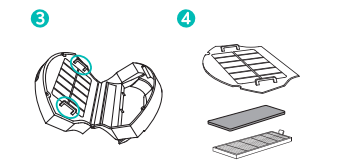
5. Clean the dust collector and filters with a vacuum cleaner or a cleaning brush.
6. Put the filters and pre-filter back together in the dust collector
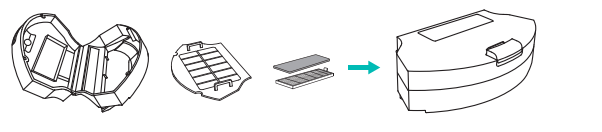
7 Push the dust collector back into the main unit.
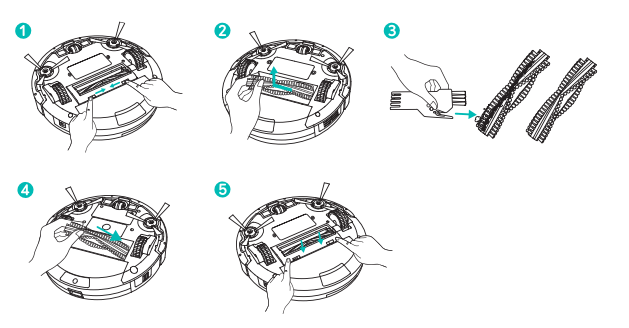
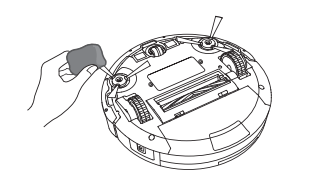
Clean the Rolling Brush
1 Pull on the release tabs to unlock the brush guard as shown.
2 Lift the rolling brush to remove.
3 Clean the rolling brush with the provided cleaning tool or a vacuum cleaner.
4 Reinstall the rolling brush by inserting the fixed protruding end first and then clicking into place.
5 Press down to snap the brush guard into place.
Clean the Sensors and Charging Pins
To maintain the best performance, clean the drop sensors and charging pins regularly.
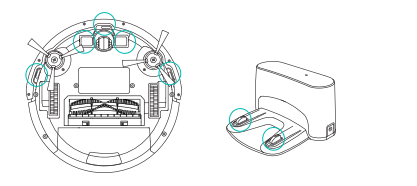
Clean the Side Brushes
Foreign substances, such as hair, can easily get tangled in the side brushes, and dirt may adhere to them. Be sure to clean them regularly.
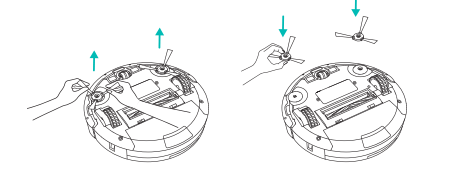
Replace the Side Brushes
The side brushes may become bent or damaged after being used for a period of time. Follow the instructions below to replace them. Pull off the old side brushes and snap the new ones into place.
RoboVac cannot be activated.
The remote control does not work.
In this case, do not dock RoboVac to the Charging Base. Turn off the main power switch and then:
(1) press and hold on the remote control until the icon blinks on the display;
(2) turn on the main power switch.
You will hear three beeps after successful pairing.
RoboVac stops working suddenly
RoboVac does not start scheduled cleaning.
Suction power is weak.
RoboVac cannot be charged
RoboVac cannot return to the Charging Base
RoboVac's movements or travel paths are abnormal.
The rolling brush does not rotate.
When RoboVac is in trouble, it will emit a series of short or long beeps and the red indicator on RoboVac will be solid or flashing.
Flashing red indicator light
One beep
Two beeps
Three beeps
Four beeps
Five beeps
Solid red indicator light
One beep
Two beeps
Three beeps
Four beeps
Reference file: eufy T2104 ROBOVAC 11+ Vacuum Cleaner
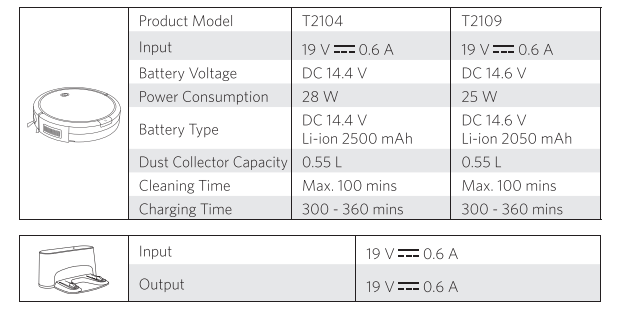
Additionally, the document applies to other eufy models: T2109