
Loading ...
Loading ...
Loading ...
Sometimes the camera’s exposure meter is deceived by
certain conditions, exposure compensation can compensate
for this. For example, a very bright scene, such as a snowy
landscape or a white sandy beach, can appear too dark in the
captured image. Before taking the picture, adjusting the
exposure by +1 or +2 EV will result in an image with normal
tonal values.
In the example on the right, the dark water caused the camera
to overexpose the image making it too bright and washed-out.
By compensating the exposure, detail is brought out in the
leaves, and the stones and water appear richer.
Flash compensation changes the ratio between the ambient
and flash exposures. For example, when using the fill-flash to
reduce harsh shadows on the subject caused by direct
sunlight, flash compensation can change the ratio between the
highlights and shadows. The fill-flash will affect the darkness of
the shadows without affecting the area illuminated by the sun.
By decreasing the flash output with a negative Ev setting, the
shadows will receive less light and be deeper, but will have
detail that would be lost without the flash. Increasing the flash
output by using a positive Ev setting will soften or eliminate
shadows.
75
74
A SHORT GUIDE TO PHOTOGRAPHY
No compensation Negative compensation
Using exposure and flash compensation
MOVIE AND AUDIO RECORDING
Recording audio
Audio can be recorded without an image.
About 30 minutes of audio can be stored on
a 16MB memory card. Audio is recorded at
approximately 8KB/s. A maximum of 180
minutes can be recorded at one time; the
optional AC adapter is required for long
recordings.
Recording audio.
Press shutter to stop.
Press shutter button
to record.
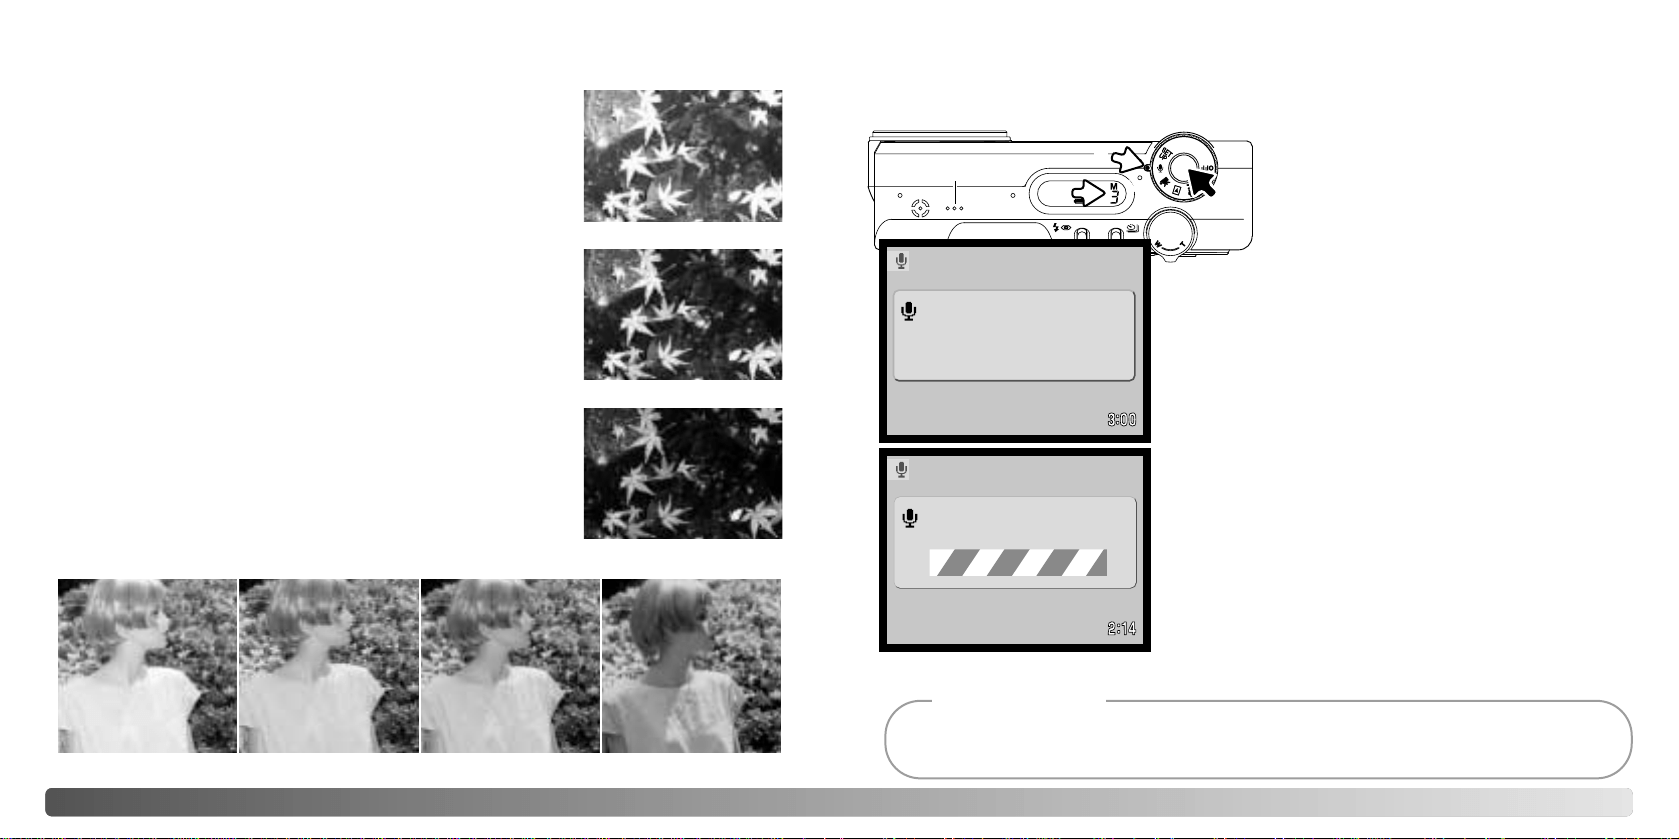
To begin recording, press and release the shutter button
(3). The frame counter will display the remaining
recording time. The recording will stop when the shutter-
release button is pressed again or the remaining time
has elapsed.
When making audio recordings, be careful not to touch
or cover the microphone. The quality of the recording is
proportional to the subject to microphone distance. For
best results, hold the camera approximately 20cm (8in)
from your mouth.
Microphone
Turn the mode dial to the audio-recording position (1); a
blue screen is displayed. In stand-by, the monitor and
data panel show the approximate recording time
available. Above the data panel frame counter (2), the
unit of the remaining time is displayed: M - minute, S -
second.
When turning the camera on, the lens can be prevented from extending. Turn the zoom lever to the
left and hold when turning the mode dial from off to the audio recording position.
Camera Notes
3
1
2
Positive compensation No flash
–2.0Ev
–1.0Ev
Camera exposure
Loading ...
Loading ...
Loading ...