
Loading ...
Loading ...
Loading ...
Power / Access lamp
22
23A
UTO-RECORDING MODE - BASIC OPERATION
AUTO-RECORDING MODE
Setting the camera to record images automatically
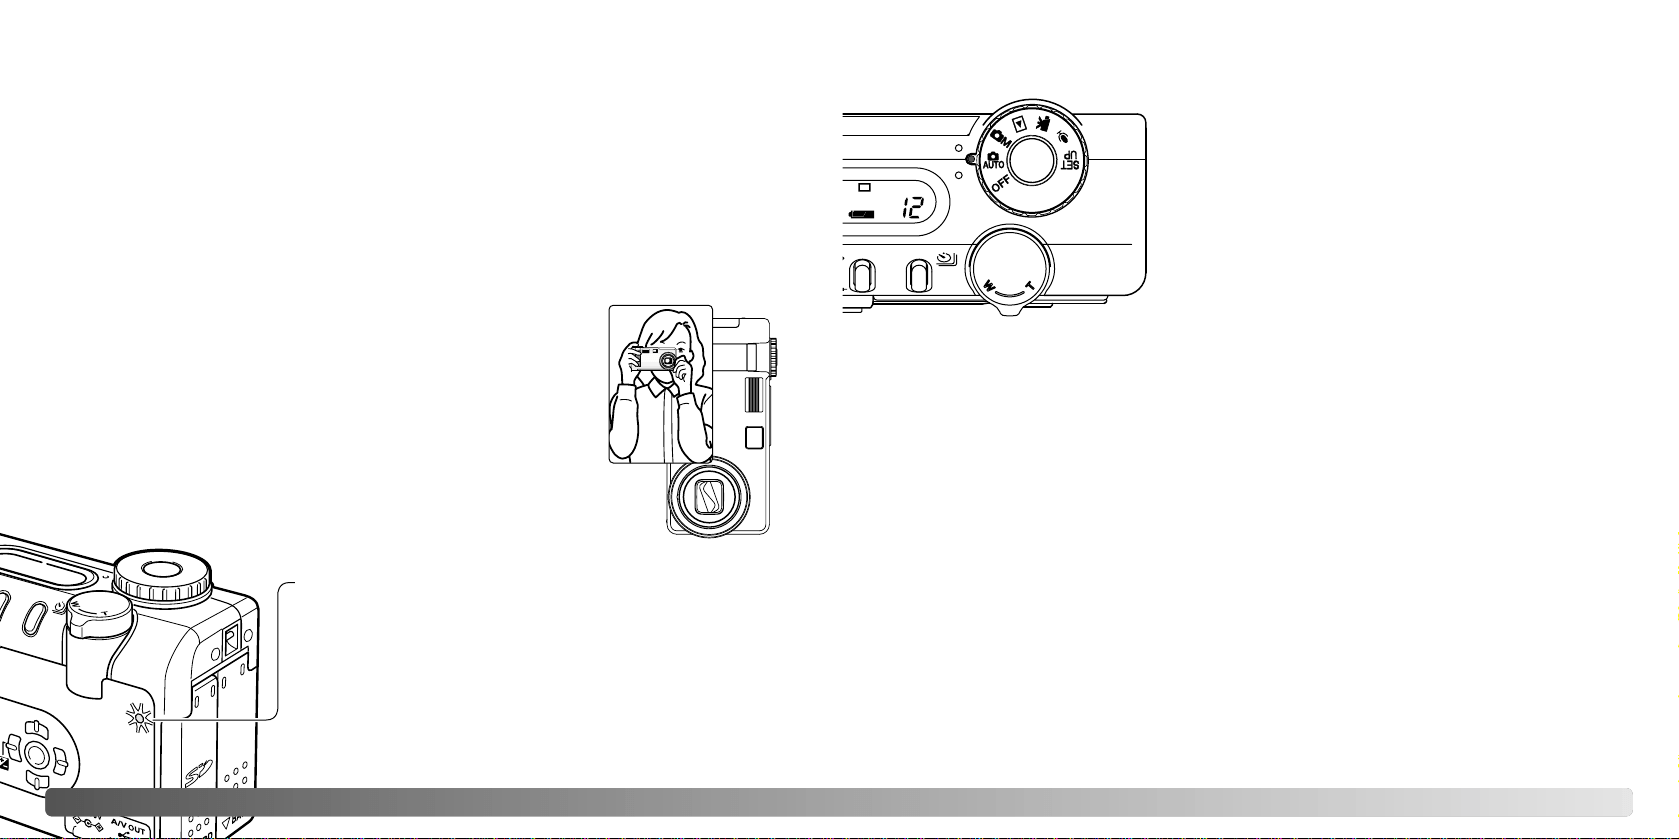
Turn the mode dial to the auto-recording mode position
(1); all camera operations are now fully automatic. The
autofocus, exposure, and imaging systems will work
together to bring beautiful results effortlessly.
While many of the camera’s systems in this mode are
automatic, the camera’s operation can be optimized to
different subjects very simply with the digital subject
program button (p. 29). The flash mode (p. 32) and drive
mode (p. 38) can also be changed. Image size and
quality can be set on the auto-recording mode menu (p.
44).
Exposure mode Program (fixed)
Metering mode
* Changes to the flash mode, focus area, drive mode, or exposure compensation will be reset
when the mode dial is turned to another position. The flash mode is reset to autoflash or
autoflash with red eye reduction depending on which of the two modes was set last.
While using the viewfinder or LCD monitor, grip the camera firmly
with your right hand while supporting the body with your left. Keep
your elbows at your side and your feet shoulder-width apart to hold
the camera steadily.
When taking vertical pictures, hold the camera so that the flash is
above the lens with the grip to the top. Take care not to cover the
lens with your fingers or the strap.
Handling the camera
This section covers the basic operation of this camera. Thoroughly familiarize yourself
with the operations in this section before moving on to the other sections in the manual.
The sophisticated technology employed in the auto-recording mode frees the
photographer from complicated camera settings. Although automated, the camera’s
operation can be changed to meet various conditions as well as to suit personal shooting
preferences.
1
BASIC OPERATION
Multi-segment (fixed)
Camera sensitivity (ISO)
Flash mode
Focus area
Focus control
Drive mode
Auto (fixed)
Autoflash (can be changed*)
Single-frame advance (can be changed*)
Exposure compensation
Sharpness
0.0 (can be adjusted*)
Normal (fixed)
Contrast Normal (fixed)
Saturation Normal (fixed)
Color mode
White balance
Natural Color (fixed)
Auto (fixed)
Area AF & Subject Tracking AF (fixed)
Wide focus area (can be changed*)
–
–
–
–
–
–
–
–
–
–
–
–
–
The power / access lamp turns green and glows steadily
when the camera is on. The lamp will turn red and blink
when data is being transferred between the camera and
memory card; never remove the card during this period.
If the lens is hindered while extending, the green lamp may
blink for a three-minute period. Turn the camera off and on
to initialize the lens.
Loading ...
Loading ...
Loading ...