
Loading ...
Loading ...
Loading ...
40
A
UTO-RECORDING MODE - ADVANCED OPERATION
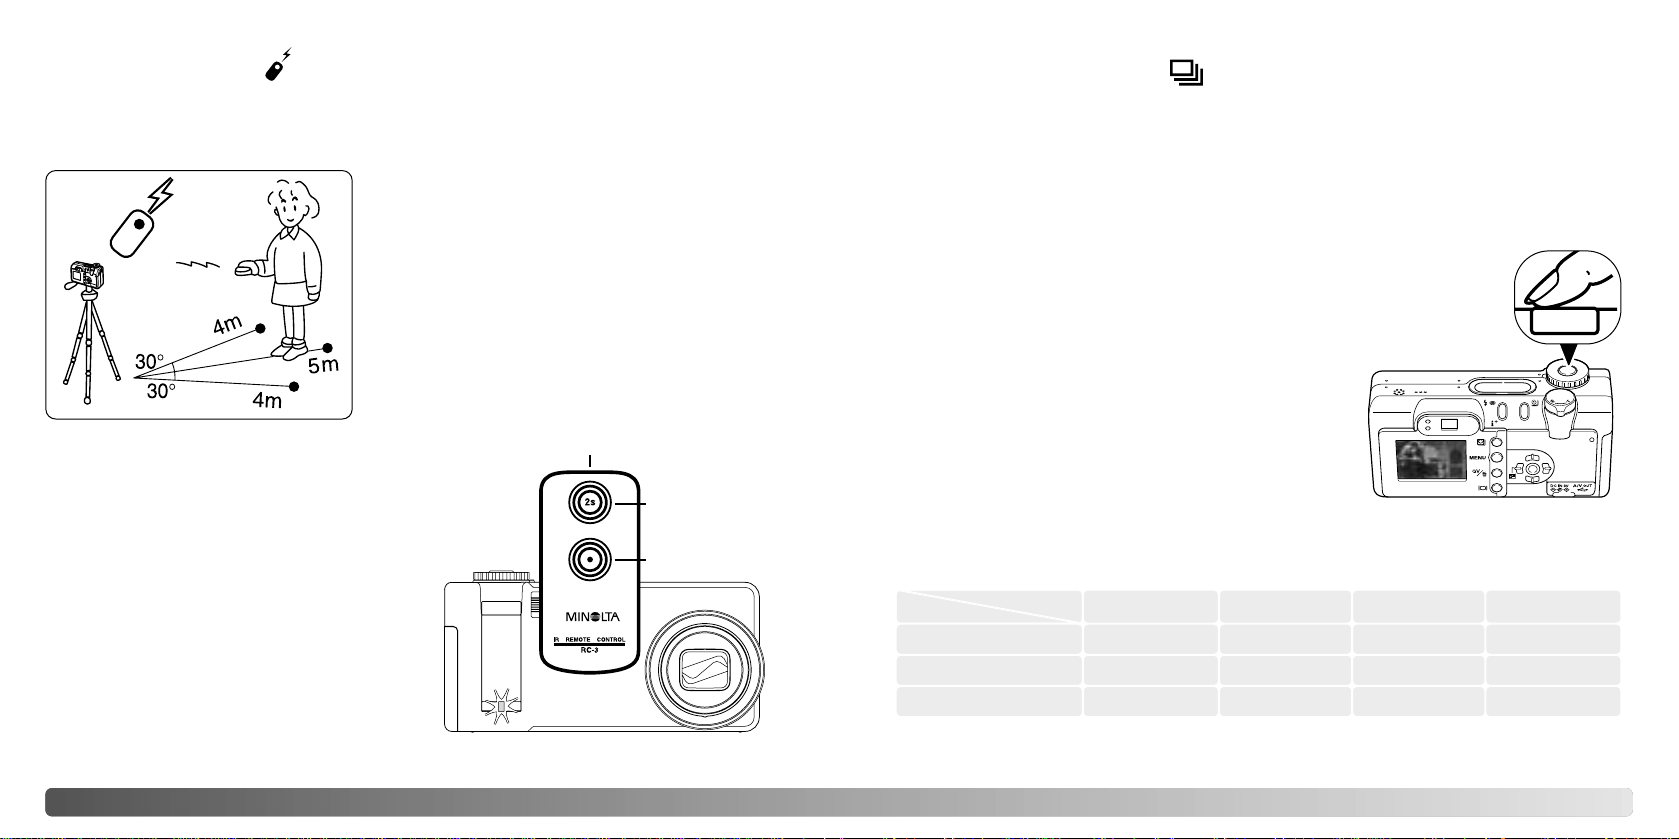
Place the camera on a tripod, and set the drive
mode to remote control (p. 38). Arrange the
camera and subject to compose the picture.
When setting up the camera, make sure the
subject will fall within the focus frames. Focus lock
cannot be used with the IR remote control. Focus
area selection (p. 52) and manual focus (p. 67) can
be used.
41
The optional IR Remote Control RC-3 allows remote camera operation up to 5m (16 ft.)
away. The remote control unit can also be used in movie and audio recording (p. 77). The
remote control may not operate with backlit subjects or under fluorescent light.
1
Point the emitter window of the remote
control unit toward the camera and press the
release button or the delay button to take the
picture.
When the release button is pressed, the self-
timer lamp on the front of the camera (1) will
blink once before the picture is taken. When
the delay button is pressed, the self-timer
lamp will blink for two seconds before the
picture is taken.
Emitter window
Delay button
Release button
The continuous-advance drive mode allows a series of images to be captured while
holding down the shutter-release button. Continuous advance acts like a motor drive on
a film camera. The number of images that can be captured at one time and the rate of
capture depend on the image-quality and image-size setting. The maximum rate of
capture is 1.2 fps with the shutter FX on (p. 103), or 1.5 fps with it off. Date imprinting
lowers the frame rate. The continuous-advance mode is set with the drive-mode button
(p. 38).
When the shutter-release button is pressed and held, the camera will begin
recording images until the maximum number has been taken or the shutter
button is released. TIFF images (p. 46) cannot be captured. The built-in
flash can be used, but the rate of capture is reduced because the flash
must recharge between frames. Date-imprinting (p. 49) also reduces the
rate of capture.
Compose the picture as described in the basic recording
operation section (p. 26). Press the shutter-release
button partway down to lock onto the subject and set the
exposure for the series. Press and hold the shutter-
release button all the way down (1) to begin taking
pictures; focus is locked with the first frame.
The following chart lists the maximum number of images that can be captured with
different image-quality and image-size combinations.
Economy
Standard
Fine
2272 X 1764 1600 X 1200 1280 X 960 640 X 480
3
7
14
7
14
25
11
20
36
36
57
80
Continuous advance
1
Quality
Size
Remote control (Sold separately)
Loading ...
Loading ...
Loading ...