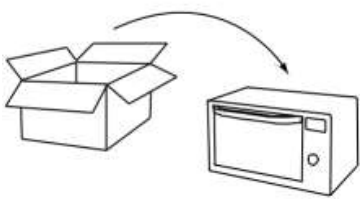
1. Unpack oven, remove all packing material, and examine the oven for any damage such as dents, broken door latches or cracks in the door. Notify dealer immediately if unit is damaged. DO NOT install if unit is damaged.
Guarantee
2. Your receipt is your guarantee, please keep it safe.
Cord
3. If the supply cord of this appliance is damaged, it must be replaced by the manufacturer or it’s service agent or a similarly qualified person in order to avoid a hazard.
Note: The appliance should be inspected for damage to the door seals and door seal areas. If these areas are damaged the appliance should not be operated until it has been repaired by a service technician trained by the manufacturer.
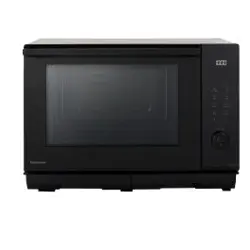
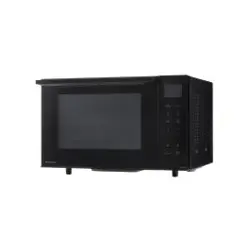
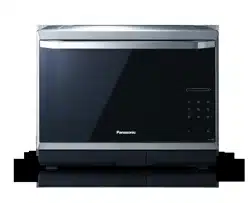
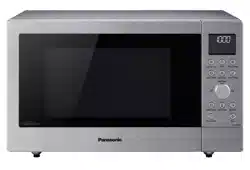
Placement of your oven
This oven is intended for counter-top use only. It is not intended for Built-in use or for use inside a cupboard.
Counter top use
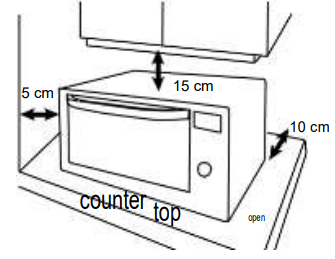
1. The oven must be placed on a flat, stable surface 850 mm above the floor, with rear of oven placed against a back wall. For proper operation the oven must have sufficient air flow, i.e. 5 cm at one side, the other being open; 15 cm clear over the top; 10 cm at the rear.
2. Do not place the microwave oven on a shelf directly above a gas or electric hob. This may be a safety hazard and the oven may be damaged.
3. Do not block air vents on the rear, bottom and top of the oven. If air vents are blocked during operation, the oven may overheat. If the oven overheats, a thermal safety device will turn the oven off. The oven will remain inoperable with blank display until it has cooled.
4. This appliance is intended to be used in household applications only.
Care & cleaning of your oven
Important: It is essential for the safe operation of the oven that it is kept clean, and wiped out after each use. Failure to maintain the oven in a clean condition could lead to deterioration of a surface that could adversely affect the life of the appliance and possibly result in a hazardous situation.
1. Switch the oven off before cleaning and unplug at socket if possible.
2. Keep the inside of the oven, door seals and door seal areas clean. When food splatters or spilled liquids adhere to oven walls, door seals and door seal areas wipe off with a damp cloth. Mild detergent may be used if they get very dirty. The use of harsh detergent or abrasives is not recommended.
3. After using GRILL, OVEN, and COMBINATION cooking the walls of the oven should be cleaned with a soft cloth squeezed in soapy water.
Particular care should be taken to keep the window area clean particularly after cooking by GRILL, OVEN and COMBINATION. Stubborn spots inside the oven can be removed by using a small amount of branded conventional ovencleaner sprayed onto a soft damp cloth. Wipe onto problem spots, leave for recommended time and then wipe off. DO NOT SPRAY DIRECTLY INSIDE THE OVEN.
4. Do not use harsh abrasive cleaners or sharp metal scrapers to clean the oven door glass since they may scratch the surface, which may result in shattering of the glass.
5. The outside oven surface should be cleaned with a damp cloth. To prevent damage to the operating parts inside the oven, water should not be allowed to seep into the ventilation openings.
6. If the control panel becomes dirty, clean with a soft, dry cloth. DO NOT use harsh detergents or abrasives on control panel. When cleaning the control panel, leave the oven door open to prevent the oven from accidentally turning on. After cleaning touch Stop/Cancel to clear the display window.
7. If steam accumulates inside or around the outside of the oven door, wipe with a soft cloth. This may occur when the microwave oven is operated under high humidity conditions and in no way indicates a malfunction of the unit or microwave leakage.
8. The oven cavity floor should be cleaned regularly. Simply wipe the bottom surface of the oven with mild detergent and hot water then dry with a clean cloth. Cooking vapours collect during repeated use but in no way affect the bottom surface.
9. When GRILLING or cooking by OVEN or COMBINATION some foods may splatter grease onto the oven walls. If the oven is not cleaned to eliminate this grease, it can accumulate and cause the oven to ‘SMOKE’ during use. These marks will be more difficult to clean later.
10. A steam cleaner is not to be used for cleaning.
11. Ensure all accessories are kept scrupulously clean, especially when using microwave or combination programs.
12. Keep air vents clear at all times. Check that no dust or other material is blocking any of the air vents on the top, bottom or rear of the oven. If vents become blocked this could cause overheating which would affect the operation of the oven and possibly result in a hazardous situation.
Maintenance of your oven
Service
1. WHEN YOUR OVEN REQUIRES A SERVICE call your local Panasonic engineer
Warning! It is hazardous for anyone other than a competent person to car Cry out any service or repair operation which involves the removal of a cover which gives protection against exposure to microwave energy.
Door seals
2. Do not attempt to tamper with or make any adjustments or repairs to door, control panel housing, safety interlock switches or any other part of the oven. Do not remove outer panel from oven. The door seals and door seal areas should always be kept clean – use a damp cloth.
Warning! The appliance should be inspected for damage to the door seals and door seal areas. If these areas are damaged the appliance should not be operated until it has been repaired by a service technician trained by the manufacturer.
Oven light
3. The oven lamp must be replaced by a service technician trained by the manufacturer. DO NOT attempt to remove the outer casing from the oven.
Selected spares and accessories
4. These may be ordered directly on line Most major credit and debit cards accepted.
1. Do not cook food directly on the base of the oven. Always place food in a microwave safe dish.
2. The metal accessories provided must ONLY be used as directed for GRILLING, OVEN and COMBINATION cooking. Never use metal accessories when cooking in microwave only mode. Do not use if operating the oven with less than 200 g (7 oz) of food on a manual Combination program. Do not use the enamel shelf in COMBINATION with MICROWAVE. The maximum weight that can be used on the enamel shelf is 4 kg (8 lb 14 oz). FAILURE TO USE ACCESSORIES CORRECTLY COULD DAMAGE YOUR OVEN.
3. When cooking with MICROWAVE power arcing may occur if the incorrect weight of food is used, a metal container has been used incorrectly, or the accessories have been damaged. If this occurs, stop the machine immediately. You can continue to cook by GRILL OR OVEN ONLY.
4. Always refer to instructions for correct accessories to use on all programs.
Wire rack
1. The wire rack is used to facilitate browning of small dishes and help with the good circulation of the heat.
2. Do not use any metal container directly on the wire rack in COMBINATION with MICROWAVE.
3. Do not use the wire rack in MICROWAVE mode only.
Enamel shelf
1. The Enamel Shelf is for cooking on OVEN or GRILL mode only. Do not use on MICROWAVE or COMBINATION modes.
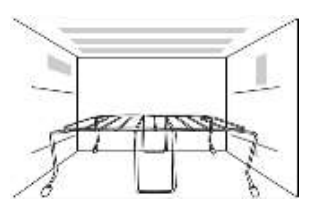
Outline diagram
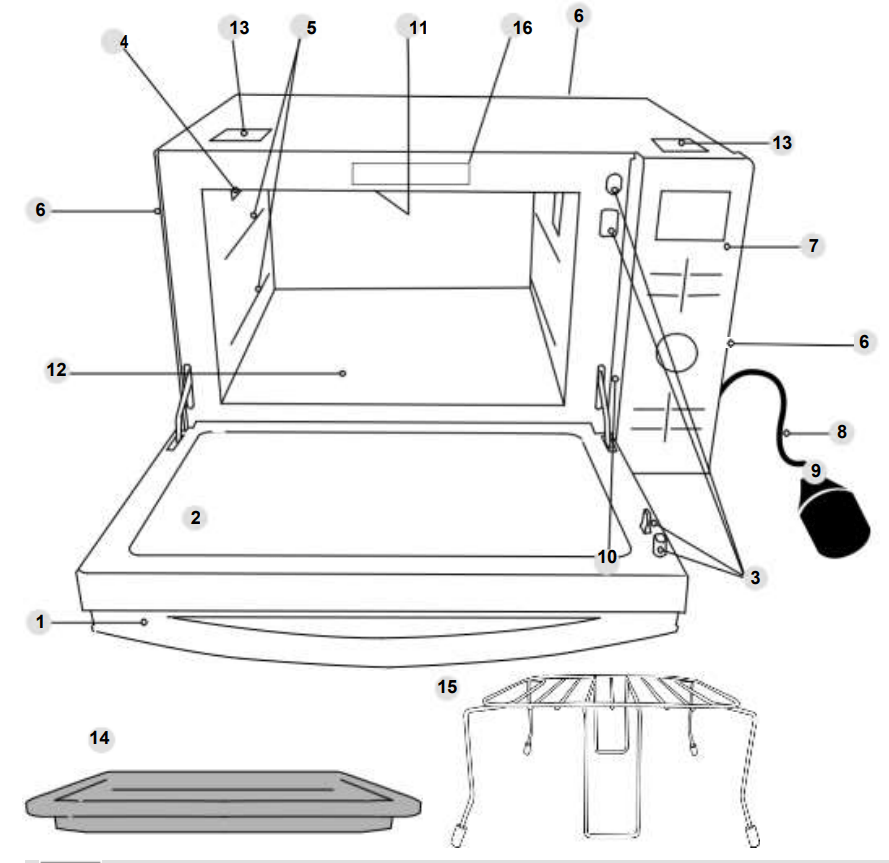
1. Door release
Pull the door handle downwards to open. When you open the oven door during cooking, the cooking is stopped temporarily without clearing earlier made settings. The cooking is resumed as soon as the door is closed and the Start pad pressed. The oven lamp lights as soon as the oven door is opened.
2. Oven window
3. Door safety lock system
4. Oven air vent
5. Shelf positions
6. External oven air vents
7. Control panel
8. Power supply cord
9. Plug
10. Identification label
11. Grill elements
12. Ceramic plate
13. Caution label (Hot surfaces
14. Enamel shelf
15. Wire rack
16. Menu label
Control panel
1. Display window
2. Microwave power levels button
3. Chaos defrost programs button
4. Grill button
5. Auto sensor programs button
6. Oven power button
7. Auto weight programs button
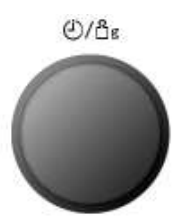
8. Time / Weight selection dial
9. More button
10. Less button
11. Memory button
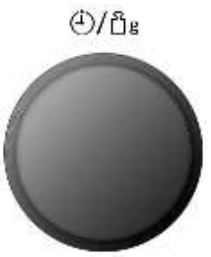
12. Timer button
13. Stop /Cancel button:
Before Cooking:
One press clears your instructions
During Cooking:
One press temporarily stops the cooking program. Another press cancels all your 7 instructions and the time of day will appear in the display.
14. Start button Touch to start operating the oven. If during cooking the door is opened or Stop/Cancel is touched once, Start has to be touched again to continue cooking.
Beep sound: When a button is pressed correctly a beep will be heard. If a button is pressed and no beep is heard, the unit has not or cannot accept the instruction. At the end of any 10 complete program, the oven will beep 5 times.
Note:
When in stand-by mode the brightness of the display will be reduced.
The oven will enter stand-by mode, when first plugged in and immediately after the last operation has completed.
If an operation is set and start button is not pressed, after 6 minutes the oven will automatically cancel the operation. The display will revert back to clock mode.
Setting the clock
When the oven is first plugged in “REFER TO OPERATING INSTRUCTIONS BEFORE USE” appears in display window.
Press Timer Button twice.
Turn Time / Weight Dial.
Enter the time by turning the Time/ Weight dial. The time appears in the display and the colon blinks.
Press Timer Button.
The colon stops blinking time of day is now locked into the display.
Note:
To reset time of day, repeat step 1 through to step 3, as above.
The clock will keep the time of day as long as the oven is plugged in and electricity is supplied.
This is a 24 hour clock, i.e. 2 pm = 14:00 not 2:00.
Operation guide setting
To assist you in programming your oven, the following operation will appear in the display window. When you become familiar with your oven, the operation guide can be turned off.
To turn off:
Press Timer Button four times.
Display window
Colon or time of day appears in the display window.
To turn on:
Press Timer Button four times.
Display window
Colon or time of day appears in the display window.
Child safety lock
Using this system will make the oven controls inoperable; however, the door can be opened. Child Lock can be set when the display shows a colon or the time.
To set:
Press Start three times
The time of day will disappear. Actual time will not be lost. ‘LOCK’ is indicated in the display.
To cancel:
Press Stop /Cancel three times
The time of day will reappear in the display.
Note: To activate child lock, Start must be pressed 3 times within a 10 second period.
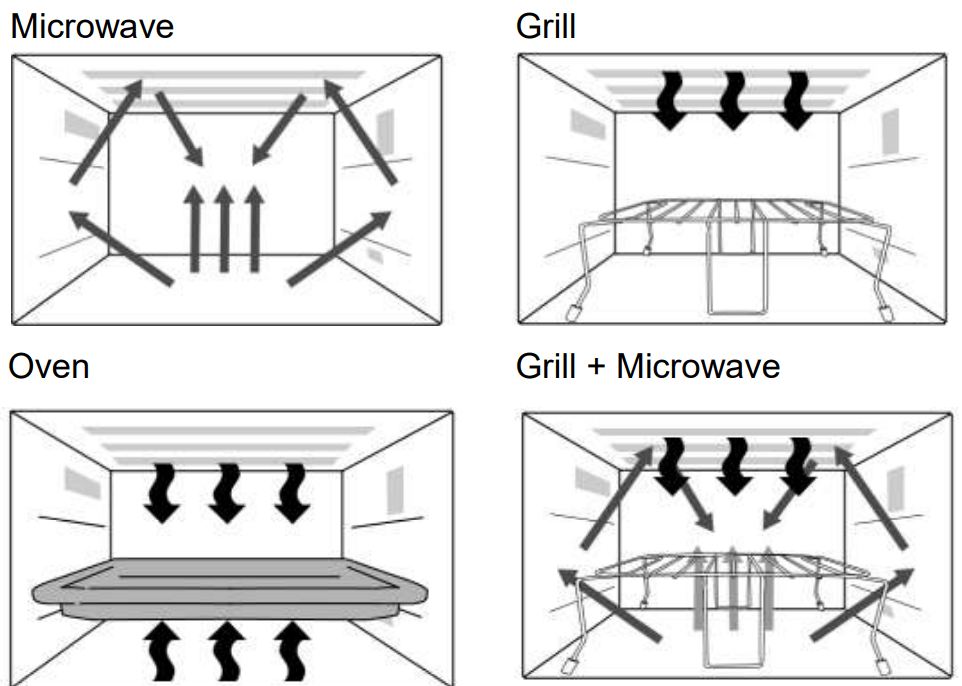
Cooking Modes
The diagrams shown below are cooking modes with examples of the accessories. It may vary depending on recipe/dish used.
Key
Heater
Microwave
Microwave cooking and defrosting
Press Microwave Power.
Select desired power level.
1 Press
HIGH
1000 Watts
2 Presses
DEFROST
270 Watts
3 Presses
MEDIUM
600 Watts
4 Presses
LOW
440 Watts
5 Presses
SIMMER
300 Watts
6 Presses
WARM
100 Watts
Set the cooking time using the Time/Weight Dial (HIGH power: up to 30 minutes Other powers: up to 90 minutes).
Press Start Button.
The cooking program will count down.
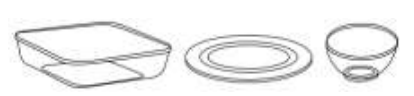
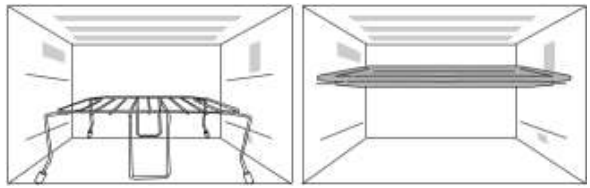
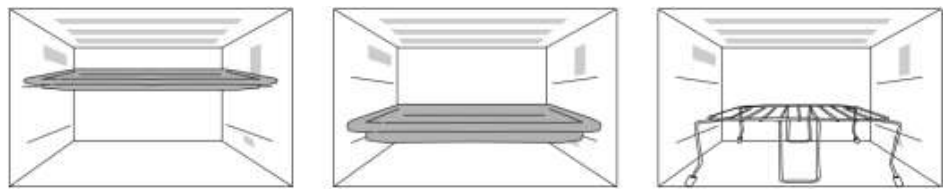
Use of accessory: Use your own Pyrex® dishes, plates or bowls directly on the ceramic plate. Do not place food directly on the ceramic plate.
Note:
Stand time can be programmed after microwave power and time setting.
You can change the cooking time during cooking if required. Turn Time/Weight Dial to increase or decrease the cooking time. Time can be increased/decreased in 1 minute increments, up to 10 minutes. Turning the dial to zero will end cooking.
Grilling Cooking
Press Grill to select level
1 press
Grill 1
1000 W (high)
2 presses
Grill 2
700 W (medium)
3 presses
Grill3
500 W (low)
Set Time
Select Cooking time by turning the Time/Weight Dial. Time can be set up to 90 minutes.
Press Start
The time counts down in the display.
Use of accessory:
Note:
Place food on wire rack on ceramic plate. Place a heatproof plate (Pyrex®) underneath to catch fat and drips. Alternatively use the enamel shelf in the top shelf position. For large weight foods, place in a dish directly on the ceramic plate.
Never cover foods when grilling.
DO NOT attempt to preheat the grill.
The grill will only operate with the oven door closed. It is not possible to use the grill function with the door open.
There is no microwave power on the GRILL only program.
Most foods require turning halfway during cooking. When turning food, open oven door and CAREFULLY remove wire rack using oven gloves.
After turning, return food to the oven and close door. After closing oven door, press Start. The oven display will continue to count down the remaining grilling time. It is quite safe to open the oven door at any time to check the progress of the food as it is grilling.
The grill will glow on and off during cooking - this is normal. Always clean the oven after using the Grill and before using the microwave or combination.
You can change the cooking time during cooking if required. Turn Time/Weight Dial to increase or decrease the cooking time. Time can be increased/decreased in 1 minute increments, up to 10 minutes. Turning the dial to zero will end cooking.
CAUTION:
Remove wire rack from oven by holding the rack and heatproof dish fi rmly. Use oven gloves when removing accessories. Never touch the outside window or inside metal parts of the door or oven when taking food in or out due to the high temperatures involved.
Oven Cooking
This Pad offers a choice of oven temperatures 40°C (for proving dough) and 100 - 220°C in 10°C increments. For quick selection of the most commonly used cooking temperatures, the temperatures start at 150°C and count up to 220°C then 40°C (for proving dough) and 100°C.
Use of accessory:
Oven:
Set the desired oven temperature.
Press Start Button to start preheating.
Note The oven can not preheat at 40 g.
After preheating, place the food in the oven.
Set Time
Select Cooking time by turning the Time/Weight Dial. Time can be set up to 90 mins
Press Start Button
Note on Preheating:
Do not open the door during preheating. After preheating 3 beeps will be heard and the “P” will flash in the display window. If the oven door is not opened after preheating, the oven will maintain the selected temperature. After 1 hour, including preheating, the oven will shut off automatically and revert to time of day.
If you want to cook without preheating, after selecting the desired temperature, set the cooking time then press Start Button.
Note:
When the selected cooking time is less than one hour, the time counts down second by second.
When the selected cooking time is over one hour, the time counts down minute by minute until only “1H 00” (1 hour) remains. The display then indicates minutes and seconds and counts down second by second.
You can add to the cooking time during cooking, if required. Turn the Time/Weight Dial to increase the cooking time. Time can be added in 1 minute increments up to 10 minutes.
After pressing Start Button, the selected temperature can be recalled. Press Oven Button once to indicate the temperature in the display window.
CAUTION: Always use oven gloves when removing the food and Accessories after cooking as the oven and accessories will be Very hot.
Combination Cooking
Grill + Microwave
HIGH power is not available on Combination cooking. This would not be useful in normal use (the food would be cooked before browning is achieved). DEFROST power Defrost can not be set in combination.
Use of accessory:
Set the desired Grill setting
Set the desired Microwave Power Level.
Set the cooking time using the Time/Weight Dial (up to 90 minutes).
Press Start Button. The time counts down in the display.
Note:
Place food on wire rack on ceramic plate. Place a heatproof plate (Pyrex®) underneath to catch fat drips.
The wire rack is designed to be used for Combination and Grilling. Never attempt to use any other metal accessory except the one provided with the oven.
Use the wire rack only as described. DO NOT use if operating the oven with less than 200 g of food on a manual program. For small quantities do not cook by Combination, cook by GRILL or MICROWAVE ONLY for best results.
Never cover foods when cooking on Combination.
DO NOT preheat the grill on Combination.
Arcing may occur if the incorrect weight of food is used, the wire rack has been damaged, or a metal container has been used accidentally. Arcing is fl ashes of blue light seen in the microwave. If this occurs, stop the oven immediately.
Some foods should be cooked on Combination without using the wire rack i.e. roasts, gratins, pies and puddings. The food should be placed in a heatproof nonmetallic dish and placed directly onto the ceramic plate.
DO NOT use plastic MICROWAVE containers on combination programs (unless suitable for combination cooking). Dishes must be able to withstand the heat of the top grill - heatproof glass e.g. Pyrex® or ceramic are ideal.
DO NOT use your own metal dishes or tins, as the microwaves will not penetrate the food evenly.
When the selected cooking time is less than one hour, the time counts down second by second.
When the selected cooking time is over one hour, the time counts down minute by minute until only “1H 00” (1 hour) remains. The display then indicates minutes and seconds and counts down second by second.
You can add to the cooking time during cooking, if required. Turn the Time/Weight dial to increase the cooking time. Time can be added in 1 minute increments, up to 10 minutes.
CAUTION: Remove wire rack from oven by holding the rack and heatproof dish fi rmly. Use oven gloves when removing accessories. Never touch the outside window or inside metal parts of the door or oven when taking food in or out due to the high temperatures involved.
Using the timer
Delay start cooking
By using the Timer, you are able to program Delay Start cooking.
example
Press Timer.
Set the delay time by turning the Time/ Weight Dial (up to 9 hours).
Set the desired cooking program and cooking time.
Press Start
Note:
1. Three stage cooking can be programmed including Delay Start cooking.
example
2. If the programmed delay time exceeds one hour, the time will count down in units of minutes. If less than one hour, the time will count down in units of seconds.
3. Delay Start cannot be programmed before an auto program.
Stand time
By using the Timer, you can program Stand Time after cooking is completed or use to program the oven as a minute timer.
example
Set the desired cooking program and cooking time.
Press Timer.
Set desired amount of time by turning the Time/Weight Dial (up to 9 hours).
Press Start.
Note:
1. Three stage cooking can be programmed including stand time.
example
2. If the oven door is opened during the Stand Time or Minute Timer, the time in the display window will continue to count down.
3. This feature may also be used as a minute timer. In this case press the Timer, set time and press Start.
4. Stand time cannot be programmed after an auto program.
Multi-stage cooking
2 or 3 stage cooking
Example:
Press Microwave Power.
Select desired power level
Set the cooking time using the Time/Weight Dial.
Press Microwave Power.
Select desired power level
Set the cooking time using the Time/Weight Dial
Press Start.
The cooking program will start and the time in the display will count down
Example: To DEFROST (DEFROST power) for 2 minutes and cook food on HIGH power for 3 minutes.
Press Microwave Power twice to select DEFROST power.
Set the cooking time to 2 minutes using the Time/ Weight Dial
Press Microwave Power once to select HIGH power.
Set the cooking time to 3 minutes using the Time/Weight Dial.
Press Start
Example: To GRILL at LOW for 4 minutes and cook food on LOW power for 5 minutes.
Press Grill Power 3 times to select Grill level 3 (low).
Set the cooking time to 4 minutes using the Time/Weight Dial
Press Microwave Power four times to select LOW power.
Set the cooking time to 5 minutes using the Time/Weight Dial
Press Start
Note:
For 3 stage cooking, enter another cooking program before pressing start.
During operation, pressing Stop/Cancel once will stop the operation. Pressing Start will re-start the programmed operation. Pressing Stop/Cancel twice will stop and clear the programmed operation.
Whilst not operating, pressing Stop/Cancel will clear the selected program.
Auto programs cannot be used with multi-stage cooking.
Common queries answered
Problem
Cause
Solution
Food cools quickly after being MICROWAVED.
Food not cooked through.
Put back in oven for extra time. Remember foods at fridge temperature require more cooking time than food at room temperature.
Rice pudding or casserole boils over during cooking by MICROWAVE.
Container too small.
For liquid foods, use container twice the volume of food.
Food cooks too slowly when cooked by MICROWAVE.
Oven not receiving correct power.
Oven should be on an independent outlet.
Food temperature from fridge colder than room temperature.
Extra time required for cooking colder foods.
Meat is tough when cooked by MICROWAVE or combination
Power setting too high.
Use reduced power level for meats.
Meat salted before cooking.
Do not salt before cooking. Add salt if necessary, after cooking.
Cake remains uncooked in centre when cooked by MICROWAVE.
Too short a cooking and/or standing time.
Add extra cooking time/standing time.
Scrambled or poached eggs tough and rubbery when cooked by MICROWAVE.
Cooking time too long.
Take care when cooking small quantities of eggs, once spoiled they cannot be saved.
Quiche/Egg Custards are tough and rubbery when cooked by MICROWAVE.
Power level too high.
Use reduced power levels for these items.
Quiche/Egg Custards are tough and rubbery when cooked by Combination.
Cooked too long. Dish size larger than stated in recipe.
Always check progress of food as it cooks.
Cheese sauce is tough and stringy when cooked by MICROWAVE
Cheese cooked with sauce
Add cheese at the end of cooking time. The heat of the sauce will melt the cheese
Vegetables are dry when cooked by MICROWAVE.
Cooked uncovered.
Cover with a lid or cling film
Low moisture content, e.g. old root vegetables.
Add extra 2-4 tbsp. of water.
Salt added before cooking.
Salt after cooking if necessary
Condensation appears in the oven.
This is normal and means the food is cooking faster then the moisture can be expelled from the oven.
Wipe off with a soft cloth
Warm air is felt coming from the door seal area
The oven door is not an air-tight seal.
This is normal and does not indicate any microwave leakage.
Blue sparks or arcing is seen when using the metal utensils.
Using metal accessories on MICROWAVE only is incorrect.
If using a Combination Program check accessories for any damage.
Stop the oven IMMEDIATELY. Do not use metal utensils on MICROWAVE only.
The GRILL periodically turns off during GRILLING or Combination.
During cooking the GRILL will cycle on and off so that the food does not burn before it is cooked through in the centre.
This is normal.
Questions and answers
Q: Why won’t my oven turn on?
A: When the oven does not turn on, check the following:
1. Is the oven plugged in securely? Remove the plug from the outlet, wait 10 seconds and reinsert.
2. Check the circuit breaker and the fuse Reset the circuit breaker or replace the fuse if it is tripped or blown.
3. If the circuit breaker or fuse is all right, plug another appliance into the outlet. If the other appliance works, there probably is a problem with the oven. If the other appliance does not work, there probably is a problem with the outlet. If it seems that there is a problem with the oven, contact an authorized Service Centre.
Q: My oven causes interference with my TV.Is this normal?
A: Some radio, TV, Wi-Fi, cordless telephone, baby monitor, blue tooth or other wireless equipment interference might occur when you cook with the microwave oven. This interference is similar to the interference caused by small appliances such as mixers, vacuums, blow dryers, etc. It does not indicate a problem with your oven.
Q: The oven won’t accept my program. Why?
A: The oven is designed not to accept an incorrect program. For example, the oven will not accept a fourth stage.
Q: Sometimes warm air comes from the oven vents. Why?
A: The heat given off from the cooking food warms the air in the oven cavity. This warmed air is carried out of the oven by the air flow pattern in the oven. There are no microwaves in the air. The oven vents should never be blocked during cooking.
Q: I can’t set an auto sensor program and ‘HOT’ appears in the display. Why?
A: If the oven has previously been used and it is too hot to be used on an Auto Sensor Program, ‘HOT’ will appear in the display window. After the ‘HOT’ disappears, the Auto Sensor Programs may be used. If in a hurry, cook food manually by selecting the correct cooking mode and cooking time yourself.
Q: Can I use a conventional oven thermometer in the oven?
A: Only when you are using OVEN/ GRILL cooking mode. The metal in some thermometers may cause arcing in your oven and should not be used on MICROWAVE and COMBINATION cooking modes.
Q: There are humming and clicking noises from my oven when I cook by COMBINATION. What is causing these noises?
A: The noises occur as the oven automatically switches from MICROWAVE power to OVEN/GRILL to create the combination setting. This is normal.
Q: My oven has an odour and generates smoke when using the COMBINATION and GRILL function. Why?
A: After repeated use, it is recommended to clean the oven and then run the oven without food. This will burn off any food, residue or oil which may cause an odour and/or smoking.
Q: The oven stops cooking by microwave and ‘H97’ or ‘H98’ appears in the display. Why?
A: This display indicates a problem with the microwave generation system. Please contact an authorised Service Centre.
Q The fan continues to rotate after cooking. Why?
A: After using oven, the fan motor may rotate to cool the electrical components. This is normal and you can continue using the oven at this time.
Q: Can I check the pre-set oven temperature while cooking or preheating by Oven?
A: Yes. Press Oven Button and the oven temperature will appear in the display window for 2 seconds.
Q “D” or “DEMO MODE PRESS ANY KEY” appears in the display and the oven does not cook. Why?
A: The oven has been programmed in DEMO MODE. This mode is designed for retail store display. Deactivate this mode by pressing microwave button once and stop/cancel button 4 times.
Q: The operation guide has disappeared on my display, I can only see numbers?
A: The operation guide was turned off by tapping Timer/Clock 4 times. When colon or time of day is displayed, touch Timer/Clock 4 times to turn the operation guide back on.
Q: The control panel keys do not respond when tapped. Why?
A: Ensure the oven is plugged in. The oven may be in stand-by mode. Open and close the door to activate.
Food that has been reheated or cooked should be served “piping hot” i.e. steam should be visibly emitted from all parts. As long as good hygiene practices have been followed during the preparation and storage of the food, then cooking or reheating presents no safety risks. Foods that cannot be stirred should be cut with a knife to test that they are adequately heated throughout. Even if a manufacturer’s instructions or the times in the cookbook have been followed, it is still important to check the food is heated thoroughly. If in doubt, always return to the oven for further reheating. If you cannot find the equivalent food in the chart then choose a similar type and size listed and adjust the cooking time if necessary. REMEMBER even if the pastry is cold to the touch, the fi lling will be piping hot and will warm the pastry through. Take care not to overheat otherwise burning can occur due to the high fat and sugar content of the filling.
 1. Door release
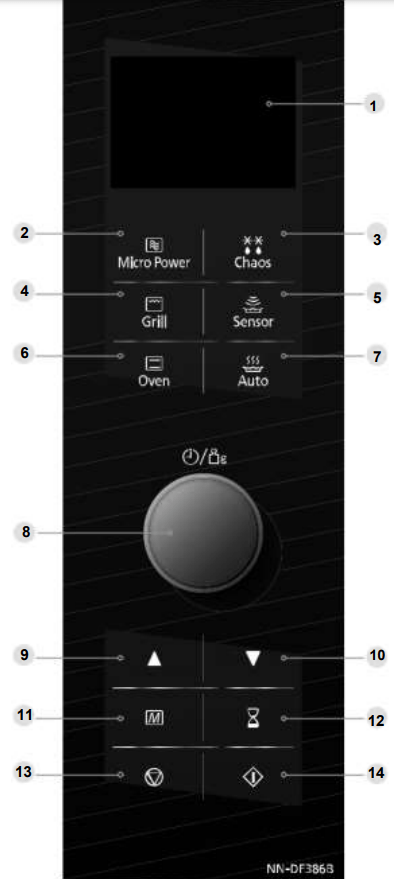


 Heater
 Microwave