Loading ...
Loading ...
Loading ...
150
Maintenance
Removing & Installing Body Components
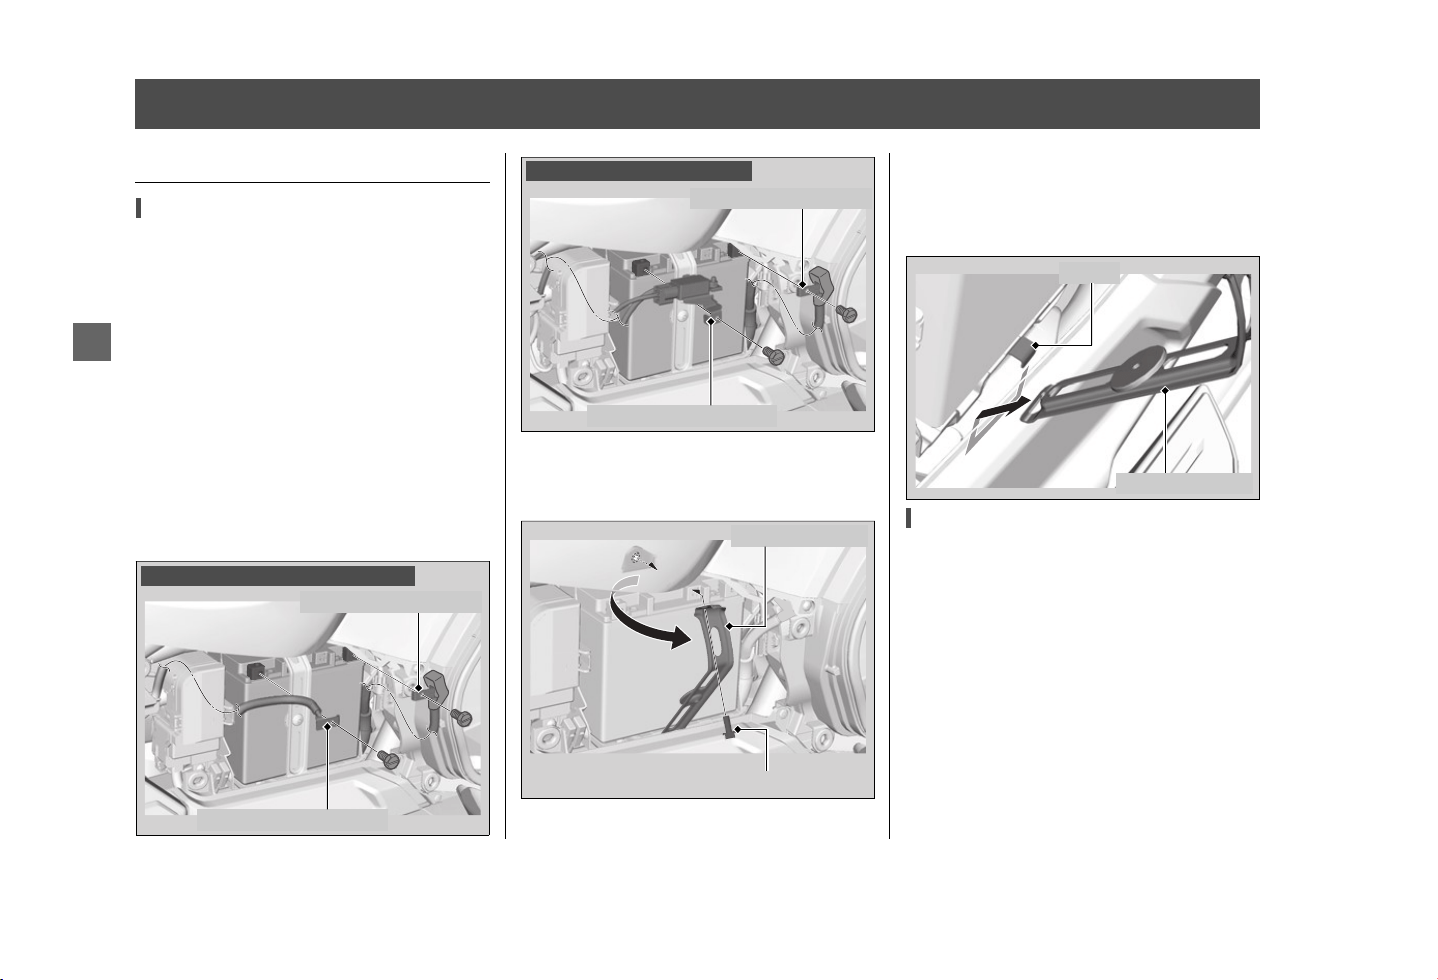
Battery
Removal
Make sure the ignition switch is turned to
OFF.
After turning the ignition switch OFF, wait
more than 60 seconds and then remove the
negative cable of the battery. Because the
electrical system may not function
correctly.
1.
Remove the left side cover.
2
P. 152
2.
Disconnect the negative - terminal
from the battery.
3.
Disconnect the positive + terminal from
the battery.
4.
Remove the battery holder bolt.
5.
Swing the battery holder as shown to
avoid interference against the seat.
6.
Remove the battery holder from the
hook.
7.
Remove the battery taking care not to
drop the terminal nuts.
Installation
Install the parts in the reverse order of
removal. Always connect the positive +
terminal first. Make sure that bolts and nuts
are tight.
Make sure the clock information is correct
after the battery is reconnected.
2
P. 77
For proper handling of the battery, see
“Maintenance Fundamentals.”
2
P. 140
“Battery Goes Dead.”
2
P. 203
Positive + terminal
Except GL1800D/DA Canada model
Negative - terminal
GL1800D/DA Canada model
Positive + terminal
Negative - terminal
Battery holder bolt
Battery holder
Battery holder
Hook
Loading ...
Loading ...
Loading ...