Loading ...
Loading ...
Loading ...
Before First Use
Before your begin, remove any packaging material and extra stickers/ labels from your juicer.
Check that the unit is turned o and unplugged.
Wash all of the components with warm/soapy water before assembling: the lter basket,
cutting disc, food pusher, pulp collector and juice jug and lid. Rinse and dry thoroughly.
Motor can be wiped down with a damp cloth. Your juicer is now ready for use.
• Place the juice jug with lid under the spout located on the
right hand side of the juicer. Use the juice jug lid to avoid
any splatter. Alternatively, you can t the juice nozzle over
the juice spout and place a glass underneath. This will
direct the ow of juice directly into the glass to ensure
mess-free juicing! You can ip the juice nozzle/drip stopper
up to avoid dripping on the countertop.
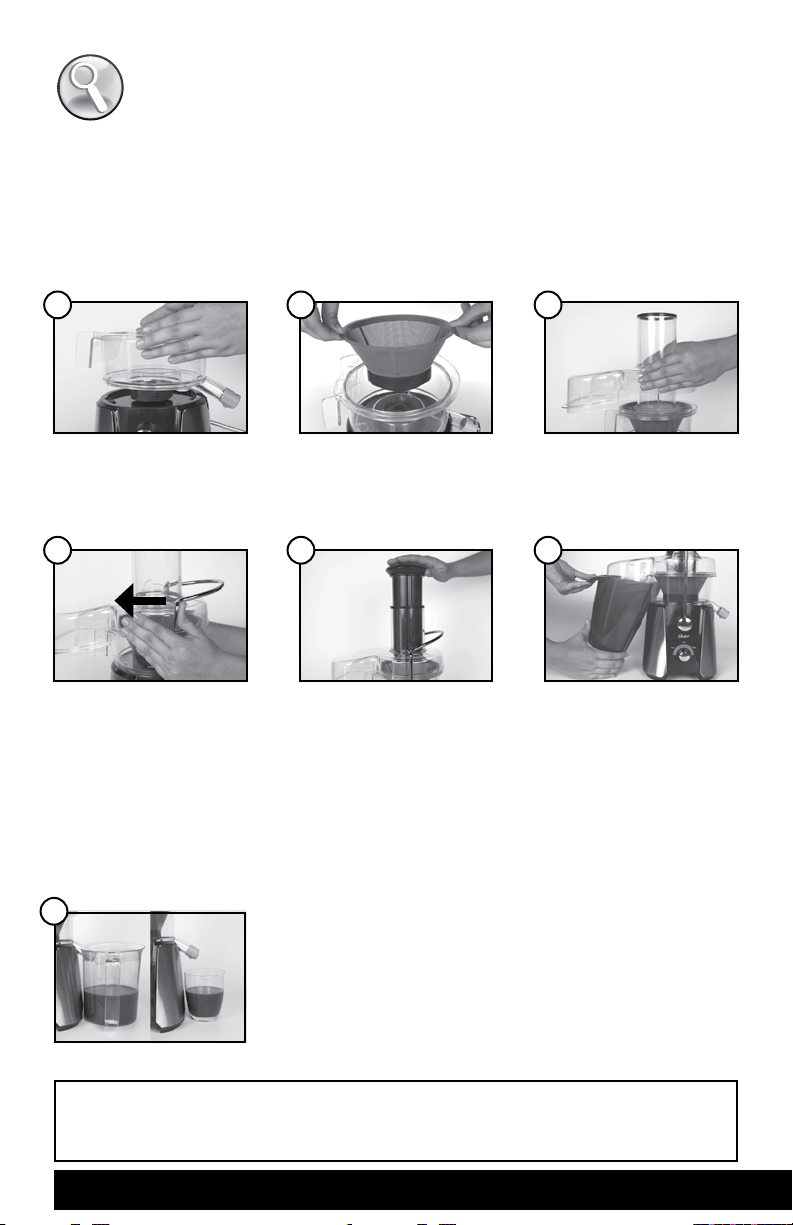
ASSEMBLING YOUR JUICER
• Place lter basket on top
of the motor housing.
• Place the Rinse n’ Ready™
lter on top of the lter
basket, push down and
click into place.
• Place juicer cover/lid on
top of the lter basket.
• Raise the safety locking
arm up and then lower it
down to securely t into
the grooves (from right
to left) on the lid. The
arm should rest vertically
on top of the juicer lid –
keeping in in place.
• Slide the food pusher
down the food chute. Be
sure to align the grooves
in the pusher with the
small protrusion on the
inside top of the feed
chute. Push all the way
down until it’s entirely
within the chute.
• Place the Pulp Collector
into position by tilting
it slightly at an angle to
t underneath the juicer
cover. Important: Check
that the Pulp Collector
edge is underneath the
lip of the basket.
1
4
2
5
3
6
IMPORTANT: Remember to place the juice nozzle/drip stopper open and facing
down before juicing.
www.oster.com5
7
Loading ...
Loading ...
Loading ...