Loading ...
Loading ...
Loading ...
Rails en
25
a Once the drying process has ended, an audible sig-
nal sounds and the display shows the cooking time
as zero.
5.
Press to switch the appliance off.
6.
To dry the cooking compartment completely, leave
the appliance door open for 1 to 2 minutes.
20 Rails
To thoroughly clean the rails and the cooking compart-
ment, or to replace the rails, you can remove the rails.
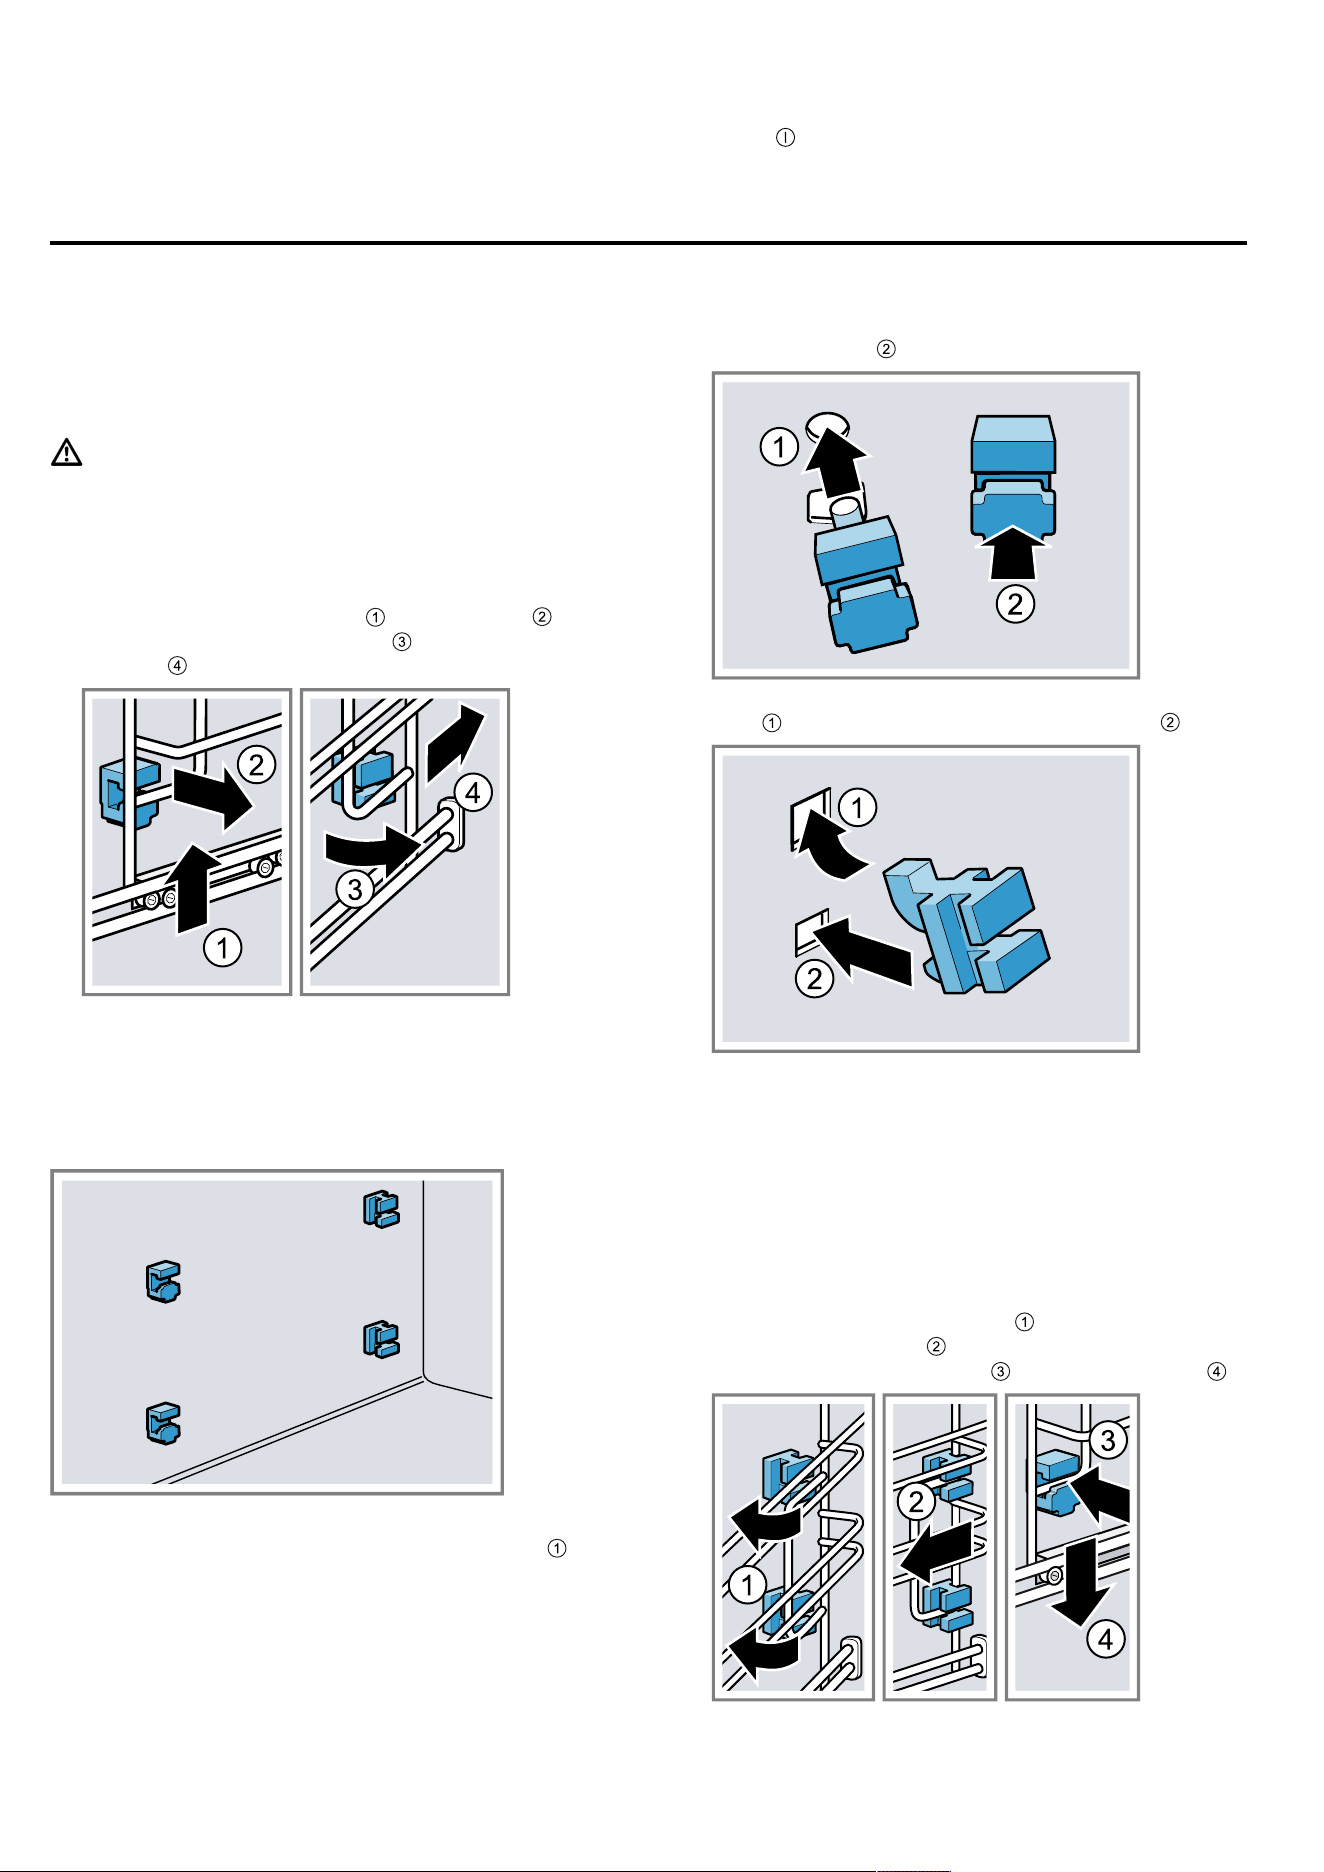
20.1 Detaching the rails
WARNING‒Risk of burns!
The shelf supports get very hot
▶
Never touch the shelf supports when hot.
▶
Always allow the appliance to cool down.
▶
Keep children at a safe distance.
1.
Pull out the pull-out forwards.
2.
Lift the rail forwards slightly and detach it .
3.
Swivel the entire rail outwards and unhook it at
the rear .
20.2 Fitting the retainers
The retainers may fall out when you detach the rails.
Note:
The retainers at the front differ from those at the rear.
1.
Hook the front retainers with the hook into the round
hole at the top and set them at a slight angle .
2.
Hook the front retainers in at the bottom and
straighten them .
3.
Hook the rear retainers with the hook into the top
hole and push them into the bottom hole .
20.3 Attaching the rails
Notes
¡ When hanging the rails, ensure that the pull-out is at
the bottom.
¡ The rails only fit on the right or left.
¡ For both pull-out rails, ensure that you can pull them
forwards and out.
1.
Set the rear rail at an angle, hooking it into the re-
tainers at the top and bottom .
2.
Pull the rail forwards .
3.
Hook in the rail at the front and press it down .
4.
Push the pull-outs in completely.
Loading ...
Loading ...
Loading ...