Loading ...
Loading ...
Loading ...
Gathertherequiredtoolsandpartsandreadallinstructionsbeforestartinginstallation.Savetheseinstructionsforfuturereference.
NOTE=Beforemovingyourproductintoyourhome,measurethedoorwayofyourhometoseewhetheryouneedtoremovetherefrigeratorandfreezer
doors.Ifdoorremovalisnecessary,seetheinstructionsbelow.
IMPORTANT=Beforeyoubegin,turntherefrigeratorcontrolOFForturncoolingoff.Unplugrefrigeratorordisconnectpower.Removefood,theicestorage
bin(onsomemodels),andanyadjustabledoororutilitybinsfromdoors.
TOOLSNEEDED=
Bubblelevel,Phillipsscrewdriver,3/16"hexkey,1/4"hex-headsocketwrench,1/4"and5/16"open-endedwrenchesoradjustablewrench,internalstardriveor
3/8"hex-headsocketwrench
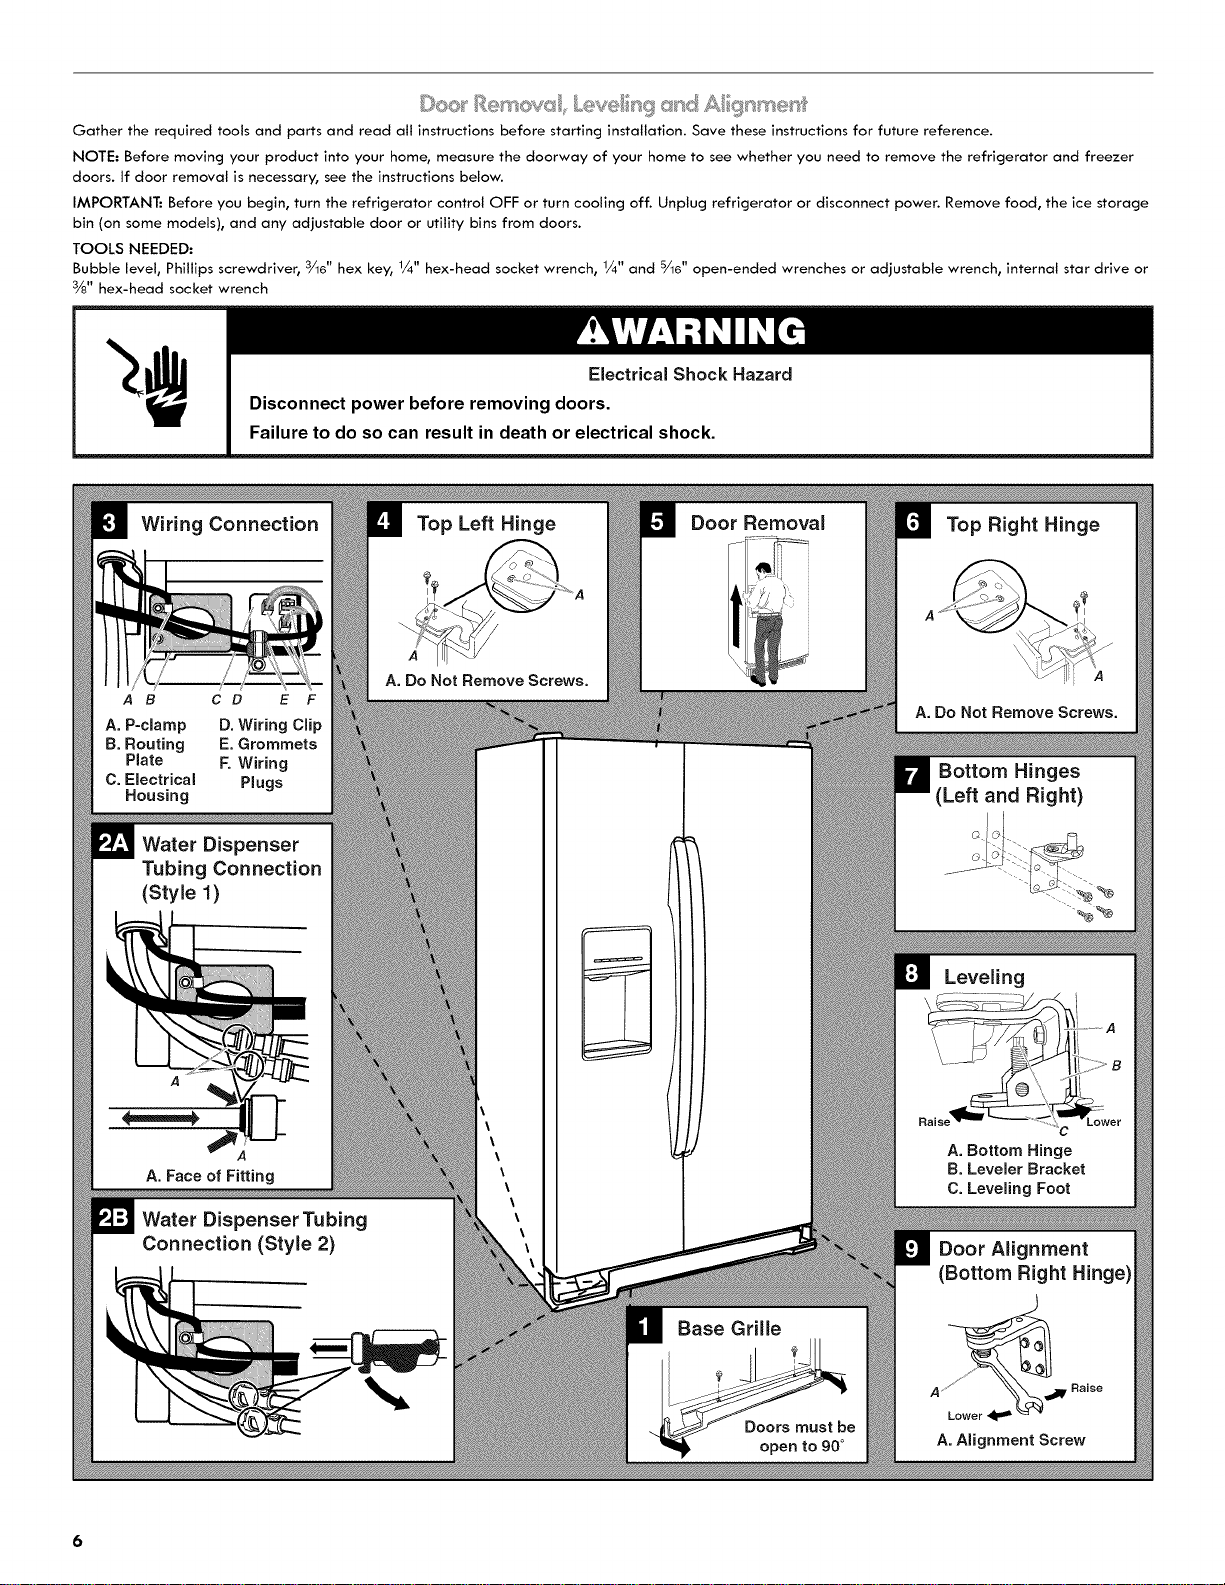
Electrical Shock Hazard
Disconnect power before removing doors.
Failure to do so can result in death or electrical shock.
Wiring Connection
A B C D E F
A. P-clamp D. Wiring Clip
B. Routing E. Grommets
Plate F. Wiring
C. Electrical Plugs
Housing
Water Dispenser
Tubing Connection
(Style 1)
A
A
A. Face of Fitting
Top Left Hinge
A. Do Not Remove Screws.
Water Dispenser Tubing
Connection (Style 2)
Door Removal
Top Right Hinge
A. Do Not Remove Screws.
Bottom Hinges
(Left and Right)
Leveling
A. Bottom Hinge
B. Leveler Bracket
C. Leveling Foot
Door Alignment
(Bottom Right Hinge)
jS "/
A,__jI V Raise
Lower _ "_ _
A. Alignment Screw
b
Loading ...
Loading ...
Loading ...