Loading ...
Loading ...
Loading ...
DEFRNLITEN
15
ENGLISH
FIRST USE
3
INSTALLING THE APPLIANCE
n Place your machine on a stable, flat, heat-resistant surface away from water splashes and
sources of heat. Ensure that the location chosen is sufficiently well ventilated, as the appliance
gives off heat. Please do not place the appliance on surfaces such as marble. Remove the
protective films from the display and grids.
3.1 Before first use
n Before using the appliance for the first time, check the hardness of your water so that you can set
the appliance accordingly. This operation should also be carried out when you use your machine
in a place where the hardness of the water is different or if you notice a difference in the hardness
of the water. To check the water hardness, use the stick supplied with your machine or contact
your local water authority.
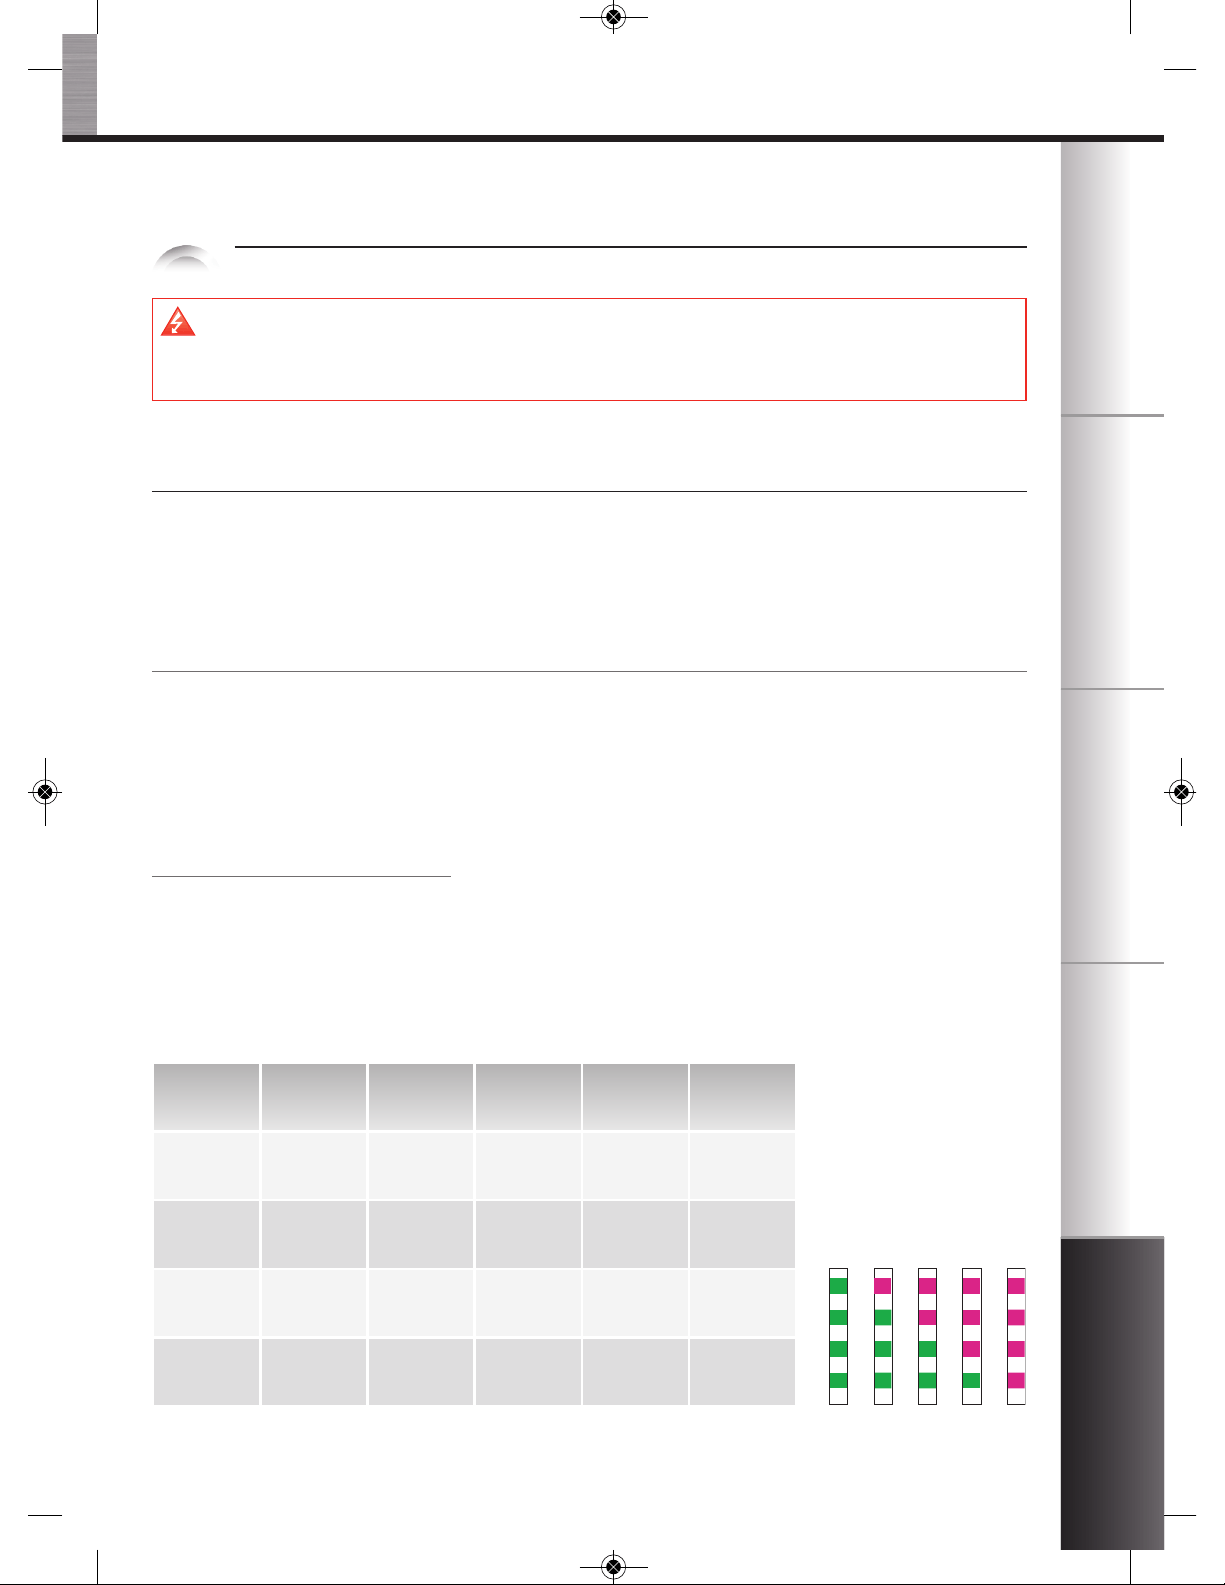
Measuring the water hardness
n Fill a glass of water and immerse the stick in it for 5 seconds. Wait for a minute before reading the
water hardness. You will be asked for the hardness class observed (from 0 to 4) during the initial
setup of the machine. The red zones on the stick indicate the degree of hardness: class 0 = no red
zone, i.e. your water has a very low mineral content. Your water is more or less hard depending on
the number of red zones. The details of the classes are given in the table below:
Degree of
hardness
Class 0 Class 1 Class 2 Class 3 Class 4
° dH < 3° > 4° > 7° > 14° > 21°
° e < 3,75° > 5° > 8,75° > 17,5° > 26,25°
° f < 5,4° > 7,2° > 12,6° > 25,2° > 37,8°
Appliance
setting
0 1 2 3 4
01234
The water hardness classes for the initial setting of the appliance (section 3.2)
Danger: Connect the appliance to an earthed mains socket. Voltage 220 - 240V. Failure to do
so means that you run the risk of fatal injury due to electricity! Respect the safety
guidelines (see section “Safety guidelines”).
IFU_EN_KR_COFFEEMAKER_BARISTA_0828479_Mise en page 1 15/06/11 10:11 Page15
Loading ...
Loading ...
Loading ...