Loading ...
Loading ...
Loading ...
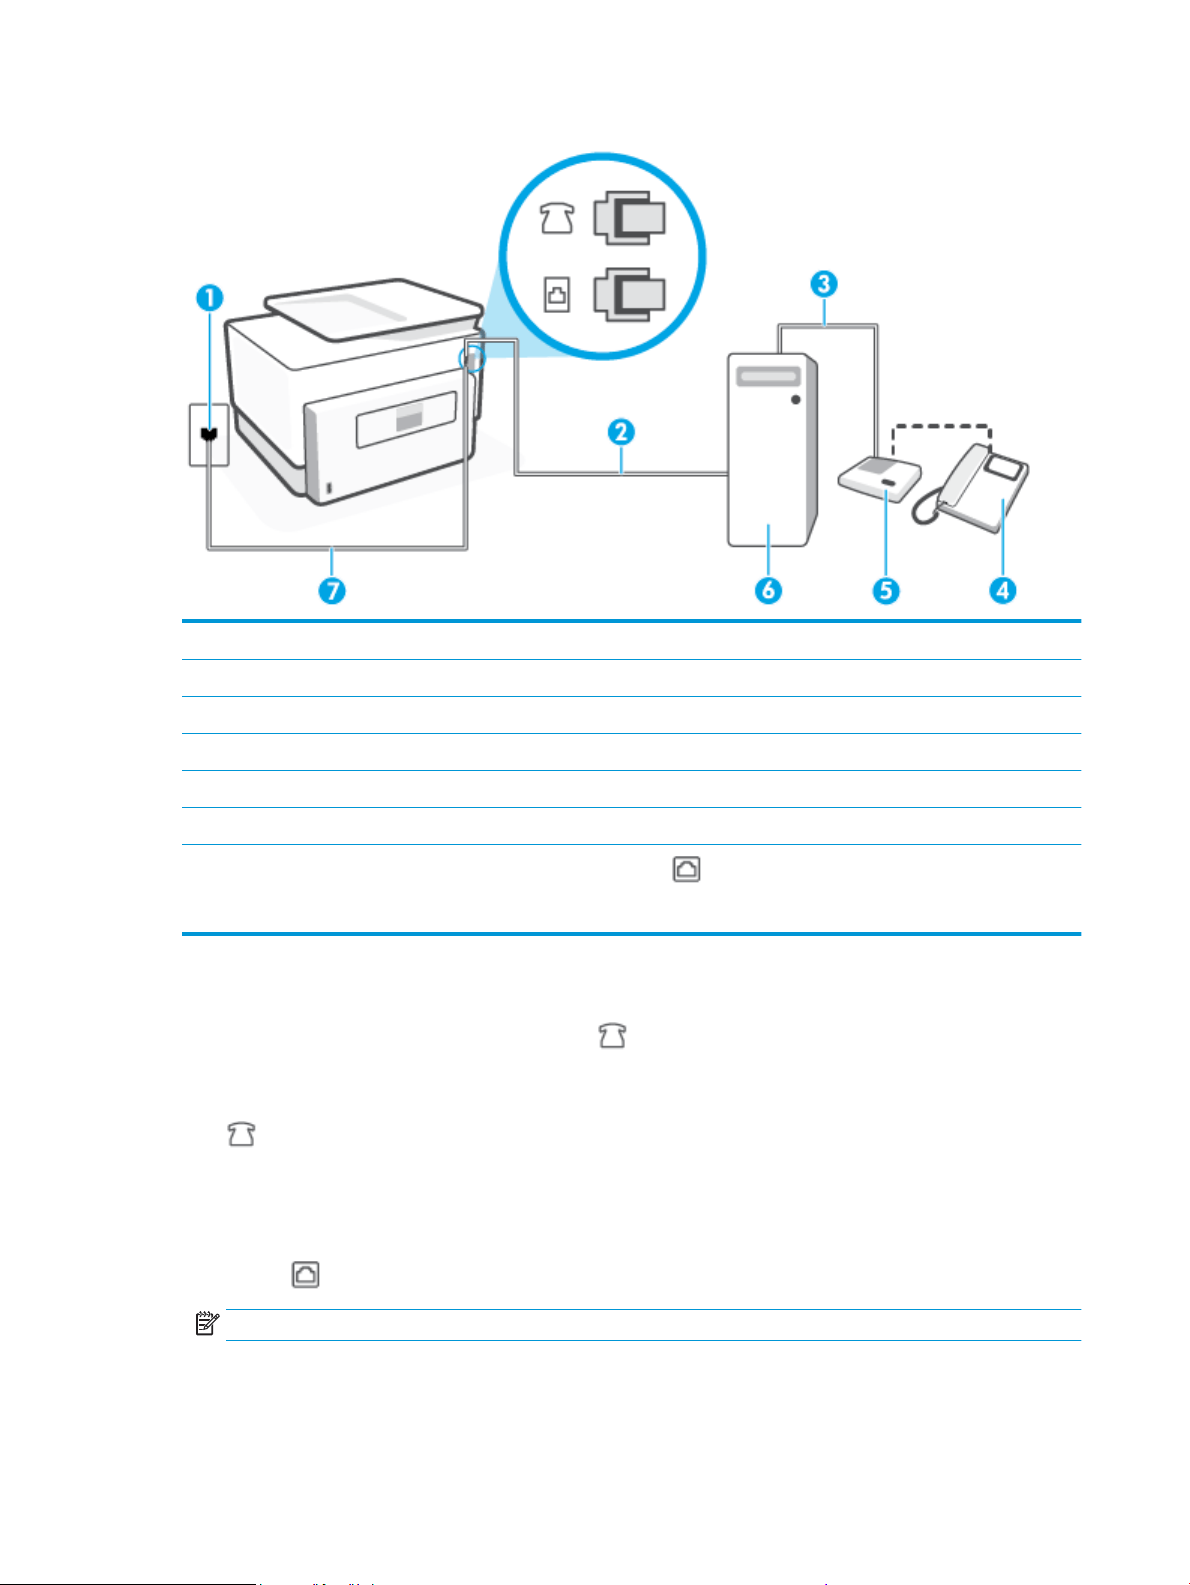
Figure 4-13 Back view of the printer
1 Telephone wall jack.
2 "IN" phone port on your computer.
3 "OUT" phone port on your computer.
4 Telephone (optional).
5 Answering machine.
6 Computer with modem.
7
Connect the phone cord to the port labeled on the back of the printer.
You might need to connect the phone cord to your country/region adapter.
To set up the printer on the same phone line as a computer with two phone ports
1. Remove the white plug from the port labeled on the back of the printer.
2. Find the phone cord that connects from the back of your computer (your computer dial-up modem) to a
telephone wall jack. Disconnect the cord from the telephone wall jack and plug it into the port labeled
on the back of the printer.
3. Unplug your answering machine from the telephone wall jack, and connect it to the port labeled "OUT"
on the back of the computer (the computer dial-up modem).
4. Connect one end of the phone cord to your telephone wall jack, then connect the other end to the port
labeled
on the back of the printer.
NOTE: You might need to connect the phone cord to your country/region adapter.
5. (Optional) If your answering machine does not have a built-in phone, for convenience you might want to
connect a phone to the back of your answering machine at the "OUT" port.
114 Chapter 4 Fax ENWW
Loading ...
Loading ...
Loading ...