
Loading ...
Loading ...
Loading ...
7
EN
2
24
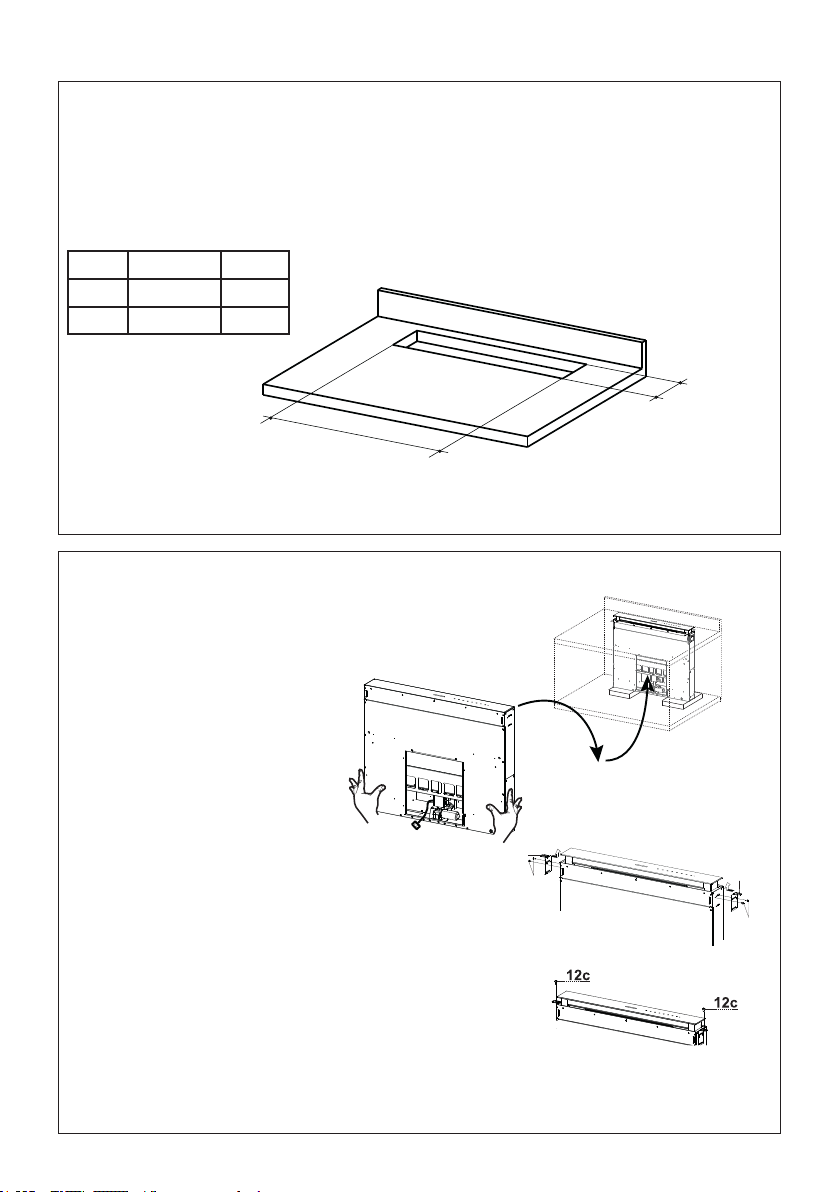
Inserting the Hood Canopy into the support surface from below
• Insert the Hood Canopy from below into the
support worktop, drilled as described above.
• With the aid of a support, lift the Hood Cano-
py until the front comes out of the Worktop.
• Insert the Brackets 7.2, as indicated in the
figure, into the slots provided and fix them
with the screws 12a provided.
• Centre the Hood Canopy with respect to the
Cooking Hob slot.
• Using the 2 screws 12c provided, fix the
Hood Canopy to the worktop and remove
the supports.
Warning:
If the cooker top is made from a material that does not allow the screws 12c to be inserted, use
a small amount of silicone to glue the Brackets 7.2 to the top and allow it to dry completely
before proceeding with installation.
1
2
The distance between the opening made for the cooker hob and the one for the suction device must
be minimum 1 3/16" - maximum 1 15/16", according to the strength of the material used for the top.
• Insert the Hood Canopy from below into the countertop
cutout, drilled as described above.
Installation Instructions
Cutout Dimensions
EN
2
23
INSTALLATION
This Hood is set up to be fitted inside the kitchen unit in:
• Ducting version: Evacuation to the outside.
Sequence of operations - Installation
• Drilling the Support Surface and Fitting the Hood
• Connections
• Functional Check
• Disposal of Packaging
Drilling the Support Surface
X
812
Warning
Once the Support surface has been drilled the Hood Canopy can be installed in two ways:
• By inserting the Hood Canopy from below ( X = 106 mm ).
• By inserting the Hood Canopy from above ( X = 113 mm ).
IMPORTANT
The minimum distance between the opening for the hob and the one for the hood must be of at
least 3-5 cm according to the strength of the material used for the working top.
Y
X
Inserting the Hood Canopy into the countertop from below
• Insert the Brackets
7.2, as indicated in
the gure, into the
slots provided and x
them with the screws
12a provided.
• Center the Hood
Canopy with respect
to the Cooktop slot.
• Using the 2 screws 12c provided, secure the
Hood Canopy to the countertop and remove
the supports.
Warning:
If the countertop is made from a material that does not allow the screws 12c to be inserted, use
a small amount of silicone to glue the Brackets 7.2 to the top and allow it to dry completely
before proceeding with installation.
• With the aid of a support,
lift the Hood Canopy until
the front comes out of the
countertop.
FOR YOUR SAFETY:
WARNING Before beginning the installation, switch power off at service panel and lock the service
disconnecting means to prevent power from being switched on accidentally. When the service
disconnecting means cannot be locked, securely fasten a prominent warning device, such as a tag,
to the service panel.
Hood X Y
30" 25 15/16" 4 5/16"
36" 31 15/16" 4 5/16"
Loading ...
Loading ...
Loading ...