
Loading ...
Loading ...
Loading ...
29
EN
2
26
12c
12a
7.1
12a
7.1
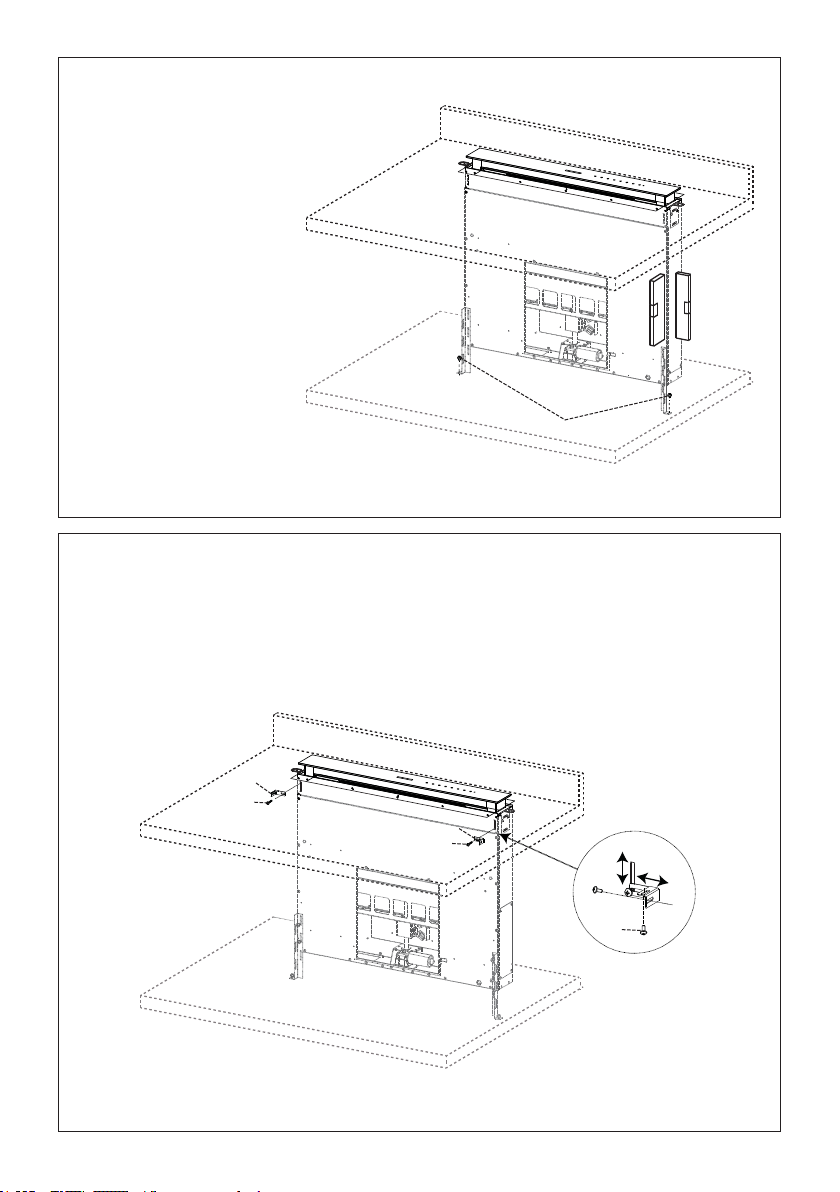
Fixing the Lower Brackets
• Screw the brackets 7.1 to the front of the Hood Canopy using the screws 12a provided.
• Before tightening the Brackets completely, make all the adjustments to allow them to rest on
the lower base of the worktop to avoid deformation of the upper brackets 7.2 as shown in the
figure.
• With the aid of a spirit level, set the Hood Canopy level vertically and fix it to the Lower
Surface using 2 screws 12c provided.
• Tighten the screws 12a completely.
5
Miseàniveauetxationdesbridesdubas
• À l'aide d'un niveau,
assurez-vous que le
cadre de la hotte est de
niveau verticalement,
et xez-le à la surface
inférieure à l'aide de 2 vis
12c fournies.
• Serrez à fond les vis 12a.
6
Fixation des brides équerres
• Vissez les brides 7.3 au cadre de la hotte à l'aide des vis 12b fournies, sans les serrer à
fond.
• Utilisez les vis 12c fournies, serrez l'autre partie des brides 7.3 soit au mur à côté de
l'appareil ou à la partie inférieure de la surface de cuisson.
EN
2
27
Fixing the Squaring Brackets
• Screw the brackets 7.3 to the Hood Canopy using the screws 12b provided, without
tightening completely.
• Using the screws 12c provided, fasten the other part of the brackets 7.3 either to the side
walls of the unit or to the lower part of the cooker top.
12b
7.3
12b
7.3
12c
• Tighten the screws 12c and 12b completely.
• Serrez à fond les vis 12c et 12b.
Loading ...
Loading ...
Loading ...