User Guide Breville BMF600BSS Milk Cafe Frother
Contents
- Breville recommends safety first
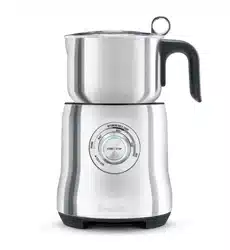
- Know your Breville Milk Café
- Operating your Breville Milk Café
- Care & cleaning
- Hints & tips
- Troubleshooting
- Recipes
- French
BREVILLE RECOMMENDS SAFETY FIRST
We at Breville are very safety conscious. We design and manufacture consumer products with the safety of you, our valued customer, foremost in mind. In addition, we ask that you exercise a degree of care when using any electrical appliance and adhere to the following precautions:
IMPORTANT SAFEGUARDS
This product is an ISM device that complies with Part 18 of the FCC Rules and with Canadian ICES-001.
- Carefully read all instructions before operating the appliance for the first time and save for future reference.
- Remove and safely discard any packaging materials and promotional labels before using the appliance for the first time.
- To eliminate a choking hazard for young children, remove and safely discard the protective cover fitted to the power plug of this appliance
- To protect against electrical shock, do not immerse the power cord, power plug or motor base in water or any other liquid, or allow moisture to come into contact with these parts. Do not place the appliance near the edge of a bench or table during operation
- Do not place the appliance on or near a hot gas or electric bumer, or where it could touch any other source of heat.
FRESH IS BEST
- To get the most out of your Grind ControlTM coffee brewer we recommend using quality freshly roasted whole bean coffee & grind right before you brew. Coffee is at its peak flavor potential 5-20 days after roasting. Always buy coffee with a “Roasted On” date printed on the bag and avoid buying coffee with a “Best
- Before” or “Use By” date, as you never know when it was roasted. Coffee loses flavor and its aromatics once it’s ground, so grinding right before you brew is the key to great tasting coffee with superior flavor and aroma.
PRODUCT OVERVIEW
- Your Grind ControlTM coffee brewer is the first drip coffee maker with an adjustable built-in grinder and calibration mode.
- The adjustable grinder features machined stainless steel burrs that allow you to adjust the coarseness or fineness to optimize flavor balance.
- The calibration mode allows you adjust the amount of coffee delivered on any strength/ cup size setting to suit coffee of varying grind size, origins, age and degree of roast, so you can achieve the maximum flavor potential from any coffee you choose.
- The Grind ControlTM also allows you to brew a single cup or travel mug in “cup” mode or from to 12 cups in “carafe” mode.
Fill the Water Tank
- Press the flip-top lid to open. Pour the desired amount of cold, preferably filtered water into the tank using a jug or the provided carafe.
- Never use Distilled, De-mineralized or highly filtered water as this will affect the electronics and the taste of your coffee.
- If using the carafe, ensure the carafe is clean and the carafe lid is securely locked in place.
- The LCD screen will indicate the amount of water in the tank as it is filled. The machine will beep when full and the water level float will rise to indicate the maximum level. Do not exceed the 12 cup maximum. Doing so may cause the carafe to overflow or water spillage at the back of the machine. Close the flip-top lid.
Pre-Warm the Carafe
- A warm carafe will help maintain the coffee’s optimal temperature and keep coffee hotter for longer. Remove the carafe lid by turning counter-clockwise then lifting upwards.
- Fill the carafe with hot water and leave to stand for about 30 seconds then discard the water.
- To lock the carafe lid back into position, align the arrow on the carafe lid with the ALIGN arrow on the carafe. Turn clockwise until the arrow on the carafe lid aligns with the LOCK arrow on the carafe. This ensures that the lid is closed and in the proper position for brewing and pouring. Place the carafe into position under the drip stop outlet.
Empty the Coffee Basket
- Once the brewing cycle is complete, the ready signal will sound and a winding noise will be heard. This is normal. The coffee machine will automatically shut-off and the LCD screen will flash ‘EMPTY COFFEE FILTER’ as a reminder to remove the coffee basket and discard the used grinds. Wash the coffee basket, taking particular care to rinse the chute area. Then dry the coffee basket and chute area thoroughly.
- We also recommend checking the coffee grinds chute disc for any build-up of coffee grinds. This is the stainless steel disc that is visible when the swing-out door is opened.
- A build-up of grinds on this disc can affect the performance of the machine. Wipe the disc clean then dry thoroughly.
Fill the Water Tank
- Press to open the flip-top lid. Pour the desired amount of cold, preferably filtered water into the tank using a jug or the carafe. Never use
- Distilled, De-mineralized or highly filtered water as this will affect the electronics and the taste of your coffee.
- The LCD screen will indicate the amount of water in the tank as it is filled. The machine will beep when full and the water level float will rise to indicate the maximum level. Do not exceed the 12 cup maximum. Doing so may cause water spillage at the back of the machine. Close the flip-top lid.
To perform a cleaning cycle
- Insert the silicon disk into the portafilter.
- Place the cleaning tablet on the silicon disk (position in the center).
- Insert the portafilter into the group head and rotate to right to lock in position.
- Ensure Power On/Off button is on.
- Turn the dial to the ‘Espresso’ position for 20 seconds.
- Turn the dial back to the ‘Standby’ position.
- Repeat steps 5-6 three times or until the cleaning tablet is dissolved.
DECALCIFYING THE MACHINE
- Ensure the Control Dial is in the ‘Standby’ position, the POWER On/Off button is off and unplugged.
- Remove the filter holder and pour the mixture of white vinegar and water into the water tank.
- Plug the machine into the power outlet.
- Ensure POWER On/Off button is on and the Control Dial is set to the ‘Standby’ position.
- Place a large container under both the Group Head and the Steam Wand.
- Set the Control Dial to the ‘Espresso’ position and let half the mixture of white vinegar and water run through the Group Head.
CLEANING
- Rinse the water tank before filling it with fresh potable water. Put the water tank in place
- Rinse the cup support. Place a container of at least 13.5 fl oz./0.4 l under coffee outlet
- Open the machine head and let the used capsule be ejected. Empty and rinse the capsule container
- Close the head and turn lever left until “LOCKED” position.
- Push the button 3 times within 2 seconds. The button will blink quickly during the procedure. It will take less than 2 minutes before a flow comes out. The cleaning procedure will run automatically for 5 minutes. The procedure consists of 3 cycles of pumping water in/internal cleaning/water flowing from outlet to complete
- The procedure can be stopped at any time by pushing the button. The button will go to a steady light. In case you want to resume the cleaning process, push the button again. To brew a coffee, put a capsule, then close, lock the machine by turning the lever left and push the button
TROUBLESHOOTING
No light on the button.
- The machine has turned “OFF” automatically; push the button or “UNLOCK” the machine.
- Check the outlet, plug, voltage, and fuse
No coffee, no water.
- Check that the water tank is filled.
- Check that a fresh capsule is inserted in correct position, that the lever is properly locked and push the button to start.
- Descale if necessary.
- Open the machine head and let the capsule be ejected. Then perform a cleaning as per cleaning section.
Coffee is not hot enough.
- Preheat cup with hot water from the tap.
- Descale if necessary
.Light blinks while machine is running.
- If coffee is flowing normally, this indicates the machine is working properly.
- If only water is flowing, the machine is executing a user request for either cleaning, descaling or emptying the system. Refer to the corresponding paragraph in this user manual.
- If there is no intention to clean, descale, or empty the system, then push the button to stop the machine. If the machine is still blinking, exit descaling mode by holding the button for at least 7 seconds or refer to next section.
- If problem persists, call the Nespresso C