
Loading ...
Loading ...
Loading ...
11
EN
PARTS & ACCESSORIES
CONTROL PANEL
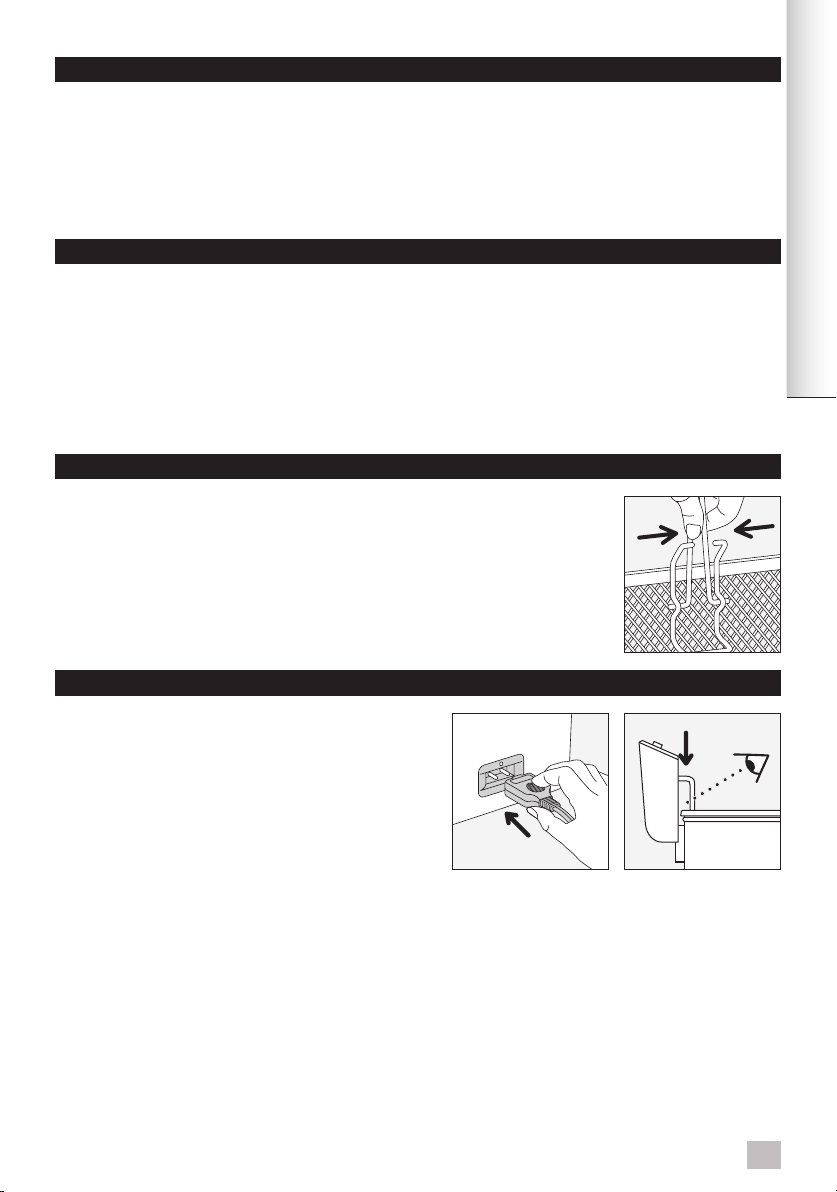
BEFORE FIRST USE
1 Lid Assembly
a Odor Filter
b Filter Cover
c Cool Touch handle
d Viewing Window
2 Housing
a Stainless Steel oil container
b Cool Touch Handles
3 Electronic Assembly
a Control Panel (refer below for more detail)
b Breakaway cord
c Heating element
4 Large Fry Basket with cool touch handle
5 Small Fry Baskets with cool touch handles (two)
6 Reset
A Presets – our recommended settings for your
favorite fried foods
a French Fries – for use with frozen French fries
b Onion Rings
c Donuts
d Chicken
B PRESET Button – Scroll and select preset options
C DUAL LEVEL DISPLAY – Displays currently selected
time and temperature
D TEMP/TIME Knob – Adjust time and temperature by
turning the knob; press down on the knob to switch
from one to the other
E ON indicator – Red light indicates when the heating
element is on
F OIL READY indicator – Green light indicates when
the oil has reached your desired temperature
G START/STOP Button – Press to begin heating and
countdown time. Press and hold to stop heating at
any time
1. Remove all packaging and stickers from your deep fryer
2. Thoroughly clean the oil container, lid and baskets to remove any dust or residue
remaining from manufacturing.
3. Attach the cool touch basket handles to the baskets
a) Squeeze the handle rods together placing the ends into the loop of the basket.
Ensure the handle stem is placed beneath the locking bracket on the basket as
shown in the image.
Note: Serious injury can occur if your handle is not properly locked in place.
SET UP
1. Place the unit on a stable horizontal at surface.
2. Attach the magnetic end of the power cord to the unit.
3. Ensure the Electronic Assembly (controls and heating
element) is rmly in place.
a) Line up the control panel with the grooves on the rear
of the unit and slide down.
Note: Your Deep Fryer is equipped with a safety microswitch
which will not allow the control panel to work unless it is
properly seated into both grooves in the housing.
4. Add desired amount of oil, making sure not to ll below
the Min or above the Max line.
5. Plug the pronged end of cord into a standard 120V outlet. The display will automatically switch on and will show
default temperature.
Note: always attach the cord to the Fryer before plugging into the outlet.
2. 3.
RESET
1d
4
5
3a
6
3c
a
b
c
A
d
B
3b
2b
C
D
G
E
F
2a
1c
1b
1a
RESET
3a
Loading ...
Loading ...
Loading ...