
Loading ...
Loading ...
Loading ...
12
Operation
m
IMPORTANT! This pressure washer is equipped with
a micro-switch sensitive to water ow. This Total Stop System
(TSS) senses water ow in the pump. When the trigger is
released, water stops owing through the pump. The TSS then
automatically turns the motor o to protect the pump from
overheating, thus saving energy and prolonging pump life.
The TSS system will work only when there's water in the
bucket or the base unit is connected with a water supply.
When there's no water connected with the unit, the On/O
button has to be pressed to stop the unit.
mIMPORTANT! This system is capable of producing
8 Mpa. To avoid rupture and injury, do not operate this pump
with components rated less than 8 Mpa working pressure
(including but not limited to spray guns, hose, and hose
connections).
Connecting to Water Source and Start
the Unit
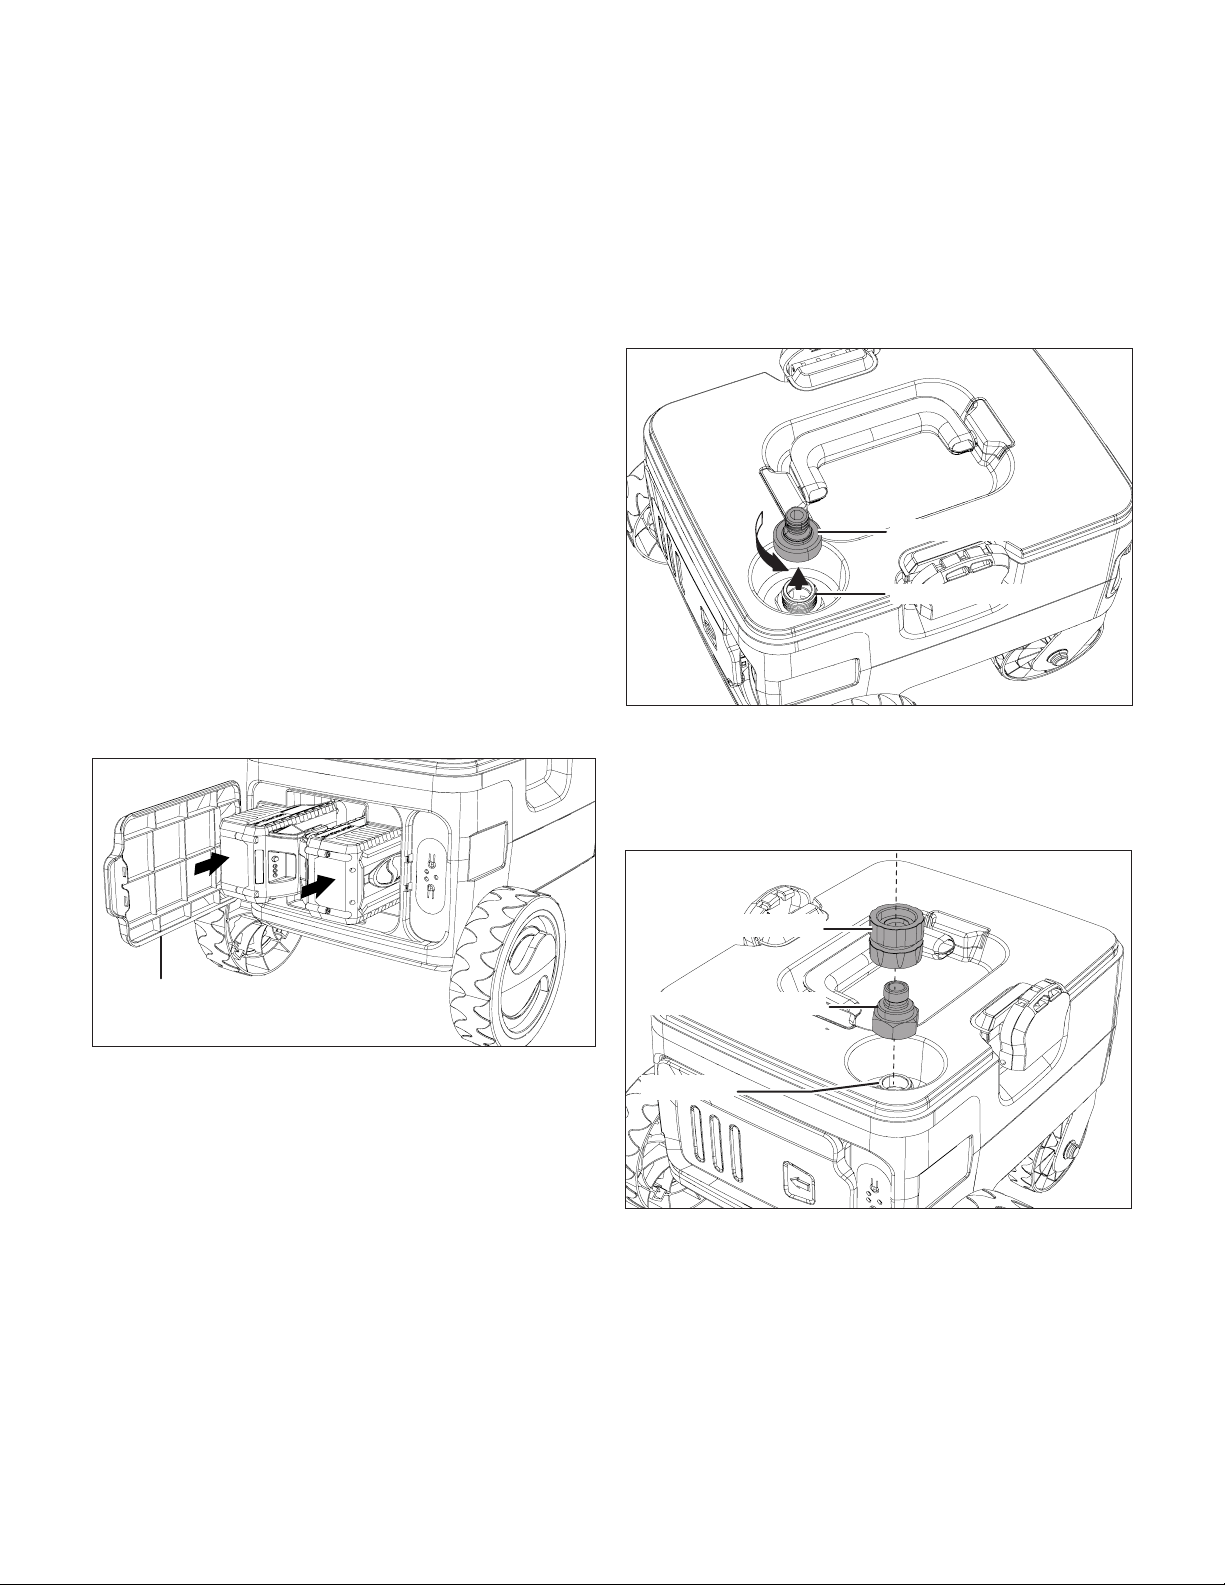
1. Open the battery compartment cover and slide the battery
packs in until they click to lock into position, then close
the battery compartment cover (Fig. 17).
2. Remove the water bucket from the base unit and ll with
clean (fresh) water.
mWARNING! The intake water temperature must not
exceed 104ºF/40ºC.
mCAUTION! The washer must only be used with clean
(fresh) water; use of unltered water containing corrosive
chemicals will damage the washer.
mWARNING! Do not ll the bucket with the bucket still
xed on the base unit.
3. Put the bucket back on the base unit. Make sure the
bucket is properly aligned on the base. Latch and lock
the buckles to ensure the bucket is securely connected
before using (Figs. 8 – 9).
NOTE: If you do not want to use the bucket, you can use
the base unit directly as a pressure washer. See following
instructions (step 4 – 6) to learn how to connect the base unit
with a water supply.
4. Disengage the bucket buckles and remove the bucket
from the base unit. Disconnect the bucket adapter from
the water inlet by turning it counterclockwise with a
wrench (Fig. 18).
5. Connect the included brass water inlet connector to the
water inlet and turn it clockwise to lock securely. Connect
the included garden hose adapter with the brass water
inlet connector and push it until it clicks and locks in place
(Fig. 19).
6. Thread your garden hose (male end) into the garden
hose adapter (Fig. 20). The garden hose must have an
internal diameter of at least 13 mm (1/2 in.) and must be
reinforced. The water supply must be at least equal to the
washer delivery capacity.
Fig. 17
Battery
compartment cover
Fig. 18
Bucket adapter
Water inlet
Fig. 19
Water inlet
Water inlet connector
Garden hose adapter
Loading ...
Loading ...
Loading ...