Loading ...
Loading ...
Loading ...
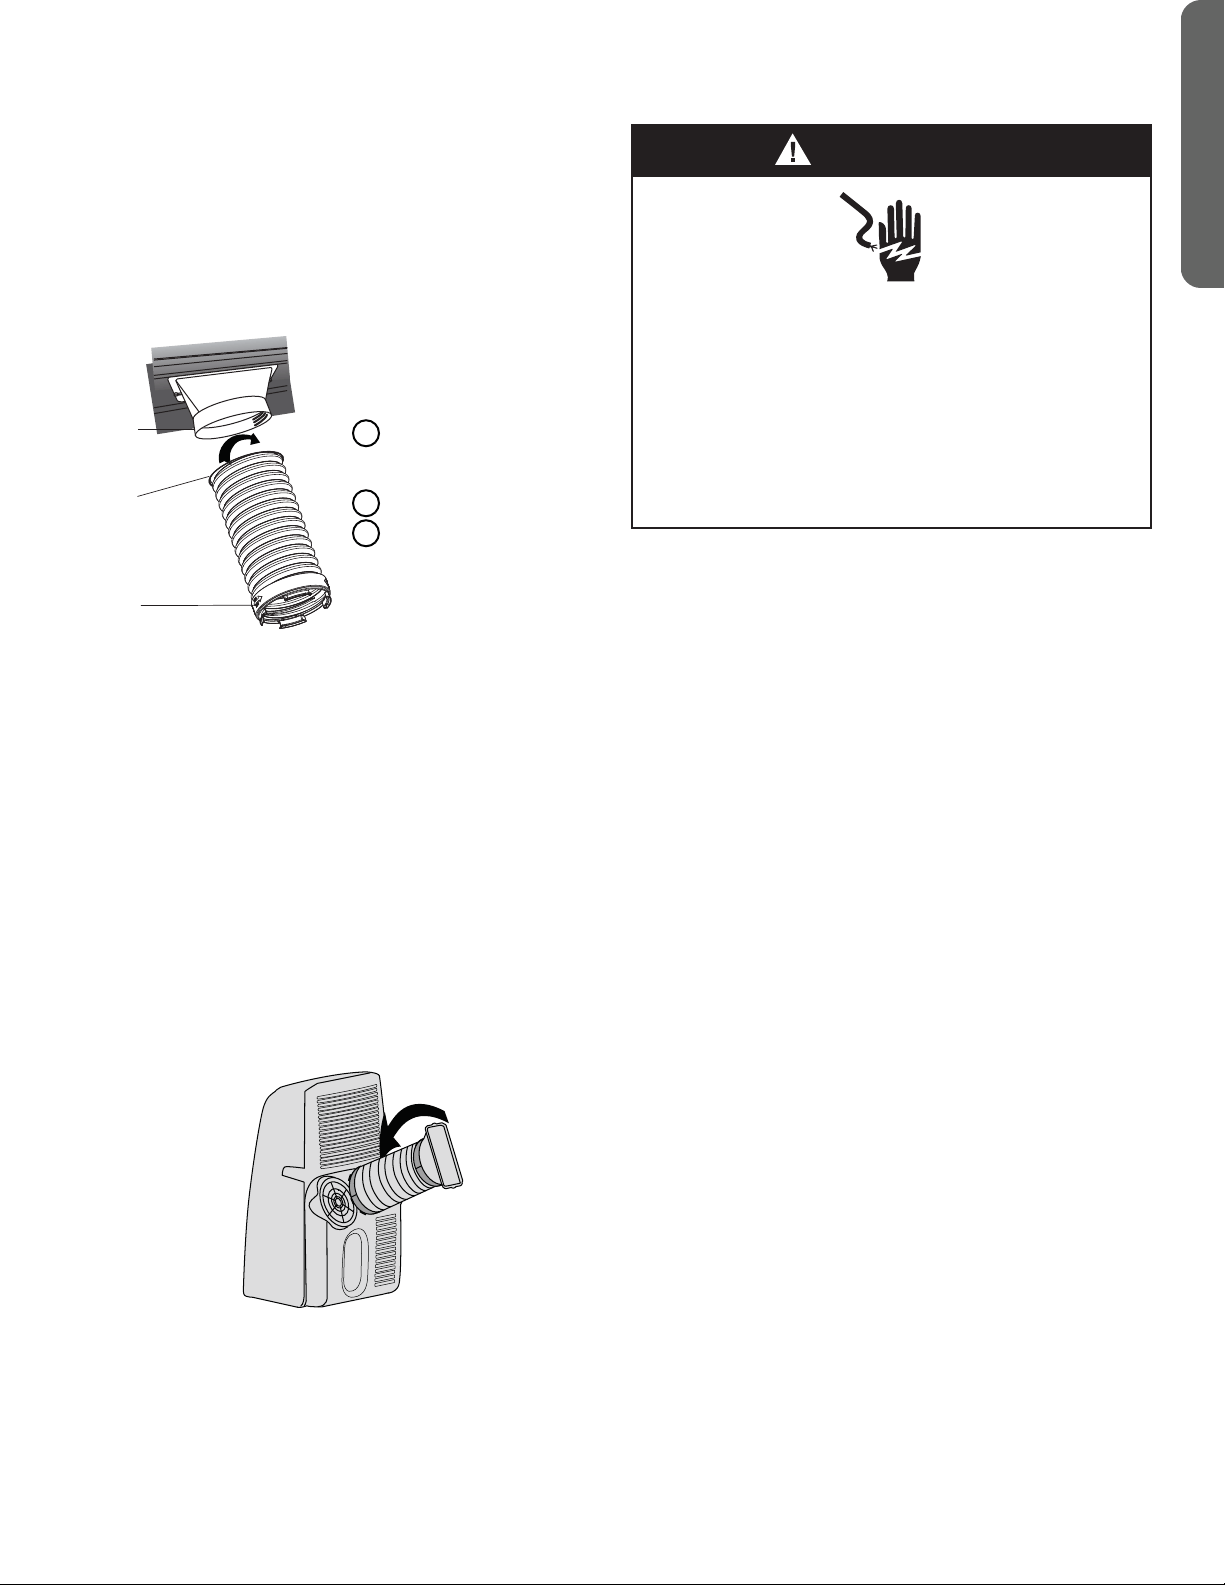
A A Exhaust Nozzle (1 or
2 depending on
model)
B Hose (open end)
C Hose (connector
end)
B
C
WARNING
Electrical Shock Hazard
Plug into a grounded 3 prong outlet.
Do not remove the ground prong from the power
cord plug.
Do not use an adapter.
Do not use an extension cord.
Ïäìïøõè÷òçòöòæäñõèöøï÷ìñçèä÷ëĤõèòõ
electrical shock.
ENGLISH
NOTE: Do not attach additional hoses to extend the
ïèñê÷ëÝëìöúòøïççèæõèäöèæòòïìñêèĦæìèñæüäñçðäü
damage the air conditioner.
2. Using a counterclockwise motion, attach the open end
of the exhaust hose to the exhaust nozzle.
STEP 5 - CONNECT EXHAUST HOSE
TO THE AIR CONDITIONER
IMPORTANT: When connecting the hose, the air conditioner
must be close enough to the window that you will not
dislodge the window seal plate. Once the hose is connected,
move the air conditioner 20” (51 cm) from the wall.
1. Align the notches on the connector end of the exhaust
hose with the ridges in the opening on the back of the air
conditioner.
2. Using a counterclockwise motion, screw the exhaust hose
(connector end) into the air outlet located on the back of
the air conditioner.
7
STEP 6 - COMPLETE INSTALLATION
1. Plug the power cord into a grounded 3 prong outlet.
2. Press the Reset button on the power cord to ensure the
safety plug is providing power to the air conditioner.
STEP 4 - ATTACH EXHAUST HOSE
TO THE EXHAUST NOZZLE
1. Grasp both ends of the exhaust hose and gently pull to
expand the hose.
Loading ...
Loading ...
Loading ...