Loading ...
Loading ...
Loading ...
WATER SUPPLY INSTALLATION (CONT.)
A shutoff valve to connect the water supply line to your household water system
NOTE: Do not use a self-piercing type shutoff valve.
A compression nut and ferrule (sleeve) for connecting the water supply line to the ice maker inlet valve.
Do not install water supply tubing in areas where the temperature falls below freezing.
Connect the ice maker to a drinkable water source that is not connected to a water softening system.
Chemicals from the softener may damage the ice maker, causing it to malfunction.
INSTALLATION INSTRUCTIONS
1. Disconnect refrigerator from power supply.
2. Turn off water supply at shut off valve.
3. Connect copper water supply line to household water system.
4. Turn ON water supply and tighten any connections that leak.
5. Re-install rear access cover for compressor compartment.
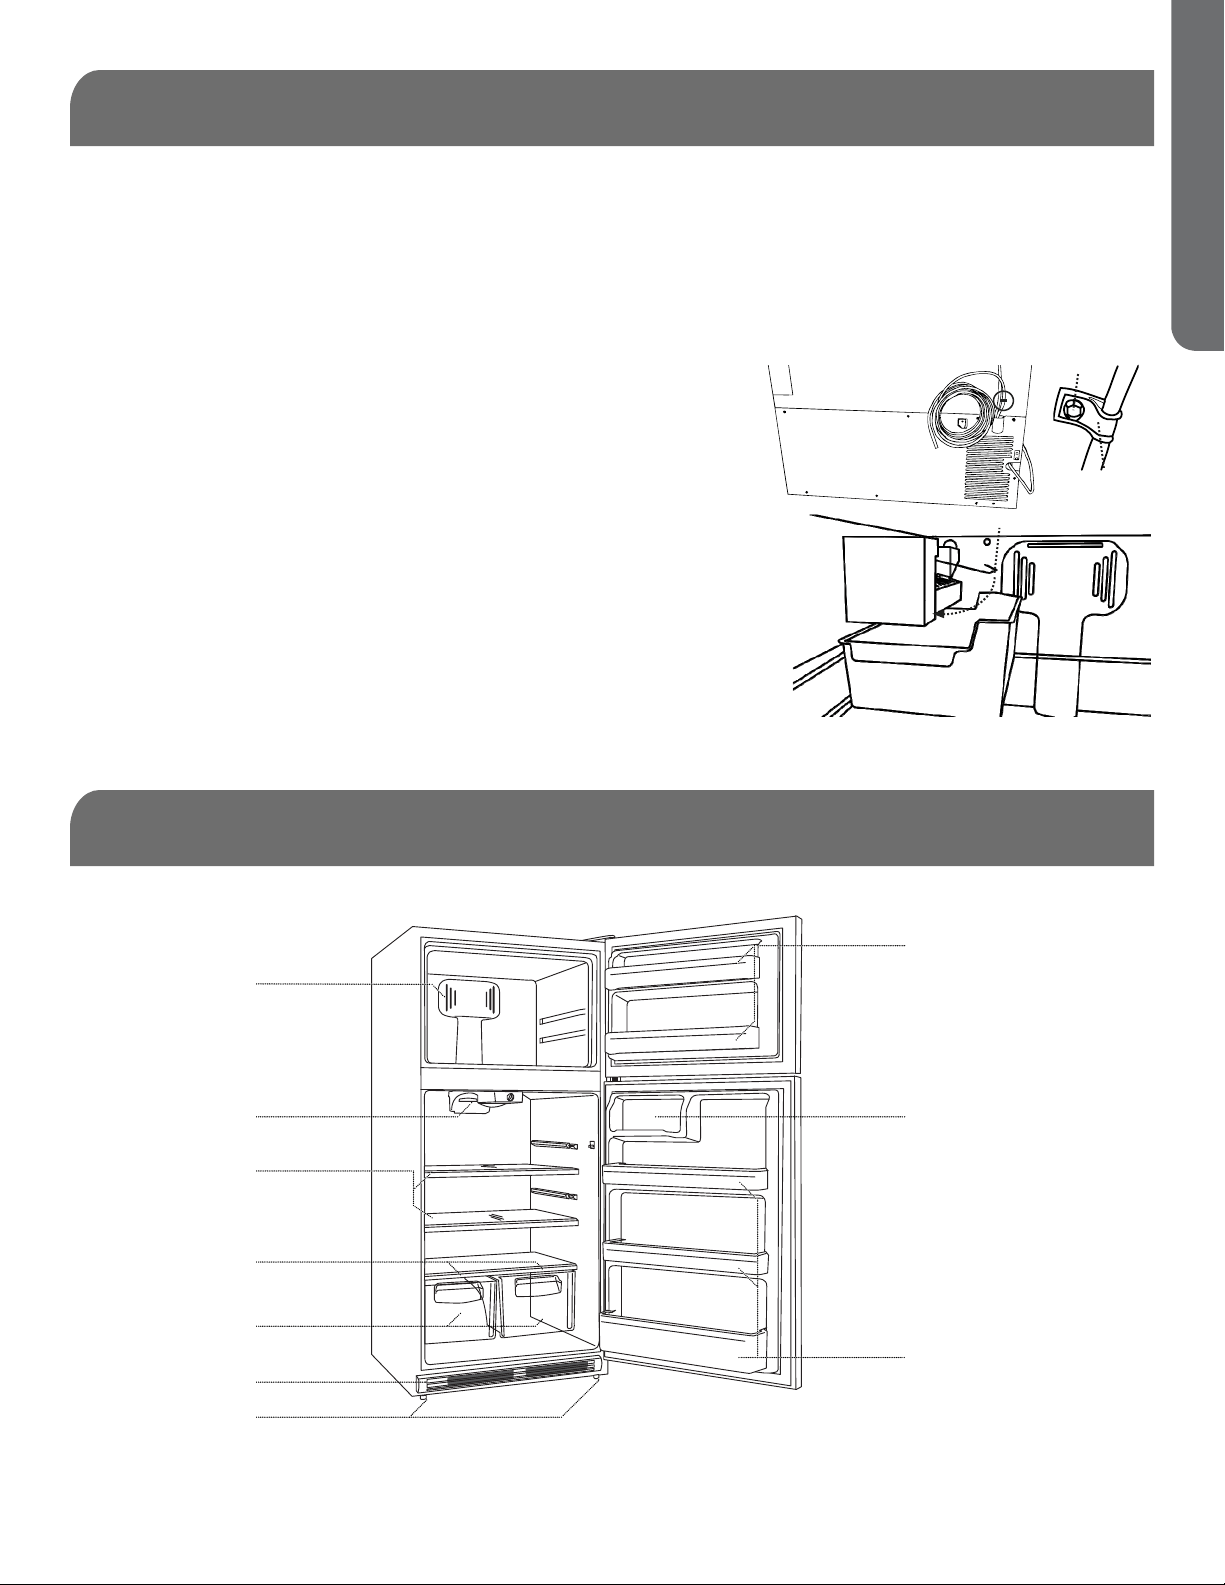
6. Coil excess water supply line behind refrigerator, as shown below
and arrange coils so they do not vibrate or wear against other
surfaces. Use water tube clamp and #8 screw from the parts
included bag to secure water supply line to rear of refrigerator.
7. Reconnect refrigerator to power supply.
8. Turn icemaker ON by lowering wire control arm.
Water Supply
Clamp
#8 Screw
Wire Control Arm
PAGE 8 ●SET UP & USE
FEATURES AND USE
Air Flow Control
Temperature
Control with
Interior Light
Full-Width Shelves
Crisper Humidity
Controls
Crisper Bins
Front Grille
Leveling Legs
Freezer Door Shelves
Dairy Compartment
Full-Width Door Shelves
Diagram for instructional purposes only.
Design may vary by model number.
NOTE: All features not available on all models.
ENGLISH
Loading ...
Loading ...
Loading ...