Loading ...
Loading ...
Loading ...
ENGLISH
PAGE 7 ●SET UP & USE
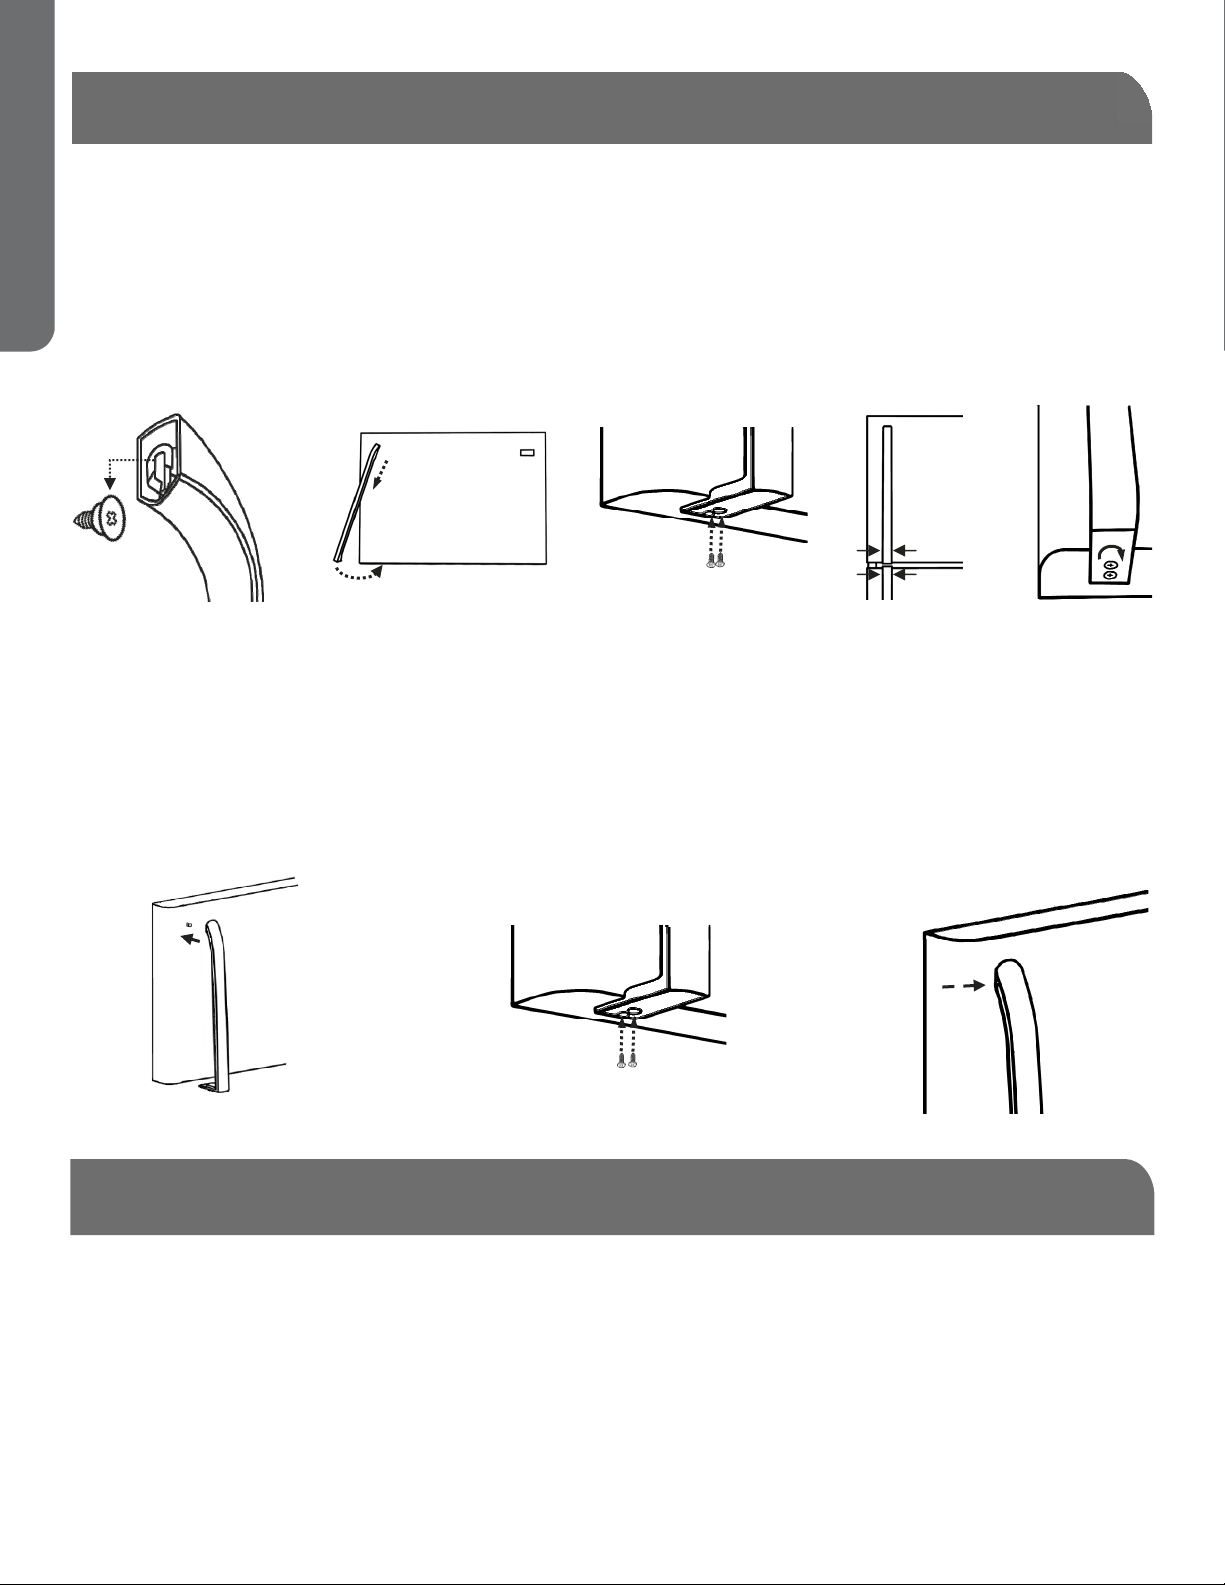
DOOR HANDLE INSTALLATION
PLASTIC HANDLES
1. Remove door handles and screws from plastic bags.
2. Place flared end of handle over pre-installed door face mounting screw. Slide handle down to secure it.
(Screw may need to be loosened slightly if handle is difficult to slide on).
3. Rotate door handle toward gap between doors.
4. Install screws from parts-included bag but do not tighten fully.
5. Repeat above steps for remaining door.
6. With both handles mounted, visually align handles, carefully open door and tighten screws.
2
2
3
STAINLESS STEEL HANDLES:
1. Remove door handles and hex key from freezer compartment
2. Place flared end of handle over mounting stud on face of door; align holes in flat end of handle with holes
on door edge
3. Install screws into flat end of handle
4. Use hex key to tighten set screw on flared end of handle, tighten until handle is flush with door then
tighten another half turn.
WATER SUPPLY INSTALLATION
IMPORTANT: This water supply installation is not covered under warranty by the refrigerator or ice maker
manufacturer(s). Follow these instructions carefully to minimize the risk of expensive water damage.
SUPPLIES REQUIRED FOR INSTALLATION:
Access to a household cold water line with water pressure between 20 psi and 120psi
A water supply line made of 1/4-inch outside diameter, copper tubing. Plastic is not recommended since it
greatly increases the potential for water leaks. To determine the length of the copper tubing needed, you
will need to measure the distance from the ice maker water valve at the back of the refrigerator to your
cold water pipe. Then add approximately 7 feet, so the refrigerator can be moved out for service.
Loading ...
Loading ...
Loading ...