Loading ...
Loading ...
Loading ...
FEATURES AND USE (CONT.)
PAGE 9 ●SET UP & USE
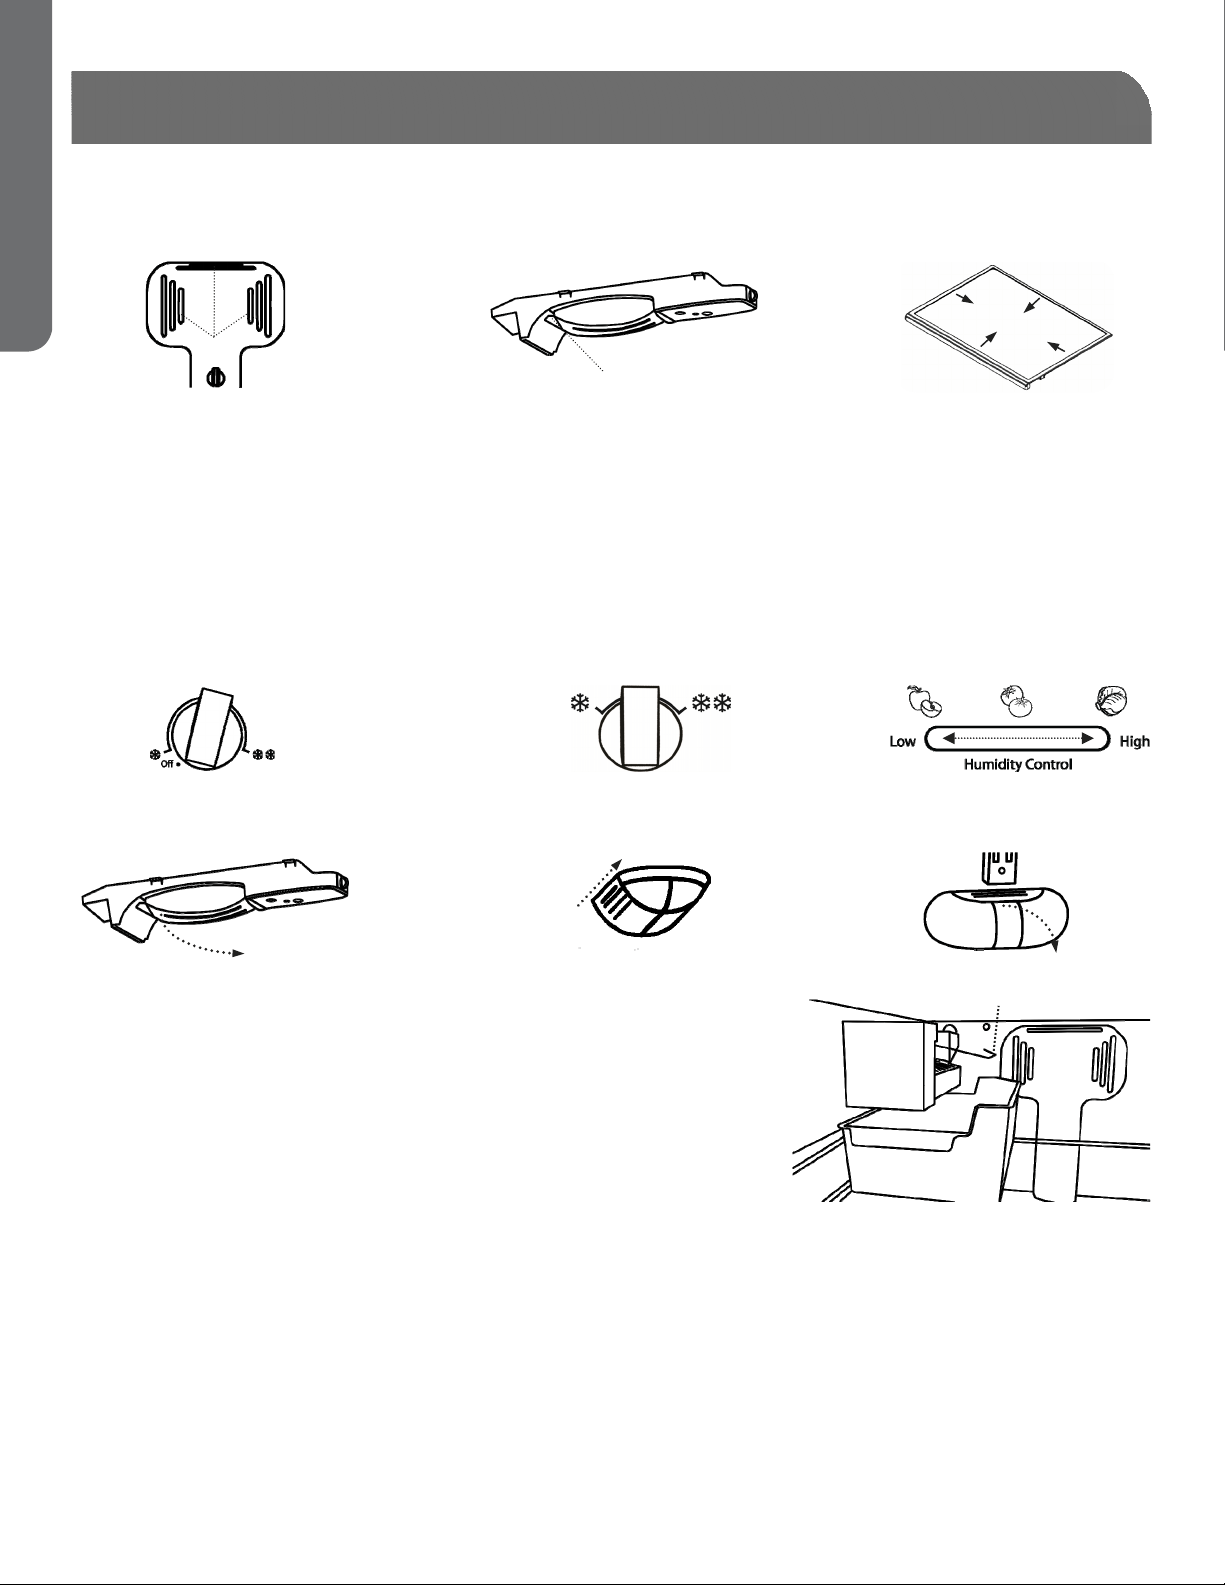
LIGHT COVERS (NOT ALL MODELS)
Freezer (Not All Models)
Mid-Level (Not All Models) Main Refrigerator (Not All Models)
CONTROLS
Allow 24 hours for adjustments.
The Refrigerator Temperature control should be set at “1 o’clock” and adjusted in small increments after
24 hours to achieve desired temperature.
The Freezer Temperature control should be set at “12 o’clock” and adjusted in small increments after 24
hours to achieve desired temperature.
Adjusting the refrigerator control will affect the freezer compartment as well.
Turning either control to “Off” or the lowest temperature setting does not disconnect the power supply
from the refrigerator.
Refrigerator Temperature Freezer Temperature Crisper
ICE MAKER (NOT ALL MODELS)
To stop the ice maker, lift the wire arm until it clicks and locks in the OFF
(raised) position. The ice maker turns OFF automatically when the ice
container is full.
NOTE: It takes approximately 24 hours for the ice maker to begin
producing ice. New plumbing may cause ice discoloration and
poor flavor. Discard ice made in the first 24 hours.
Water quality determines ice quality. Do not connect the ice maker to
water that is softened. Chemicals from a malfunctioning softener can
damage the ice maker.
Ice stored too long may develop an odd flavor. Empty the container and make sure the wire arm is in the
ON (lowered) position. The ice maker will then produce ice.
Keep the wire arm in OFF position until the refrigerator is connected to the water supply or whenever the
water supply is turned OFF.
IMPORTANT:
Do not wash the ice container in your dishwasher.
Be sure to stop the ice maker when cleaning the freezer or on vacation.
If the ice maker has to be turned OFF for a long period of time, turn the water supply valve to the closed
position.
Wire Control Arm
STORAGE
In order for air to flow properly inside of your refrigerator, do not store items directly in front of the freezer
fan tower vents, directly under the refrigerator vent or against the sides of the refrigerator compartment.
Position items toward the center of shelves.
Vents
Refrigerator Vent
ENGLISH
Loading ...
Loading ...
Loading ...