USER MANUAL PowerVac Compact Vacuum Sealing Machine
FEATURES
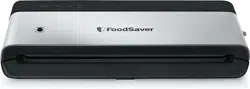
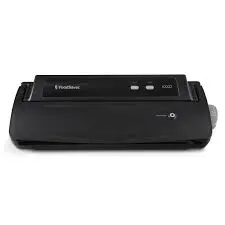
FoodSaver® VS0100 Models
Optional Accessories

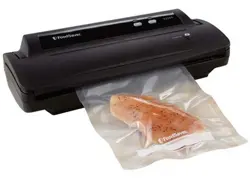
1. Handheld Sealer
- Use with FoodSaver® Zipper Bags and Fresh Containers, ideal for fresh foods and snacks.
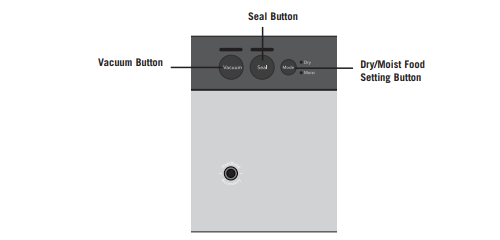
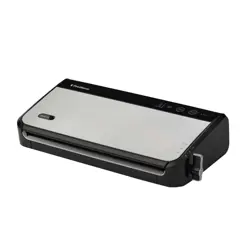
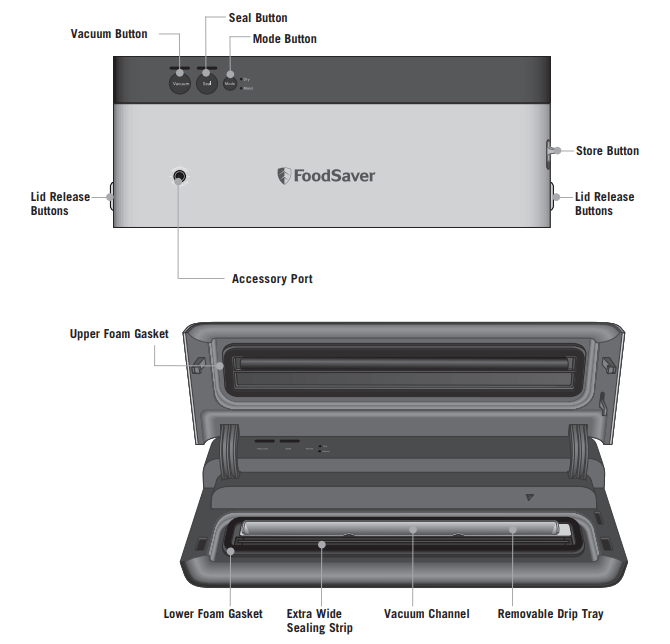
The user-friendly, intuitive control panel makes it easy for you to get the most out of your FoodSaver® System:
1 Seal Indicator Light
- Flashes when sealing process is engaged and becomes constant when sealing process is finished.
2 Vacuum Indicator Light
- Flashes when vacuum cycle is engaged and becomes constant when vacuum cycle is finished.
3 Seal Button
This button has three uses:
- Press to create a seal when making bags from a FoodSaver® Roll.
- Press to immediately stop the vacuum process and begin sealing the bag. This prevents crushing delicate items such as bread, cookies and pastries.
- Press to create a seal on multilayer film bags (such as a potato chip bag) to keep food sealed airtight.
4 Vacuum Button
This button has three uses:
- Press to vacuum seal food airtight. Motor will continue to run until bag is fully vacuumed, then will automatically seal.
- Press to pause vacuum process at any point.
- Press to use the Handheld vacuum accessory.
5 Dry/Moist Food Setting Button
- For optimal vacuum sealing of moist or juicy foods, press the Dry/Moist Food Settings Button until the Moist Indicator Light is illuminated. Choose the Dry Food Settings for foods without liquids.
HOW TO
Make a Bag from a FoodSaver® Roll
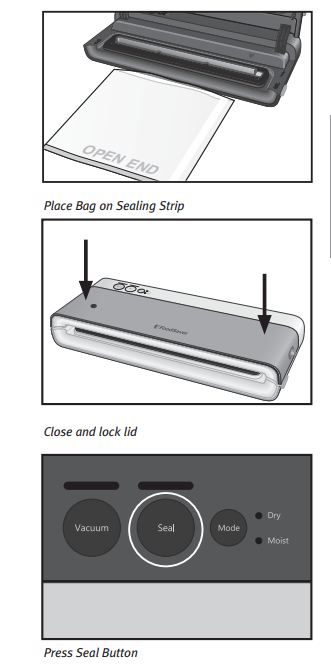
- Using scissors, cut enough bag material from roll to hold item, plus 3 inches. Be sure to cut straight.
- Insert one end of bag material across Sealing Strip.
- Press lid to lock. Dry mode light will illuminate when the lid is fully locked and ready to OPERATE.
- Press Seal button.
- When Seal Indicator Light stops flashing and becomes constant, sealing is complete. Press lid release buttons to open lid.
Now you are ready to vacuum seal with your new bag
This appliance is compatible with FoodSaver® 11” rolls, 8” rolls, pint, quart and gallon bags, and accessories.
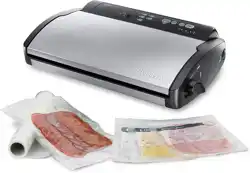
Vacuum Seal with FoodSaver® Bags
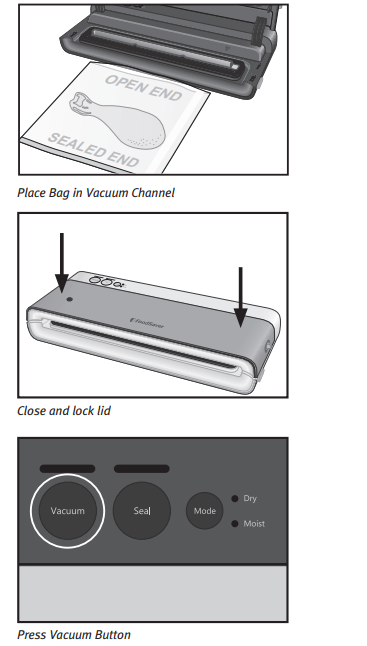
- Place item(s) in bag, allowing at least 3 inches of space between bag contents and top of bag.
- Open appliance lid and place open end of bag into Vacuum Channel.
- Press lid to lock. Dry mode light will illuminate when lid is fully locked and ready to OPERATE.
- Press Vacuum button to begin vacuum and sealing process. Motor will continue to run until bag is fully vacuumed, then will automatically seal.
- When Seal Indicator Light stops flashing and becomes constant, press release buttons on both sides to open, lift lid and remove bag.
NOTE: Let appliance cool down for 20 seconds after each use.
Important Tips: To minimize bag waste, do not insert bags too far into the appliance. Only insert bag just over the edge of the removable drip tray.
Vacuum Seal with FoodSaver® Accessories
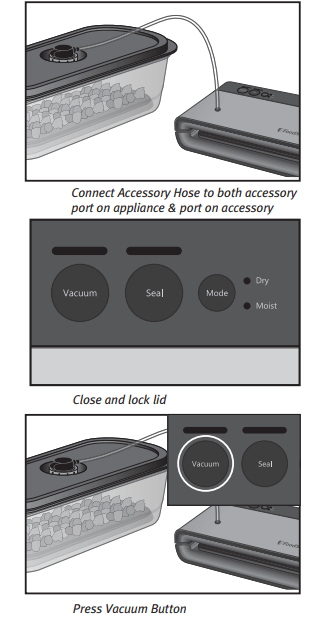
- Prepare container according to FoodSaver® Accessory Guidelines (see manual that comes with your Accessory Kit).
- Insert one end of the Accessory Hose into Accessory Port on appliance until it clicks into place. Connect other end to the accessory per Accessory Guidelines.
- Press lid to lock. Dry light will illuminate when the lid is fully locked and ready to OPERATE. Press Vacuum button.
- When the light becomes constant, the vacuum process is complete. Note that the appliance will still go through the sealing cycle when vacuum sealing an accessory.
- Remove Accessory Hose from accessory and appliance.
- To test vacuum, simply tug on accessory lid. It should not move.
Use Handheld Sealer with Vacuum Zipper Bags
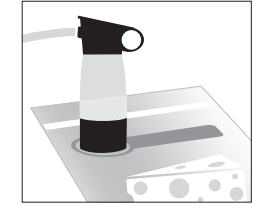
Handheld sealer can be used with Vacuum Zipper Bags.
- Fill zipper bag, lay flat with grey circle facing upwards. Squeeze air out, zip 3/4 of the way closed and squeeze any remaining air out before zipping completely.
- Press Handheld Sealer over gray circle on bag and press Vacuum button.
Open FoodSaver® Accessories After Sealing
FoodSaver® Containers
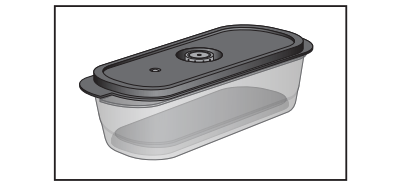
- To release vacuum and open, turn knob to open position.
FoodSaver® Jar Sealer with Mason Jars
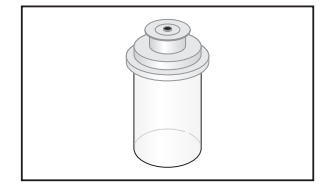
- Important: Do NOT use screw bands when vacuum sealing jars. To open, wedge spoon between Mason jar lid and highest part of threaded rim. Twist spoon gently to release vacuum.
FoodSaver® Bottle Stoppers
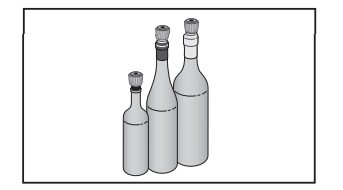
- To release vacuum and open, twist and pull up on Bottle Stopper.
CARE & CLEANING
To Clean Appliance:
- Remove Power Cord from electrical outlet. Do not immerse in liquid.
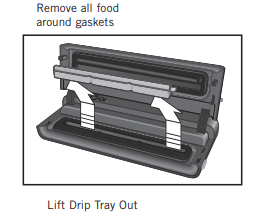
- Check Gaskets and around Drip Tray to make sure they are free from food materials. Wipe off Gasket with warm soapy cloth if needed. Upper and Lower Gaskets may be removed for cleaning. Clean with warm, soapy water.
- The Removable Drip Tray makes cleanup easy when small amounts of liquids are pulled into the Vacuum Channel during vacuum process.
- Empty Drip Tray after each use. Wash in warm soapy water or place on top rack of dishwasher. Dry thoroughly before re-inserting into the appliance.
To Store Appliance:
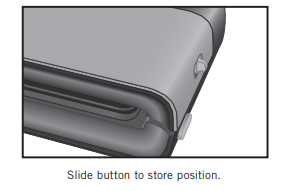
- Clean unit thoroughly as detailed above.
- After the unit has been cleaned and allowed to fully dry, close lid without locking and slide button to the Store position. This setting prevents any undue pressure from being applied to the internal sealing gaskets of the unit.
- Never store lid in OPERATE position as gaskets may become compressed and the unit may not function properly.
Store Vertically
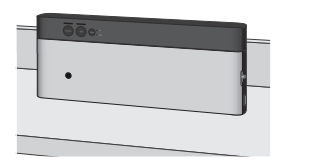
- Once in Store position, store vertically to save valuable kitchen space.
Important Safeguards & Tips
When using electrical appliances, basic safety precautions should always be followed to reduce the risk of fire, electric shock, and/or injury to persons including the following:
- Read all instructions before using this product.
- For bag sealers: To reduce the risk of burns, do not touch the sealing strip while using the appliance.
- To protect against electric shock, do not place or immerse cord, plugs, or appliance in water or other liquid.
- This appliance is not to be used by children or by persons with reduced physical, sensory or mental capabilities.
- Close supervision is necessary when any appliance is used near children. Children should not play with the appliance.
- Unplug from outlet when not in use, before putting on or taking off parts and before cleaning. Allow to cool before putting on or taking off parts, and before cleaning. To disconnect, unplug power cord from outlet. Do not disconnect by pulling on cord.
- Do not operate any appliance with a damaged cord or plug or after the appliance malfunctions, or has been damaged in any manner. Do not attempt to replace or splice a damaged cord. Contact Customer Service (see warranty) for examination, repair or adjustment.
- The use of an accessory not recommended by the appliance manufacturer for use with this appliance may result in fire, electric shock or injury to persons.
- Do not use in wet locations or leave outdoors. Do not use for commercial purposes.
- Do not let cord hang over edge of table or counter, or touch hot surfaces.
- Place cord where it cannot be tripped over, pulled on, cause user to become entangled with, especially by children, or cause the appliance to be overturned.
- Do not place on or near wet surfaces, or heat sources such as a hot gas or electric burner, or heated oven. Always use appliance on a dry, stable, level surface.
- Extreme caution must be used when sealing bags or moving an appliance containing hot liquids.
- Always attach plug to appliance first, then plug cord into outlet (for appliances with detachable cords).
- Use appliance only for its intended use.
- Vacuum packaging is not a substitute for the heat process of canning. Perishables still need to be refrigerated or frozen.