Loading ...
Loading ...
Loading ...

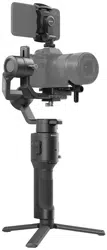
RONIN-SC
User Manual
© 2019 DJI OSMO All Rights Reserved.
25
Button Features
Power Button
Press and hold the power button to turn Ronin-SC on or off. Tap the power button to enter or exit sleep
mode.
M Button
Tap to select a user prole. Press and hold to enter Sport mode. Press three times to enter or exit 3D Roll
360 mode. Press six times to restore the default Bluetooth password. The prole light glows to indicate the
password has been restored successfully.
Sport Lock: Hold down the M Button and then double tap the trigger to enter and stay in Sport Mode.
Repeat the same procedure to exit Sport Lock Mode.
Joystick
Push the joystick up or down to control the movement of the tilt axis, and push it left or right to control the
movement of the pan axis. Go to the Joystick screen of the Ronin app to adjust the parameters for the pan,
tilt, and roll axes.
Camera Control Button
After connecting the camera control port and camera, press halfway for autofocus, as you would the
shutter button on a camera. Press to start or stop recording.
Press and hold to take a photo. For the most updated Camera Compatibility List, refer to the Ronin-SC
product page on the ofcial DJI website (http://www.dji.com/ronin-sc).
Trigger
Press and hold the trigger to enter Lock mode. Press twice to re-center the gimbal. Press three times to
turn the gimbal 180° so that the camera faces you.
Press four times and hold to begin Joystick Calibration.
Joystick calibration is only required if the gimbal drifts (if the gimbal moves by itself without input from the
joystick). During calibration, push and pull the joystick several times as far as it will go in all directions.
Press four times and hold the trigger again to complete calibration.
The calibration has failed if the LEDs turns solid red. If the calibration fails, go through the process again.
Loading ...
Loading ...
Loading ...