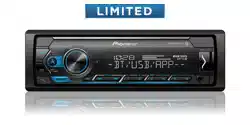
Pioneer MVH-S322BT Audio Digital Media Receiver

User Manual

For MVH-S322BT. Additionally, the document applies to other Pioneer models: MVH-S320BT

PDF File Manual, 118 pages, Read Online | Download pdf file

MVH-S322BT photo
background
English Français Español
DIGITAL MEDIA RECEIVER
RÉCEPTEUR NUMÉRIQUE MULTIMÉDIA
RECEPTOR DE MEDIOS DIGITALES
MVH-S320BT
MVH-S322BT
Operation Manual
Mode d’emploi
Manual de operación
Important (Serial number)
The serial number is located on the bottom of this unit. For your own security and convenience, be sure to
record this number on the enclosed warranty card.
Important (Numéro de série)
Le numéro de série se trouve au bas de cet appareil. Pour votre sécurité et votre commodité, veillez à noter ce
numéro sur la carte de garantie fournie.
Importante (Número de serie)
El número de serie se encuentra en la parte inferior de esta unidad. Por su propia seguridad y comodidad,
asegúrese de anotar este número en la tarjeta de garantía que se adjunta.
Loading page 2...
Loading page 3...
Loading page 4...
Loading page 5...
Loading page 6...
Loading page 7...
Loading page 8...
Loading page 9...
Loading page 10...
Loading page 11...
Loading page 12...
Loading page 13...
Loading page 14...
Loading page 15...
Loading page 16...
Loading page 17...
Loading page 18...
Loading page 19...
Loading page 20...
Loading page 21...
Loading page 22...
Loading page 23...
Loading page 24...
Loading page 25...
Loading page 26...
Loading page 27...
Loading page 28...
Loading page 29...
Loading page 30...
Loading page 31...
Loading page 32...
Loading page 33...
Loading page 34...
Loading page 35...
Loading page 36...
Loading page 37...
Loading page 38...
Loading page 39...
Loading page 40...
Loading page 41...
Loading page 42...
Loading page 43...
Loading page 44...
Loading page 45...
Loading page 46...
Loading page 47...
Loading page 48...
Loading page 49...
Loading page 50...
Loading page 51...
Loading page 52...
Loading page 53...
Loading page 54...
Loading page 55...
Loading page 56...
Loading page 57...
Loading page 58...
Loading page 59...
Loading page 60...
Loading page 61...
Loading page 62...
Loading page 63...
Loading page 64...
Loading page 65...
Loading page 66...
Loading page 67...
Loading page 68...
Loading page 69...
Loading page 70...
Loading page 71...
Loading page 72...
Loading page 73...
Loading page 74...
Loading page 75...
Loading page 76...
Loading page 77...
Loading page 78...
Loading page 79...
Loading page 80...
Loading page 81...
Loading page 82...
Loading page 83...
Loading page 84...
Loading page 85...
Loading page 86...
Loading page 87...
Loading page 88...
Loading page 89...
Loading page 90...
Loading page 91...
Loading page 92...
Loading page 93...
Loading page 94...
Loading page 95...
Loading page 96...
Loading page 97...
Loading page 98...
Loading page 99...
Loading page 100...
Loading page 101...
Loading page 102...
Loading page 103...
Loading page 104...
Loading page 105...
Loading page 106...
Loading page 107...
Loading page 108...
Loading page 109...
Loading page 110...
Loading page 111...
Loading page 112...
Loading page 113...
Loading page 114...
Loading page 115...
Loading page 116...
Loading page 117...
Loading page 118...

Other documents for Pioneer MVH-S322BT

The following documents are available:
User Manual Specification Photos

Specifications

Pioneer MVH-S322BT Questions and Answers


#1 How many rca outs are on this? i have two external amplifiers.

2 sets

#2 What is the actual size of the radio itself? I see where it says package dimensions but don’t think that’s the actual radio size

It's 4 inches deep 2 inches tall 7 inches wide

User Manual - Transcript

  • Page 2 - English - : 2 English Getting Started 3 Radio 7 USBiPhoneAUX 8 Bluetooth 10 Pandora 14 Spotify 15 Using Pioneer Smart SyncAPP 17 Audio Adjustments 20 Settings 21 FUNCTION settings 21 AUDIO settings 22 SYSTEM settings 25 ILLUMINATION settings 27 MIXTRAX settings 27 Additional Information 29 About this manual In the following instructions a USB memory or USB audio player are referred to as USB device Table of Contents CAN ICES3 BNMB3 B
  • Page 3 - English - : 3 3 English MVHS322BTS320BT Optional remote control The remote control CDR510 is sold separately Frequently used operations Getting Started Basic operation Purpose Operation Turn on the power Press SRCOFF to turn on the power Press and hold SRCOFF to turn off the power Adjust the volume Turn the MC dial Select a source Press SRCOFF repeatedly Change the display information Press DISP repeatedly Return to the previous displaylist Press BAND Return to the normal display from the menu Press and hold BAND Change the display brightness Press and hold BAND Answering a call Press any button Detach button Display window BAND DISP display navigationLIST USB port AUX input jack 35 mm stereo jack MC multicontrol dial SRC sourceOFF BASS
  • Page 4 - English - : 4 English When this units bluewhite lead is connected to the vehicles autoantenna relay control terminal the vehicles antenna extends when this units source is turned on To retract the antenna turn the source off Display indication Detach the front panel to prevent theft Remove any cables and devices attached to the front panel and turn off the unit before detaching it Important Avoid subjecting the front panel to excessive shock Keep the front panel out of direct sunlight and high temperatures Always store the detached front panel in a protective case or bag Ending a call Press Boost the bass level Press BASS You can select the bass level HI or LOW in DBASS page 24 Indication Description Appears when a lower tier of the menu or folder exists BASS Appears when the BASS function is activated Appears when randomshuffle play is set except when BT AUDIO is selected as the source Appears when repeat play is set except when BT AUDIO is selected as the source Appears when a Bluetooth connection is made page 10 APP Appears when a Pioneer Smart Sync connection is made page 17 Detaching the front panel Purpose Operation Detach Attach
  • Page 5 - English - : 5 5 English The microprocessor must be reset in the following situations Before using this unit for the first time after installation If the unit fails to operate properly When strange or incorrect messages appear on the display 1 Remove the front panel page 4 2 Press the RESET button with a pointed instrument longer than 8 mm When you turn the ignition switch to ON after installation the setup menu appears in the display 1 Turn the MC dial to select the options then press to confirm To proceed to the next menu option you need to confirm your selection 2 QUIT YES appears To return to the first item of the setup menu turn the MC dial to select QUIT NO then press to confirm Resetting the microprocessor Setup menu Menu Item Description LANGUAGE Select the language to display the text information from a compressed audio file ENGEnglish ESPSpanish FRA Canadian French CLOCK SET Set the clock 1 Turn the MC dial to adjust the hour then press to confirm The indicator moves to the minute setting automatically 2 Turn the MC dial to adjust the minute then press to confirm RESET button
  • Page 6 - English - : 6 English 3 Press the MC dial to confirm the settings NOTE These settings can be made at any time from the SYSTEM settings page 25 1 Press the MC dial to display the main menu 2 Turn the MC dial to select SYSTEM then press to confirm 3 Turn the MC dial to select DEMO OFF then press to confirm 4 Turn the MC dial to select YES then press to confirm 1 Press and hold SRCOFF until the unit turns off 2 Press the MC dial to display the main menu 3 Turn the MC dial to select INITIAL then press to confirm 4 Turn the MC dial to select an option then press to confirm Canceling the demonstration display DEMO OFF INITIAL settings Menu Item Description SPPO MODE Select when there is a fullrange speaker connected to the rear speaker output leads and there is a subwoofer connected to the RCA output REARSUBW SUBWSUBW Select when there is a passive subwoofer connected directly to the rear speaker output leads and there is a subwoofer connected to the RCA output REARREAR Select when there are fullrange speakers connected to the rear speaker output leads and RCA output If there is a fullrange speaker connected to the rear speaker output leads and the RCA output is not used you may select either REARSUBW or REARREAR SYSTEM UPDATE Select SYSTEM INFO to confirm the latest system information on the unit Select SW UPDATE to update the unit to the latest software and initialize the unit settings For details on the latest software and updating visit our website SYSTEM INFO S W UPDATE SYSTEM RESET Select YES to initialize the unit settings The unit will be restarted automatically YES NO
  • Page 7 - English - : 7 7 English The tuner frequencies on this unit are allocated for use in North America Use in other areas may result in poor reception 1 Press SRCOFF to select RADIO 2 Press BAND to select the band from FM1 FM2 FM3 or AM 3 Press a number button 1 to 6 TIP The buttons can be also used to select a preset station when SEEK is set to PCH in the FUNCTION settings page 22 The six strongest stations are stored on the number buttons 1 to 6 1 After selecting the band press the MC dial to display the main menu 2 Turn the MC dial to select FUNCTION then press to confirm 3 Turn the MC dial to select BSM then press to confirm To seek a station manually After selecting the band press to select a station Press and hold then release to seek an available station Scanning stops when the unit receives a station To cancel seek tuning press NOTE SEEK needs to be set to MAN in the FUNCTION settings page 22 To store stations manually While receiving the station you want to store press and hold one of the number buttons 1 to 6 until it stops flashing Radio Receiving preset stations Best stations memory BSM
  • Page 8 - English - : 8 English iPhone source is not available when USB MTP is set to ON in the SYSTEM settings page 26 Disconnect headphones from the device before connecting it to the unit USB devices including AndroidiPhone Open the USB port cover 2 Plug in the USB deviceiPhone using an appropriate cable NOTE To automatically switch to USB source when a USB deviceiPhone is connected to the unit set USB AUTO to ON in the SYSTEM settings page 26 CAUTION Use a USB cable sold separately to connect the USB device as any device connected directly to the unit will protrude out from the unit which could be dangerous Before removing the device stop playback AOA connections A device running Android OS 41 or later installed and also supports AOA Android Open Accessory 20 can be connected to the unit via AOA using the cable supplied with the device NOTE If you use an AOA connection APP CONTROL needs to be set to WIRED page 26 and USB MTP needs to be set to OFF page 26 in the SYSTEM settings MTP connection A device installed with Android OS 40 or most of later versions can be connected to the unit via MTP using the cable supplied with the device However depending on the connected device OS version or the numbers of the files in the device audio filessongs may not be able to be played back via MTP Note that MTP connection is not compatible with WAV file formats and FLAC file formats and cannot be used with the MIXTRAX function NOTE If you use an MTP connection USB MTP needs to be set to ON in the SYSTEM settings page 26 AUX Insert the stereo mini plug into the AUX input jack USBiPhoneAUX Playing back
  • Page 9 - English - : 9 9 English 2 Press SRCOFF to select AUX IN as the source NOTE If AUX is set to OFF in the SYSTEM settings AUX IN cannot be selected as a source page 25 You can make various adjustments in the FUNCTION settings page 21 except for AUX INUSB source Note that the following operations do not work for an AUX device To operate an AUX device use the device itself 1 Compressed audio files only 2 When you use the fast forward or reverse function while playing a VBR file the playback time may be not correct The MIXTRAX function creates a nonstop mix of your music library For details on MIXTRAX settings see page 27 NOTES iPhone needs to be connected with Pioneer Smart Sync via USB for using this function page 17 Operations Purpose Operation Select a folder1 Press 1 or 2 Select a tracksong chapter Press or Fast forward or reverse2 Press and hold or Search for a file from a list USB only 1 Press and hold to display the list 2 Turn the MC dial to select the desired file folder name or category then press to confirm 3 Turn the MC dial to select the desired file then press to confirm Playback starts View a list of the files in the selected folder category1 Press the MC dial when a foldercategory is selected Play a song in the selected folder category1 Press and hold the MC dial when a folder category is selected Repeat play Press 6 Randomshuffle play Press 5 Pauseresume playback Press 4PAUSE Return to root folder USB only1 Press and hold 1 About MIXTRAX USBiPhone only
  • Page 10 - English - : 10 English Depending on the filesong sound effects may not be available 1 Press 3MIX to turn MIXTRAX onoff Important If ten or more Bluetooth devices eg a phone and separate audio player are connected they may not work properly TIP The next connection to the unit is performed automatically if the Bluetooth device has been connected previously in the following steps 1 Turn on the Bluetooth function of the device If you make a Bluetooth connection from the device proceed to step 4 2 Press to display the ADD DEVICE setting The unit starts to search for available devices then displays them in the device list To cancel searching press the MC dial If the desired device is not in the list select RESEARCH If there is no device available NOT FOUND appears in the display If there is already a connected device the phone menu appears by pressing 3 Turn the MC dial to select a device from the device list then press to confirm Press and hold the MC dial to switch the displayed device information between the Bluetooth device address and device name If you make a Bluetooth connection from the unit proceed to step 5 4 Select the unit name shown in the device display 5 Make sure the same 6digit number appears on this unit and the device then select YES if the 6digit numbers displayed on this unit and the device are the same First make a Bluetooth connection with the Bluetooth telephone page 10 Up to two Bluetooth telephones can be connected simultaneously Bluetooth Bluetooth connection Bluetooth telephone
  • Page 11 - English - : 11 11 English Important Leaving the unit on standby to connect to your phone via Bluetooth while the engine is not running can drain the vehicles battery Be sure to park your vehicle in a safe place and apply the parking brake before operation To make a phone call Press to display the phone menu When two phones are connected a phone name appears first then a phone menu will display To switch to another phone press again 2 Turn the MC dial to select RECENTS or PHONE BOOK then press to confirm If you select PHONE BOOK proceed to step 4 3 Turn the MC dial to select MISSED DIALED or RECEIVED then press to confirm 4 Turn the MC dial to select a name or phone number then press to confirm The phone call starts To answer an incoming call Press any button when a call is received TIP When two phones are connected to the unit via Bluetooth and there is an incoming call while one phone is being used for a call a message will appear in the display To answer that incoming call you need to end the existing call Basic operations To preset phone numbers Select a phone number from a phone book or call history Purpose Operation End a call Press Reject an incoming call Press and hold when a call is received Switch between the current caller and a caller on hold Press the MC dial Cancel a caller on hold Press and hold Adjust the volume of the callers voice When private mode is on this function is not available Turn the MC dial during the call Turn the private mode on or off Press BAND during the call
  • Page 12 - English - : 12 English 2 Press and hold one of the number buttons 1 to 6 The contact is stored in the selected preset number To make a call using a preset number press one of the number buttons 1 to 6 then press the MC dial while the phone menu is displayed Voice recognition This function is only available when an iPhoneAndroid device equipped with voice recognition is connected to the unit via Bluetooth 1 Press and hold and then talk into the microphone to input voice commands To exit the voice recognition mode press BAND NOTE For details on the voice recognition features refer to the manual supplied with your device TIP When a Pioneer Smart Sync connection is made page 17 you can also use the voice recognition function from Pioneer Smart Sync installed on your iPhoneAndroid device by pressing and holding For details on the voice recognition features see the applications help section Phone menu Press to display the phone menu Menu Item Description RECENTS Display the missed call history MISSED DIALED Display the dialed call history RECEIVED Display the received call history PHONE BOOK Display the contacts in your phone PRESET 16 Recall the preset phone numbers You can also recall the preset phone numbers by pressing one of the number buttons 1 to 6 AANSR Select ON to answer an incoming call automatically ON OFF PB INVT Invert the order of names in the phone book name view DEVICELIST Display the list of paired Bluetooth devices appears on the device name when the Bluetooth connection is established When no device is selected in the device list this function is not available
  • Page 13 - English - : 13 13 English If two phones are connected this function does not work on incoming calls that are received while one of the phones is being used for a call Important Depending on the Bluetooth audio player connected to this unit the available operations will be limited to the following two levels A2DP Advanced Audio Distribution Profile can only play back songs on your audio player AVRCP AudioVideo Remote Control Profile can perform functions such as playback pause select song etc The sound of the Bluetooth audio player will be muted when the phone is in use When the Bluetooth audio player is in use you cannot connect to a Bluetooth telephone automatically Depending on the type of Bluetooth audio player you have connected to this unit operation and information displayed may vary based on availability and functionality 1 Make a Bluetooth connection with the Bluetooth audio player 2 Press SRCOFF to select BT AUDIO as the source 3 Press BAND to start playback NOTE You must reconnect the Bluetooth connection when the source is switched or the unit is turned off TIP When more than two and up to five devices are registered to the unit via Bluetooth you can switch the Bluetooth device by playing back songs on the device By doing so playing back a song from the Bluetooth device of each passenger is easily available However depending on the usage conditions multiple connections may not be available and the audio filessongs may not be able to be played back properly Basic operations You can make various adjustments in the FUNCTION settings page 21 DEL DEVICE Delete the device information DELETE YES DELETE NO ADD DEVICE Register a new device DEV INFO Switch the device information on the display between the device name and Bluetooth device address Bluetooth audio Purpose Operation Fast forward or reverse Press and hold or Menu Item Description
  • Page 14 - English - : 14 English Depending on the connected device these operations may not be available Not available when USB MTP is set to ON in the SYSTEM settings page 26 Pandora music is a music service not affiliated with Pioneer More information is available at httpwwwpandoracom The Pandora mobile application is available for iPhone and Android phones Please visit wwwpandoracomeverywheremobile for the latest compatibility information Update the firmware of the Pandora application to the latest version before use 1 Connect this unit with the mobile device iPhone via USB page 8 iPhoneAndroid device via Bluetooth page 10 2 Press SRCOFF to select PANDORA 3 Press and hold 1 to display APP CONTROL 4 Turn the MC dial to select one of the below Select WIRED for the USB connection Select BLUETOOTH for the Bluetooth connection 5 Press SRCOFF to select PANDORA 6 Launch the Pandora application on the mobile device and start playback Select a track Press or Repeat play Press 6 Random play Press 5 Pauseresume playback Press 4PAUSE Search for a file from a list 1 Press and hold to display a list 2 Turn the MC dial to select the desired folder name then press to confirm 3 Turn the MC dial to select the desired file then press to confirm Playback starts Pandora Listening to Pandora Purpose Operation
  • Page 15 - English - : 15 15 English NOTE When you connect a mobile device other than an iPhoneAndroid device it may not operate correctly depending on your mobile device Basic operations You can make various adjustments in the FUNCTION settings page 21 NOTE Some functions of Pandora may not be operated from the unit Not available when USB MTP is set to ON in the SYSTEM settings page 26 Purpose Operation Skip a track Press Switch between Shuffle and the station Press and hold then turn the MC dial to select the Shuffle or the desired station Change the sort order Press and hold then select one of the following ABC Sort the items in the list alphabetically DATE Sort the items in the list in order of the dates on which the items were created Play When Shuffle or the station is selected press the MC dial Delete a station 1 When the station is selected press and hold the MC dial DELETE YES appears 2 Press the MC dial To cancel press BAND in step 1 Pauseresume playback Press 4PAUSE Thumbs Up Press 1 Thumbs Down Press 2 Create a new station based on the track currently being played Press and hold 5 Create a new station based on the artist currently being played Press and hold 6 Store the track information currently being played in your Pandora account 1 Press and hold 3MIX BOOKMARK appears 2 Press the MC dial Spotify
  • Page 16 - English - : 16 English Spotify is a music streaming distribution service not affiliated with Pioneer More information is available at httpwwwspotifycom The Spotify application is available for compatible smartphones please visit https supportspotifycom for the latest compatibility information To enjoy Spotify as you drive first download the Spotify app to your iPhone or Android device You can download it on the iTunes App Store or Google Play Choose a free account or a paid Premium account either in the app or at spotifycom A Premium account gives you more features like offline listening Important This product incorporates Spotify software which is subject to 3rd party licenses found here wwwspotifycomconnectthirdpartylicenses For information on the countries and regions where Spotify can be used take a look at https spotifycomusselectyourcountry Update the firmware of the Spotify application to the latest version before use 1 Connect this unit with the mobile device iPhone via USB page 8 iPhoneAndroid device via Bluetooth page 10 2 Press SRCOFF to select SPOTIFY 3 Press and hold 1 to display APP CONTROL 4 Turn the MC dial to select one of the below Select WIRED for the USB connection Select BLUETOOTH for the Bluetooth connection 5 Press SRCOFF to select SPOTIFY 6 Launch the Spotify application on the mobile device and start playback NOTE When you connect a mobile device other than an iPhoneAndroid device it may not operate correctly depending on your mobile device Basic operations You can make various adjustments in the FUNCTION settings page 21 NOTE The available operations may vary according to the type of contents trackalbumartistplaylistradio you want to play Listening to Spotify Purpose Operation Skip a track Press or
  • Page 17 - English - : 17 17 English NOTE Some functions of Spotify may not be operated from the unit Pioneer Smart Sync is the application that intelligently brings your maps messages and music together in the vehicle You can operate the unit from Pioneer Smart Sync installed on an iPhoneAndroid device In some cases you can control aspects of the application such as source selection pause etc by using the unit For details on what operations are available on the application see the applications help section NOTE The APP source is not available when a Pioneer Smart Sync connection is not made or USB MTP is set to ON in the SYSTEM settings page 26 WARNING Do not attempt to operate the application while driving Make sure to pull off the road and park your vehicle in a safe location before attempting to use the controls on the application For iPhone users This function is compatible with iOS 103 or later Search for a track from a list 1 Press and hold to display the list 2 Turn the MC dial to select the desired category then press to confirm 3 Turn the MC dial to select the desired file then press to confirm Playback starts Pauseresume playback Press 4PAUSE Thumbs Up Only for radio Press 1 Thumbs Down Only for radio Press 2 Random play Only for trackalbumartist playlist Press 5 Repeat play Only for trackalbumartist playlist Press 6 Start a radio channel based on the song currently being played 1 Press and hold 5 to start a radio 2 Press the MC dial This function may not be available depending on the selected song Using Pioneer Smart SyncAPP Purpose Operation
  • Page 18 - English - : 18 English You can download Pioneer Smart Sync on iTunes App Store For Android device users For Bluetooth connections this function is compatible with devices that have Android OS 50 or later installed For USB connections this function is compatible with a phone that runs Android 50 or later up to 712 and also supports AOA Android Open Accessory 20 However the compatibility depends on the smartphone You can download Pioneer Smart Sync on Google Play NOTE Some Android devices connected via AOA 20 may not work properly or emit sounds due to their own software design regardless of the OS version What kind of function does the application have Promoting the use of the unit The interface of the unit can be evolved by using your iPhoneAndroid device Image example Examples Selecting a source of the unit
  • Page 19 - English - : 19 19 English Listening to the music on your iPhoneAndroid device Controlling the sound field intuitively Controlling your connected Bluetooth device Extending the functions of the unit by using the application The following functions which are unavailable on the unit alone are available by making a Pioneer Smart Sync connection NOTES Some functions may be restricted depending on the connection conditions with the application The 31 Band EQ setting is converted into 13 bands when a music source from this product is engaged TIP It is recommended to enter the search term quotPioneer Smart Syncquot in the search field to search for the application 1 Press the MC dial to display the main menu 2 Turn the MC dial to select SYSTEM then press to confirm 3 Turn the MC dial to select APP CONTROL then press to confirm 4 Turn the MC dial to select one of the below Select WIRED for the USB connection Select BLUETOOTH for the Bluetooth connection Menu Item example Description Using a navigation application You can specify and start the navigation application installed on your device Message reading You can read messages received from the apps installed on your device 31 Band EQ setting You can select an equalizer band from the 31band graphic equalizer 13band for not using the Pioneer Smart Sync connection Super quotTodorokiquot Sound You can boost the bass level more dynamically than when not using the Pioneer Smart Sync connection Easy Sound Fit You can perform the time alignment setting easily by selecting your vehicle type Making a connection with Pioneer Smart Sync
  • Page 20 - English - : 20 English 5 Turn the MC dial to select AUTO APP CONN then press to confirm 6 Turn the MC dial to select ON then press to confirm 7 Connect this unit with the mobile device iPhoneAndroid device via USB page 8 iPhoneAndroid device via Bluetooth page 10 Pioneer Smart Sync on the device starts automatically NOTE Regardless of whether the AUTO APP CONN setting is set to ON or OFF you can also perform the following to start Pioneer Smart Sync For devices other than the USBconnected Android device press SRCOFF to select any source and press and hold the MC dial For iPhone launch Pioneer Smart Sync on the mobile device NOTES When you connect a mobile device other than an iPhoneAndroid device it may not operate correctly depending on your mobile device If Pioneer Smart Sync has not been installed on your iPhoneAndroid device yet a message that prompts you to install the application will appear on your iPhoneAndroid device except for the Android device connected via Bluetooth Select OFF in AUTO APP CONN to clear the message page 26 1 Press SRCOFF to select APP You can also make various adjustments in the AUDIO settings page 22 You can adjust the cutoff frequency value and the slope value of each speaker The following speakers can be adjusted FRONT REAR SUBWOOFER NOTE SUBWOOFER can only be selected when ON is selected in SUBWOOFER page 23 1 Press the MC dial to display the main menu Listening to music on your device Audio Adjustments Adjusting the cutoff frequency value and the slope value
  • Page 21 - English - : 21 21 English 2 Turn the MC dial to select AUDIO then press to confirm 3 Turn the MC dial to select CROSSOVER then press to confirm 4 Turn the MC dial to select the speaker unit filter to be adjusted then press to confirm 5 Turn the MC dial to select HPF or LPF according to the speaker unit filter then press to confirm 6 Turn the MC dial to select an appropriate cutoff frequency for the speaker unit filter selected in step 4 then press to confirm 25HZ to 250HZ 7 Turn the MC dial to select an appropriate slope for the speaker unit filter selected in step 4 6 to 24 if you choose FRONT or REAR 6 to 36 if you choose SUBWOOFER You can adjust various settings in the main menu 1 Press the MC dial to display the main menu 2 Turn the MC dial to select one of the categories below then press to confirm FUNCTION settings page 21 AUDIO settings page 22 SYSTEM settings page 25 ILLUMINATION settings page 27 MIXTRAX settings page 27 3 Turn the MC dial to select the options then press to confirm The menu items vary according to the source Settings FUNCTION settings Menu Item Description BSM Store the six strongest stations on the number buttons 1 to 6 automatically
  • Page 22 - English - : 22 English NOTE CHK APP SETTG may be displayed when the setting is performed from Pioneer Smart Sync LOCAL FM OFF LV1 LV2 LV3 LV4 AM OFF LV1 LV2 Restrict the tuning station according to the signal strength SEEK MAN PCH Assign or buttons to seek the stations one by one manual tuning or select a station from the preset channels SAVE Store the information about the song currently being played to your music list on Spotify UNSAVE Remove the song information stored in SAVE SEL DEVICE Connect a Bluetooth device in the list BOOKMARK Store the track information currently being played in your Pandora account NEW STATION FROM TRACK FROM ARTIST Create a new station based on the track or artist currently being played PLAY Start playback STOP Stop playback AUDIO settings Menu Item Description iPhone
  • Page 23 - English - : 23 23 English Menu Item Description EQ SETTING SUPER BASS POWERFUL DYNAMIC NATURAL VOCAL VIVID SET BY APP CUSTOM1 CUSTOM2 FLAT SET BY APP is displayed when the preset equalizer curve that is not available in the unit has been set from Pioneer Smart Sync Select an equalizer band and level for further customizing Equalizer band 50HZ to 125kHZ Equalizer level 6 to 6 Select or customize the equalizer curve When you select a setting other than CUSTOM1 CUSTOM2 and SET BY APP you can also customize the equalizer curve by pressing and holding the MC dial then store the customized equalizer curve in CUSTOM1 FADER1 Adjust the front and rear speaker balance BALANCE Adjust the left and right speaker balance SUBWOOFER2 ON OFF Set to ON when using a subwoofer speaker SUBWOOFER NOR REV Select the subwoofer phase SPEAKER LEVEL Types of speaker FRONT L FRONT R REAR L REAR R SUBWOOFER Output level 24 to 10 Select a speaker unit filter and adjust the output level Each value you have adjusted changes when you change the POSITION setting page 23 CROSSOVER Select a speaker unit filter to adjust the HPF or LPF cutoff frequency and the slope for each speaker unit For details on the CROSSOVER setting see page 20 POSITION OFF FRONT LEFT front seat left FRONT RIGHT front seat right FRONT front seats ALL Select a listening position to adjust the speakers output levels automatically and add a delay time that corresponds to the number and locations of occupied seats
  • Page 24 - English - : 24 English TIME ALGNMNT INITIAL OFF CUSTOM Select a type of speaker and adjust the speaker distance for further customizing in CUSTOM Types of speaker FRONT L FRONT R REAR L REAR R SUBWOOFER Speaker distance inch 140 to 0 Select or customize the time alignment settings to reflect the distance between the listeners position and each speaker Select INITIAL to initialize the setting value Select OFF to reset all setting values to 0 The CUSTOM setting is available when FRONT LEFT or FRONT RIGHT is selected in POSITION page 23 The CUSTOM setting is not available when OFF is selected in SUBWOOFER page 23 SAVE SETTINGS YES NO Save to later recall the following sound settings at their current values CROSSOVER SPEAKER LEVEL EQ SETTING POSITION TIME ALGNMNT DBASS SUBWOOFER The settings that can be saved differ when a Pioneer Smart Sync connection is made LOAD SETTINGS Load the sound settings when you have already performed SAVE SETTINGS DBASS OFF LOW HI Boost the bass level dynamically to offer an effect as if a subwoofer was added to the system LOUDNESS OFF LOW MID HI Compensate for clear sound at low volume SLA 4 to 4 Adjust the volume level for each source except FM Each of the below combinations are set to the same setting automatically When making a USB connection set USB iPhone PANDORA APP and SPOTIFY When making a Bluetooth connection set BT AUDIO iPhone PANDORA APP and SPOTIFY Menu Item Description
  • Page 25 - English - : 25 25 English 1 Not available when SUBWSUBW is selected in SPPO MODE in the INITIAL settings page 6 2 Not available when REARREAR is selected in SPPO MODE in the INITIAL settings page 6 You can also access to these menus when the unit is turned off SRTRV 1 effective for low compression rates 2 effective for high compression rates OFF Enhance compressed audio and restore rich sound SYSTEM settings Menu Item Description LANGUAGE ENGEnglish ESPSpanish FRA Canadian French Select the language to display the text information from a compressed audio file CLOCK SET 12H 24H Set the clock page 5 This setting is not available when a Pioneer Smart Sync connection is made SCROLL SET ONCE LOOP OFF Select the way to scroll the text in the display window BEEP TONE ON OFF A beep can be heard when any button is pushed Select OFF to disable this function INFO DISPLAY SOURCESPEANA CLOCK SPEANA SRCLIVE FX CLOCK LIVE FX SOURCE SPEANA OFF Display the item on the sub information display When SOURCESPEANA or CLOCKSPEANA is selected display the antenna instead of the speana on the radio source AUX ON OFF Set to ON when using an auxiliary device connected to the unit BT AUDIO ON OFF Set the Bluetooth signal onoff Menu Item Description
  • Page 26 - English - : 26 English Information on the connections for each device The available sources differ depending on the setting value Please set APP CONTROL according to the table for the source you want to use For details on Pioneer Smart Sync connection see page 17 PANDORA ON OFF Set to ON when using the Pandora function SPOTIFY ON OFF Set to ON when using the Spotify function BT MEM CLEAR YES NO Clear the Bluetooth device data device list PIN code call history phone book preset phone numbers stored in the unit CLEARED appears when data is successfully deleted APP CONTROL WIRED BLUETOOTH Select the appropriate connection method according to your device See page 26 for details on the connections for each device USB MTP ON OFF Set to ON when using the MTP connection The following sources are not available when the setting is set to ON APP PANDORA SPOTIFY iPhone and USB AOA AUTO APP CONN ON OFF Select ON to automatically launch Pioneer Smart Sync when the iPhoneAndroid device is connected to the unit USB AUTO ON OFF Select ON to automatically switch to USB source when a USB deviceiPhone is connected to the unit Select OFF when a USB deviceiPhone is being connected to the unit just for charging Menu Item Description
  • Page 27 - English - : 27 27 English When Pioneer Smart Sync connection is NOT performed When Pioneer Smart Sync connection is performed Setting Value Device Available sources WIRED iPhone iPhone PANDORA SPOTIFY Android USB AOA BLUETOOTH iPhone iPhone PANDORA SPOTIFY Android PANDORA SPOTIFY Setting Value Device Available sources WIRED iPhone APP PANDORA SPOTIFY Android APP BLUETOOTH iPhone APP PANDORA SPOTIFY Android APP PANDORA SPOTIFY ILLUMINATION settings Menu Item Description DIM SETTING SYNC CLOCK MANUAL Select the way to change the display brightness BRIGHTNESS 1 to 10 Change the display brightness The available setting ranges differ depending on DIM SETTING MIXTRAX settings Menu Item Description SHORT PLAYBCK 10 MIN 15 MIN 20 MIN 25 MIN 30 MIN OFF Select the length of the playback time
  • Page 28 - English - : 28 English MIX PATTERN SOUND LEVEL Change the MIXTRAX special effects according to the audio level The mix pattern changes according to the sound level LOW PASS The mix pattern changes according to the bass level RANDOM The mix pattern changes randomly according to the sound level mode and low pass mode DISPLAY FX ON OFF Set the MIXTRAX special effects onoff CUT IN FX ON OFF Turn the MIXTRAX sound effects onoff while manually changing the tracks Menu Item Description
  • Page 29 - English - : 29 English The display automatically returns to the normal display No operations have been made for about 30 seconds Perform an operation The repeat play range changes unexpectedly Depending on the repeat play range the selected range may change when another folder or track is being selected or during fast forwardingreversing Select the repeat play range again A subfolder is not played back Subfolders cannot be played when FLD folder repeat is selected Select another repeat play range The sound is intermittent You are using a device such as a cellular phone that may cause audible interference Move electrical devices that may be causing the interference away from the unit The sound from the Bluetooth audio source is not played back There is a call in progress on a Bluetoothconnected cellular phone The sound will be played back when the call is terminated A Bluetoothconnected cellular phone is currently being operated Stop using the cellular phone The connection between the unit and the cellular phone is not established correctly after a call made by a Bluetoothconnected cellular phone Make a Bluetooth connection between the unit and the cellular phone again Common AMP ERROR This unit fails to operate or the speaker connection is incorrect The protective circuit is activated Check the speaker connection Turn the ignition switch OFF and back to ON again If the message remains contact your dealer or an authorized Pioneer Service Station for assistance NO XXXX NO TITLE for example There is no embedded text information Switch the display or play another trackfile USB deviceiPhone FORMAT READ Sometimes there is a delay between the start of playback and when you start to hear any sound Wait until the message disappears and you hear sound NO AUDIO There are no songs Transfer the audio files to the USB device and connect The connected USB device has security enabled Follow the USB device instructions to disable the security Additional Information Troubleshooting Error messages
  • Page 30 - English - : 30 English SKIPPED The connected USB device contains DRM protected files The protected files are skipped PROTECT All the files on the connected USB device are embedded with DRM Replace the USB device NA USB The connected USB device is not supported by this unit Disconnect your device and replace it with a compatible USB device HUB ERROR The USB device connected via a USB hub is not supported by this unit Connect the USB device directly to this unit using a USB cable CHECK USB The USB connector or USB cable has shortcircuited Check that the USB connector or USB cable is not caught in something or damaged The connected USB device consumes more than maximum allowable current Disconnect the USB device and do not use it Turn the ignition switch OFF and back to ACC or ON Connect only compliant USB devices ERROR19 Communication failed Perform one of the following operations then return to the USB source Disconnect the USB device Change to a different source iPhone failure Disconnect the cable from the iPhone Once the iPhones main menu is displayed reconnect the iPhone and reset it ERROR23 USB device was not formatted properly Format the USB device with FAT12 FAT16 or FAT32 ERROR16 The iPhone firmware version is old Update the iPhone version iPhone failure Disconnect the cable from the iPhone Once the iPhones main menu is displayed reconnect the iPhone and reset it STOP There are no songs in the current list Select a list that contains songs NO BT DEVICE GO TO BT MENU TO REGISTER No Bluetooth device found Connect the unit and iPhone via Bluetooth page 10 CONN FAILED PRESS BAND KEY TO RETRY Bluetooth connection with iPhone failed Press BAND to make a connection again DISCONNECTED PRESS BAND KEY TO RETRY Bluetooth connection lost Press BAND to make a connection again Bluetooth device ERROR10 The power failed for the Bluetooth module of the unit Turn the ignition switch OFF and back to ACC or ON
  • Page 31 - English - : 31 English Pandora ERROR19 Communication failed Disconnect the cable from the device Once the devices main menu is displayed reconnect the device and reset it NOT FOUND The Pandora application has not started running yet Start up the Pandora application RATING ERROR The thumb rating operation was disabled Run the same command for another track CANT SKIP The skip operation was disabled Run the same command for another track THUMB ERROR Unable to save thumb rating Try again later BOOKMARK ERR Unable to save BookMark Try again later INOPERABLE The operation to save BookMark or add station was disabled Run the same command for another track UNABLE TO ADD Unable to add station Try again later SKIP LIMIT Due to music licensing restrictions Pandora limits the total number of skips per hour Wait until Pandora allows you to skip again UPDATE APP This version of the Pandora application is not supported Connect a device that has a compatible version of the Pandora application installed LOG IN ERROR Your Pandora account is not logged in Disconnect the cable from the device and log in to your Pandora account Then reconnect the device ERROR Device error message displayed in the Pandora application Check the connected device Pandora system is undergoing maintenance Try again later NO STATIONS No station found Create a station in the Pandora application on your connected device NO BT DEVICE GO TO BT MENU TO REGISTER No Bluetooth device found Connect the unit and the device via Bluetooth page 10 CONN FAILED PRESS BAND KEY TO RETRY Bluetooth connection failed Press BAND to make a connection again CHECK APP PRESS BAND KEY TO RETRY Connection to the Pandora application failed Press BAND to make a connection again
  • Page 32 - English - : 32 English DISCONNECTED PRESS BAND KEY TO RETRY Bluetooth connection lost Press BAND to make a connection again STATION LIMIT A new station cannot be added Delete an old station to open a spot for a new one CANNOT DELETE The station could not be deleted Run the same command for another station BAD NETWORK The connected device is out of area Connect the device to a network UNAVAILAVLE The connected device is out of area Connect the device to a network The operation was disabled Run the same command for another station CHECK APP An unknown error including communication error has occurred Follow the instructions that appear on the screen APP CONNECT APP Pioneer Smart Sync connection is not made Make a connection with Pioneer Smart Sync page 17 Spotify NOT FOUND The Spotify application has not started running yet Start up the Spotify application NO BT DEVICE GO TO BT MENU TO REGISTER No Bluetooth device found Connect the unit and the device via Bluetooth page 10 CONN FAILED PRESS BAND KEY TO RETRY Bluetooth connection failed Press BAND to make a connection again CHECK APP PRESS BAND KEY TO RETRY Connection to the Spotify application failed Press BAND to make a connection again DISCONNECTED PRESS BAND KEY TO RETRY Bluetooth connection lost Press BAND to make a connection again CHECK APP An unknown error including communication error has occurred Follow the instructions that appear on the screen USB storage device Connections via USB hubs are not supported Firmly secure the USB storage device before driving Do not let the USB storage device fall onto the floor where it may become jammed under the brake or accelerator pedal Depending on the USB storage device the following problems may occur Operations may vary The storage device may not be recognized Handling guidelines
  • Page 33 - English - : 33 English Files may not be played back properly The device may cause audible interference when you are listening to the radio iPhone Do not leave the iPhone in places with high temperatures Firmly secure the iPhone when driving Do not let the iPhone fall onto the floor where it may become jammed under the brake or accelerator pedal Incompatible text saved on the iPhone will not be displayed by the unit Only the first 32 characters can be displayed as a file name including the file extension or a folder name The unit may not work properly depending on the application used to encode WMA files There may be a slight delay at the start of the playback of audio files embedded with image data or audio files stored on a USB device with numerous folder hierarchies CAUTION Pioneer cannot guarantee compatibility with all USB mass storage devices and assumes no responsibility for any loss of data on media players smartphones or other devices while using this product Do not leave a USB device in any place that is subject to high temperatures WMA files MP3 files WAV files WAV file formats cannot be connected via MTP AAC files Compressed audio compatibility File extension wma Bit rate 48 kbps to 320 kbps CBR 48 kbps to 384 kbps VBR Sampling frequency 32 kHz 441 kHz 48 kHz Windows Media Audio Professional Lossless VoiceDRM StreamStream with video Not compatible File extension mp3 Bit rate 8 kbps to 320 kbps CBR VBR Sampling frequency 8 kHz to 48 kHz 32 kHz 441 kHz 48 kHz for emphasis Compatible ID3 tag version 10 11 22 23 24 ID3 tag Version 2x is given priority over Version 1x M3u playlist Not compatible MP3i MP3 interactive mp3 PRO Not compatible File extension wav Quantization bits 8 and 16 LPCM Sampling frequency 16 kHz to 48 kHz LPCM Compatible format AAC encoded by iTunes File extension m4a Sampling frequency 11025 kHz to 48 kHz Stereo Bit Rate 16 kbps to 320 kbps VBR Apple Lossless Not compatible AAC file bought from the iTunes Store m4p file extension Not compatible
  • Page 34 - English - : 34 English FLAC files FLAC file formats cannot be connected via MTP FLAC files may not be playable depending on the encoder USB device There may be a slight delay when starting playback of audio files on a USB storage device with numerous folder hierarchies This unit supports only the following iPhone models Older versions may not be supported Made for iPhone XR iPhone XS Max iPhone XS iPhone X iPhone 8 iPhone 8 Plus iPhone 7 iPhone 7 Plus iPhone SE iPhone 6s iPhone 6s Plus iPhone 6 iPhone 6 Plus iPhone 5s Operations may vary depending on the generation andor software version of the iPhone Users of iPhone with the Lightning Connector should use the Lightning to USB Cable supplied with iPhone Refer to the iPhone manuals for information about the fileformat compatibility Audiobook Podcast Compatible CAUTION Pioneer accepts no responsibility for data lost on the iPhone even if that data is lost while this unit is used The user cannot assign folder numbers and specify playback sequences with this unit Sequence of audio file depends on the connected device Note that the hidden files in a USB device cannot be played back Example of a hierarchy File extension flac fla Sampling frequency 81102512162205 24324414896 kHz Quantization bit rate 81624 bit Channel mode 12 ch Playable folder hierarchy Up to eight tiers A practical hierarchy is less than two tiers Playable folders Up to 1 500 Playable files Up to 15 000 Playback of copyright protected files Not compatible Partitioned USB device Only the first partition can be played iPhone compatibility Sequence of audio files Folder Compressed audio file to Playback sequence 01 to 05 Folder number
  • Page 35 - English - : 35 English Bluetooth The Bluetooth word mark and logos are registered trademarks owned by Bluetooth SIG Inc and any use of such marks by PIONEER CORPORATION is under license Other trademarks and trade names are those of their respective owners iTunes Apple and iTunes are trademarks of Apple Inc registered in the US and other countries WMA Windows Media is either a registered trademark or trademark of Microsoft Corporation in the United States andor other countries This product includes technology owned by Microsoft Corporation and cannot be used or distributed without a license from Microsoft Licensing Inc FLAC Copyright 20002009 Josh Coalson Copyright 20112014 XiphOrg Foundation Redistribution and use in source and binary forms with or without modification are permitted provided that the following conditions are met Redistributions of source code must retain the above copyright notice this list of conditions and the following disclaimer Redistributions in binary form must reproduce the above copyright notice this list of conditions and the following disclaimer in the documentation andor other materials provided with the distribution Neither the name of the Xiphorg Foundation nor the names of its contributors may be used to endorse or promote products derived from this software without specific prior written permission THIS SOFTWARE IS PROVIDED BY THE COPYRIGHT HOLDERS AND CONTRIBUTORS AS IS AND ANY EXPRESS OR IMPLIED WARRANTIES INCLUDING BUT NOT LIMITED TO THE IMPLIED WARRANTIES OF MERCHANTABILITY AND FITNESS FOR A PARTICULAR PURPOSE ARE DISCLAIMED IN NO EVENT SHALL THE FOUNDATION OR CONTRIBUTORS BE LIABLE FOR ANY DIRECT INDIRECT INCIDENTAL SPECIAL EXEMPLARY OR CONSEQUENTIAL DAMAGES INCLUDING BUT NOT LIMITED TO PROCUREMENT OF SUBSTITUTE GOODS OR SERVICES LOSS OF USE DATA OR PROFITS OR BUSINESS INTERRUPTION HOWEVER CAUSED AND ON ANY THEORY OF LIABILITY WHETHER IN CONTRACT STRICT LIABILITY OR TORT INCLUDING NEGLIGENCE OR OTHERWISE ARISING IN ANY WAY OUT OF THE USE OF THIS SOFTWARE EVEN IF ADVISED OF THE POSSIBILITY OF SUCH DAMAGE Pandora Music PANDORA the PANDORA logo and the Pandora trade dress are trademarks or registered trademarks of Pandora Media LLC Used with permission Pandora is only available in certain countries Please visit httpwwwpandoracomlegal for more information iPhone and Lightning Use of the Made for Apple badge means that an accessory has been designed to connect specifically to the Apple products identified in the badge and has been certified by the developer to meet Apple performance standards Apple is not responsible for the operation of this device or its compliance with safety and regulatory standards Copyright and trademark
  • Page 36 - English - : 36 English Please note that the use of this accessory with an Apple product may affect wireless performance iPhone and Lightning are trademarks of Apple Inc registered in the US and other countries Siri Works with Siri through the microphone Google Google Play Android Google Google Play and Android are trademarks of Google LLC MIXTRAX MIXTRAX is a trademark of the PIONEER CORPORATION Spotify SPOTIFY and the Spotify logo are among the registered trademarks of Spotify AB Compatible mobile digital devices and premium subscription required where available see httpswwwspotifycom TKernel 20 This product uses the source code of T Kernel 20 under TLicense 20 granted by TEngine Forum wwwtronorg MP3 Copyright C 19982009 PacketVideo Licensed under the Apache License Version 20 the quotLicensequot you may not use this file except in compliance with the License You may obtain a copy of the License at httpwwwapacheorglicensesLICENSE Unless required by applicable law or agreed to in writing software distributed under the License is distributed on an quotAS ISquot BASIS WITHOUT WARRANTIES OR CONDITIONS OF ANY KIND either express or implied See the License for the specific language governing permissions and limitations under the License General Power source 144 V DC 108 V to 151 V allowable Grounding system Negative type Maximum current consumption 100 A Dimensions W H D DIN Chassis 178 mm 50 mm 97 mm 7 in 2 in 378 in Nose 188 mm 58 mm 17 mm 7 38 in 214 in 58 in D Chassis 178 mm 50 mm 97 mm 7 in 2 in 378 in Nose 170 mm 46 mm 17 mm 6 34 in 134 in 58 in Weight 05 kg 11 lbs Audio Maximum power output 50 W 4 ch4 Ω for no subwoofer 50 W 2 ch4 Ω 70 W 1 ch2 Ω for subwoofer Continuous power output 22 W 4 50 Hz to 15 000 Hz 5 THD 4 Ω load both channels driven Load impedance 4 Ω 4 Ω to 8 Ω 2 Ω for 1 ch allowable Preout maximum output level 20 V MVH S320BT 40 V MVHS322BT Equalizer 13Band Graphic Equalizer Frequency 50 Hz80 Hz125 Hz200 Hz315 Hz500 Hz800 Hz125 kHz2 kHz315 kHz5 kHz8 kHz125 kHz Gain 12 dB 2 dB step High pass filter Frequency 25 Hz315 Hz40 Hz50 Hz63 Hz80 Hz100 Hz125 Hz160 Hz200 Hz250 Hz Specifications
  • Page 37 - English - : 37 English Slope 6 dBoct 12 dBoct 18 dB oct 24 dBoct OFF SubwooferLow pass filter Frequency 25 Hz315 Hz40 Hz50 Hz63 Hz80 Hz100 Hz125 Hz160 Hz200 Hz250 Hz Slope 6 dBoct 12 dBoct 18 dB oct 24 dBoct 30 dBoct 36 dB oct OFF Phase NormalReverse Speaker level 10 dB to 24 dB 1 dB step Time alignment 0 Inch to 140 Inch 1 inchStep USB USB standard specification USB 20 full speed Maximum current supply 15 A USB Protocol MSC Mass Storage Class MTP Media Transfer Protocol AOA Android Open Accessory 20 File system FAT12 FAT16 FAT32 MP3 decoding format MPEG1 amp 2 Audio Layer 3 WMA decoding format Ver 7 8 9 91 92 2 ch audio AAC decoding format MPEG4 AAC iTunes encoded only Ver 106 and earlier FLAC decoding format v121 Free Lossless Audio Codec WAV signal format Linear PCM Non compressed FM tuner Frequency range 879 MHz to 1079 MHz Usable sensitivity 11 dBf 10 μV75 Ω mono SN 30 dB Signaltonoise ratio 65 dB analog broadcasting IHFA network AM tuner Frequency range 530 kHz to 1 710 kHz Usable sensitivity 25 μV SN 20 dB Signaltonoise ratio 60 dB analog broadcasting IHFA network Bluetooth Version Bluetooth 40 certified Output power 4 dBm Maximum Power class 2 BLE Bluetooth Low Energy Version 40 certified BLE Bluetooth Low Energy Output power 3 dBm Maximum Frequency bands 2 400 MHz to 2 4835 MHz Bluetooth profiles GAP Generic Access Profile SDAP Service Discovery Application Profile HFP Hands Free Profile 16 PBAP Phone Book Access Profile A2DP Advanced Audio Distribution Profile AVRCP AudioVideo Remote Control Profile 15 SPP Serial Port Profile 11 CTA2006 Specifications Power output 14 W RMS 4 Channels 4 Ω and 1 THDN SN ratio 91 dBA reference 1 W into 4 Ω NOTE Specifications and the design are subject to modifications without notice lt
  • Page 38 - French - : 2 Français Pour commencer 3 Radio 7 USBiPhoneAUX 8 Bluetooth 11 Pandora 16 Spotify 18 Utilisation de Pioneer Smart SyncAPP 20 Réglages audio 23 Réglages 24 Réglages FUNCTION 25 Réglages AUDIO 26 Réglages SYSTEM 29 Réglages ILLUMINATION 31 Réglages MIXTRAX 31 Informations complémentaires 33 À propos de ce manuel Dans les instructions suivantes une mémoire USB ou un lecteur audio USB est nommé périphérique USB Table des matières CAN ICES3 BNMB3 B
  • Page 39 - French - : 3 3 Français MVHS322BTS320BT Télécommande en option La télécommande CDR510 est vendue séparément Opérations fréquemment utilisées Pour commencer Fonctionnement de base Objectif Opération Mise en marche de lappareil Appuyez sur SRCOFF pour mettre lappareil en marche Appuyez de manière prolongée sur SRC OFF pour éteindre lappareil Réglage du volume Tournez la commande MC Sélection dune source Appuyez plusieurs fois sur SRCOFF Changement des informations de laffichage Appuyez plusieurs fois sur DISP Retour à la listelaffichage précédent Appuyez sur BAND Retour à laffichage normal à partir du menu Appuyez de manière prolongée sur BAND Touche de retrait Fenêtre daffichage BAND DISP affichage navigationLIST Port USB Prise dentrée AUX prise stéréo 35 mm Commande MC multicontrôle SRC sourceOFF BASS
  • Page 40 - French - : 4 Français Si le fil bleublanc de cet appareil est connecté à la borne de commande du relais dantenne automatique du véhicule celleci se déploie lorsque la source est activée Pour rétracter lantenne désactivez la source Indications affichées Retirez la face avant pour prévenir le vol Retirez tous les câbles et périphériques connectés à la face avant et éteignez lappareil avant de la retirer Modification de la luminosité de laffichage Appuyez de manière prolongée sur BAND Réponse à un appel Appuyez sur nimporte quel bouton Fin dun appel Appuyez sur Accentuation du niveau des graves Appuyez sur BASS Vous pouvez sélectionner le niveau des graves HI ou LOW dans DBASS page 28 Indication Description Apparaît lorsquun niveau inférieur de menu ou de dossier existe BASS Apparaît lorsque la fonction BASS est activée Apparaît lorsque la lecture aléatoire est réglée sauf lorsque vous sélectionnez BT AUDIO comme source Apparaît lorsque la lecture répétée est réglée sauf lorsque vous sélectionnez BT AUDIO comme source Apparaît lorsquune connexion Bluetooth est établie page 11 APP Apparaît lorsquune connexion Pioneer Smart Sync est établie page 20 Retrait de la face avant Objectif Opération Retirer Fixer
  • Page 41 - French - : 5 5 Français Important Évitez de soumettre la face avant à des chocs importants Nexposez pas la face avant à la lumière directe du soleil ou à des températures élevées Rangez toujours la face avant retirée dans un sac ou un boîtier protecteur Le microprocesseur doit être réinitialisé dans les situations suivantes Avant la première utilisation de cet appareil après linstallation Si lappareil ne fonctionne pas correctement Lorsque des messages étranges ou incorrects saffichent 1 Retirez la face avant page 4 2 Appuyez sur la touche RESET avec un instrument pointu de plus de 8 mm Lorsque vous tournez le commutateur dallumage à ON après linstallation le menu de configuration saffiche 1 Tournez la commande MC pour sélectionner les options puis appuyez pour confirmer Pour passer à la prochaine option de menu vous devez confirmer votre sélection Réinitialisation du microprocesseur Menu de configuration Option de menu Description LANGUAGE Sélection de la langue daffichage des informations textuelles dun fichier audio compressé ENG Anglais ESP Espagnol FRA Français canadien Touc he RESET
  • Page 42 - French - : 6 Français 2 QUIT YES saffiche Pour retourner à la première option du menu de configuration tournez la commande MC pour sélectionner QUIT NO puis appuyez pour confirmer 3 Appuyez sur la commande MC pour confirmer les réglages REMARQUE Ces réglages peuvent être effectués à tout moment à partir des réglages SYSTEM page 29 1 Appuyez sur la commande MC pour afficher le menu principal 2 Tournez la commande MC pour sélectionner SYSTEM puis appuyez pour confirmer 3 Tournez la commande MC pour sélectionner DEMO OFF puis appuyez pour confirmer 4 Tournez la commande MC pour sélectionner YES puis appuyez pour confirmer 1 Appuyez de manière prolongée sur SRCOFF jusquà ce que lappareil séteigne 2 Appuyez sur la commande MC pour afficher le menu principal 3 Tournez la commande MC pour sélectionner INITIAL puis appuyez pour confirmer 4 Tournez la commande MC pour sélectionner une option puis appuyez pour confirmer CLOCK SET Réglage de lhorloge 1 Tournez la commande MC pour régler lheure puis appuyez pour confirmer Lindicateur passe automatiquement au réglage des minutes 2 Tournez la commande MC pour régler les minutes puis appuyez pour confirmer Annulation de laffichage de démonstration DEMO OFF Réglages INITIAL Option de menu Description
  • Page 43 - French - : 7 7 Français Les fréquences du syntonisateur de cet appareil sont attribuées pour une utilisation en Amérique du Nord Son utilisation dans dautres régions pourrait se traduire par une réception de mauvaise qualité 1 Appuyez sur SRCOFF pour sélectionner RADIO 2 Appuyez sur BAND pour sélectionner la bande FM1 FM2 FM3 ou AM 3 Appuyez sur une touche numérique 1 à 6 CONSEIL Les touches peuvent également servir à sélectionner une station présélectionnée lorsque loption SEEK est réglée à PCH dans les réglages FUNCTION page 25 Option de menu Description SPPO MODE Sélectionnez cette option lorsquun hautparleur pleine gamme est connecté aux fils de sortie de hautparleur arrière et quun hautparleur dextrêmes graves est connecté à la sortie RCA REARSUBW SUBWSUBW Sélectionnez cette option lorsquun hautparleur dextrêmes graves passif est connecté directement aux fils de sortie de hautparleur arrière et quun hautparleur dextrêmes graves est connecté à la sortie RCA REARREAR Sélectionnez cette option lorsque des hautparleurs pleine gamme sont connectés aux fils de sortie de hautparleur arrière et à la sortie RCA Si un hautparleur pleine gamme est connecté aux fils de sortie de hautparleur arrière et que la sortie RCA nest pas utilisée vous pouvez sélectionner REARSUBW ou REAR REAR SYSTEM UPDATE Sélectionnez SYSTEM INFO pour confirmer les plus récentes informations de système de lappareil Sélectionnez SW UPDATE pour mettre à jour lappareil avec le logiciel le plus récent et initialiser les réglages de lappareil Pour les détails sur le logiciel le plus récent et la mise à jour visitez notre site Web SYSTEM INFO S W UPDATE SYSTEM RESET Sélectionnez YES pour initialiser les réglages de lappareil Lappareil redémarrera automatiquement YES NO Radio Réception des stations présélectionnées
  • Page 44 - French - : 8 Français Les six stations au signal le plus puissant sont enregistrées sur les touches numériques 1 à 6 1 Après la sélection de la bande appuyez sur la commande MC pour afficher le menu principal 2 Tournez la commande MC pour sélectionner FUNCTION puis appuyez pour confirmer 3 Tournez la commande MC pour sélectionner BSM puis appuyez pour confirmer Pour rechercher une station manuellement Après la sélection de la bande appuyez sur pour sélectionner une station Appuyez de manière prolongée sur puis relâchez pour rechercher une station disponible Le balayage sinterrompt lorsque lappareil reçoit une station Pour annuler la syntonisation par recherche appuyez sur REMARQUE Loption SEEK doit être réglée à MAN dans les réglages FUNCTION page 25 Pour enregistrer des stations manuellement Pendant la réception de la station que vous souhaitez enregistrer appuyez de manière prolongée sur lune des touches numériques 1 à 6 jusquà ce quelle cesse de clignoter La source iPhone nest pas disponible lorsque USB MTP est réglé à ON dans les réglages SYSTEM page 30 Déconnectez le casque découte du périphérique avant de connecter ce dernier à lappareil Mémoire des meilleures stations BSM USBiPhoneAUX Lecture
  • Page 45 - French - : 9 9 Français Périphériques USB y compris AndroidiPhone Ouvrez le couvercle du port USB 2 Branchez le périphérique USBiPhone en utilisant un câble approprié REMARQUE Pour passer automatiquement à la source USB lorsquun périphérique USBiPhone est connecté à lappareil réglez USB AUTO à ON dans les réglages SYSTEM page 30 PRÉCAUTION Utilisez un câble USB vendu séparément pour connecter le périphérique USB car les périphériques connectés directement à lappareil dépassent de ce dernier et peuvent savérer dangereux Avant de retirer le périphérique arrêtez la lecture Connexions AOA Vous pouvez connecter à lappareil un périphérique muni dAndroid OS 41 ou version ultérieure et prenant également en charge AOA Accessoire ouvert Android 20 via une connexion AOA en utilisant le câble fourni avec le périphérique REMARQUE Si vous utilisez une connexion AOA APP CONTROL doit être réglé à WIRED page 30 et USB MTP doit être réglé à OFF page 30 dans les réglages SYSTEM Connexion MTP Vous pouvez connecter à lappareil un périphérique doté dAndroid OS 40 ou de la plupart des versions ultérieures via une connexion MTP en utilisant le câble fourni avec le périphérique Toutefois selon le périphérique connecté la version OS ou le nombre de fichiers enregistrés sur le périphérique la lecture des fichiers audiochansons via MTP pourrait être impossible Veuillez noter que la connexion MTP nest pas compatible avec les formats de fichier WAV ou les formats de fichier FLAC et quil nest pas possible de lutiliser avec la fonction MIXTRAX REMARQUE Si vous utilisez une connexion MTP USB MTP doit être réglé à ON dans les réglages SYSTEM page 30 AUX Insérez la minifiche stéréo dans la prise dentrée AUX 2 Appuyez sur SRCOFF pour sélectionner AUX IN comme source REMARQUE Lorsque loption AUX est réglée à OFF dans les réglages SYSTEM vous ne pouvez pas sélectionner AUX IN comme source page 29
  • Page 46 - French - : 10 Français Vous pouvez effectuer divers ajustements dans les réglages FUNCTION page 25 sauf pour la source AUX INUSB Veuillez noter que les opérations suivantes ne sont pas disponibles pour un périphérique AUX Pour faire fonctionner un périphérique AUX utilisez les commandes du périphérique 1 Fichiers audio compressés uniquement 2 Lorsque vous utilisez la fonction davance ou de retour rapide pendant la lecture dun fichier VBR la durée de lecture pourrait être incorrecte Opérations Objectif Opération Sélection dun dossier1 Appuyez sur 1 ou 2 Sélection dune plagechanson chapitre Appuyez sur ou Avance ou retour rapide2 Appuyez de manière prolongée sur ou Recherche dun fichier dans une liste USB uniquement 1 Appuyez de manière prolongée sur pour afficher la liste 2 Tournez la commande MC pour sélectionner le nom de fichier dossier ou la catégorie de votre choix puis appuyez pour confirmer 3 Tournez la commande MC pour sélectionner le fichier souhaité puis appuyez pour confirmer La lecture démarre Affichage de la liste des fichiers dans le dossierla catégorie que vous sélectionnez1 Appuyez sur la commande MC après avoir sélectionné un dossierune catégorie Lecture dune chanson dans le dossierla catégorie que vous sélectionnez1 Appuyez de manière prolongée sur la commande MC après avoir sélectionné un dossierune catégorie Lecture répétée Appuyez sur 6 Lecture aléatoire Appuyez sur 5 Pausereprise de lecture Appuyez sur 4PAUSE Retour au dossier racine USB uniquement1 Appuyez de manière prolongée sur 1
  • Page 47 - French - : 11 11 Français La fonction MIXTRAX permet de créer un mixage sans interruption de votre bibliothèque musicale Pour les détails sur les réglages MIXTRAX consultez la page 31 REMARQUES Le iPhone doit être connecté avec Pioneer Smart Sync via USB pour lutilisation de cette fonction page 20 Selon le fichierla chanson les effets sonores pourraient ne pas être disponibles 1 Appuyez sur 3MIX pour activerdésactiver MIXTRAX Important Si dix périphériques Bluetooth ou plus par exemple un téléphone et un lecteur audio distinct sont connectés ils pourraient ne pas fonctionner correctement CONSEIL La prochaine connexion à lappareil sera effectuée automatiquement si le périphérique Bluetooth a été connecté précédemment en suivant les étapes cidessous 1 Activez la fonction Bluetooth du périphérique Si vous établissez une connexion Bluetooth à partir du périphérique passez à létape 4 2 Appuyez sur pour afficher le réglage ADD DEVICE Lappareil commence à rechercher des périphériques disponibles pour ensuite les afficher dans la liste des périphériques Pour annuler cette recherche appuyez sur la commande MC Si le périphérique souhaité napparaît pas dans la liste sélectionnez RESEARCH Si aucun périphérique nest disponible NOT FOUND saffiche Si un périphérique est déjà connecté le menu de téléphone saffiche lorsque vous appuyez sur 3 Tournez la commande MC pour sélectionner un périphérique dans la liste puis appuyez pour confirmer Appuyez de manière prolongée sur la commande MC pour commuter les informations de périphérique affichées entre ladresse de périphérique Bluetooth et le nom de périphérique Si vous établissez une connexion Bluetooth à partir de lappareil passez à létape 5 À propos de MIXTRAX USBiPhone uniquement Bluetooth Connexion Bluetooth
  • Page 48 - French - : 12 Français 4 Sélectionnez le nom de lappareil sur laffichage du périphérique 5 Assurezvous que le même numéro à 6 chiffres apparaît sur cet appareil et sur le périphérique puis sélectionnez YES si le même numéro à 6 chiffres saffiche sur cet appareil et sur le périphérique Commencez par établir une connexion Bluetooth avec le téléphone Bluetooth page 11 Jusquà deux téléphones Bluetooth peuvent être connectés simultanément Important Le fait de laisser lappareil en veille pour établir la connexion à votre téléphone via Bluetooth pendant que le moteur est à larrêt pourrait décharger la batterie du véhicule Assurezvous de stationner votre véhicule dans un endroit sûr et dappliquer le frein à main avant deffectuer cette opération Pour effectuer un appel téléphonique Appuyez sur pour afficher le menu de téléphone Lorsque deux téléphones sont connectés un nom de téléphone apparaît dabord puis un menu de téléphone saffiche Pour passer à un autre téléphone appuyez à nouveau sur 2 Tournez la commande MC pour sélectionner RECENTS ou PHONE BOOK puis appuyez pour confirmer Si vous sélectionnez PHONE BOOK passez à létape 4 3 Tournez la commande MC pour sélectionner MISSED DIALED ou RECEIVED puis appuyez pour confirmer 4 Tournez la commande MC pour sélectionner un nom ou un numéro de téléphone puis appuyez pour confirmer Lappel téléphonique commence Pour répondre à un appel entrant Appuyez sur nimporte quel bouton pendant la réception dun appel CONSEIL Lorsque deux téléphones sont connectés à lappareil via Bluetooth et quun appel entrant est reçu pendant lutilisation dun téléphone pour un appel un message saffiche Pour répondre à cet appel entrant vous devez mettre fin à lappel en cours Téléphone Bluetooth
  • Page 49 - French - : 13 13 Français Opérations de base Pour présélectionner des numéros de téléphone Sélectionnez un numéro de téléphone à partir dun annuaire ou dun historique dappels 2 Appuyez de manière prolongée sur lune des touches numériques 1 à 6 Le contact est enregistré dans le numéro de présélection sélectionné Pour effectuer un appel en utilisant un numéro de présélection appuyez sur lune des touches numériques 1 à 6 puis appuyez sur la commande MC pendant que le menu de téléphone est affiché Reconnaissance vocale Cette fonction est disponible uniquement lorsquun iPhonepériphérique Android doté de la reconnaissance vocale est connecté à lappareil via Bluetooth 1 Appuyez de manière prolongée sur puis parlez dans le microphone pour entrer les commandes vocales Pour quitter le mode de reconnaissance vocale appuyez sur BAND REMARQUE Pour les détails sur les fonctions de reconnaissance vocale reportezvous au mode demploi fourni avec votre périphérique CONSEIL Lorsquune connexion Pioneer Smart Sync est établie page 20 vous pouvez également utiliser la fonction de reconnaissance vocale de Pioneer Smart Sync installée sur votre iPhonepériphérique Objectif Opération Terminer un appel Appuyez sur Refuser un appel entrant Appuyez de manière prolongée sur pendant la réception dun appel Alterner entre lappel en cours et un appel en attente Appuyez sur la commande MC Annuler un appel en attente Appuyez de manière prolongée sur Régler le volume de la voix de lappelant Lorsque le mode confidentiel est activé cette fonction nest pas disponible Tournez la commande MC pendant lappel Activer ou désactiver le mode confidentiel Appuyez sur BAND pendant lappel
  • Page 50 - French - : 14 Français Android en appuyant de manière prolongée sur Pour les détails sur les fonctions de reconnaissance vocale consultez la section daide de lapplication Menu de téléphone Appuyez sur pour afficher le menu de téléphone Si deux téléphones sont connectés cette fonction nest pas disponible pour les appels entrants reçus pendant lutilisation dun des téléphones pour un appel Option de menu Description RECENTS Affichage de lhistorique dappels manqués MISSED DIALED Affichage de lhistorique dappels composés RECEIVED Affichage de lhistorique dappels reçus PHONE BOOK Affichage des contacts dans votre téléphone PRESET 16 Rappel des numéros de téléphone présélectionnés Vous pouvez également rappeler des numéros de téléphone présélectionnés en appuyant sur lune des touches numériques 1 à 6 AANSR Sélectionnez ON pour répondre automatiquement à un appel entrant ON OFF PB INVT Inversion de lordre des noms dans lannuaire affichage des noms DEVICELIST Affichage de la liste de périphériques Bluetooth jumelés saffiche sur le nom du périphérique lorsque la connexion Bluetooth est établie Lorsquaucun périphérique nest sélectionné dans la liste de périphériques cette fonction nest pas disponible DEL DEVICE Suppression des informations de périphérique DELETE YES DELETE NO ADD DEVICE Enregistrement dun nouveau périphérique DEV INFO Commutation des informations de périphérique affichées entre le nom de périphérique et ladresse de périphérique Bluetooth
  • Page 51 - French - : 15 15 Français Important Selon le lecteur audio Bluetooth connecté à cet appareil les opérations disponibles sont limitées aux deux niveaux suivants A2DP Profil de distribution audio avancé permet uniquement découter des chansons sur votre lecteur audio AVRCP Profil de commande audiovidéo à distance permet dutiliser des fonctions telles que la lecture la mise en pause la sélection de chanson etc Le son du lecteur audio Bluetooth est coupé lorsque le téléphone est utilisé Lors de lutilisation du lecteur audio Bluetooth vous ne pouvez pas établir automatiquement la connexion à un téléphone Bluetooth Selon le type de lecteur audio Bluetooth connecté à cet appareil les opérations et les informations affichées pourraient varier en fonction de la disponibilité et des fonctionnalités 1 Établissez une connexion Bluetooth avec le lecteur audio Bluetooth 2 Appuyez sur SRCOFF pour sélectionner BT AUDIO comme source 3 Appuyez sur BAND pour démarrer la lecture REMARQUE Vous devez rétablir la connexion Bluetooth lorsque la source est commutée ou lappareil est éteint CONSEIL Lorsque plus de deux et jusquà cinq périphériques sont enregistrés sur lappareil via Bluetooth vous pouvez commuter le périphérique Bluetooth en démarrant la lecture de chansons sur le périphérique En procédant ainsi la lecture dune chanson du périphérique Bluetooth de chaque passager est facilement disponible Toutefois selon les conditions dutilisation les connexions multiples pourraient ne pas être disponibles et la lecture des fichiers audiochansons pourrait ne pas seffectuer correctement Opérations de base Vous pouvez effectuer divers ajustements dans les réglages FUNCTION page 25 Audio Bluetooth Objectif Opération Avance ou retour rapide Appuyez de manière prolongée sur ou Sélection dune plage Appuyez sur ou Lecture répétée Appuyez sur 6 Lecture aléatoire Appuyez sur 5 Pausereprise de lecture Appuyez sur 4PAUSE