Loading ...
Loading ...
Loading ...
42 49-60820 Rev. 2
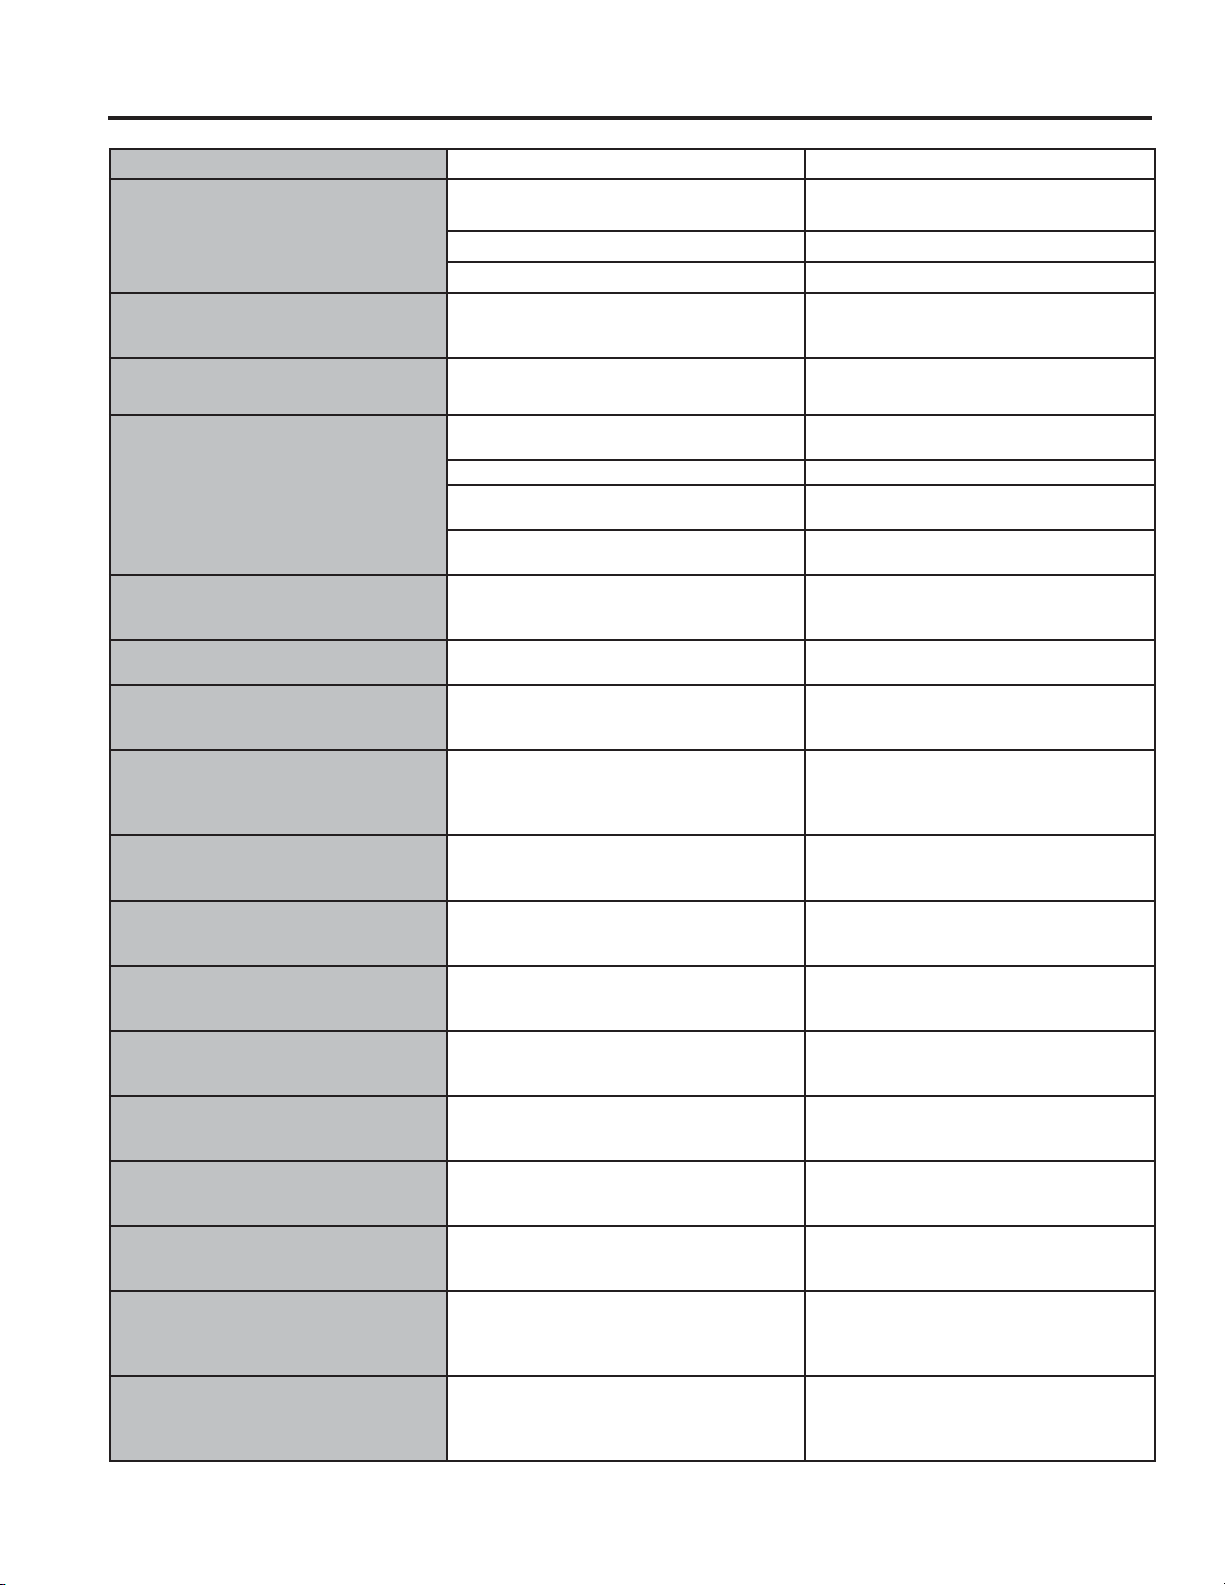
Problem Possible Causes What to Do
Photos not found 3KRWRVQRWLQURRWGLUHFWRU\RI86% Make sure the photos are in the root
GLUHFWRU\LQ\RXU86%
Photos not in JPEG format Photos must be in JPEG format
&DPHUD3&XVHGZLWK86%FRUG 0XVWXVHD86%GULYH
Freezer cooling, fresh food not cooling Normal, when refrigerator first plugged in
or after extended power outage
Wait 24 hours for temperature in both
compartments to reach selected
temperatures.
Ice dispenser opens after closing freezer
drawer
Normal The ice dispenser door may open after
closing freezer door to allow access
Hot water does not work Operation disabled 0DNHVXUH³+RW:DWHU'LVDEOHG´LVQRW
selected
Low water pressure Make sure water line is not kinked
Water supply line turned off or not
connected
See Installing the Water Line
Water filter clogged or filter/bypass plug not
installed
Replace filter cartridge or remove filter
and install bypass plug*
Hot water continues to dispense for a
short time after releasing the knob
Water filter is partially clogged or low water
pressure (<40 psi)
Replace filter cartridge or remove filter
and install bypass plug* or increase water
pressure
Difficult to open the Icebox door Icebox door gasket might stick to main
door if it remains closed for a long duration
Disengage the door latch, wait for 3
minutes then open the Icebox door
Fresh food door not closing fully Fresh food door gasket may have
unseated and interfering with articulating
mullion operation
Reseat the gasket all the way in the
groove
Low brewing flow rate There may have been a dent at the bottom
of K-Cup causing the pin to pierce the
filter allowing coffee grounds clogging the
bottom pin
Avoid using damaged/dented K-cups, and
clean the lower needle before next brew
Low brewing flow rate / water drips from
inner door
Top needle of the brewer clogged 8QFORJWKHWRSQHHGOHKROHVXVLQJDSDSHU
clip and rinse brewer. Rinse brewer after
every use.
Brewer stuck in the door bracket Dispenser is in hot water dispense mode
instead of brew mode while the brew
module is installed
Cancel hot water dispense mode so
hot water tube will retract from the brew
module
Brewer is not detected by the screen
menu or hot water leaking from top of
the brewer
Incorrect assembly of brewer in the bracket Make sure the Keurig Logo is in the front.
Push brewer all the way in the brackets
Coffee dispensed with splash or bubble
bursting
Blocked vent hole in the brewer Make sure the vent hole at the bottom of
the brewer is clear from food or any other
contamination
Beverage quality not as expected You may be using non-standard or out
dated K-Cups
Recommend using official Keurig K-cups
that are not past expiration and have not
been damaged
Liquid drips from the brewer after brewer
cycle is completed and the brewer is
removed from the bracket
It is possible for liquids to be retained by
the brewer and drip when it is removed
8VHDFORWKRUFRQWDLQHUWRFDSWXUHWKH
drips when brewer is removed
Delay when using Keurig K-cup Pod
dispenser
To ensure a quality beverage is delivered,
a short delay is required to ensure the
refrigerator is operating correctly
Ensuring consistent, quality operation
requires the refrigerator to delay dispense
for a short period of time
After brewing, my powdered beverage is
not fully cleared from the used pod
Depending on size selected, the powder
may not dissolve fully. Some powdered
beverages develop into ‘clumps’ when left
sitting for some time
Shake the powdered pods before brewing
to break up these clumps and allow better
clearing. For powdered beverage with no
filter, use the Cocoa cycle selection
Brewer lid is difficult to close K-cup is not fully seated Press K-cup all the way down into the
brewer prior to closing the lid. Lower
needle must puncture K-cup bfore closing
the brewer lid
*Some models do not come equipped with the filter bypass plug. To obtain a free bypass plug, visit us on-line at
cafeappliances.com/service. In Canads, visit cafeappliances.ca/service.
Troubleshooting Tips... Before you schedule service
TROUBLESHOOTING TIPS
Loading ...
Loading ...
Loading ...