Loading ...
Loading ...
Loading ...
28 49-60820 Rev. 2
REINSTALLING THE
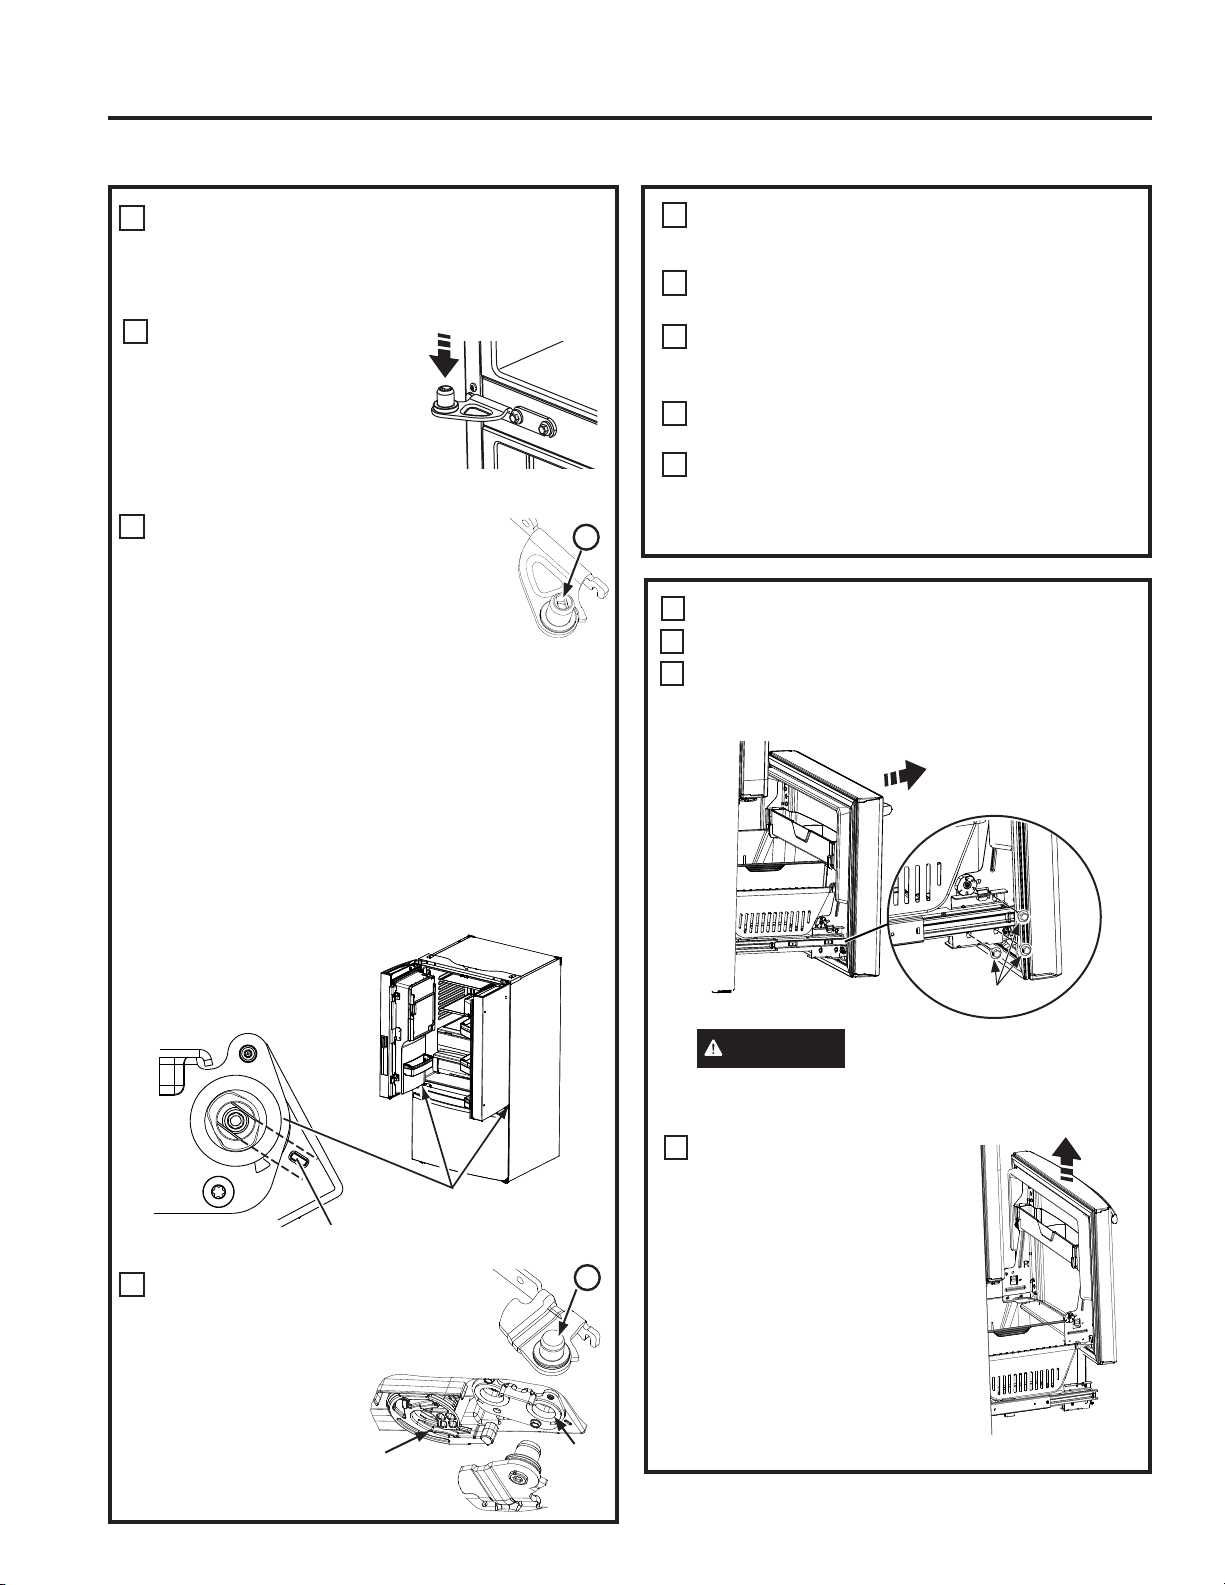
REFRIGERATOR DOORS
Reverse steps 1 through 4 to reinstall refrigerator,
follow details below for critical alignments.
A
Reinstall center hinge first
DQGWRUTXHWKHó´VFUHZWR
65 in-lbs (7.34 N-m) and
small screw to 25 in-lbs
(2.82 N-m). Rotating the
screw by 1/3 turn after it is
flush with mating surface will
achieve these torques.
If the hinge on your refrigerator
has a slot that looks like image
B on the right, follow the steps
below. Otherwise, skip to step C.
With the LH door at 90º + to the front
of the case, lower the refrigerator
door. Ensure the door and hinge align correctly.
Rotate door closed and make sure moveable center
sealing portion of the door aligns with the striker. If
door cannot be installed at 90º, follow these next
steps. Install door at 90º to case front. If space or
model limits opening door to less than 180º, remove
door and carefully turn door upside down. Check
alignment of the door. There is an alignment mark on
the door closure mechanism that corresponds to an
alignment mark on the bottom end cap. Rotate door
closure mechanism to align mark and arrow.
If the hinge on your refrigerator
does not have a slot and looks
like image C on the right, then
simply lower the outer hole of the
door on the hinge pin.
3
B
C
align marks
8QGHUVLGHRI)UHVK)RRG'RRU
REMOVE THE FREEZER DOOR
Pull the freezer door open to full extension.
Remove 3 attachment screws, located at the
bottom on each side of the freezer door using
´KH[VRFNHWGULYHU
CAUTION
Lifting Hazard
)UHH]HUGRRULVKHDY\8VHERWKKDQGVWR
secure the door before lifting.
Lift the freezer door
to disengage it from
the slide mechanism
The door can safely
rest on the bottom.
Do not rest the
door on any other
surfaces to avoid
scratches.
Push the slide
mechanism back
completely until it self
retracts.
A
B
C
4
Installation Instructions
INSTALLATION INSTRUCTIONS
INSTALLING THE REFRIGERATOR (Cont.)
B
3 Screws
REINSTALLING THE
REFRIGERATOR DOORS (cont.)
D
Securely tape the door shut with masking tape
or have a second person support the door.
E
Follow the same procedure to install the opposite
door. There are no wires, water lines or center
hinge covers on the opposite door.
F
Be sure to reinstall the ground wire and strain
relief to the top hinge.
G
Reinstall hinge cover. NOTE: Ensure wires are
not pinched or under screw bosses before
tightening screws.
3
8QGHUVLGHRI
Refrigerator Door
Outer
hole
C
Loading ...
Loading ...
Loading ...