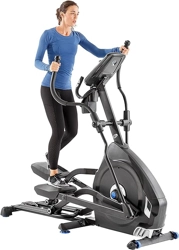
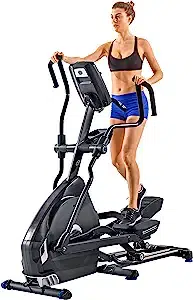
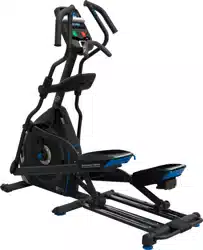
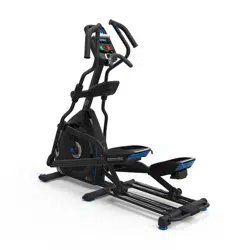
Nautilus E616 Elliptical
Product's Documents
Below are documents related to this product, you can read online or download:
- Owner's manual - (English) Read Online | Download pdf
OWNER’S MANUAL

WARNING: This product, its packaging, and components contain chemicals known to the State of California to cause cancer, birth defects, or reproductive harm. This Notice is provided in accordance with California’s Proposition 65.
Select the area where you are going to set up and operate your machine. For safe operation, the location must be on a hard, level surface. Allow a workout area of a minimum 76” x 120” (193 cm x 305 cm). Be sure that the workout space you are utilizing has adequate height clearance, taking into consideration the height of the user and the maximum incline of the elliptical machine.
Basic Assembly Tips
Follow these basic points when you assemble your machine:

A decal has been applied to all right (“ R ”) and left (“ L ”) parts to assist with assembly.


Tools

1. Attach Front Stabilizer to Frame
Note: Hardware (*) is pre-installed and not on the Hardware Card.

2. Attach Rail Assembly to Frame Assembly
Note: Hardware (*) is pre-installed and not on the Hardware Card.

3. Connect the Cables and Attach the Console Mast to Frame Assembly
NOTICE: Do not crimp cables.

4. Attach Legs to Frame Assembly

5. Attach Water Bottle Holder to Frame Assembly

6. Attach Arm Pivot Rod and Lower Handlebar Arms to Frame Assembly

7. Attach Left Pedal to Frame Assembly
NOTICE: Repeat step on opposite side with the Right Pedal (Item 23 ).

8. Attach and Adjust the Upper Handlebar Arms to Frame Assembly
Note: Hardware (*) is pre-installed and not on the Hardware Card.
Warning: Make sure the Upper Handlebar Arms are secure before you exercise.

9. Attach Handlebar Shrouds to Frame Assembly

10. Remove Hardware from Console
Note: Hardware (*) is pre-installed and not on the Hardware Card. If desired, apply the French Canadian overlay to the Console face.

11. Route Cables through the Console Junction Cover and Static Handlebars and Place onto the Console Mast
NOTICE: Do not crimp the Console Cables. Be aware that the Static Handlebar is not securely attached.

12. Connect Cables and Attach Console to Static Handlebars
NOTICE: Align the clips on the cable connectors and make sure the connectors lock. Do not crimp cables. Be aware that the Static Handlebar is not securely attached.

13. Attach the Console Junction Cover and then Secure the Static Handlebars

14. Connect the Power Cord to Frame Assembly
Note: Apply silicone lubricant to a cloth and wipe the rails to eliminate roller noise.
Warning: Connect this machine to a properly grounded outlet only (see Grounding Instructions).

15. Final Inspection Inspect your machine to ensure that all hardware is tight and components are properly assembled.
Be sure to record the serial number in the field provided at the front of this manual.
Warning: Do not use until the machine has been fully assembled and inspected for correct performance in accordance with the Owner’s Manual.
Warning: The machine may be moved by one or more persons depending on their physical abilities and capacities. Make sure that you and others are all physically fit and able to move the machine safely.
NOTICE: Be careful when you move the elliptical. Abrupt motions can affect the computer operation.

The machine needs to be leveled if your workout area is uneven or if the Rail Assembly is slightly off the floor. To adjust:
Make sure the machine is level and stable before you exercise.


The Console provides important information about your workout and lets you control the resistance levels while you exercise. The Console features the Nautilus Dual Track™ display with touch control buttons to navigate you through the exercise programs.

Resistance Increase ( ) button-Increases the workout resistance level
Resistance Decrease ( ) button- Decreases the workout resistance level
Incline Increase () button- Increases the Incline angle of the Rail Assembly
Incline Decrease () button- Decreases the Incline angle of the Rail Assembly
QUICK START button- Begins a Quick Start workout
USER button- Selects a User profile
PROGRAMS button- Selects a category and workout program
PAUSE / END button- Pauses an active workout, ends a paused workout, or goes back to the previous screen
GOAL TRACK button- Displays the Workout Totals and Achievements for the selected User Profile
Increase () button- Increases a value (age, time, distance, or calories) or moves through options
Left ( ) button- Displays different workout values during a workout, and moves through options
OK button- Starts a Program workout, confirms information, or resumes a paused workout
Right ( ) button- Displays different workout values during a workout, and moves through options
Decrease () button- Decreases a value (age, time, distance, or calories) or moves through options
FAN button- Controls 3-speed fan
Resistance Level Quick Buttons- Shifts the resistance levels to the setting quickly during a workout
Incline Level Quick Buttons- Shifts the incline level to the setting quickly during a workout
Achievement Indicator Lights- when an achievement level is reached or a result is reviewed, the achievement indicator light will activate
Upper Display Data

Program Display The Program Display shows information to the User and the grid display area shows the course profile for the program. Each column in the profile shows one interval (workout segment). The higher the column, the higher the resistance level. The flashing column shows your current interval.
Intensity Display The Intensity Display shows the level of work at that moment based on the current resistance level.
Heart Rate Zone Display The Heart Rate Zone shows which zone the current heart rate value falls into for the current User. These Heart Rate Zones can be used as a workout guide for a certain target zone (anaerobic, aerobic, or fat burn).
Warning: Consult a physician before you start an exercise program. Stop exercising if you feel pain or tightness in your chest, become short of breath, or feel faint. Contact your doctor before you use the machine again. The heart rate displayed is an approximation and should be used for reference only.
Note: If no heart rate is detected, the display will be blank.
NOTICE: To prevent interference with the telemetry HR receiver, do not place any personal electronic devices in the left side of the media tray.
Goal Display The Goal Display shows the currently selected type of goal (Distance, Time or Calories), the current value to achieve the goal, and the percent completed toward the goal.
User Display The User Display shows which User Profile is currently selected.
Achievement Display The Achievement Display activates when a workout goal is reached or a workout milestone is surpassed from past workouts. The Console display will congratulate and inform the User of their achievement, along with a celebratory sound.
Lower Display Data

The Lower Display shows the Workout Values and can be customized for each User (Consult the “Edit User Profile” section of this manual).
Speed The Speed display field shows the machine speed in miles per hour (mph) or kilometers per hour (km/h).
Time The TIME display field shows the total time count of the workout, the average Time for the User Profile, or the total operational time of the machine. Note: If a Quick Start workout is performed for more than 99 minutes and 59 seconds (99:59), the units for Time will shift to hours and minutes ( 1 hour, 40 minutes ).
Distance The Distance display shows the distance count (miles or km) in the workout. Note: To change the measurement units to English Imperial or metric, refer to the “Console Setup Mode” section in this manual.
Level The LEVEL display shows the current resistance level in the workout.
RPM The RPM display field shows the pedal revolutions per minute (RPM).
Heart Rate (Pulse) The Heart Rate display shows the beats per minute (BPM) from the heart rate monitor. When a heart rate signal is received by the Console, the icon will flash. Warning: Consult a physician before you start an exercise program. Stop exercising if you feel pain or tightness in your chest, become short of breath, or feel faint. Contact your doctor before you use the machine again. The heart rate displayed is an approximation and should be used for reference only.
Calories The Calories display field shows the estimated calories that you have burned during the exercise.
The App syncs with your fitness machine to track total calories burned, time, distance, and more. Records and stores every workout for quick reference. Plus, it automatically syncs your workout data with MyFitnessPal® to make hitting your daily goals easier than ever! Track your results and share with friends and family.
This Nautilus® fitness machine is equipped with a USB Port and can export your Workout Results to a USB Drive. With the Workouts exported from the fitness machine, connect the USB Drive to a computer and upload the file to your Nautilus Connect™ account. To export the GOAL TRACK statistics of a User Profile:
) button to move to the “CLEAR WORKOUT DATA -OK?” prompt.) button to move to the “SAVE TO USB - OK?” prompt. Push OK, and the “ARE YOU SURE? -NO” prompt will display.) button to change it to yes and push OK. The Console will display the “INSERT USB” prompt. Insert a USB Flash Drive into the USB Port. The Console will record the Statistics to the USB Flash Drive. The Console will display “SAVING”, and then “REMOVE USB” when it is safe to remove the USB Flash Drive. Note: Push the PAUSE/END button to force an exit from the “SAVING” prompt.Take advantage of Nautilus Connect™ to see your progress over time and share your data with MyFitnessPal®. Review your workouts and results away from the machine when convenient for you. Nautilus Connect™ allows for a workout value to be selected and have it graphed for weekly, monthly, or yearly comparison review.
If using a Bluetooth® device to import workout results to Nautilus Connect™:
If using a USB Drive to import workout results to Nautilus Connect™:

Monitoring your Heart Rate is one of the best procedures to control the intensity of your exercise. Contact Heart Rate (CHR) sensors are installed to send your heart rate signals to the Console. The Console can also read telemetry HR signals from a Heart Rate Chest Strap Transmitter that operates in the 4.5kHz - 5.5kHz range.
Note: The heart rate chest strap must be an uncoded heart rate strap from Polar Electro or an uncoded POLAR® compatible model. (Coded POLAR® heart rate straps such as POLAR® OwnCode® chest straps will not work with this equipment.)
Warning: If you have a pacemaker or other implanted electronic device, consult your doctor before using a wireless chest strap or other telemetric heart rate monitor.
NOTICE: To prevent interference with the telemetry HR receiver, do not place any personal electronic devices in the left side of the media tray.*
Contact Heart Rate (CHR) sensors send your heart rate signals to the Console. The CHR sensors are the stainless steel parts of the Handlebars. To use, put your hands comfortably around the sensors. Be sure that your hands touch both the top and the bottom of the sensors. Hold firm, but not too tight or loose. Both hands must make contact with the sensors for the Console to detect a pulse. After the Console detects four stable pulse signals, your initial pulse rate will be shown.
Once the Console has your initial heart rate, do not move or shift your hands for 10 to 15 seconds. The Console will now validate the heart rate. Many factors influence the ability of the sensors to detect your heart rate signal:
If your heart rate signal ever seems erratic after validation, wipe off your hands and the sensors and try again.
Heart Rate Calculations
Your maximum heart rate usually decreases from 220 Beats Per Minute (BPM) in childhood to approximately 160 BPM by age 60. This fall in heart rate is usually linear, decreasing by approximately one BPM for each year. There is no indication that training influences the decrease in maximum heart rate. Individuals of the same age could have different maximum heart rates. It is more accurate to find this value by completing a stress test than by using an age related formula. Your at-rest heart rate is influenced by endurance training. The typical adult has an at rest heart rate of approximately 72 BPM, whereas highly trained runners may have readings of 40 BPM or lower.
The Heart Rate table is an estimate of what Heart Rate Zone (HRZ) is effective to burn fat and improve your cardiovascular system. Physical conditions vary, therefore your individual HRZ could be several beats higher or lower than what is shown.
The most efficient procedure to burn fat during exercise is to start at a slow pace and gradually increase your intensity until your heart rate reaches between 60 – 85% of your maximum heart rate. Continue at that pace, keeping your heart rate in that target zone for over 20 minutes. The longer you maintain your target heart rate, the more fat your body will burn.
The graph is a brief guideline, describing the generally suggested target heart rates based on age. As noted above, your optimal target rate may be higher or lower. Consult your physician for your individual target heart rate zone.
Note: As with all exercises and fitness regimens, always use your best judgment when you increase your exercise time or intensity

What to Wear
Wear rubber-soled athletic shoes. You will need the appropriate clothes for exercise that allow you to move freely.
Warning: Care should be used when mounting or dismounting the machine. Be aware that the Pedals and the Handlebars are connected and when either of these parts move the other does as well. In order to avoid possible serious injury, only grasp the Static Handlebars to steady yourself.
To mount the fitness machine:
To dismount the fitness machine:
The Console will enter Power-Up / Idle Mode if it is plugged into a power source and the Power Switch turned on, any button is pushed, or if it receives a signal from the RPM sensor as a result of pedaling the machine.
If the Console does not receive any input in approximately 5 minutes, it will automatically shut off. The LCD display is off while in Sleep Mode.
Note: The Console does not have an On/Off switch.
Warning: To disconnect, turn all controls to the off position, then remove plug from outlet.
During the first power-up, the Console should be setup with the date, time and your preferred measurement units.
Note: To adjust these selections, consult the “Console Set-Up Mode” section.
The Quick Start ( Manual ) program lets you start a workout without entering any information. During a Manual Workout, each column represents a 2 minute time period. The active column will advance across the screen every 2 minutes. If the workout lasts for more than 30 minutes, the active column is fixed on the farthest column on the right and pushes the previous columns off the display
The Console lets you store and use 4 User profiles. The User profiles automatically record the workout results for each workout, and allow the workout data to be reviewed.
Select a User Profile
Every workout is saved to a User Profile. Be sure to select the proper User Profile before starting a workout. The last User that completed a workout will be the default user.
User Profiles are assigned the default values until they are customized by editing. Be sure to edit the User Profile for more accurate calorie and heart rate information.
From the Power-Up Mode screen, push the User button to select one of the User Profiles. The Console will display the name of the User Profile and the User Profile Icon.
Edit User Profile
) or Right() buttons to shift between segments. Push the OK button to accept the displayed User name.) or Decrease() buttons to change the value. The default is “ON”. Push the OK button to set the Telemetry Heart Rate Receiver to active.) or Decrease() buttons to hide the active workout value, and push the Left() or Right() buttons to shift the active workout value. Note: to show a hidden workout value, repeat procedure and change Upper Display value to “ON” for that value. When done with customizing the Lower Display, push the OK button to set it. 
Reset a User Profile
) or Decrease() buttons to change the prompt. Note: To exit the Edit User Profile option, push the PAUSE/END button and the console will go back to the Power-Up Mode screen. ) or Decrease() buttons to adjust the selection.Push the Resistance Level Increase() or Decrease() buttons to change the resistance level at any time in a workout program. To rapidly change the resistance level, push the desired Resistance Level Quick Button. The Console will adjust to the selected resistance level of the quick button.
Push the Incline Level Increase() or Decrease() buttons to change the incline angle of the rail assembly at any time in a workout program. To rapidly change the incline level, push the desired Incline Level Quick Button. The Console will adjust to the selected incline level of the quick button.
Warning: Be sure the area below the machine is clear before lowering. Fully lower the Incline Assembly after each workout. Exercise on this machine requires coordination and balance. Be sure to anticipate that changes in speed, incline angle and resistance level can occur during workouts, and be attentive in order to avoid loss of balance and possible injury.
Note: Be sure that the workout space you are utilizing has adequate height clearance, taking into consideration the height of the user and the maximum incline of the elliptical machine. Though the incline angle changes the exercise motion, it does not affect the calorie values.

The Console lets you select the Profile Program and type of Goal for your workout (Distance, Time or Calories), and set the Goal value.
) or Right() buttons to select a Category of Workout. ) or Decrease() buttons to select a Profile Workout, and push OK.) or Decrease() buttons to select a type of Goal (Distance, Time or Calories), and push OK.) or Decrease() buttons to adjust the workout value.Note: During a Calories Goal, each column is for a 2 minute time period. The active column will advance across the screen every 2 minutes. If the workout lasts for more than 30 minutes, the active column will fix to the last right column and push the previous columns off the display.
Fitness Test Program
The Fitness Test measures the improvements to your physical fitness level. The test compares your power output (in watts) to your heart rate. As your fitness level improves, your power output will increase at a given heart rate.
Note: The Console must be able to read the heart rate information from the Contact Heart Rate (CHR) sensors or Heart Rate Monitor (HRM) to work correctly.
You can start the Fitness Test from the FEEDBACK category. The Fitness Test program first prompts you to select your fitness level—Beginner ( “BEG” ) or Advanced ( “ADV” ). The Console will use the Age and Weight values for the selected User Profile to calculate the Fitness Score.
Start to work out and hold the Heart Rate Sensors. When the test starts, the intensity of the workout slowly increases. This means you will work harder, and as a result, your heart rate increases. The intensity continues to increase automatically until your heart rate reaches the “Test Zone”. This zone is individually computed to be near 75 percent of the maximum heart rate of your User Profile. When you reach the Test Zone, the machine holds the intensity steady for 3 minutes. This lets you reach a stable condition (where your heart rate becomes steady). At the end of the 3 minutes, the Console measures your heart rate and the power output. These numbers, along with information about your age and weight, are computed to produce a “Fitness Score”.
Note: Fitness Test scores should only be compared to your previous scores and not to other User Profiles.
Compare your Fitness Scores to see your improvement.
Recovery Test shows how quickly your heart recovers from an exercise state to a more restful state. Improved recovery is an indicator of increasing fitness.
Note: The Console must be able to read the heart rate information from the Contact Heart Rate (CHR) sensors or Heart Rate Monitor (HRM) to work correctly.
From an elevated heart rate, select the Recovery Test Program. The Console will show “STOP EXERCISING” and the goal will begin to count down. Stop exercising but continue to grip the contact heart rate sensors. After 5 seconds, the display will show “RELAX” and will continue to count down to 00:00. For the entire minute the console will also show your heart rate. You must grip the heart rate sensors for the duration of the test if not using a Remote Heart Rate Monitor.
The display will continue to show “RELAX” and your heart rate until the goal reaches 00:00. The console will then calculate your recovery score.
Recovery Score = Your heart rate at 1:00 (the beginning of the test) minus your heart rate at 00:00 (the end of the test).
The higher the Recovery Test score value, the quicker your heart rate is returning to a more restful state and is an indication of improving fitness. By recording these values over time you can see the trend toward better health.
When you select the Recovery Test Program and there is no heart rate signal or display, the Console will show “NEED HEART RATE”. This message will show for 5 seconds. If no signal is detected, the program will end.
Helpful Tip: For a more relevant score, try to obtain a steady heart rate for 3 minutes before starting the Recovery Program. This will be easier to achieve, and obtain the best result, in the Manual program so you can control the levels of resistance.
The Heart Rate Control (HRC) programs let you set a heart rate goal for your workout. The program monitors your heart rate in beats per minute (BPM) from the Contact Heart Rate (CHR) sensors on the machine or from a Heart Rate Monitor (HRM) chest strap, and adjusts the workout to keep your heart rate in the selected zone.
Note: The console must be able to read the heart rate information from the CHR sensors or HRM for the HRC program to work correctly.
The Target Heart Rate programs use your age and other User information to set the Heart Rate Zone values for your workout. The console display then gives prompts for you to set up your workout:
) or Decrease() buttons to select the percentage of maximum heart rate: 50–60%, 60–70%, 70–80%, 80–90%.) or Decrease() buttons to select the Goal type, and push OK.) or Decrease() buttons to set the goal value for the workout. Note: Be sure to allow time for your heart rate to reach the desired heart rate zone when setting the goal.A User can set a Heart Rate zone instead of a value by selecting the Heart Rate Control - User program. The Console will adjust the workout to keep the User in the desired Heart Rate zone.
) or Decrease() buttons to set the Heart Rate zone for the workout, and push OK. The Console shows the Heart Rate zone (percent) on the left, and the Heart Rate range for the User on the right side of the display.) or Decrease() buttons to select the Goal type, and push OK. ) or Decrease() buttons to set the value for the workout.The Console allows a different Workout Program to be started from an active workout.
) or Decrease() buttons to select the desired workout program, and push OK.) or Decrease() buttons to select the Goal type, and push OK.) or Decrease() buttons to set the value for the workout.The previous workout values are saved to the User Profile.
The Console will go into Pause Mode if the user stops pedaling and pushes PAUSE/END during a workout, or there is no RPM signal for 5 seconds (user not pedaling). The Console will cycle through a series of messages that change every 4 seconds:
During a paused workout, you can use the Increase/Decrease buttons to move through the result channels manually.
Results / Cool Down Mode
After a workout the GOAL display shows 03:00 and then starts to count down. During this Cool Down period, the Console shows the Workout Results. All workouts except Quick Start have a 3-minute Cool Down period. The LCD display shows the Current Workout values in three channels:
Push the Left() or Right() buttons to move through the result channels manually. During the Cool Down period, the Resistance Level will adjust to a third of the average Level of the workout. The Cool Down resistance level can be adjusted with the Resistance Increase and Decrease buttons, but the Console will not display the value.
You can push PAUSE/END to stop the Results / Cool Down period and go back to Power-Up Mode. If there is no RPM or HR signal, the Console automatically goes into Sleep Mode.
The statistics from every workout are recorded to a User Profile. The Nautilus Dual Track™ Console shows the Goal Track workout Statistics on the Lower Display in three channels:
* If the Goal Track Statistic is a single workout, LEVEL (average) is displayed. If the Goal Track Statistic is a combination of multiple workouts, DISTANCE (average) is displayed instead of LEVEL (average).
To view the GOAL TRACK statistics of a User Profile:
1. From the Power-Up screen, push the User button to select the correct User profile.
2. Push the GOAL TRACK button. The Console will display the LAST WORKOUT values and activate the corresponding Achievement light.
Note: Goal Track statistics can be viewed even during a workout. Push GOAL TRACK and the LAST WORKOUT values will be displayed. The workout values for the current workout will be hidden except for the GOAL display. Push GOAL TRACK again to return to the Power-Up screen.
3. Push the Increase() button to move to the next GOAL TRACK statistic, “LAST 7 DAYS”. The Console will display the calories burned on the display (50 calories per segment) for the previous seven days, along with the workout value totals. Use the Left() or Right() buttons to move through all the workout statistic channels.
4. Push the Increase() button to move to “LAST 30 DAYS”. The Console will display the total values for the previous thirty days. Use the Left() or Right() buttons to move through all the workout statistic channels.
5. Push the Increase() button to move to the “LONGEST WORKOUT”. The Console will display the workout values with the most Time value. Use the Left() or Right() buttons to move through all the workout statistic channels.
6. Push the Increase() button to move to the “CALORIE RECORD”. The Console will display the workout values with the most Calories value. Use the Left() or Right() buttons to move through all the workout statistic channels.
7. Push the Increase() button to move to “BMI”, or Body Mass Index. The Console will display the BMI value based on the User settings. Be sure the height value is correct for your User Profile, and the weight value is current. The BMI Measurement is a useful tool that shows the relationship between weight and height that is associated with body fat and health risk. The table below gives a general rating for the BMI score:

Note: The rating may overestimate body fat in athletes and others who have a muscular build. It may also underestimate body fat in older persons and others who have lost muscle mass. Warning: Contact your doctor for more information about Body Mass Index (BMI) and the weight that is appropriate for you. Use the values calculated or measured by the machine’s computer for reference purposes only.
8. Push the Increase() button to move to the “SAVE TO USB - OK?” prompt. Push OK and the “ARE YOU SURE? -NO” prompt will display. Push the Increase() button to change it to yes and push OK. The Console will display the “INSERT USB” prompt. Insert a USB Flash Drive into the USB Port. The Console will record the Statistics to the USB Flash Drive. The Console will display “SAVING”, and then “REMOVE USB” when it is safe to remove the USB Flash Drive. Note: Push the PAUSE/END button to force an exit from the “SAVING” prompt.
9. Push the Increase() button to move to the “CLEAR WORKOUT DATA -OK?” prompt. Push OK, and the “ARE YOU SURE? - NO” prompt will display. Push the Increase() button to change to the “ARE YOU SURE? - YES” display, and push OK. The user workouts have been reset.
10. Push GOAL TRACK to return to the Power-Up screen.
When a User performs a workout that surpasses the “LONGEST WORKOUT” or “CALORIE RECORD” of the previous workouts, the Console will congratulate with an audible sound and tell the User the new achievement. The corresponding Achievement Indicator Light will also be active.
The Console Setup Mode lets you input the date and time, set the units of measurement to either English or Metric, control the sound settings ( on/ off), or see maintenance statistics (Error Log and Run Hours – for service technician use only).
Read all maintenance instructions fully before you start any repair work. In some conditions, an assistant is required to do the necessary tasks.
Waring: Equipment must be regularly examined for damage and repairs. The owner is responsible to make sure that regular maintenance is done. Worn or damaged components must be repaired or replaced immediately. Only manufacturer supplied components can be used to maintain and repair the equipment. If at any time the Warning labels become loose, unreadable or dislodged, contact Nautilus® Customer Service for replacement labels.
DARNGER: To reduce the risk of electrical shock or unsupervised usage of the equipment, always unplug the power cord from the wall outlet and the machine and wait 5 minutes before cleaning, maintaining or repairing the machine. Place the power cord in a secure location.
Daily: Before each use, examine the exercise machine for loose, broken, damaged, or worn parts. Do not use if found in this condition. Repair or replace all parts at the first sign of wear or damage. After each workout, use a damp cloth to wipe your machine and Console free of moisture. Note: Avoid excessive moisture on the Console.
Weekly: Check for smooth roller operation. Wipe the machine to remove dust, dirt, or grime. Clean the rails and surface of the rollers with a damp cloth. Apply silicone lubricant to a dry cloth and wipe the rails to eliminate roller noise. Note: Do not use petroleum based products.
Monthly or after 20 hours: Make sure all bolts and screws are tight. Tighten as necessary
NOTICE: Do not clean with a petroleum based solvent or an automotive cleaner. Be sure to keep the Console free of moisture.


No display/partial display/ unit will not turn on
Unit operates but Contact HR not displayed
Unit operates but Telemetric HR not displayed
Unit operates but Telemetric HR displayed incorrectly
No speed/RPM reading, Console displays “Please Stride” error code
Console shuts off (enters sleep mode) while in use
Fan will not turn on or will not turn off
Fan will not turn on, but Console operates
Unit rocks/does not sit level
Foot pedals loose/unit difficult to operate
Drive train click/tick noise once per full crank revolution
Knocking sound during machine operation
Squeaking noise that appears a few minutes into a workout and normally will get progressively worse as the workout continues