Loading ...
Loading ...
Loading ...
8 TURBOLOCK TL115
Section 3
Installation (Retrot)
This section details installation steps needed if you are installing the TL115 on a door with a single cutout already
made. Replacing an older xture with a newer one is known as a retrot. If your door has never had a lock or doorknob
installed or otherwise has no cutout, please skip to Section 4.
• For easier installation, have another person help to hold the lock.
• Remove all parts of any old lock before installing the TL115. In some cases, the old strike plate and/or box may be used.
• For your convenience, installation instructions are broken into segments. Read and follow the instructions for both Pre-
Installation and Main Installation.
• If your door happens to have two cut-outs, check the clearance between the two. Make sure there is enough distance so that
you may seal o any extra openings.
3.1 Pre-Installation
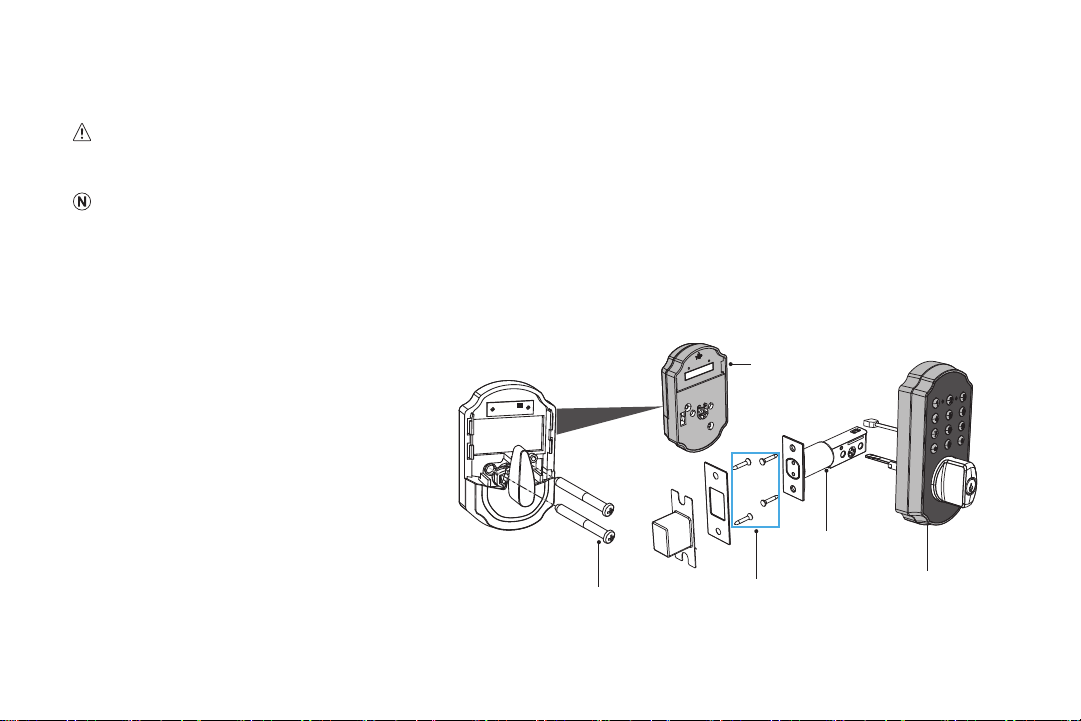
Part 1 - Disassemble the Lock
The TL115 comes already assembled. Before
installation, release the wood screws and
mounting screws to disassemble the lock into
three main parts: Outside Assembly x 1, Inside
Assembly x 1, Latch Assembly x 1 (Fig. 1).
Wood Screws
Mounting Screws
Inside Assembly
Outside Assembly
Latch Assembly
(Fig. 1)
Loading ...
Loading ...
Loading ...