Loading ...
Loading ...
Loading ...
TURBOLOCK TL115 15
Step 6. Hold the strike plate over the mortise. Using a pencil, mark a line around the
edges of plate to use as a guide. After marking at the straight edges of the
plate, remove the plate.
Step 7. Chisel about 1.5mm deep or until strike plate sits ush with door frame.
• If you choose to use the strike box, you may need to chisel slightly deeper.
• During chiseling, it’s highly recommended to stop and check to see if the strike
plate sits ush in the doorframe over the strike box. If not, chisel a little more and
check again.
Be careful not to chisel too deep; otherwise, the lock may not function correctly after installation.
Step 8. Position the strike and strike box, then use a pencil to mark the center points of the screw openings in the strike plate.
Set the strike and strike box aside and drill two small holes at each center point.
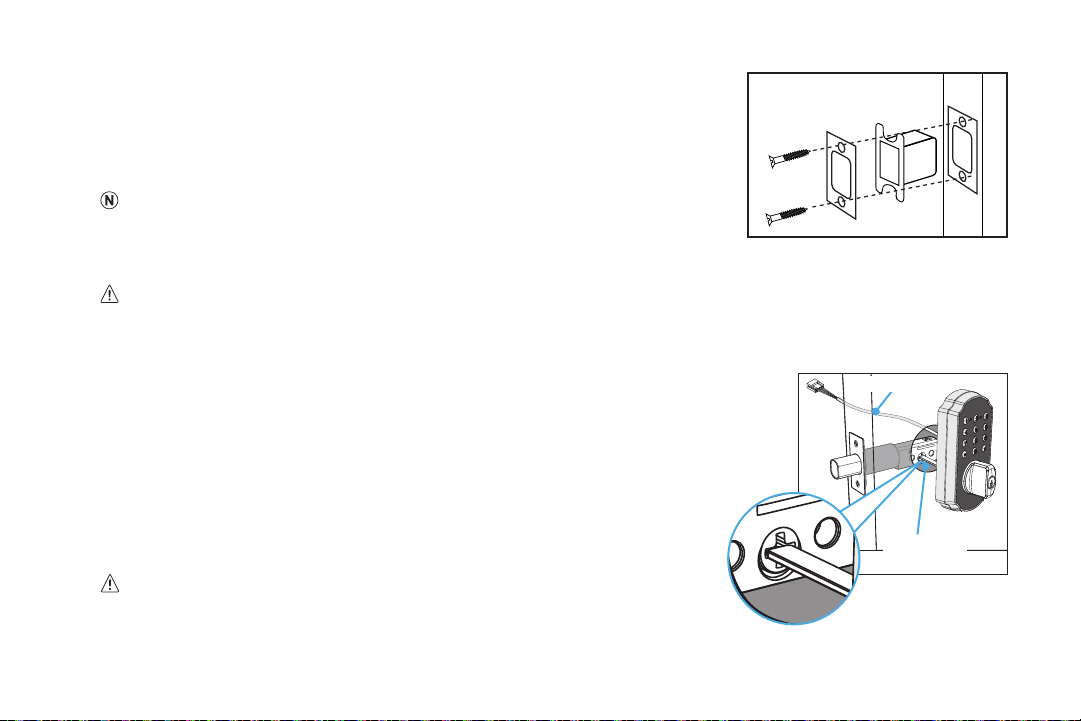
Step 9. Position the strike and strike box. Add the two remaining Wood Screws and use
a screwdriver (not included) to secure them (Fig. 20).
4.2 Main Installation
Step 1. Start with the outside section. Feed the power cable above the latch and thread
the latch pin through the square hole in latch. The latch pin must be horizontal
while inserting the square hole in latch (Fig. 6).
Do NOT force the cable’s connector end through any part of the lock.
Damaging the connector may make the lock unusable.
(Fig. 21)
Horizontal
Latch Pin
Fig. 6
Power Cable
Loading ...
Loading ...
Loading ...