Loading ...
Loading ...
Loading ...
14 TURBOLOCK TL115
Step 3. Insert the latch into the hole and check it. The latch’s plate should sit ush against the edge of the door (Fig. 3). If
there’s too much space behind the latch, or if it’s sticking out of the door, the latch should be adjusted. If the latch
needs adjusted, move to Step 4; otherwise, skip to Step 5.
Step 4. Hold the front of the latch and the square opening from both sides, pull or push to extend or retract the latch end as
needed (Fig. 4). Insert the latch back into the door.
Step 5. Check the latch’s bolt and make sure the rounded side faces in. Use the 2x Wood
Screws and a screwdriver (not included) to secure them (Fig. 5).
Part 4 - Creating a Mortise & Installing the Strike
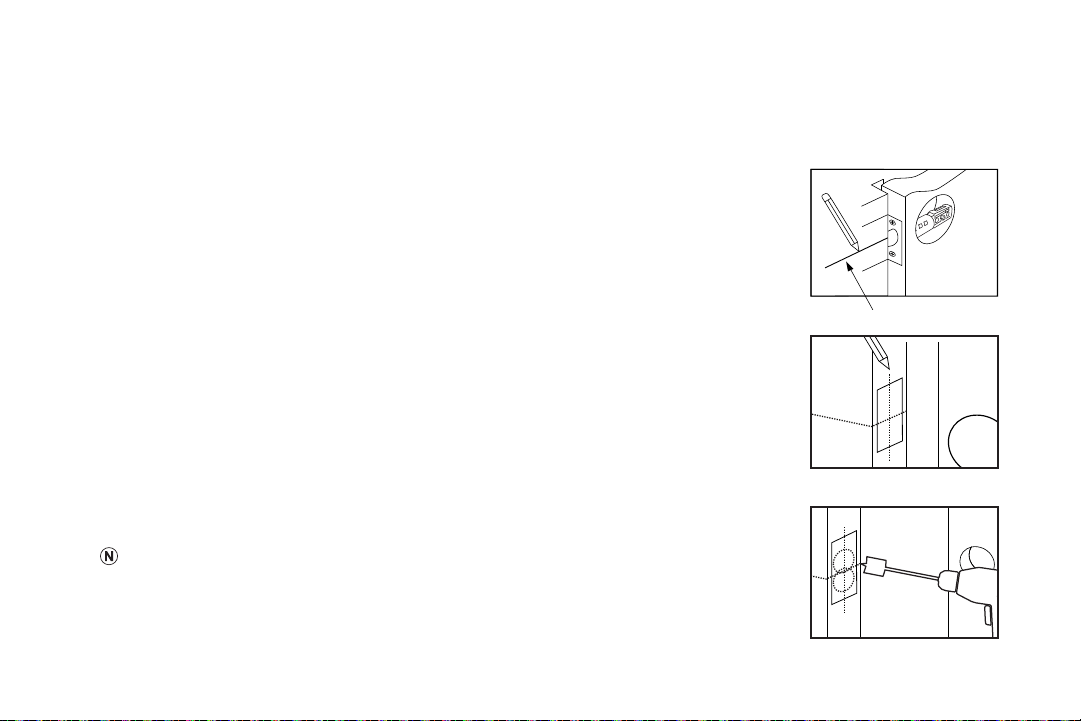
Step 1. Push the door until nearly closed and check where the latch’s bolt touches the frame.
Step 2. Use a pencil to mark the horizontal center of the latch on the door frame (Fig. 18).
Step 3. Open the door again and extend the line over the edge of the door and inside the
frame.
Step 4. Measure the inside of the frame. Determine and mark the halfway point. From this
point, use a ruler to draw a line straight down so that it intersects the existing line (Fig.
19).
Step 5. Use a 7/8” (22.2mm) spade bit and a drill to make two partially overlapping holes
about 0.6” (15mm) deep centered both above and below the center line. If needed,
use the chisel to make the hollow (aka “mortise”) more square. If you choose to use
the strike box, you may need to chisel slightly deeper (Fig. 20).
If using a spade bit, do not drill at high speeds as this may tear out extra wood and/or
damage the door or doorframe.
2
3
/
4
”
2
3
/
8
”
(Fig. 18)
(Fig. 19)
(Fig. 20)
Loading ...
Loading ...
Loading ...