Loading ...
Loading ...
Loading ...
(Fig. 17)
(Fig. 16)
TURBOLOCK TL115 13
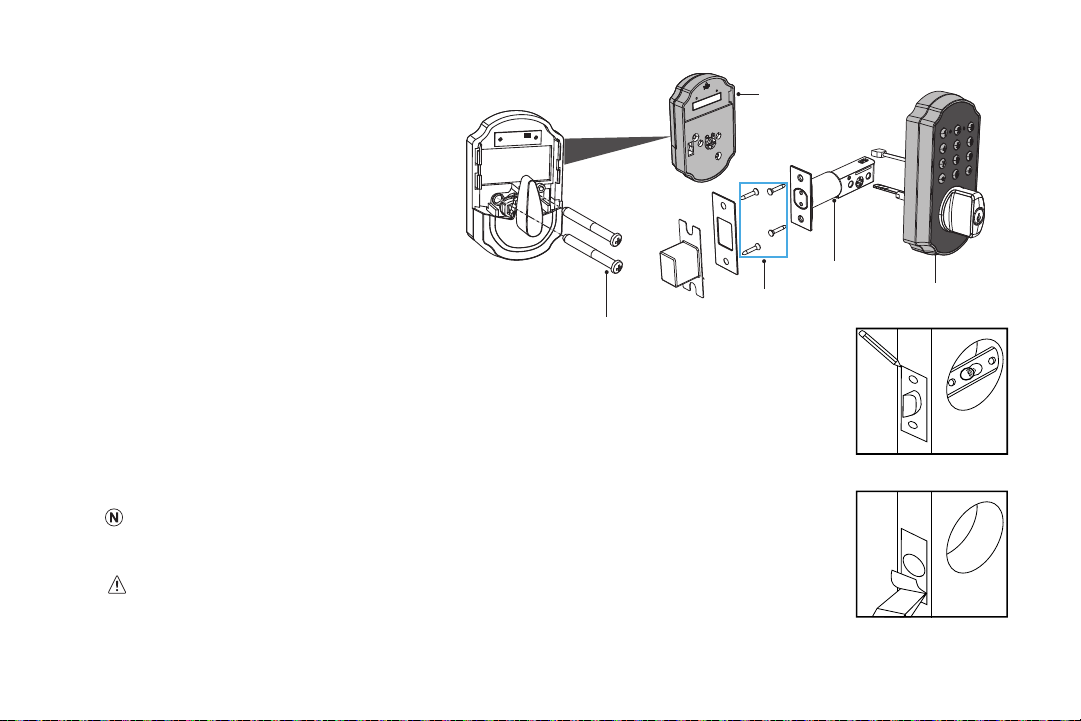
Part 2 - Disassemble the Lock
The lock is pre-assembled upon arrival. Before
installation, loosen the wood screws and
mounting screws to separate the lock into three
main parts:
Outside Assembly x 1
Inside Assembly x 1
Latch Assembly x 1
Part 3 - Installing the Latch
Step 1. Insert the latch into the hole. Using a pencil, mark a line around edge of latch plate to use as
a guide. After marking at all four sides of the plate, remove the latch (Fig. 16).
Step 2. Chisel about 3mm (0.1”) deep or until latch plate sits ush with door edge (Fig. 17).
During chiseling, it’s highly recommended to stop and reinsert the latch every once in a while to
see if it sits ush. If not, chisel a little more and check again.
Be careful not to chisel too deep; otherwise, the lock may not function correctly after installation.
Wood Screws
Mounting Screws
Inside Assembly
Outside Assembly
Latch Assembly
Loading ...
Loading ...
Loading ...