Loading ...
Loading ...
Loading ...
802258UK G4 Boiling (& ambient) residential, user guide - August 2015 - V2.01 Page 13 of 24
C. Install
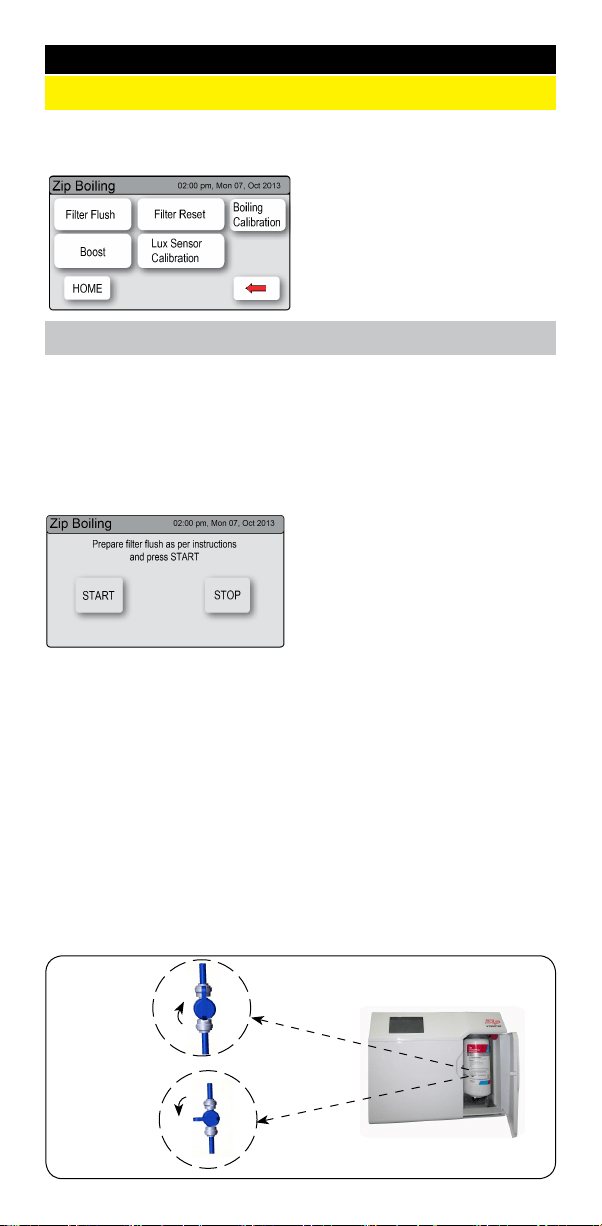
1. Filter ush
Sub menu
1. - Filter flush.
2. - Filter reset.
3. - Boiling calibration.
4. - Booster.
5. - Lux sensor calibration.
LCD Screen operation - Section C
OPEN
Position
CLOSED
Position
ON
OFF
Once your Zip HydroTap
®
G4 unit has been installed, Go to the install menu to
configure the system settings for your product.
Have a bucket or similar container (not supplied) at the ready to hold a
quantity of water that will be ejected while the filter flush mode is in operation.
Open the filter access door on the front of the HydroTap
®
G4 and the filter
cartridge will be exposed. Located to the rear right hand side of the cartridge
is a flush line, approx 600mm long and the flush line stop cock. Place the
free end of the flush line into the bucket or container (not supplied).
• Press [MENU] button for main
menu.
• Press the [Install] button. Turn the
stop cock on.
• Press the [Filter Flush] button.
• Press [START] button to start
filter flush. Once the filter flush
is finished, turn the stop cock off
first (ensure the cock is properly
closed) then press [STOP] to end
filter flush mode.
• Press [<=] button for the previous
menu or press [HOME] button to
return to the home screen.
• After initial installation,turning
off the filter flush mode puts the
HydroTap
®
G4 into calibration
mode. With subsequent filter
changes, the system reverts to
the main menu.
Note:
Run at least 10 Litres
of water through to flush the
filter of any excess black carbon
particles (this is normal). Once
the filter flush has finished,
press the [STOP] button to
display the main menu
Loading ...
Loading ...
Loading ...