Loading ...
Loading ...
Loading ...
N1X Owner’s Manual •45
Assembling the Unit
When assembling the unit, consult a qualified AvantGrand dealer.
CAUTION
• Be careful not to confuse parts, and be sure to install all
parts in the correct direction. Please assemble the unit in
the appropriate sequence.
• Since this product is very heavy, make sure that a suffi-
cient number of people are on hand to help, so you can
assemble it safely and easily.
• Be sure to use only the included screws. Do not use any
other screws. Inappropriate screws may cause damage or
malfunction of the product. Be sure to insert screws of the
proper size in the correct hole locations.
• Be sure to tighten all screws upon completing assembly of
each unit.
• To disassemble, reverse the assembly sequence.
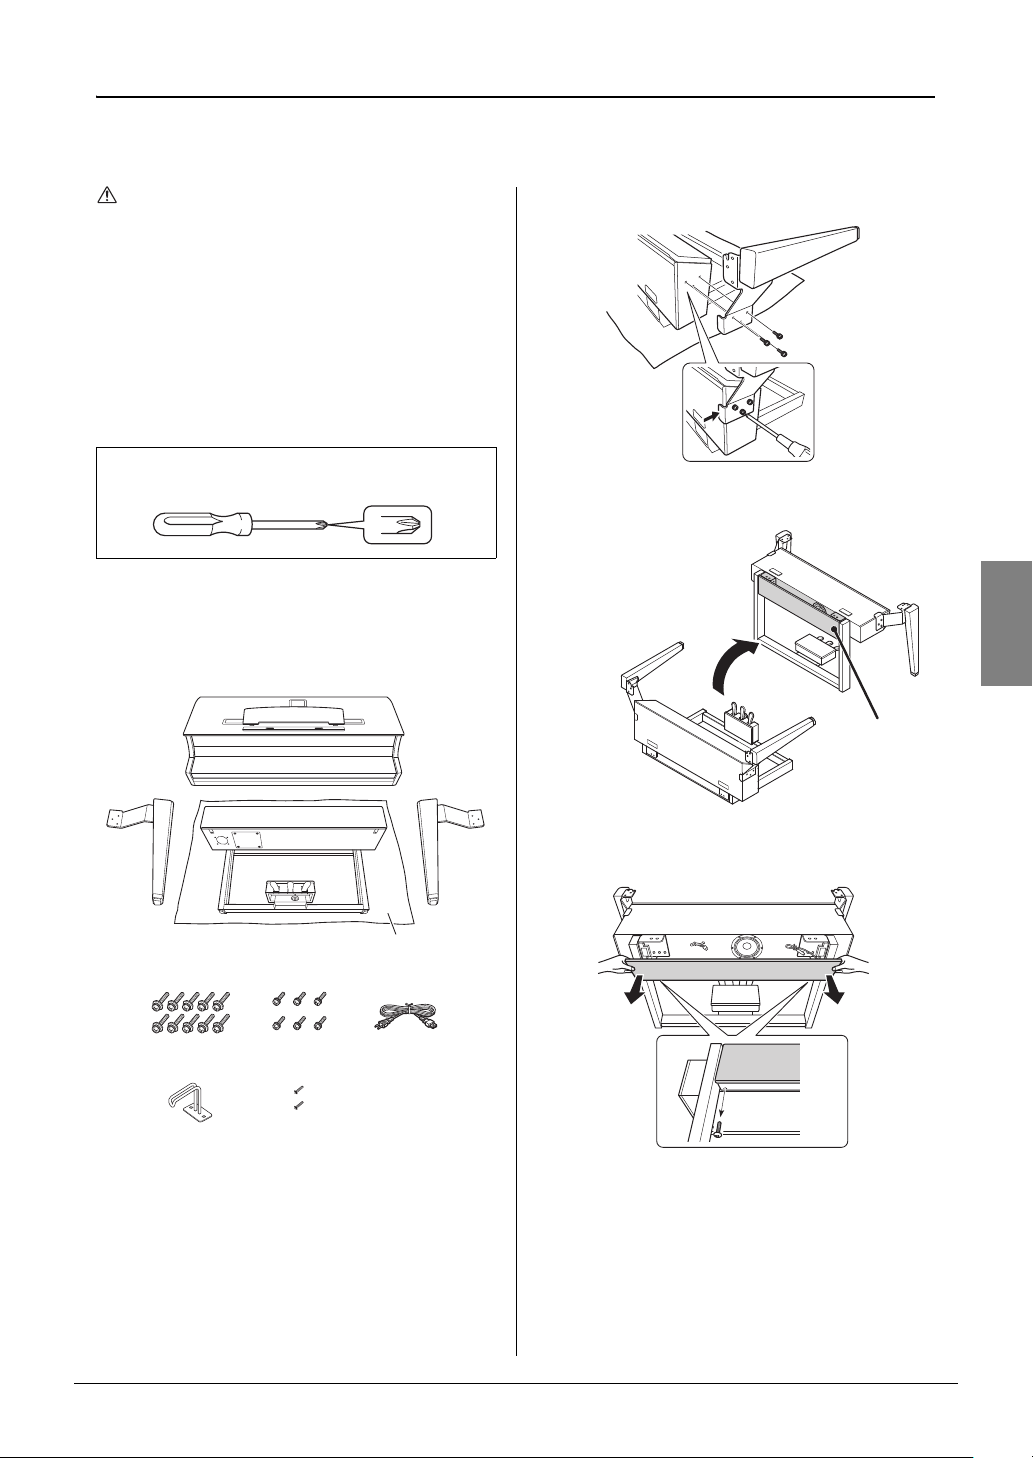
Remove all parts other than the main unit from the box.
Confirm that all parts shown in the illustration are pro-
vided. Do not remove the main unit from the box prior
to step 3.
1 Attach the legs to the speaker box.
1-1 Attach the leg (L) to the side of the speaker
box using three short screws (6 x 20 mm).
1-2 While pressing the bracket on the leg against
the speaker box, securely tighten the screws
that were attached.
1-3 Follow the same steps to attach the leg (R).
1-4 Raise the speaker box.
2 Detach the speaker net.
2-1 Remove the two screws. These screws are used
in step 6.
2-2 Detach the speaker net.
Have a Phillips-head (+) screwdriver of the appropriate
size ready.
Main Unit
Leg (L) Leg (R)
Speaker box
Be sure to lay the packaging sheet
or other protective sheet on the
floor and under the instrument.
6 × 30 mm
long screws × 10
6 × 20 mm
short screws × 6
AC power cord × 1
Headphone
hanger
4 × 10 mm
thin screws × 2
1-1
1-2
Do not hold here.
2-2
2-1
n1x_en_om.book Page 45 Friday, October 19, 2018 6:01 PM
Loading ...
Loading ...
Loading ...