Loading ...
Loading ...
Loading ...
13
12
OPERATING INSTRUCTIONS
LED SCREEN VISIBILITY
When the oven is plugged into a wall outlet, the oven alert will sound one time.
The LED screen will illuminate for two minutes and then go dark if no further action
is taken to input a cooking cycle. To "wake up" the screen, lightly press any control
button or slightly turn either control dial. The oven alert will sound, and the screen
will relight for 2 minutes and then go dark again in the absence of further input.
When a control button function is operational, the button words will light up.
When the button words are dark, the button function is not in effect.
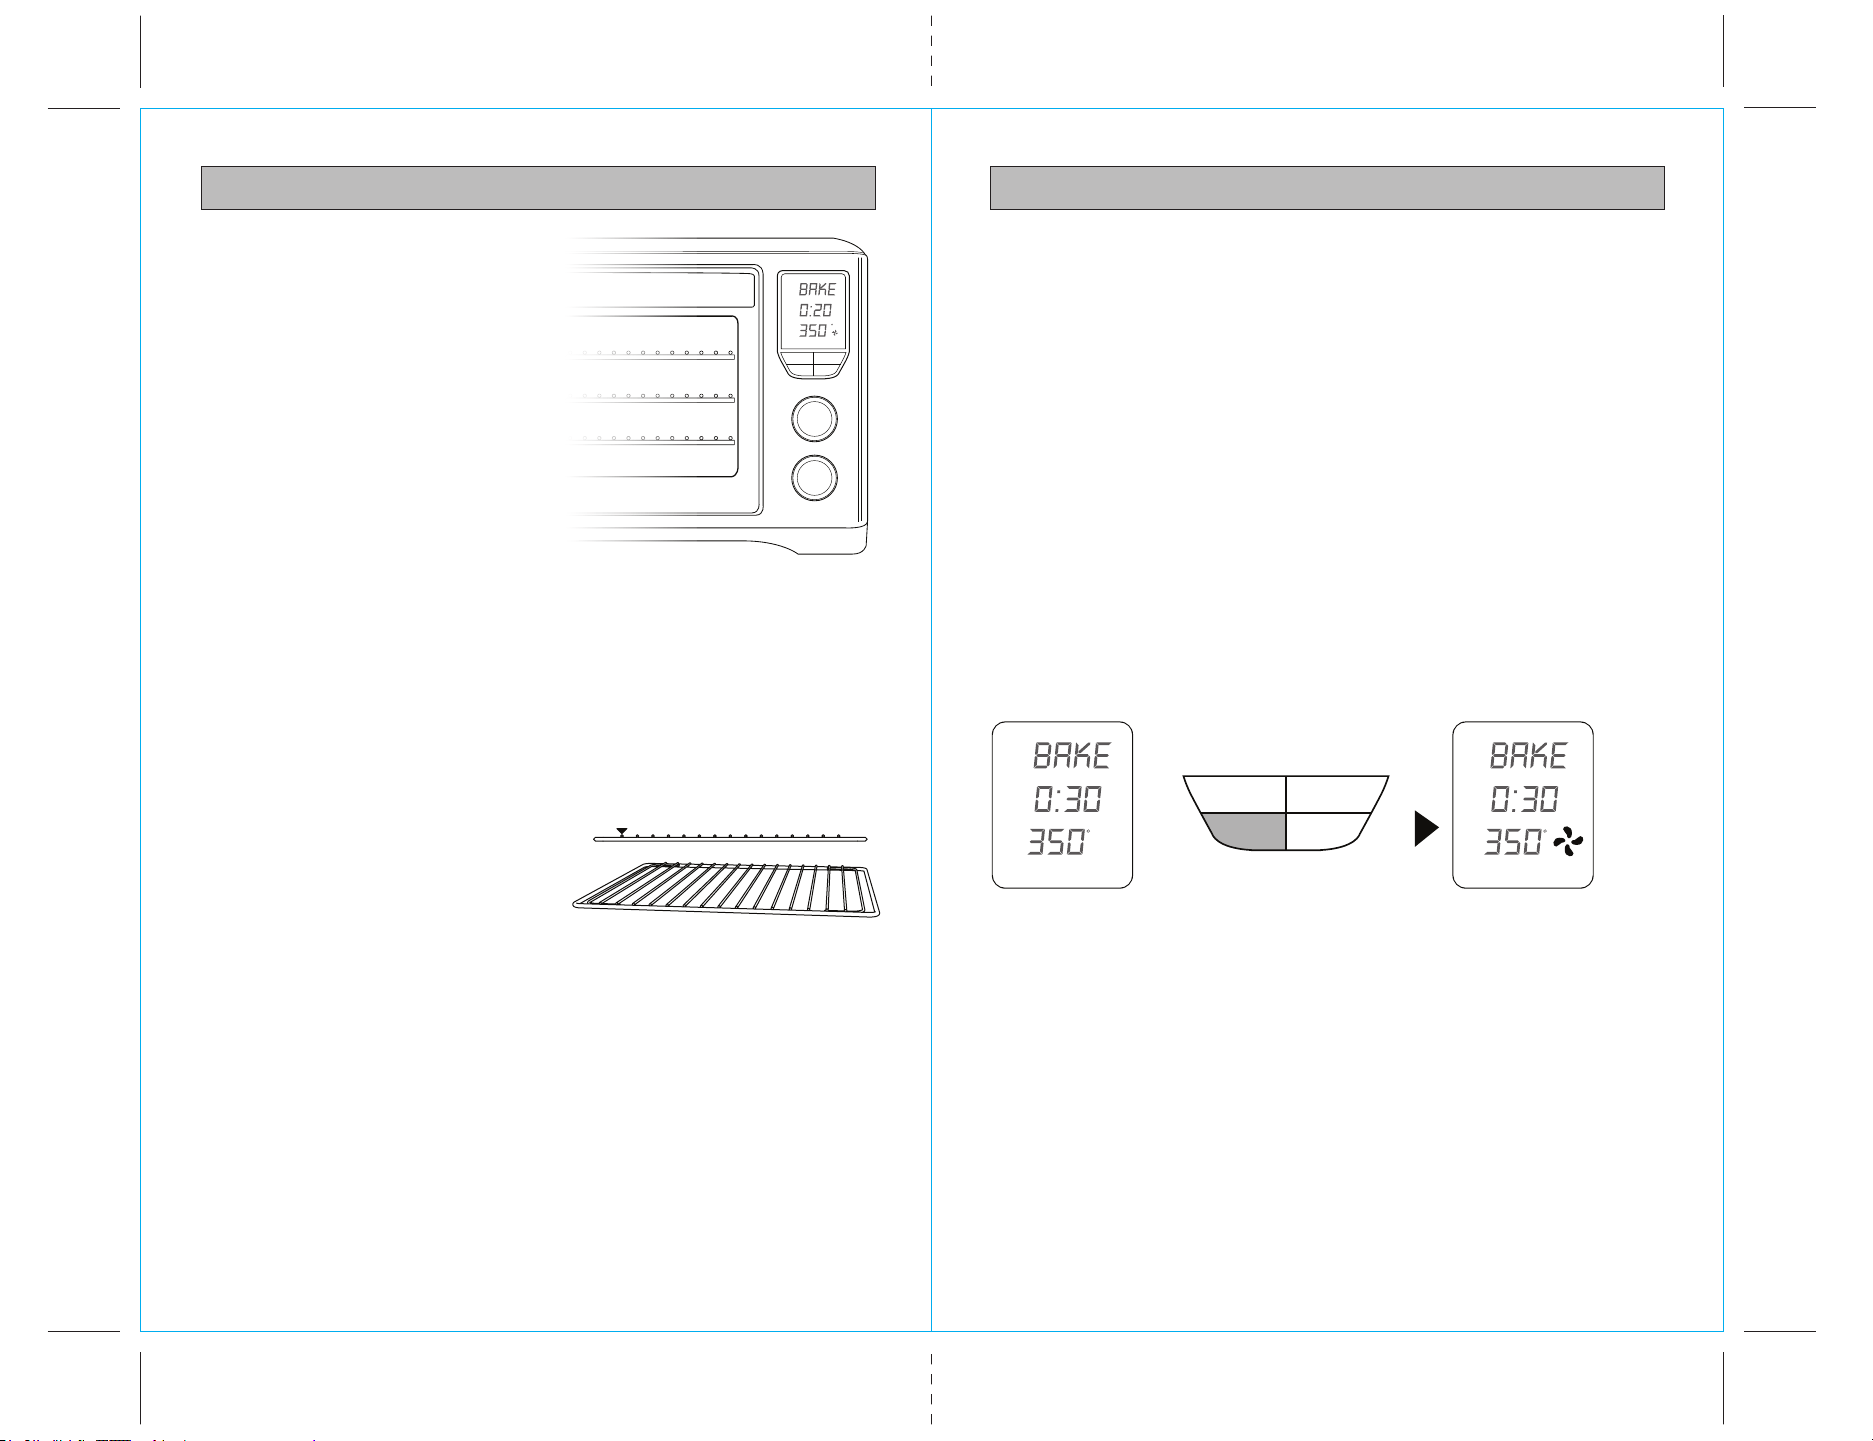
CONVECTION COOKING
Convection cooking is the default setting in the BAKE and PIZZA cooking functions.
The setting can be deselected by pressing the Convec control button, or reselected
by pressing Convec a second time.
Although Convection is not the WARM default setting, it can be selected by
pressing the Convec control button. The fan symbol displays on the LED screen
whenever Convection heating is in effect.
NOTE: When a control button function is operational, the button words will light
up. When the button words are dark, the button function is not in effect.
Convection cooking can reduce cooking times. We recommend experimenting
with the convection, temperature and time settings to produce the desired results.
For optimum results:
• Use oven-safe baking dishes, roasting pans, pizza pans or cookie sheets with
very low sides, and place on the center of the wire rack to allow for maximum
airflow around food.
• Also to maximize airflow do not cover foods with metal foil or lids.
• Most recipes recommend reducing temperatures by 25˚F when using convection
cooking. Always check the food 10 minutes before the suggested cooking time is
complete to avoid overcooking.
OPERATING INSTRUCTIONS
RACK HEIGHT POSITIONS
Cooking results are significantly affected
by the position of the wire rack as this
determines how close the food is to the
heating elements. The recommended
rack position for each cooking function
is printed on the right hand side of the
oven door glass window. However, these
are a guide only. Certain foods may
require a different rack height position
depending on the recipe, the amount
and size of the food and your
personal taste.
TOP RACK HEIGHT POSITION: BROIL function.
MIDDLE RACK HEIGHT POSITION: TOAST, BAGEL, and PIZZA functions.
BOTTOM RACK HEIGHT POSITION: BAKE and WARM functions.
For optimum cooking results:
• The recommended rack height position
should be used. However this is a guide
only. The position of the rack may vary
depending on the type and size of food
item being cooked.
• The wire rack should always be inserted
into the rack height position with the
spokes facing upwards.
• Food should be positioned on the
center of the wire rack, broil rack,
baking tray or pizza tray to allow for
maximum airflow around food.
NOTE: When the oven is plugged into a wall outlet, the oven alert will sound one
time. The LED screen will illuminate for two minutes and then go out if no further
action is taken. To "wake up" the screen, lightly press any control button or slightly
turn either control dial. The oven alert will sound, and the screen will relight for
2 minutes and then go dark again in the absence of further input.
NOTE: When a control button function is operational, the button words will light
up. When the button words are dark, the button function is not in effect.
CONVECTION ‘ON’CONVECTION ‘OFF’
Time/Temp
Convection
Function
Mode
Temp
Time
Start/Stop
Slice/Darkness
TOP
MIDDLE
BOTTOM
Time/Temp
Convection Start/Stop
Slice/Darkness
Min
Time
Temp
Hr
F
Sli ce Shad e
Min
Time
Temp
F
Min
Time
Temp
F
Fig. 7
Fig. 8
Fig. 9
Loading ...
Loading ...
Loading ...