Loading ...
Loading ...
Loading ...
English 9
Installing the hob
WARNING
Pay attention (conformity) to phase and neutral allocation of house connection and
appliance (connection schemes); otherwise, components can be damaged.
Warranty does not cover damage resulting from improper installation.
WARNING
If the supply cord is damaged, it must be replaced by the manufacturer, its service
agent or similarly qualied persons in order to avoid a hazard.
01
02
03
04 06
05
L N
1N
~
(32A)
01 220-240 V
~
04 Blue
02 Brown 05 Gray
03 Black 06 Green/Yellow
01
02
03
04
05
07
06
L1 L2 N
2N
~
(16A): Separate the 2-phase wires
(L1 and L2) before connection.
01 220-240 V
~
05 Blue
02 380-415 V
~
06 Gray
03 Brown 07 Green/Yellow
04 Black
01 04
02
03
05
06
07
L1 N1 L2 N2
2 x 1N
~
(16A): Separate the wires before
connection.
01 220-240 V
~
05 Black
02 Brown 06 Gray
03 Blue 07 Green/Yellow
04 220-240 V
~
WARNING
For correct supply connection, follow the wiring diagram attached near the terminals.
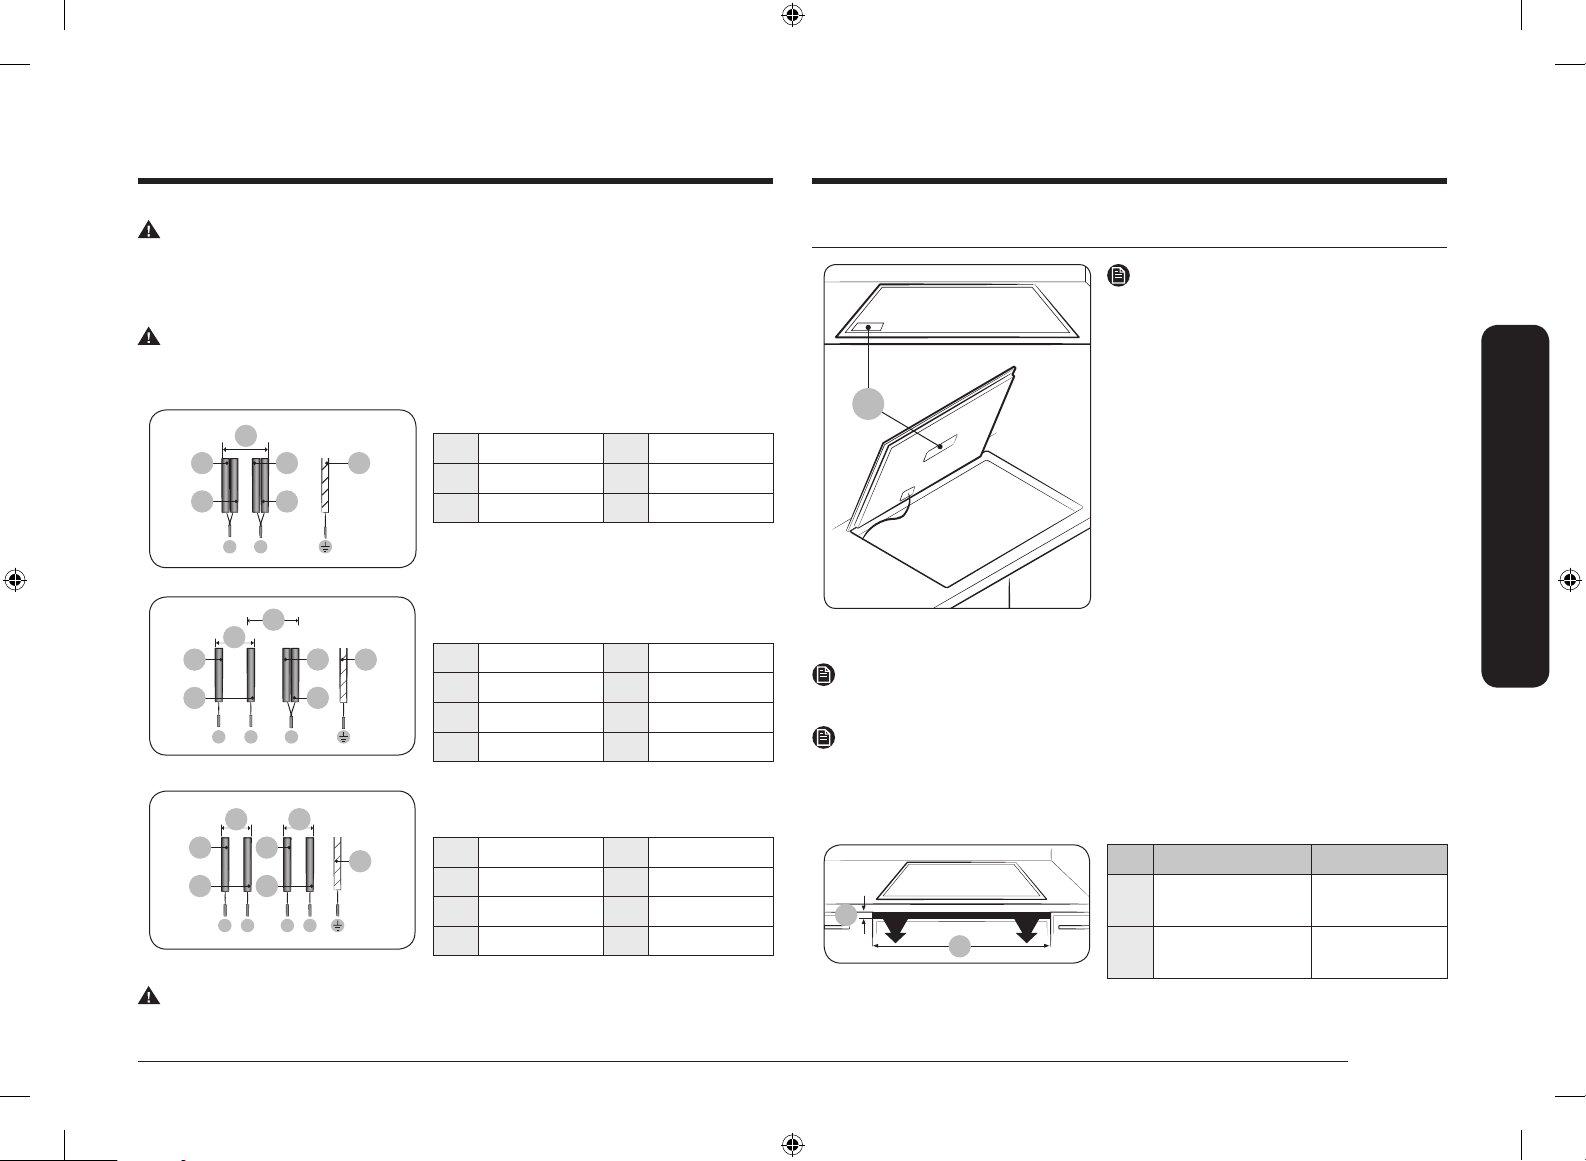
Installing into the countertop
A
A. Serial number
NOTE
Make a note of the serial number on the
appliance rating label prior to installation.
This number will be required in the case
of requests for service and is no longer
accessible after installation, as it is on the
original rating plate on the upperside or
underside of the appliance.
NOTE
Pay special attention to the minimum space and clearance requirements.
NOTE
The bottom of the hob is equipped with a fan. If there is a drawer under the hob
it should not be used to store small objects or paper, since they could damage the
fan or interfere with the cooling if they are sucked into it.
01
02
No. Explanation Size
01 Height of
ventilation hole
Min 2 mm
02 Width of
ventilation hole
560 mm
NZ6000K NZ64N9777_NZ64N7777_DG68-01073A-00_EN+FI+NO+DA+SV.indb 9 2/19/2018 12:02:13 PM
Loading ...
Loading ...
Loading ...