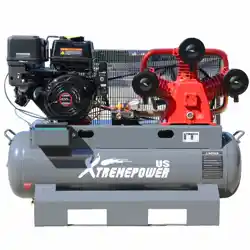
AIR CO
MPRESSOR 13HP 30GAL
ITE
M # 65150

SPECIFICATIONS
Tank capacity 30GAL W/One Couplers & One Gauges
Always wear approved protective eye wear. when using
tools. Read and observe all safety rules included in your
tool owner's manual.
Displacement
900
L
@900rpm Working
Pressure :9 BAR Oil
Lubrication
For Long
Life
Belt Drive Compressor Pump Engine
power
• Do not remove, make adjustments or substitutions for this valve.
• Occasionally pull the ring on the valve to make sure that the valve operates freely. If the valve does not operate freely, it
must be replaced. Never weld to, drill into, or change the air receiver in any way.
• If any of the above conditions are changed or tampered with this will result in voiding of the manufacturer's warranty. Be
advised that any replacement parts should be purchased with the same specification as the original equipment. Please
contact your authorized dealer for replacement parts or specifications.
• Do not smoke while operating the air compressor. To avoid the ignition of a fire or explosion, never spray where sparks or flame
is present.
• Keep the compressor away from children and those who are unfamiliar with the unit operation.
Compressed air from
the
unit may contain carbon monoxide. Air produced is not suitable for breathing purposes.
• Always use a respirator when spraying paint or chemicals.
• Always wear safety glasses or goggles when spraying air.
INSTALLATION AND OPERATING INSTRUCTIONS
General information
Depending on the C.F.M. draw of the tools being operated, your new air compressor can be used for operating paint sprayers,
air tools, grease guns, airbrushes, caulking guns, sandblasters, inflating tires and plastic toys, etc. An air pressure regulator is
usually necessary for most of these applications.
General description of operation
To compress air, the pistons move up down in the cylinder, On the down stroke, air is drawn in though the valve inlet. The
discharge valve remains closed, On the upstroke of the piston, air is compressed. The inlet valve closes and compressed air is
forced out through the discharge valve, through the check valve and into air receiver. Working air is not available until the
compressor has raised the air receiver pressure above that required at the air service connection. The air inlet filter openings
must be kept clear of obstructions, which could reduce air delivery of the compressor.
Installation and location
Locate the compressor in a clean, dry and well-ventilated area, The compressor should be located 12 to 18 inches from a wall or
any other obstruction that would interfere with the air flow through the fan blade belt wheel. Place the compressor on a firm level
surface. The compressor is designed with heat dissipation fins that allow for proper cooling. Keep the fins and other parts that
collect dust or dirt clean. A clean compressor runs cooler and provides longer service, Do not place rags, containers, or other
material on top of the compressor.
• Air compressors get hot while in operation. Never touch the engine, discharge tubing, or compressor pump while in operation.
• The compressor operates automatically while starting.
SAFETY PRECAUTIONS (Read all instructions before using this product)
Please familiarize yourself with the following information to prevent damage to your compressor and injury to the operator,
property or even
death.
TANK SAFETY VALVE
This valve is factory installed to prevent the air receiver from damage, should a malfunction occur in the compressor pump. It
is factory set at a specific limit for your particular model. Adjustments should never be tampered with.
COMPRESSOR PUMP
COMPRESSED AIR CAUTION
AIR RECEIVER
Over pressurizing the air receiver could cause an explosion or rupture. To protect from over pressurizing a factory preset safety
value is included.
1

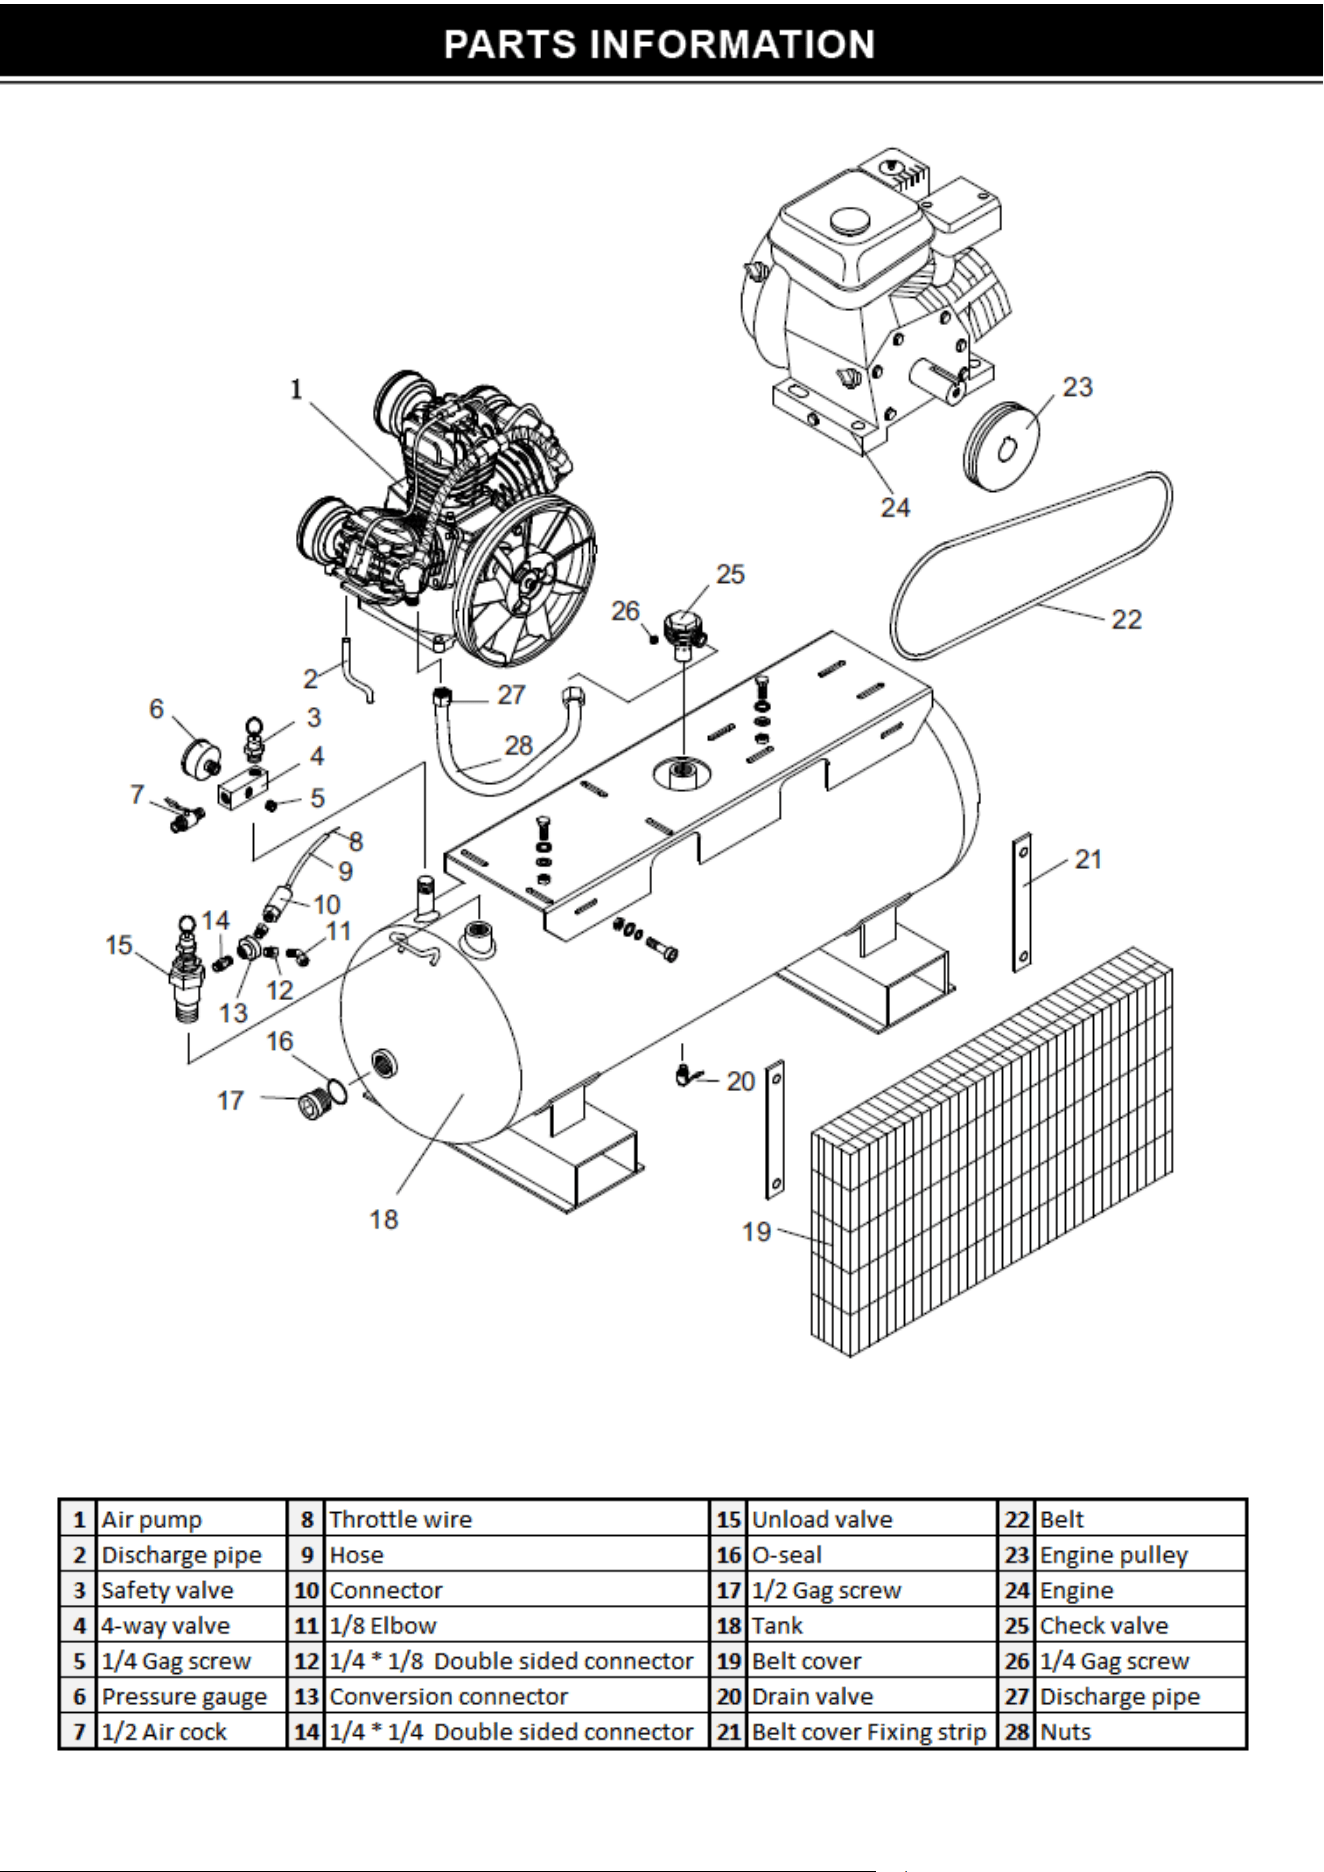
ASSEMBLY
1. Remove air filter from plastic
bag
and
screw
it into
the thread hole. Be sure to always clean air filter before and after each use.
2. Put wheel and rubber
foot
on
setting.
3. Put handle on. (TB-5570P
and TB-5570D type)
COMPRESSOR LUBRICATION
NOTE: Check the oil quantity and quality before operating the compressor. Do not add or change oil while the compressor is in operation.
Use only SAE20 or SAE30 lubricating oil, non-hydraulic.
STARTING THE COMPRESSOR
COMPRESSOR WITH OIL SIGHT GLASS
1. Locate the compressor on a flat, level surface. The oil level should be at the red dot on the oil level sight glass.
2. If the oil level is low, remove the oil fill plug and add enough oil to bring the level up to the red dot in the sight glass.
3. Replace the oil fill plug before starting the compressor.
DRAINING THE OIL
1. Remove the oil drain plug. Allow the oil to drain completely.
2. Replace the oil drain plug. (A sealing compound or Teflon tape is recommended to avoid leakage).
3. Refill with the specified oil to the red dot in the oil level sight glass.
1. Make sure the amount of oil is adequate before each use.
2. Check that all nuts and screws are tightened.
3. Make sure all pressure and water is released from the tank before use.
4. Connect the air tool and start the compressor to begin use. Be sure to check the manufacturer's maximum pressure rating for air tools
and accessories. The compressor outlet must be regulated to never exceed the maximum pressure rating of the tool.
5. Use the regulator knob to control the amount of air pressure for the attached air tool. Turn the knob clockwise to increase the air pressure
and counter-clockwise to reduce air pressure.
6. To enable the best air pressure release and avoid air leakage. Use Teflon tape to wrap around the hose and coupler thread.
AIR RELEASE
1. Turn the engine switch off after each use.
2. Open the drain valve underneath the tank and release all air and moisture from the tank.
3. The pressure gauge should now fall back to 0 PSI or 0 Bar status.
4. Release all the air from the attached air tool, then disconnect the hose from the quick coupler.
MAINTENANCE
Turn off the engine and drain the air tank of any pressure before performing any maintenance of adjustments to your air compressor, the
following safety precautions should be taken.
BEFORE EACH USE PERFORM THE FOLLOWING
1. Check the oil level, make sure it sits with the red dot on the sight glass.
2. Drain condensation from the air tank.
3. Check for any unusual noise or vibration.
4. Be sure all nuts and bolts are tight.
WEEKLY MAINTENANCE
1. Clean the air filter by opening the air filter cap. Remove the filter element and clean thoroughly with low pressure air. Clear out any debris.
2. Clean the breather holes on the oil check dipstick.
MONTHLY MAINTENANCE
1. Inspect the air system for leaks by applying soapy water to all joints. Tighten those joints if leakage is present.
250 HOURS OR 6 MONTHS (WHICHEVER COMES FIRST)
1. Change the compressor oil.
2. Replace the oil more often if the compressor is used near paint spraying operations or in dusty environments.
2
3
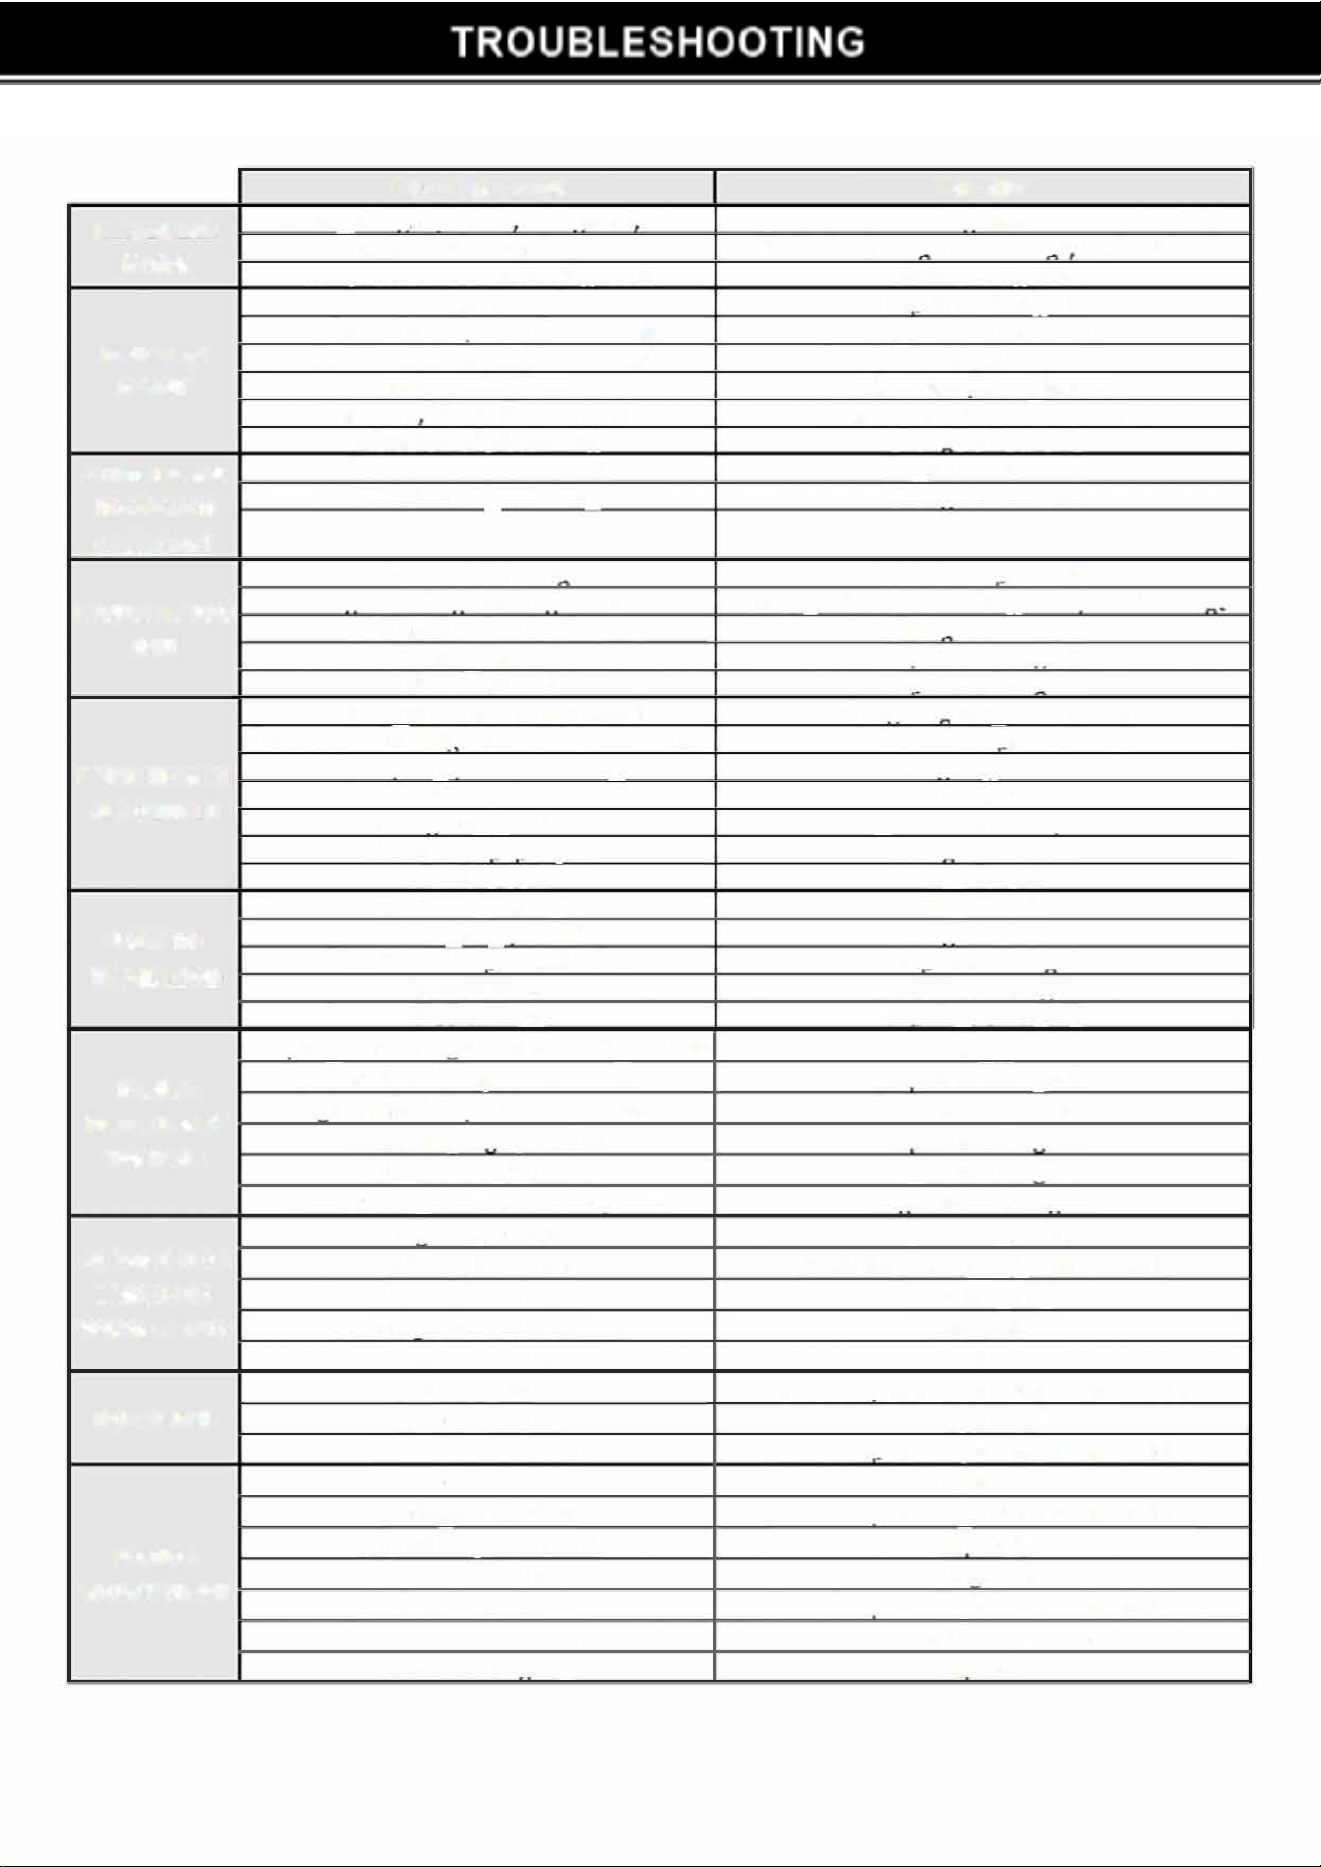
POSSIBLE CAUSE
REMEDY
IRREGUR
Loose oullev. flvwheel belt uard etc. Tihten
NOISE
L
ack of oil in crankcase
Check for dama"e to bearins renlenish oil
Comnressor floor mountino loose
Shim and tlohten
Valve sheet
reoair or chan"e It
Malfunction to sorln of valve base
Reolace with new one
PRESSURE
Carbon or oil on the valve sheet
clean it
ISSUES
Safe va
l
ve leak Clean and/or reolace it
Air valve blow off valve leak Lock them tihtlv or reolace it
Abrasion of niston rina
Chanue a new one
CONSUMING
Too much oil in the tank
Reaulate oil levels
TOO MUCH
Abrasion of oiston rin Chan2e a new one
LUBRICANT
Piston cylinder abrasion Change a new one
Pressure is too hih Use lower nressure
MOTOR IS TOO
Hiher voltae or Ioner wire
Remedv
with correct voltae and/or wire lenath
HOT
Malfunction to air valve
Chane a new one
Bearin burned
reoair or chane it
Piston burned reoair or chan"e it
lr Reau ired more than rated chane biuoer oower motor
Outout nressure hh>her than rated nressure Adlust the oressure
REDUCTION IN
Air In out oloe small or lon
e
chane rleht ones
AIR OUTPUT
Filter lam
clean it
Valve rouo oroblems
olease sent to reoair
Abrasion of naner nad
chan"e new ones
Flexible belt
reuulate it
movable oiston nin reaulate it
FAILS TO
Air Outout oioe leak chane new ones
DISPEL LOAD
Abrasion of disoel load valve
reoair or chanae
Disoel lam-
clean or chane
Pi
ston block
reoair
or chana it
Cutout oressure hiher than rated oressure ower usine. oressure
HIGHER
Abrasion of disoel load valve
reoair or chane it
PRESSURE IN
hiher rated disoels load oressure
lower rated oressure
Pressure aue oroblem
reoair or chane it
THE TANK
Disoel load oioe leak
reoair or chane it
Lower rated oressure on safetv valve
Reulate or chane it
Hiher oressure
Adiust the oressure
ABRASION OR
hotter valve base
check air-delive pipe and clean it
BREACH OF
flexible valve base lock it ti2htlv
VALVE GROUP
Oischare in the valve base
clean it
Breach of valve sheet
Reolace with a new one
Power cut
Have it repaired bv a licensed technician
NO SOUND
Wire or fuse cut
Reolace it
Motor malfunction Have It reoalred bv a licensed technician
Wire or fuse cut
Reolace It
Voltae reduction Have it repaired bv a licensed technician
MOTOR
Air deliverv valve leak
reoair it
WON'T START
Wirin error
chane wire
Malfunction of motor Have it reoaired bv a licensed technician
Overload on motor
reduce load on motor
Crankshaft tihtlv
reoair it
4
5
