

2.4 GHz Wi-Fi Connection FAQ
Veise Indoor Pan-Tilt Camera VC20Y1
Click a topic to jump to the FAQ section:
-Q1: How do I connect my camera if my router’s 2.4 GHz Wi-Fi
is disabled or hidden?
-Q2: How do I switch my Wi-Fi from 5 GHz to 2.4 GHz?
-Q3: What can I try if my camera cannot connect to 2.4 GHz
Wi-Fi?
🤩
Hi! If you need further assistance, we're here for you!
📞
Call us: 1(855)400-3853 (Mon–Fri, 9:00 AM–5:00 PM PST)
✉
Email us: [email protected]

Q1: How do I connect my camera if my router’s 2.4GHz
WiFi is disabled or hidden?
A: 1) Check your available networks:
● Open the Wi-Fi menu on your phone or computer.
● Look for multiple networks with similar names, e.g., "home_wifi",
"home_wifi_5G", "home_wifi_2.4G".
● Choose the network labeled 2.4G or the one without any suffix.
● Do not select networks with 5G or 5GHz in the name.
2) If multiple networks are not visible:
● For Android phones – Check the frequency band:
● Connect your Android phone to the Wi-Fi network.
● Go to Settings → Wi-Fi → Select the connected network.
● Note: The exact path may vary depending on your phone model.
● Look at the Frequency or Band information to confirm whether it is
2.4GHz or 5GHz.
Q2: How do I switch my Wi-Fi from 5 GHz to 2.4 GHz?
A: Step 1: Prepare your router's IP address. You need this to access your
router's settings. If you already know it, skip Step 3.
Step 2: Find your router’s IP (if needed, per your OS)
1. On Windows: Press Win + R, type cmd and press Enter> type ipconfig
and press Enter> Find the line labeled Default Gateway, that’s your
router's IP address(something like 192.168.0.1)
2. On Mac: Go to Apple menu > System Preferences > Network> Select
your active connection(Wi-Fi or Ethernet)> Click Advanced> go to the
TCP/IP tab> Find the Router address, that’s your router's IP.
Step 3: Open a browser and type your router’s IP address into the address bar
(e.g., http://192.168.0.1), then press Enter.
Step 4: Log in with your router’s username and password (default is usually on
the router label or in the manual if not changed).
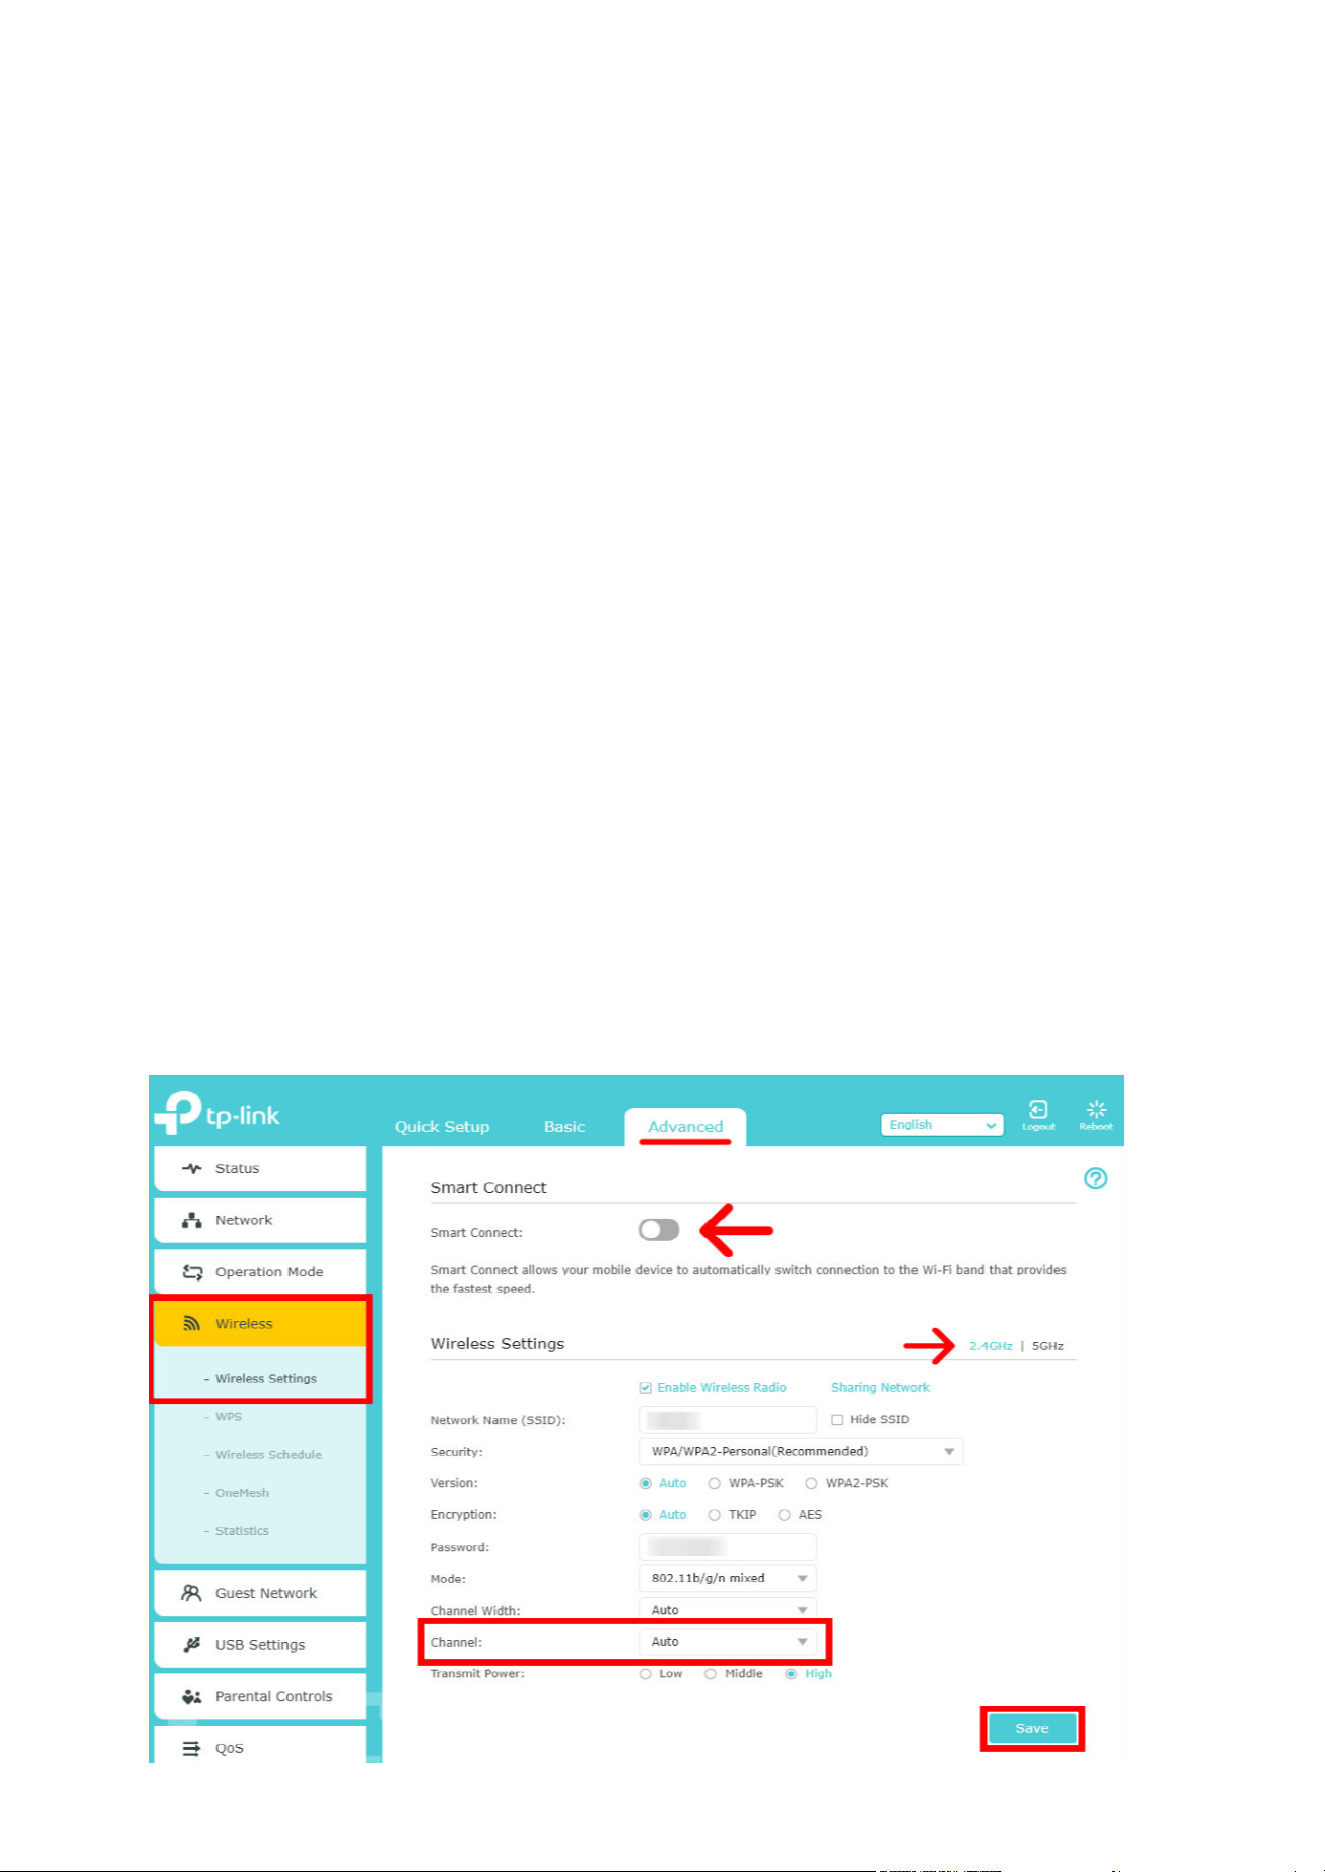
Step 5: Go to wireless settings, find the channel option, select 2.4GHz, and
make sure it’s enabled and broadcasting (see example below).

Q3: What can I try if my camera cannot connect to 2.4 GHz
Wi-Fi?
A:
1. Wi-Fi Password: Make sure the password is entered correctly—check
capitalization and special characters (e.g., *@$#!).
2. Network Settings: Your Wi-Fi network must be:2.4GHz (not hidden)Secured
with WPA or WPA2.
3. Camera Placement: Ensure the camera is not too close to or too far from
the router. A few feet of distance is recommended.
4. Router Settings: High firewall security or parental controls may block new
devices, temporarily disable them during setup (see your router manual for
instructions).
5. Confirm the app has Local Network permission enabled.
