
User Manual
TS21 GNSS Receiver
TS21 for AR Staking
Version 1.0
TS21 User Manual
1
!
Note: Please check each item according to the item list first to
confirm that all the accessories are correct for the purchased
kit.
Install the radio antenna before switching the radio
transceiver to transmit mode, or the radio transceiver may be
damaged due to overheating. The energy to be transmitted
cannot be emitted out without the antenna, which may cause
the temperature rise and overheat of the radio module.
This Quick Start Guide introduces how to start using TS21 GNSS
Receiver quickly, the detailed introduction and operations of TS21
refer to User Manual for TS21 GNSS Receiver.
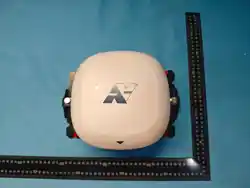
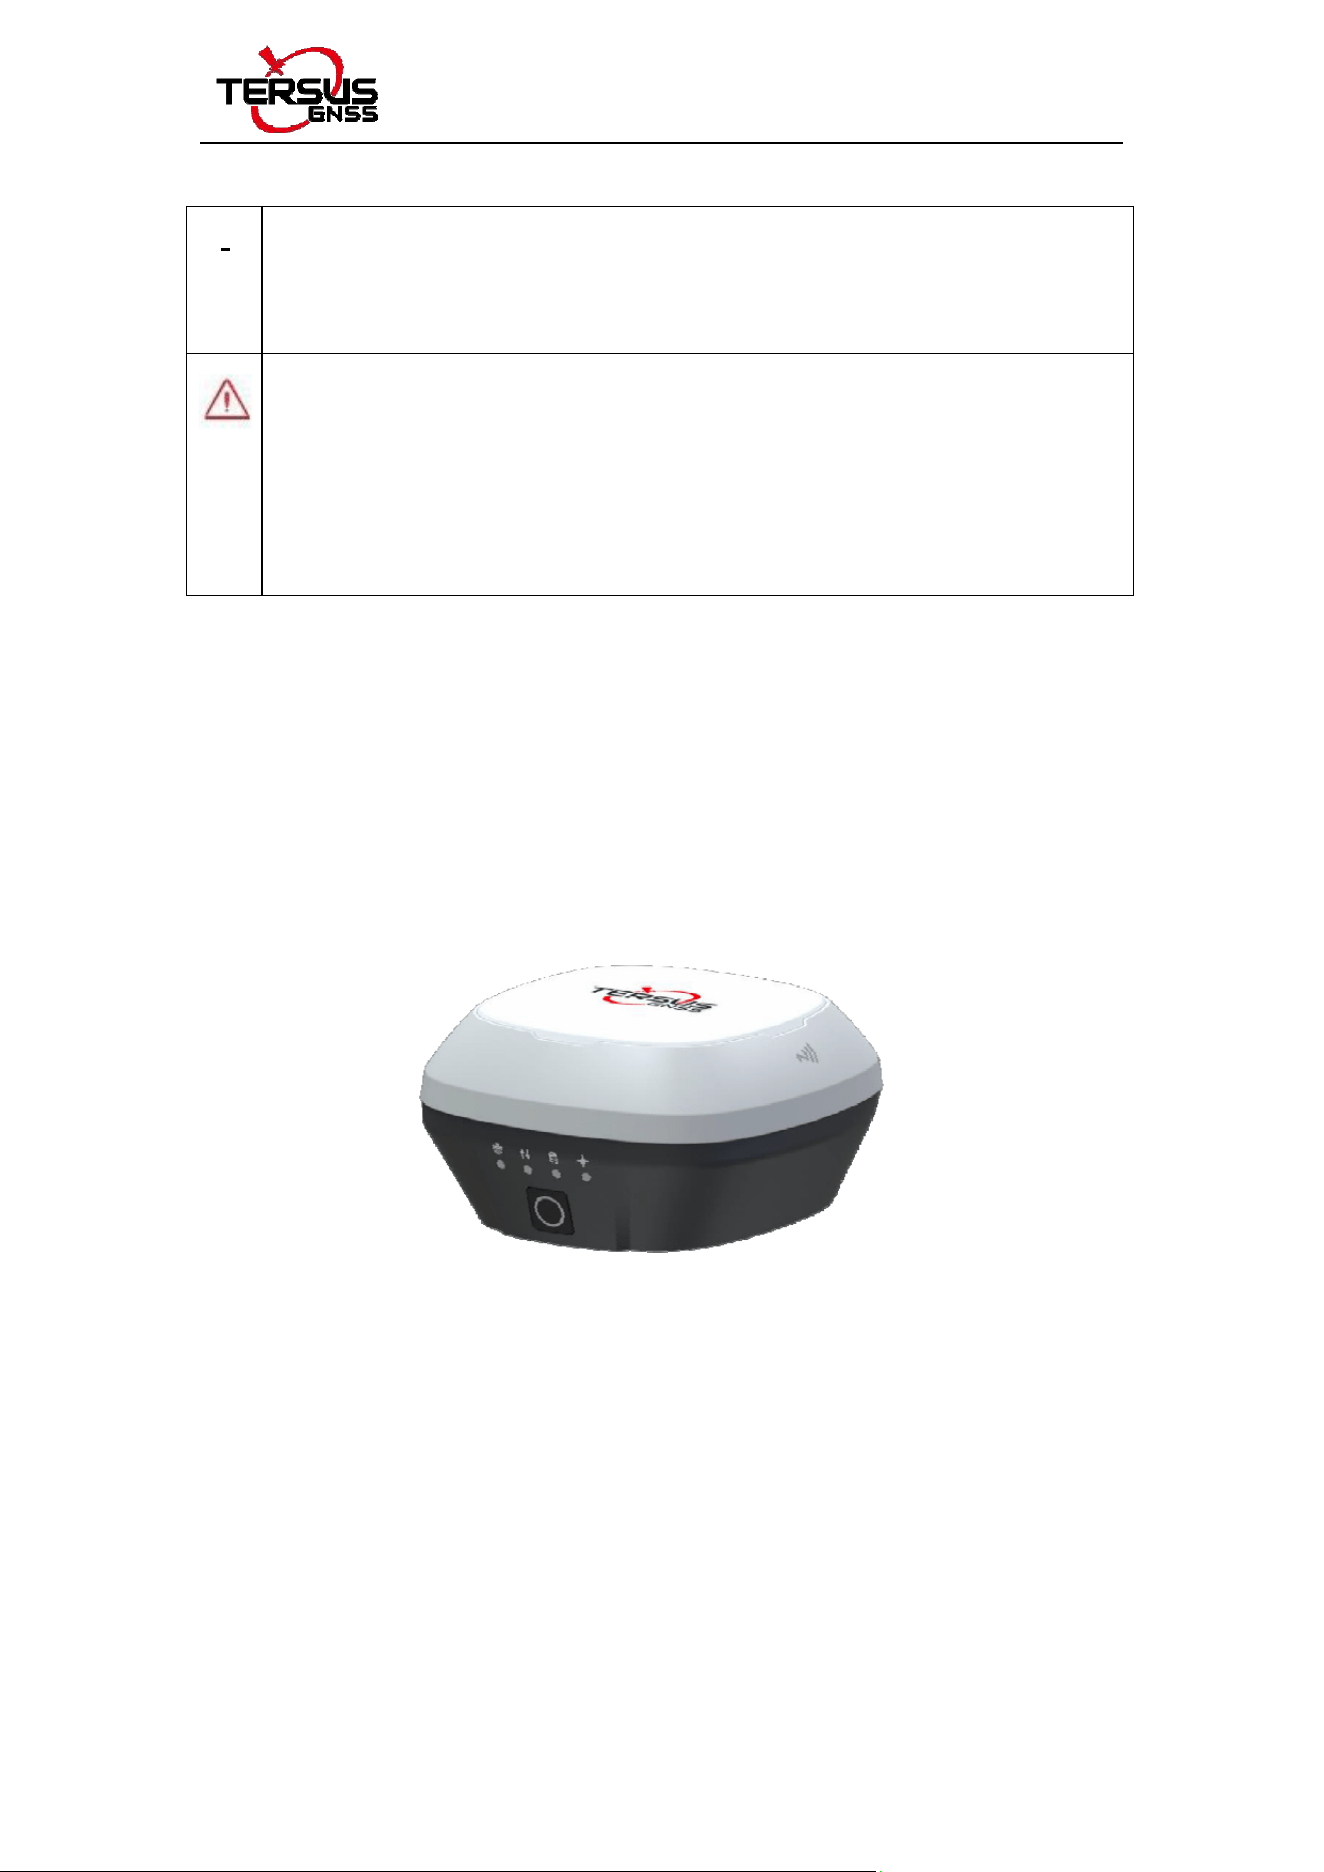
Figure 0.1 TS21 GNSS Receiver
The three steps of TS21 AR staking are outlined below:
1. Rover Setup; 2. Configuration via Nuwa; 3. AR Staking
TS21 User Manual
2
1. Rover Setup
According to the customer requirements, set up the system as per
the following pictures.
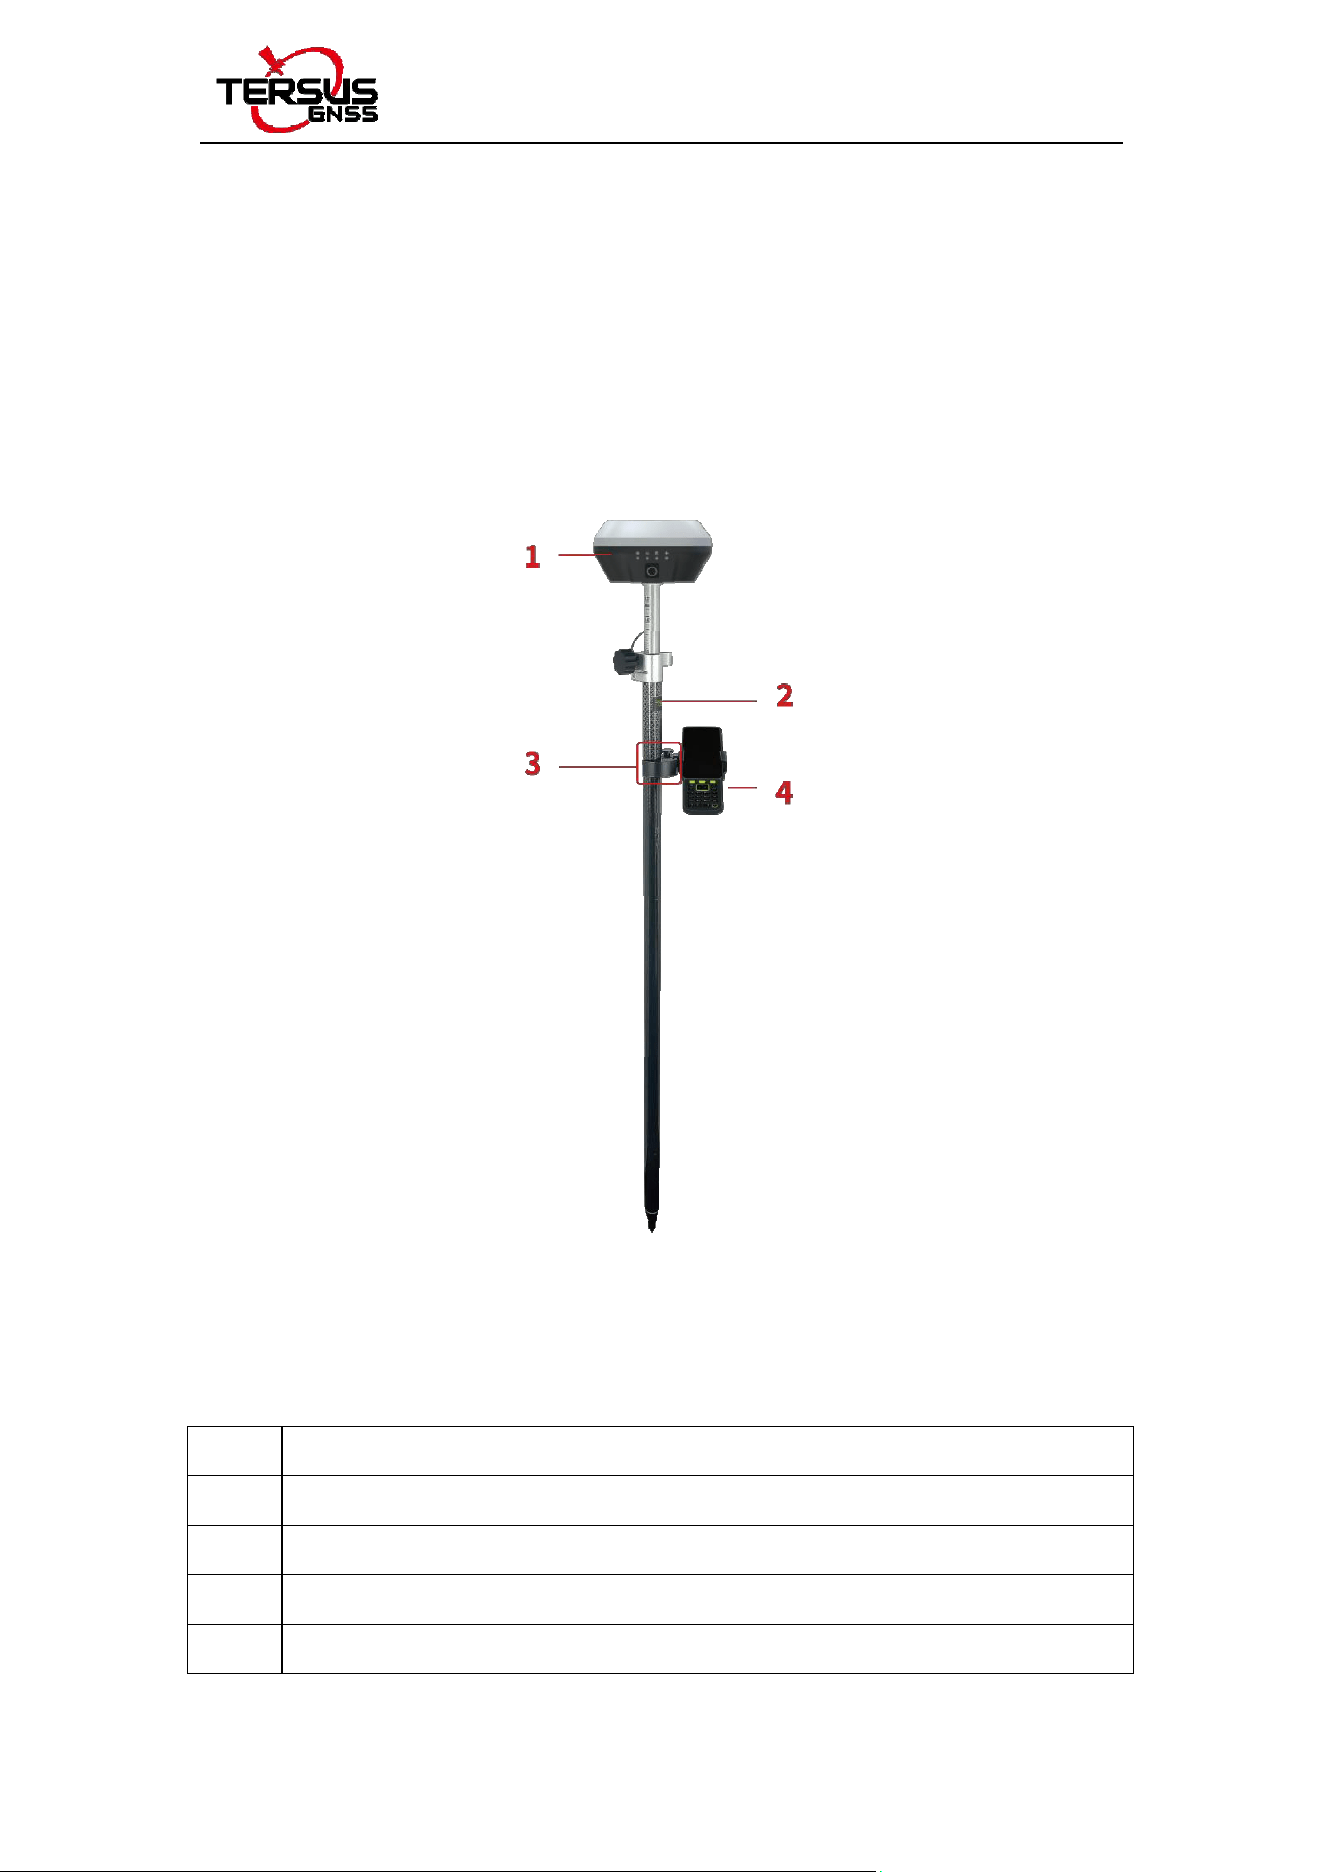
Figure 1.1 TS21 as a Rover – Network Mode
Table 1.1 Devices in Figure 1.1
NO. Device Name
1 TS21 GNSS Receiver
2 Ranging pole
3 Bracket for TC80
4 TC80 Controller
TS21 User Manual
3
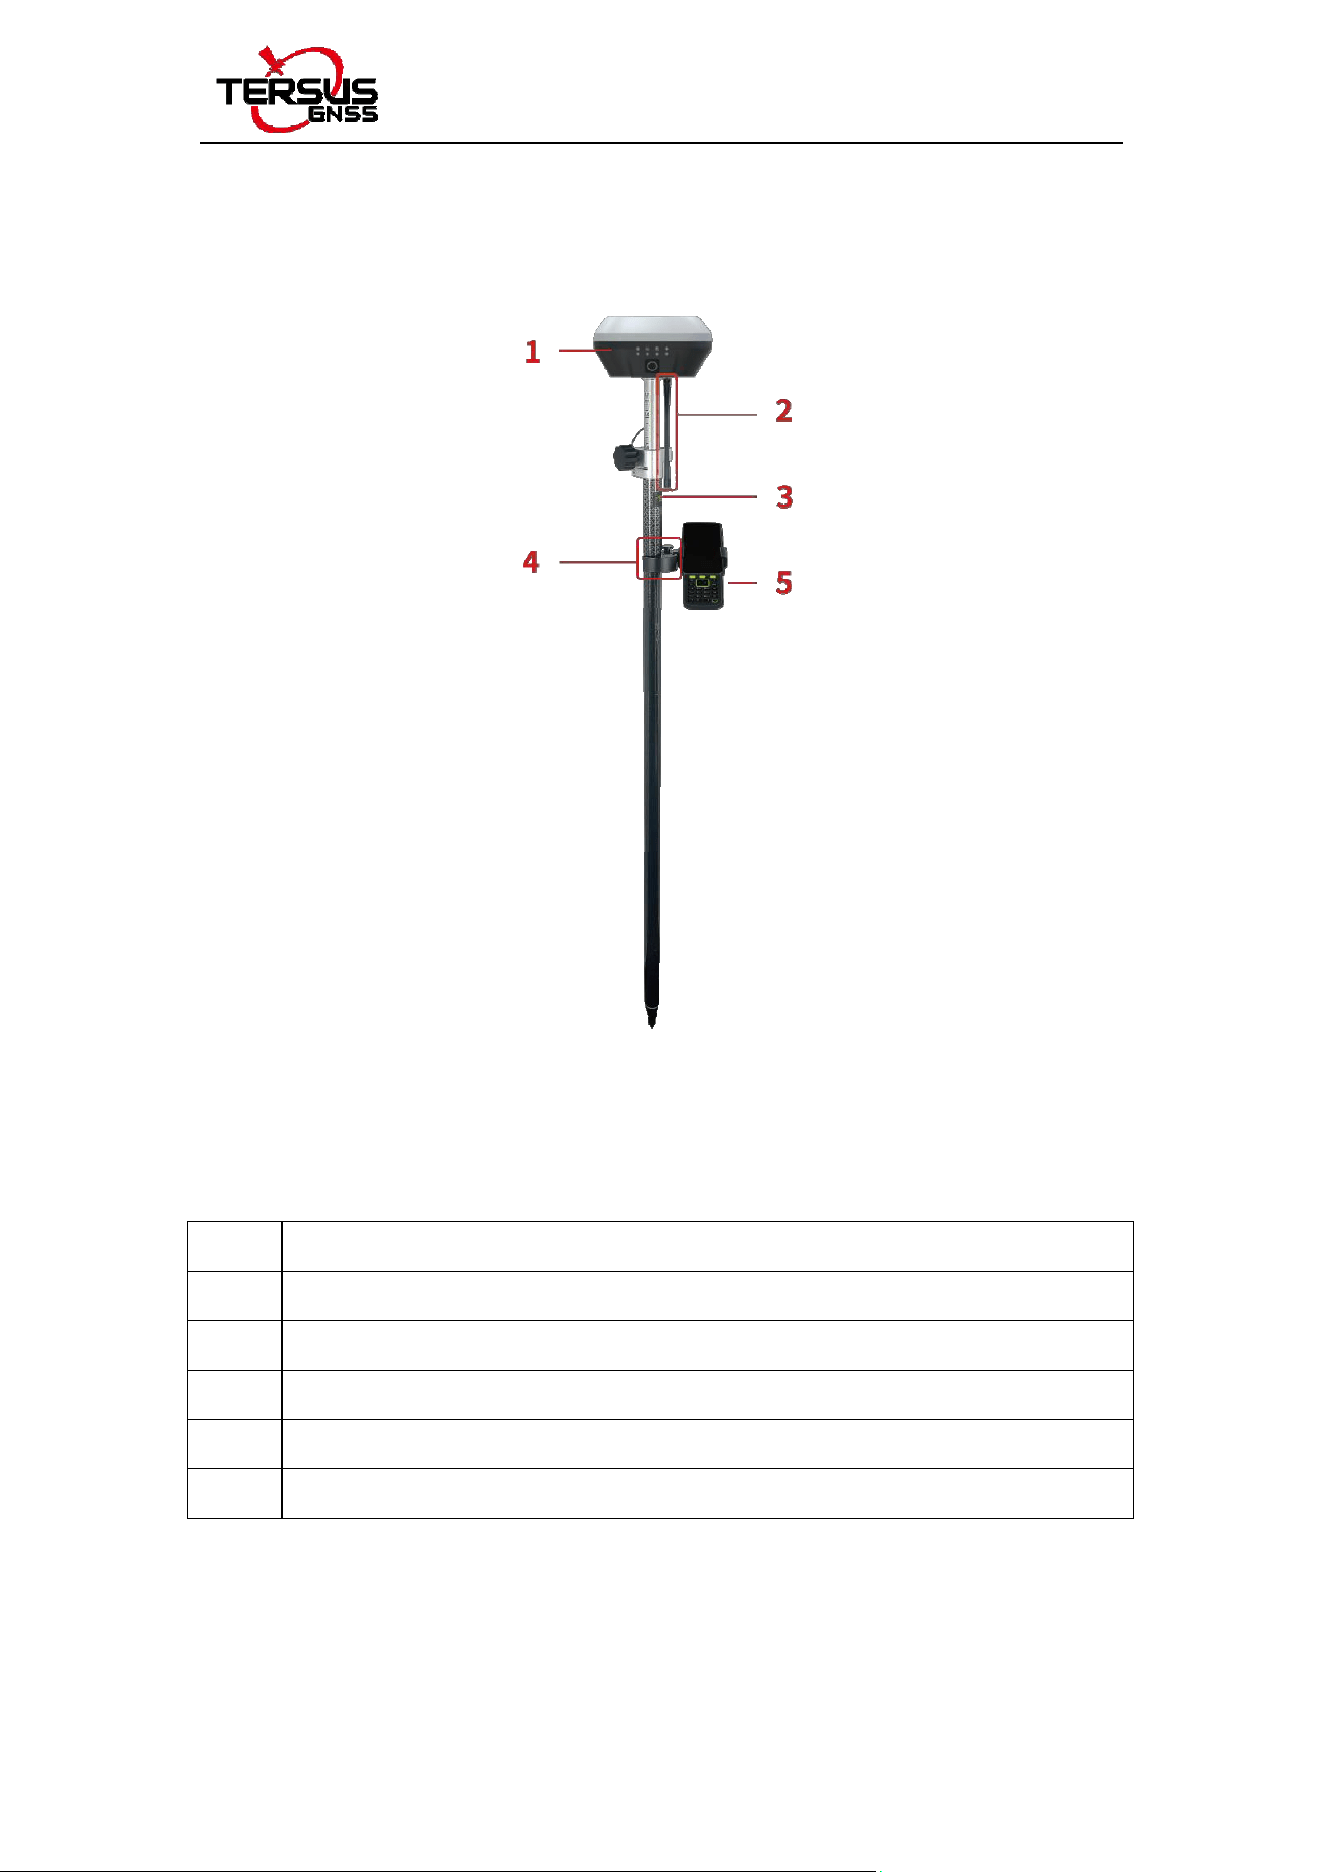
Figure 1.2 TS21 as a Rover – Internal Radio
Table 1.2 Devices in Figure 1.2
NO. Device Name
1 TS21 GNSS Receiver
2 410-470MHz radio whip antenna
3 Ranging pole
4 Bracket for TC80
5 TC80 Controller
TS21 User Manual
4
2. Configure via Nuwa
2.1 Connect TS21 in Nuwa App
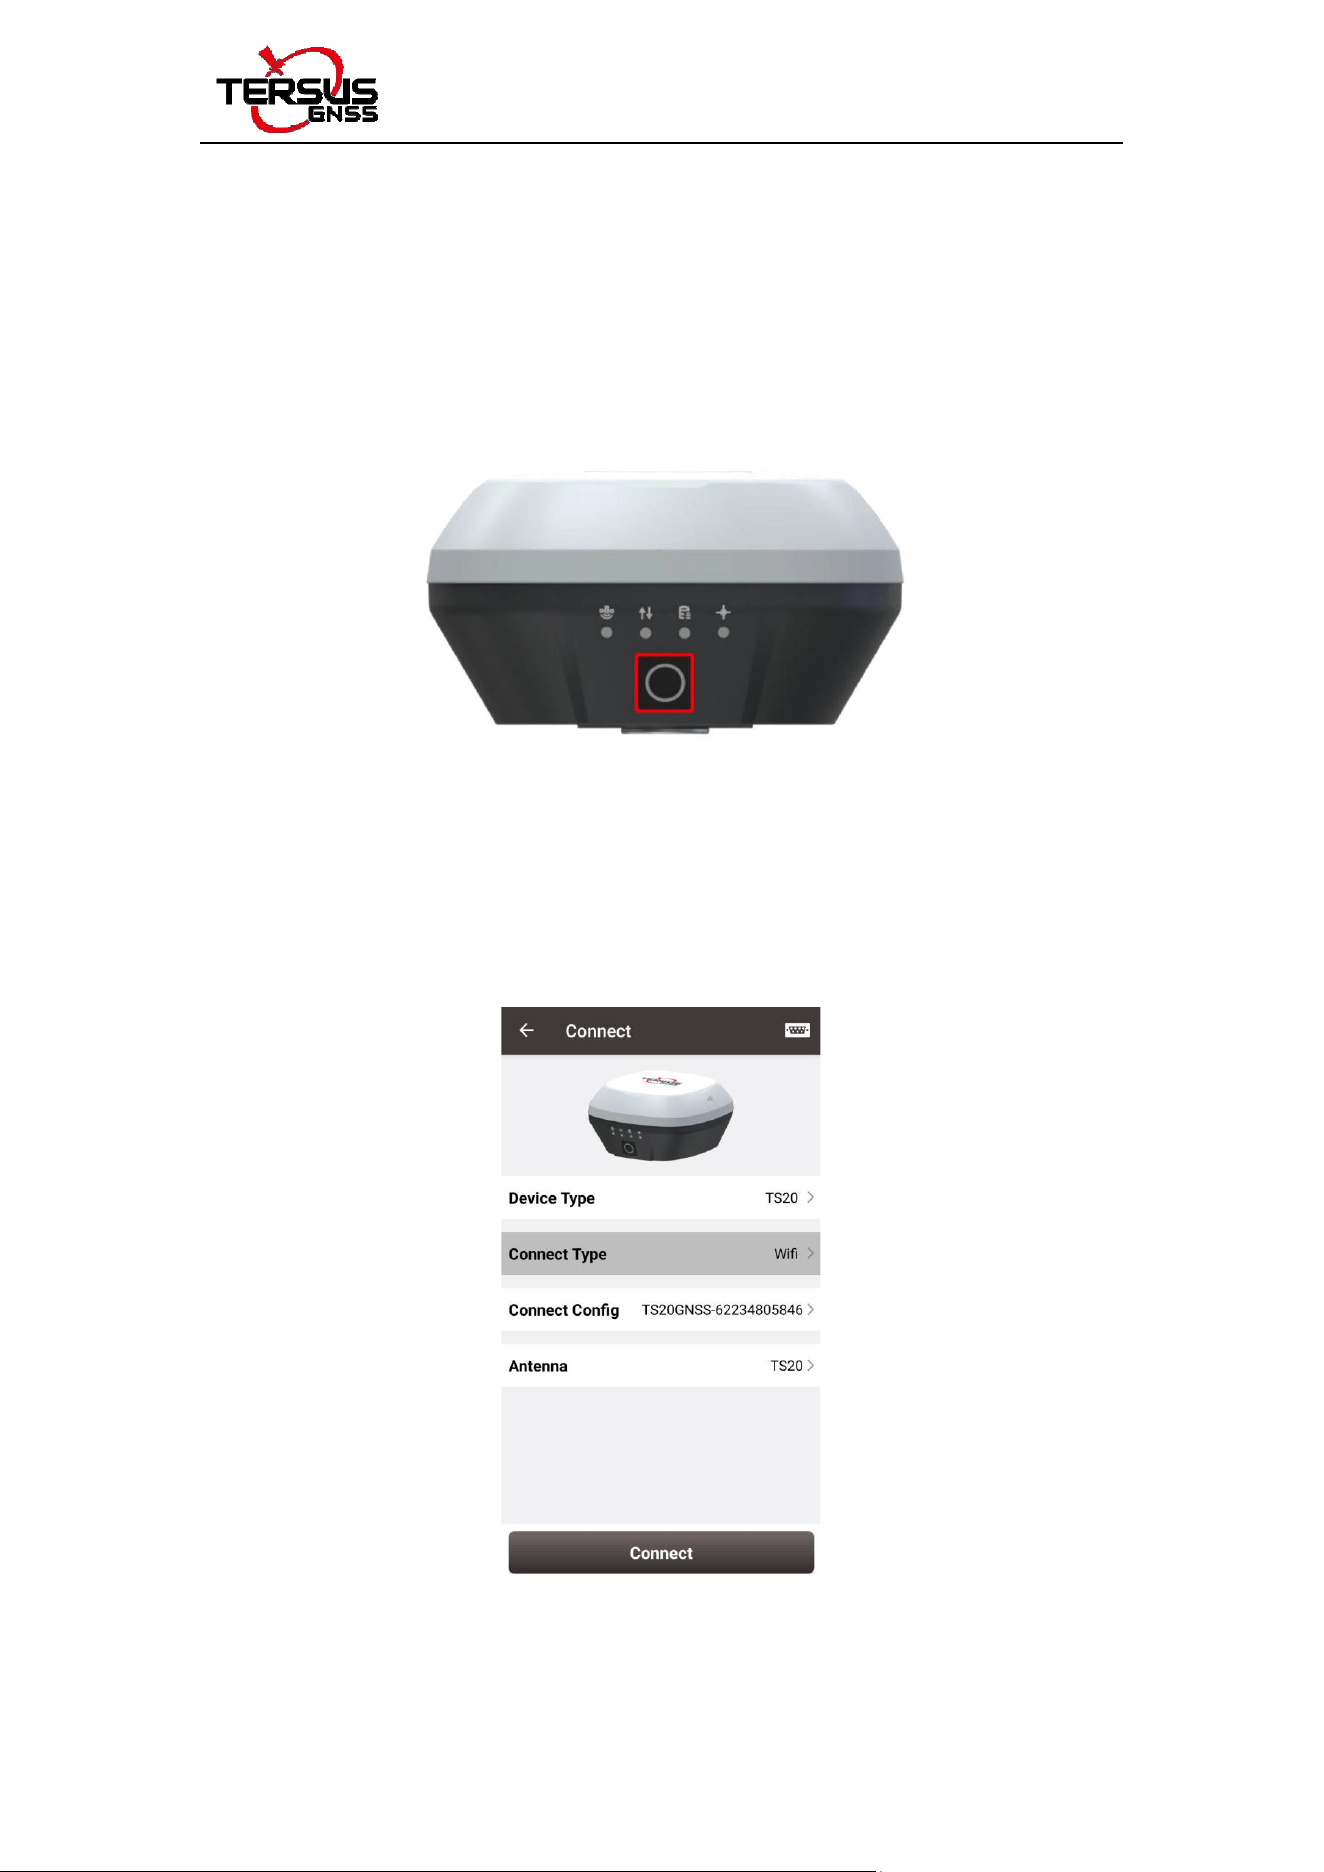
Long press the power button to power on TS21.
Figure 2.1 Power On TS21
Start Nuwa App, click [Device]-->[Connect], select device TS21 and
target WiFi, then click [Connect] to complete the device connection.
Figure 2.2 Connect TS21
TS21 User Manual
5
2.2 Configure TS21 as a Rover
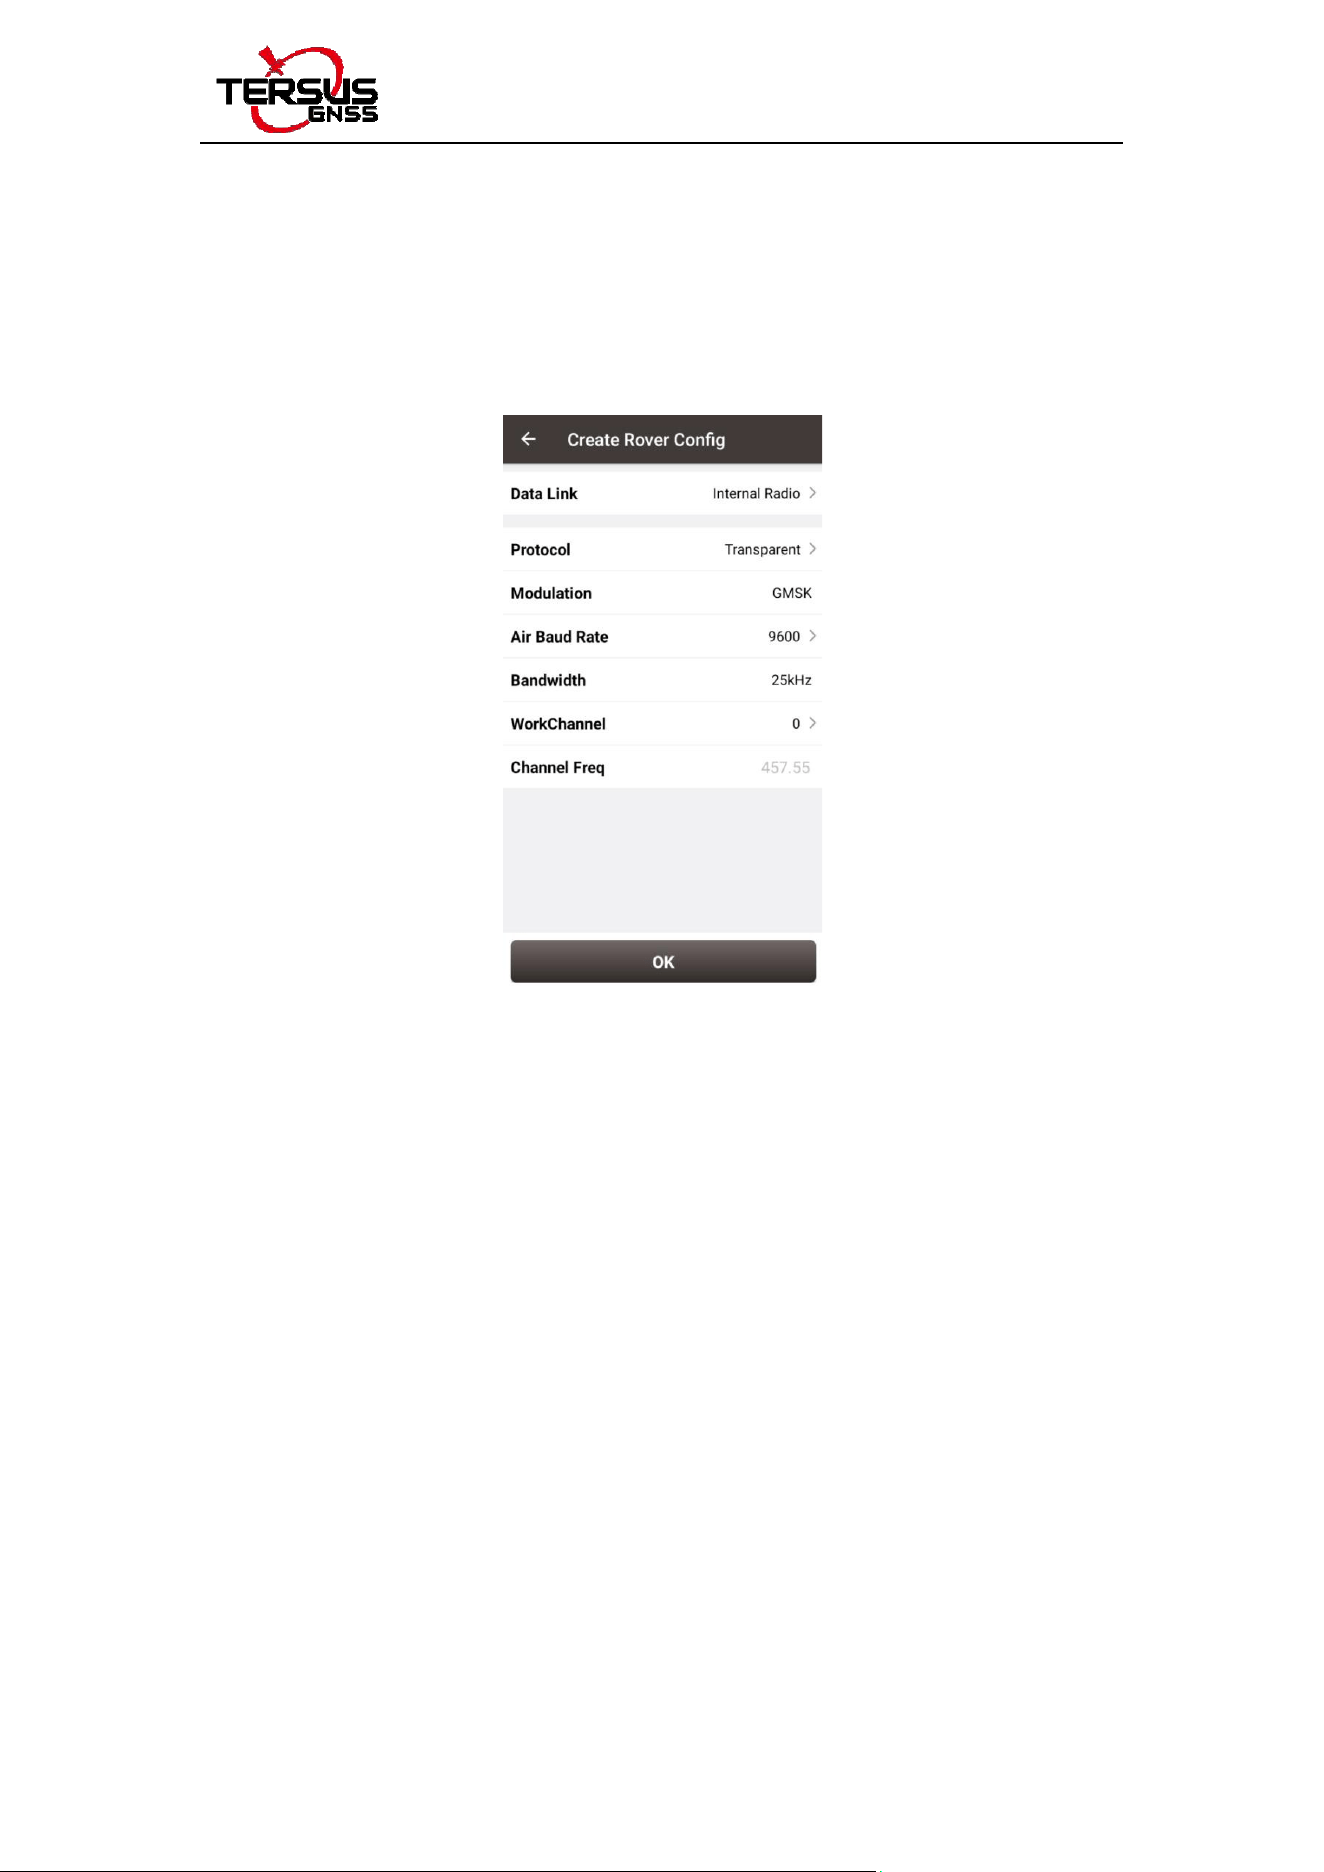
Go to the Device interface, click [Rover] to create a new Rover
mode or edit an existing rover mode as shown below.
Figure 2.3 Rover Config
Choose [Internal Radio], [Receiver Network] or [PDA Network] for
Data Link to receive the correction data. Fill in the detailed
configuration and activate rover mode to get the fixed solution.
TS21 User Manual
6
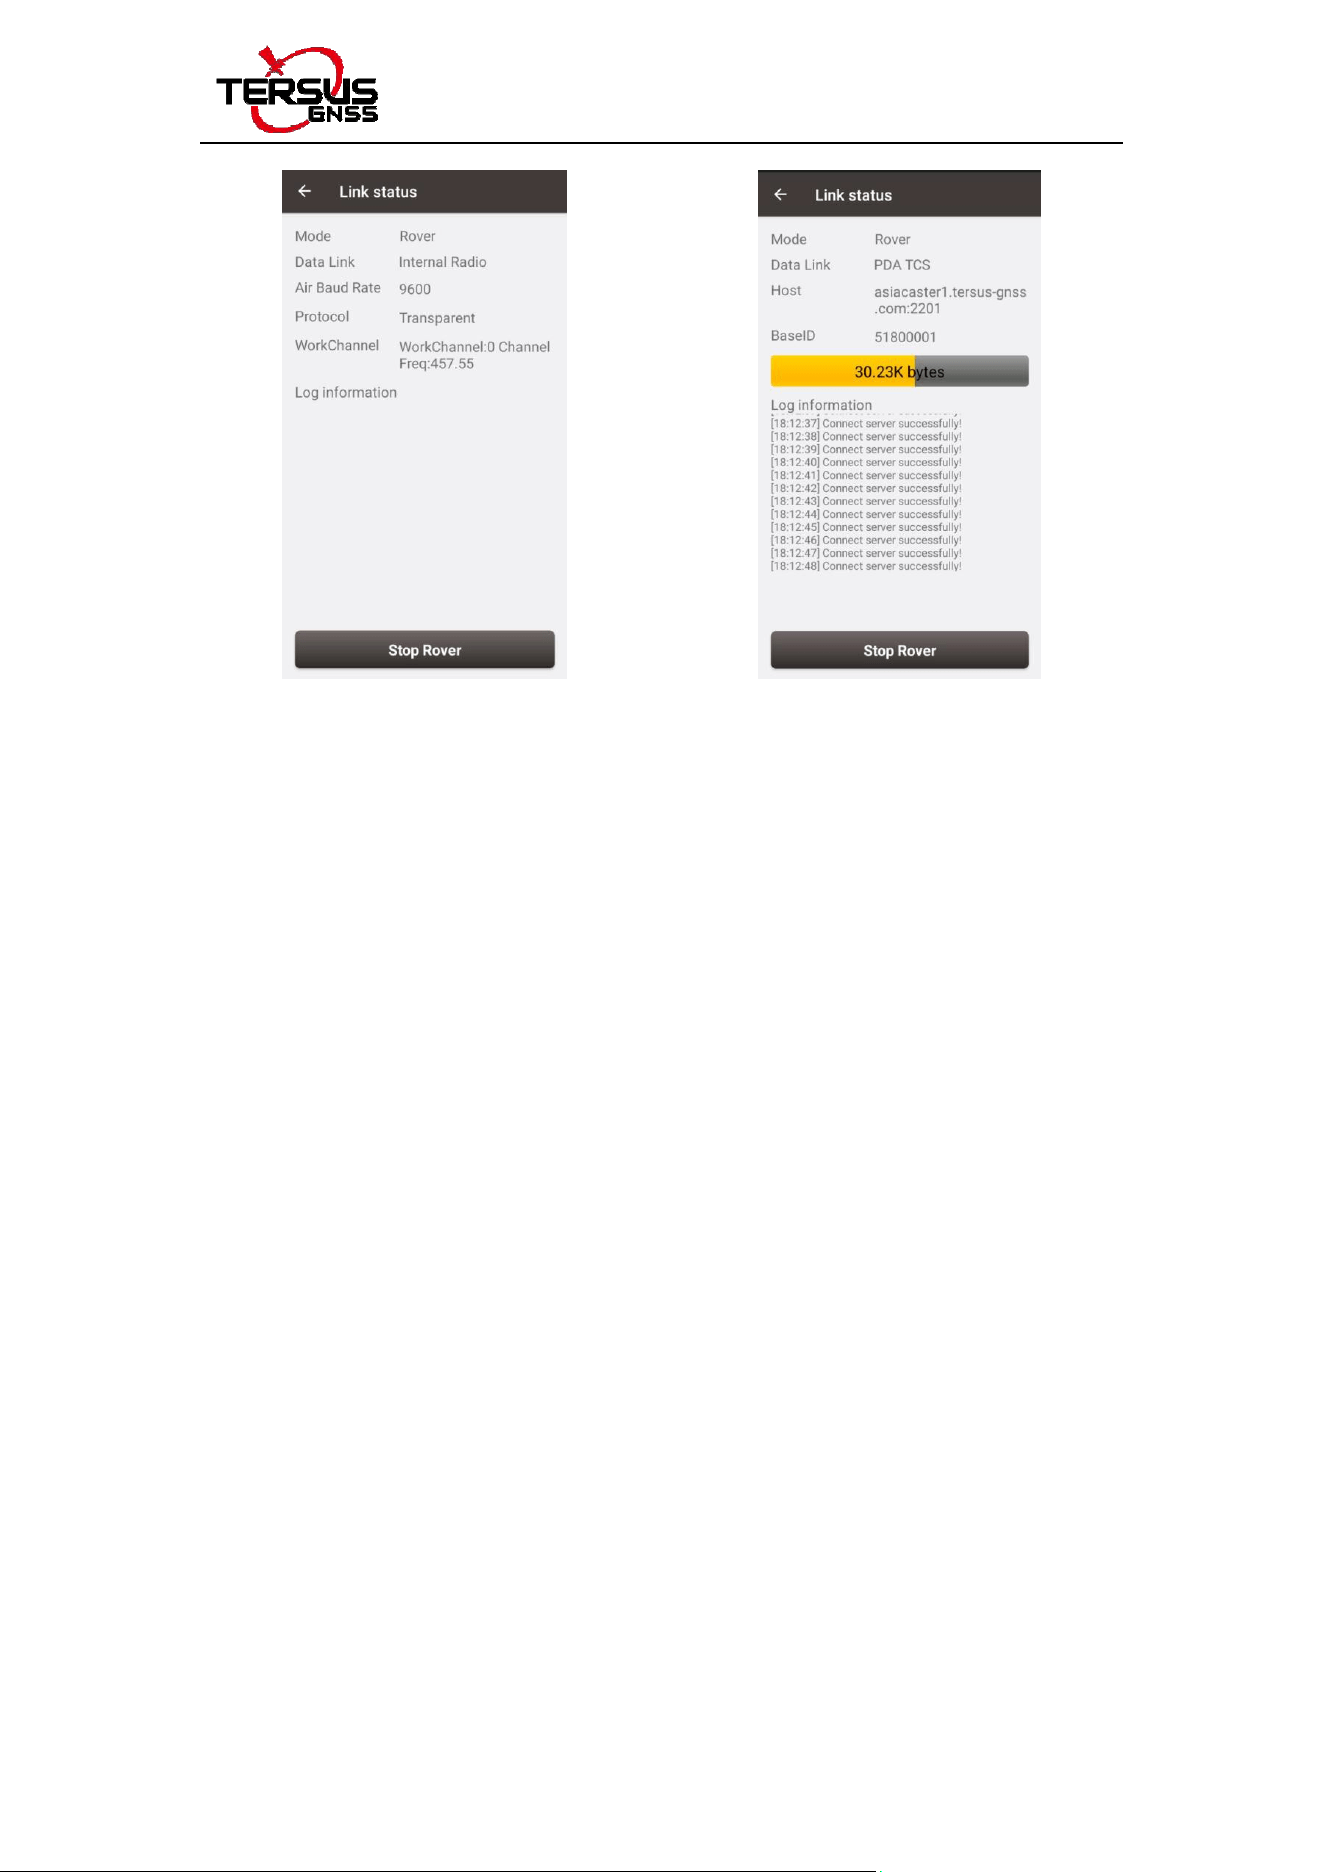
Figure 2.4 Internal Radio Figure 2.5 PDA Network
NOTE:
1) Requires radio whip antenna required in Internal Radio mode
2) Requires SIM card in TS21 in Receiver Network mode
3) Requires SIM card in controller in PDA Network mode
TS21 User Manual
7
3. AR Staking
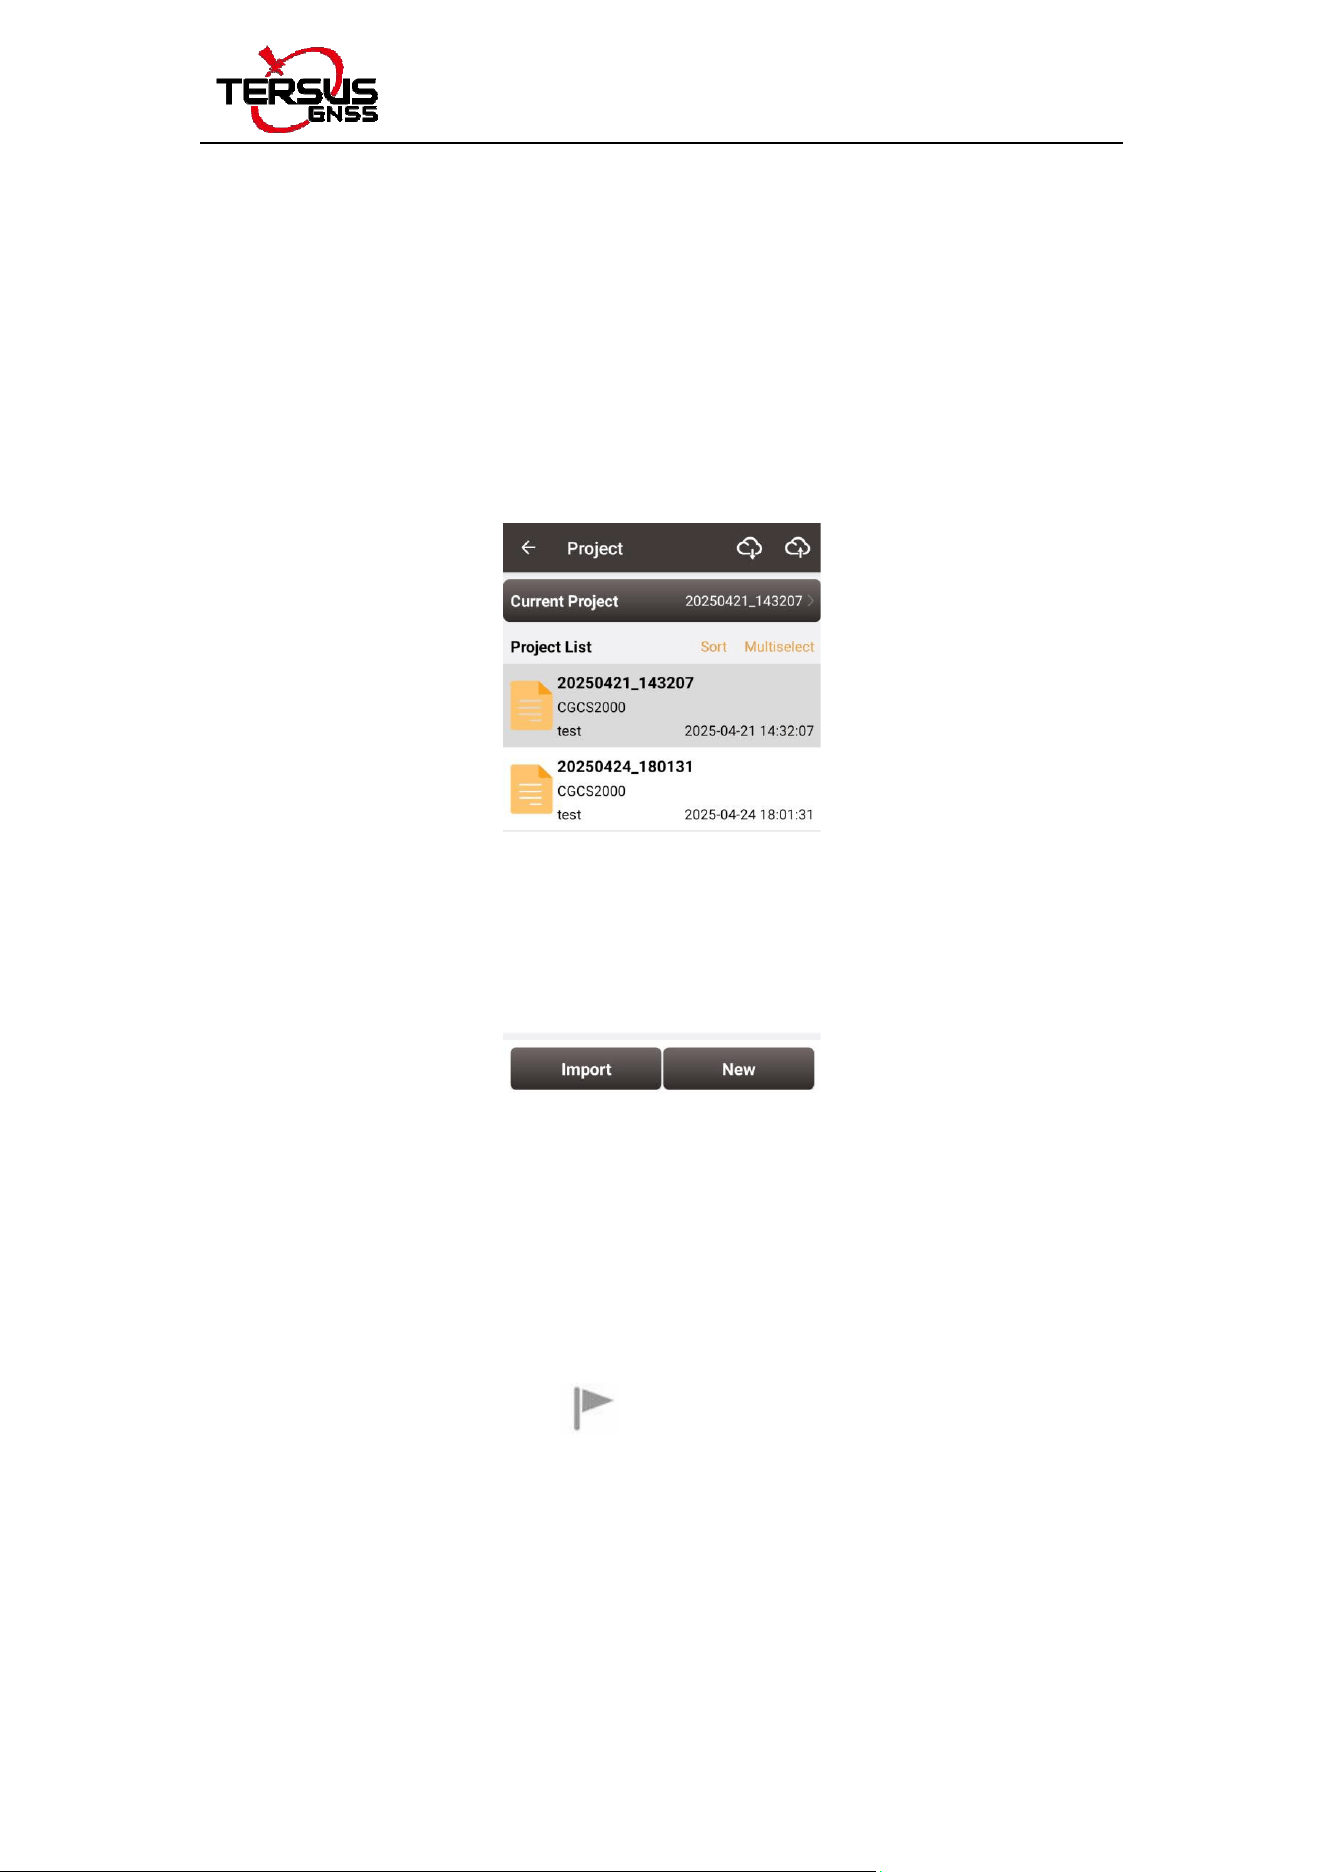
3.1 Open Project
Go to the Project interface, click [Project] to create new project or
open a project. Make sure the coordinate system is correct.
Figure 3.1 Open Project
3.2 Import Targets
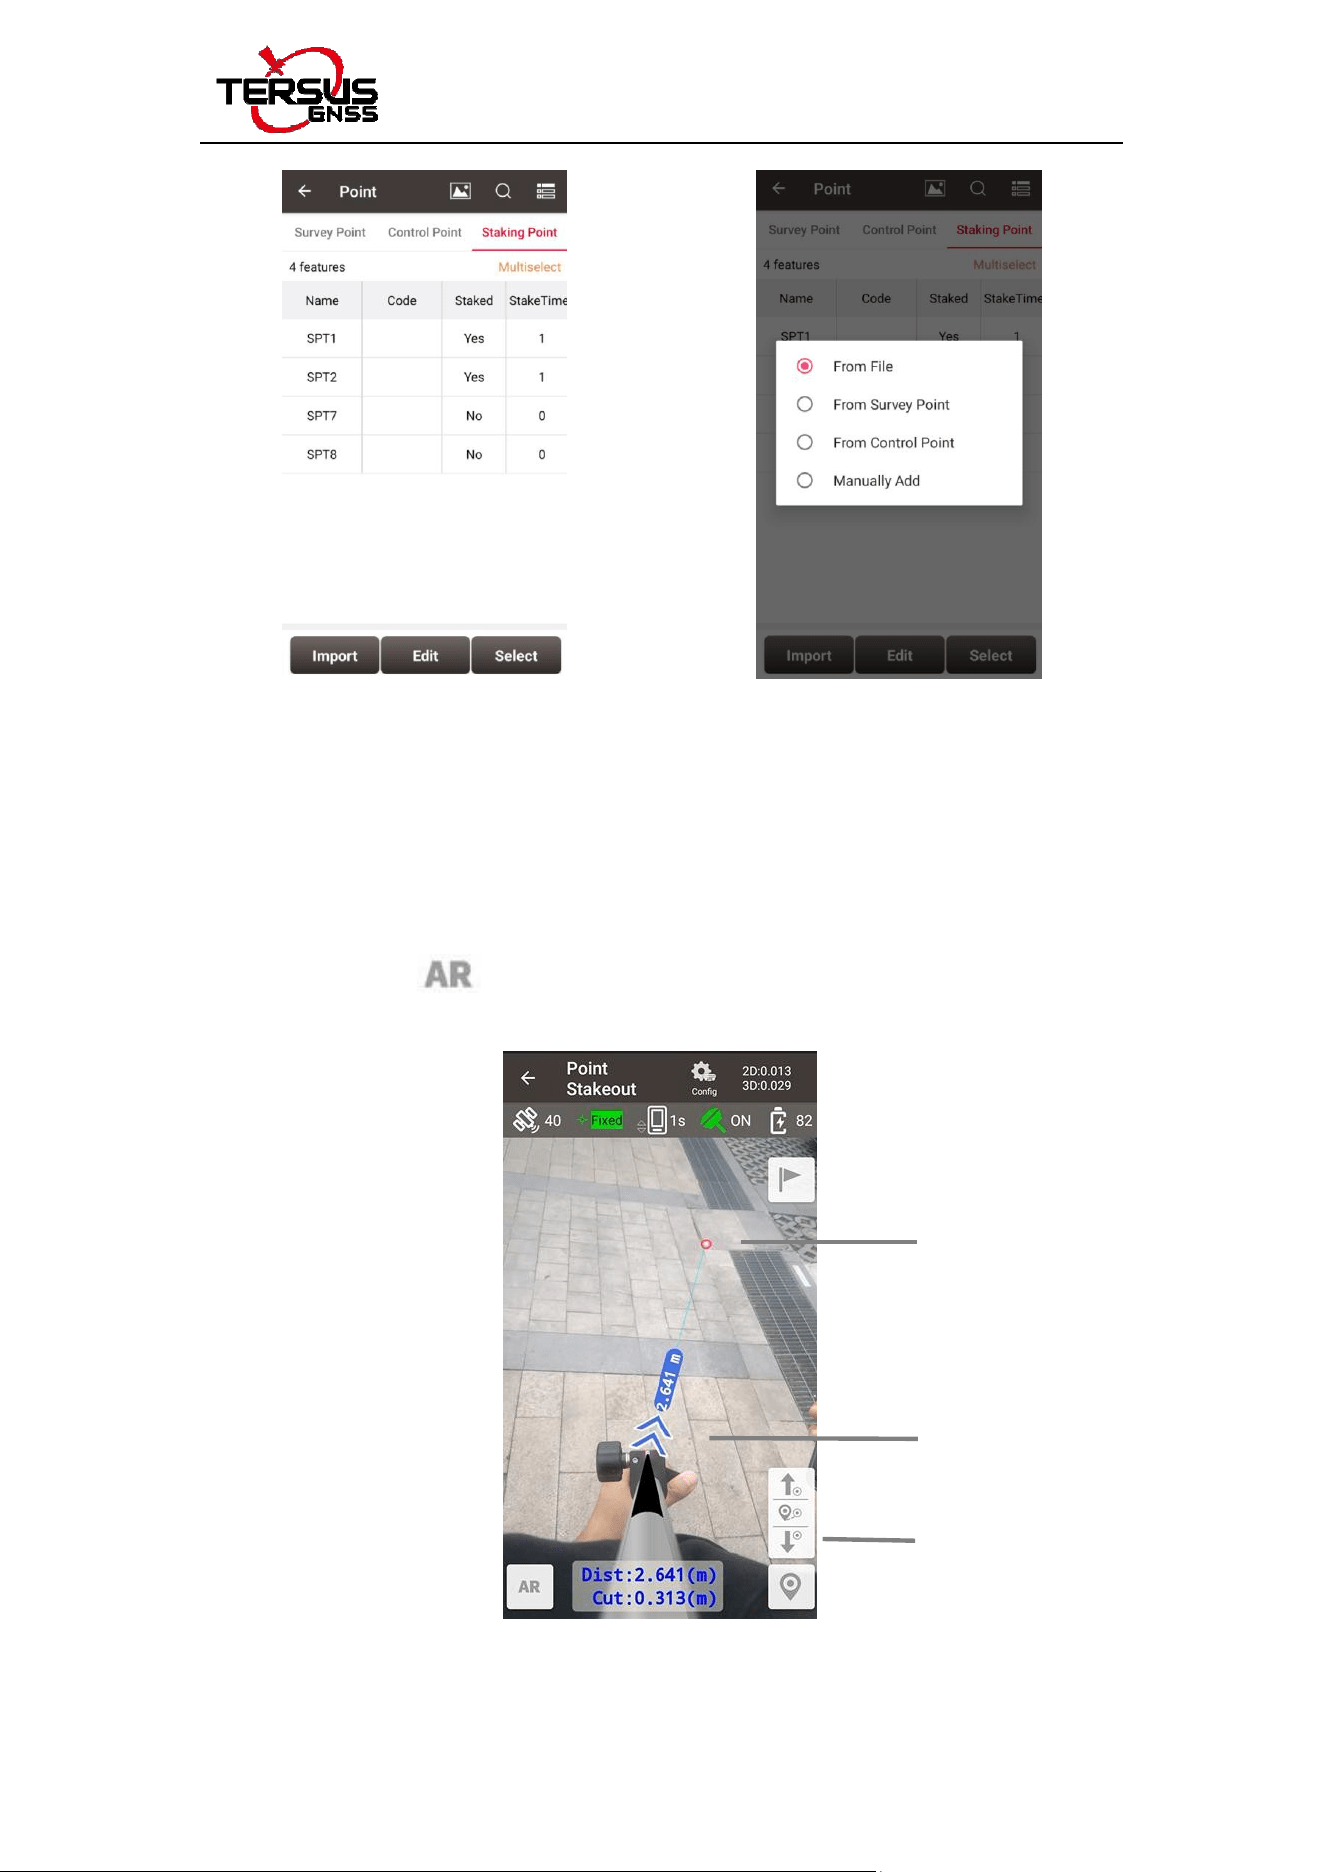
Go to the Survey interface, click [Point Stakeout] to enter point
stakeout interface. Click to show the Staking Point list and
click [Import] to import targets from file, from other point lists or
directly manually add.
TS21 User Manual
8
Figure 3.2 Staking Point List Figure 3.3 Import Targets
3.3 AR Staking
Select one of the point as the target, back to the Point Stakeout
interface. Click to enter AR staking interface as shown below.
Target Point
Direction and
Distance Indicator
Switch Targets
Figure 3.4 AR Staking

9
TS21 Quick Start Guide
4. Get More
This Quick Start Guide briefly introduces the setup and operation
for TS21 GNSS Receiver and the operation of Nuwa app. More
details please refer to User Manual of TS21 and User Manual of
Nuwa app which can be downloaded from Tersus official website:
https://www.tersus-gnss.com/document.
5. Exemption of Liability
Before using this product, please be sure to read the product
manual carefully, which helps you to better use the product. Tersus
is not liable for damages caused by failure to follow the instructions
in the manual.
Tersus is committed to continually
improving product features and
performance, and the contents of subsequent product manuals are
subject to change without notice. If the pictures and icons in the
manual are different with actual product, please refer to the actual
product.
6. Technical Support
Thank you for using Tersus products.
If you have any technical questions
for the products, please contact
us at s[email protected] or log a ticket in our tracking
system: https://tersus.supportsystem.com/ and we will serve you
promptly.

10
TS21 Quick Start Guide
FCCStatement
Any Changes or modifications not expressly approved by the party responsible for compliance could void the
user’s authority to operate the equipment.
This device complies with part 15 of the FCC Rules. Operation is subject to the following two conditions: (1) This
device may not cause harmful interference, and
(2) This device must accept any interference received, including interference that may cause undesired operation.
FCC Radiation Exposure Statement:
This equipment should be installed and operated with minimum distance 20cm between the radiator& your body.
Note : This equipment has been tested and found to comply with the limits for a Class B digital device, pursuant to
part 15 of the FCC Rules. These limits are designed to provide reasonable protection against harmful interference
in a residential installation. This equipment generates,uses and can radiate radio frequency energy and, if not
installed and used in accordance with the instructions, may cause harmful interference to radio communications.
However, there is no guarantee that interference will not occur in a particular installation. If this equipment does
cause harmful interference to radio or television reception, which can be determined by turning the equipment
off and on, the user is encouraged to try to correct the interference by one or more of the following measures:
—Reorient or relocate the receiving antenna.
—Increase the separation between the equipment and receiver.
—Connect the equipment into an outlet on a circuit different from that to which the receiver is connected.
—Consult the dealer or an experienced radio/TV technician for help.
RF exposure environment warning:
This equipment complies with FCC radiation exposure limits set forth for an Occupational/Controlled
environment .This equipment should be installed and operated with minimum distance 20cm between the
radiator& your body.
Company Name: Tersus GNSS lnc.
Address: Rm 601, Bldg E2, No. 88, Jinjihu Ave, Suzhou, China