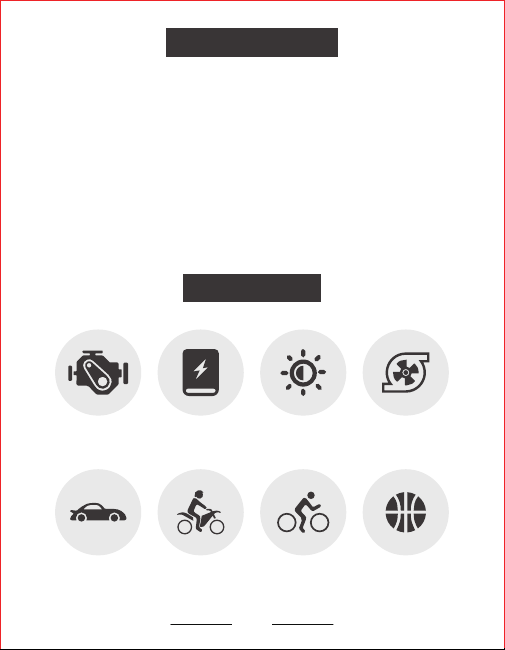
Product Description
Product Features
Car Tires Motorcycle Tires Bicycle Tire Ball Supplies
Engine Start Power Bank LED Light Air Inflation
Please read this manual carefully and keep it properly before using this
product for the first time. It will guide you to use it correctly and remind
you of relevant precautions.
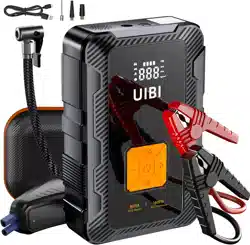
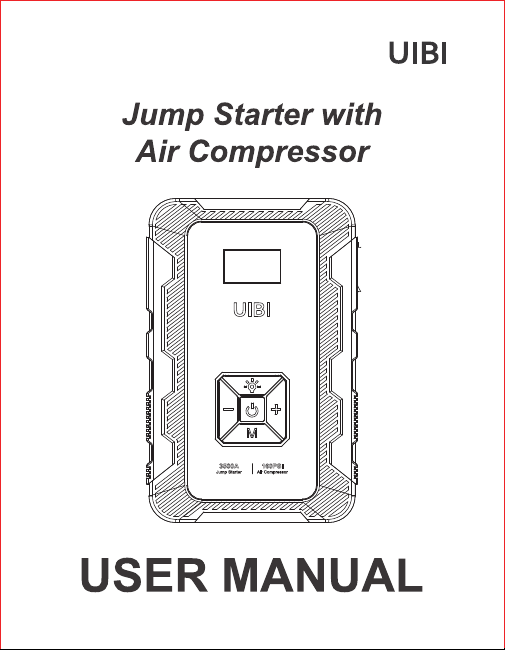
This product is a portable car jump starter + air compressor product. It
can start a car whose battery (12V) is losing electricity, and has the
function of inflating cars, motorcycles, bicycle tires and balls; it can also
be used as a mobile power source for mobile phones, tablets, PSP,
MP3/MP4, cameras, etc. Digital electronic products are charged/pow-
ered, and the products also have LED light functions (lighting mode,
SOS mode, warning mode).
Note that this product is not a toy and children are forbidden to use it.
1.
2.
3.
01

Product Diagram
LED Light
USB 5V/9V/12V Output
Inflatable Tube Interface
Type-C IN/OUT port
Jumper Cable Connection Port
Digital Tube Display
Air Pressure Set " + " Button
" M " Button(Mode/Unit Switching)
Power/Pump Button
LED Light Button
Air Pressure Set " - " Button
1
2
3
4
5
6
7
8
9
10
11
02
5
3
4
2
7
8
9
10
11
6
1
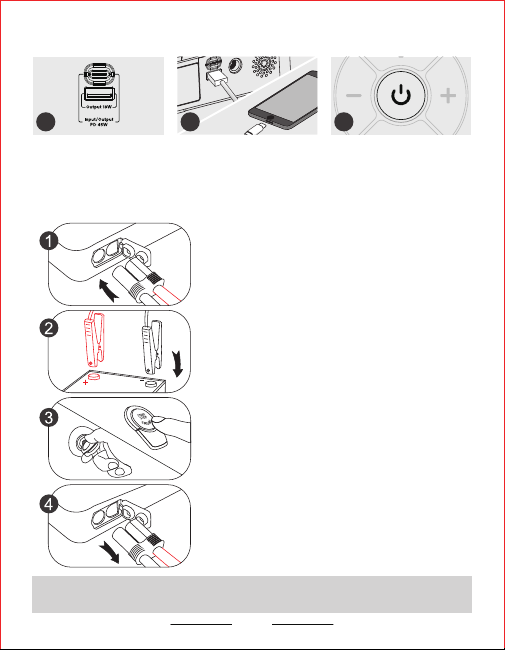
Remove the silicone plug and insert the
EC5 connector of the jumper cable into
the hole position.
Connect the red clamp to the positive
pole (+) and the black clamp to the
negative pole (-) of the car battery.
Ignition within 30 seconds:
Press the car start button or turn the
ignition switch to the START position.
After successful startup, pull the plug of
the wire clip from the product and
remove the clip from the positive and
negative terminals of the car battery.
Note: When starting the car,
please make sure that the power of the product is above 50%.
03
CHARGE DIGITAL PRODUCTS
CAR JUMP START
Insert the other end of the
charging cable into the
corresponding charging
port of the mobile phone
or digital device.
Press and hold the "Power"
button for 2 seconds to turn
on the power, and the
USB-A/Type-C power
supply can be started.
2 31
Plug the USB-A/Type-C
port of the charging cable
into the product USB-A/
Type-C interface
Detailed Instructions For Inflation Function
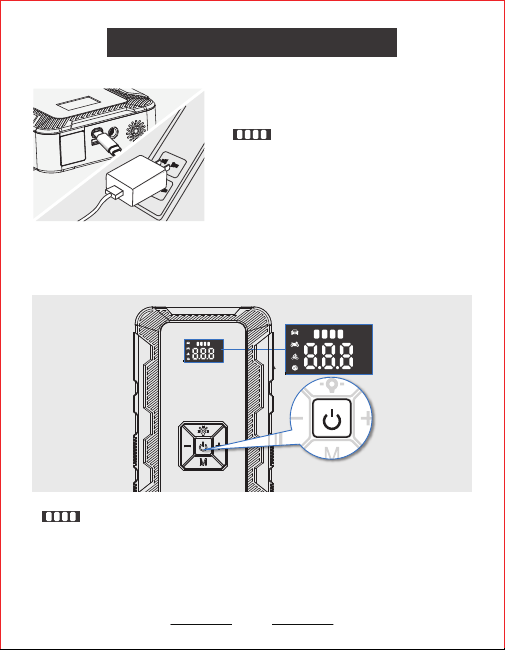
1. Charge The Product
2. Power On/Off
04
PSI
BAR
KPA
Kg/cm
2
PSI
BAR
KPA
Kg/cm
2
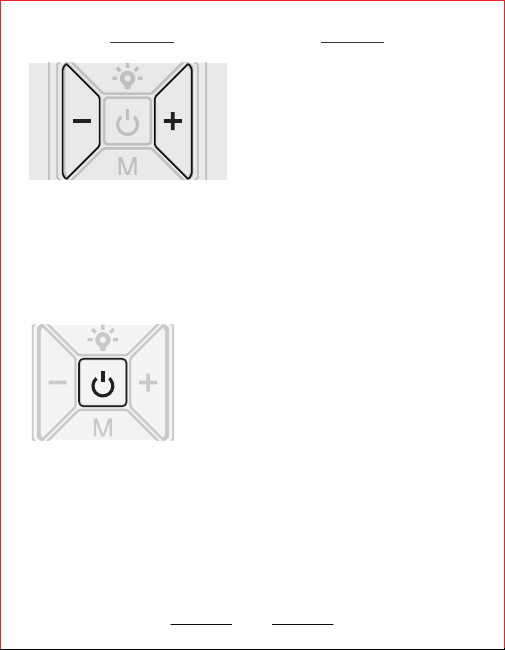
Discharge display: the digital tube displays the number of the current power grid
" " After booting, single press the "Power" button to switch between
on/pause of inflation.
Press and hold the "Power" button again for 2 seconds to shut down.
(If the product is turned on without any operation within 30 seconds, it will also
automatically shut down.)
Please fully charge the product before using it
for the first time.
Charging display: digital tube symbol
" " four grid power sequential running
flashing (1 second 1 flash), charging to 100%
power to stop flashing at the same time to
stop charging; 10 seconds after the digital
tube off the display and enter the dormant
state.
1 2 3
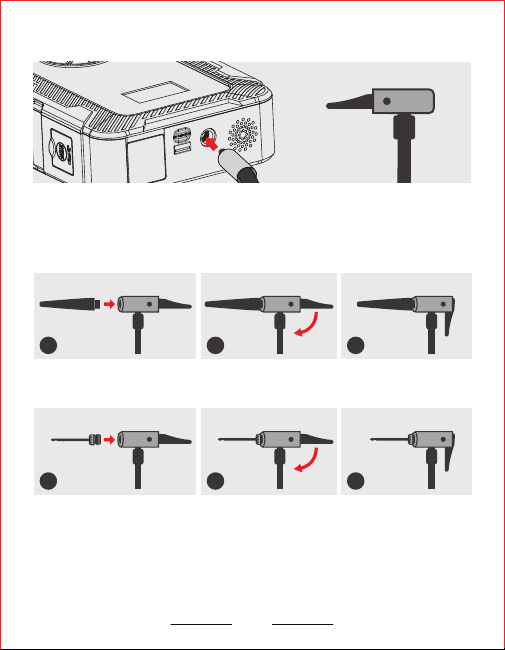
4. Gas Nozzle / Gas Needle Mounting Method
When inflating the air bed and swimming ring, please select a suitable air nozzle,
and connect the air nozzle to the inflation tube before inflating.
When inflating basketball, football and other balls, you need to use an air needle.
Connect the air needle to the inflation tube before inflating.
1 2 3
05
Bicycles, electric bicycles, motorcycles, and cars are usually directly
connected by this air pipe.
3. Connect the Inflation Tube
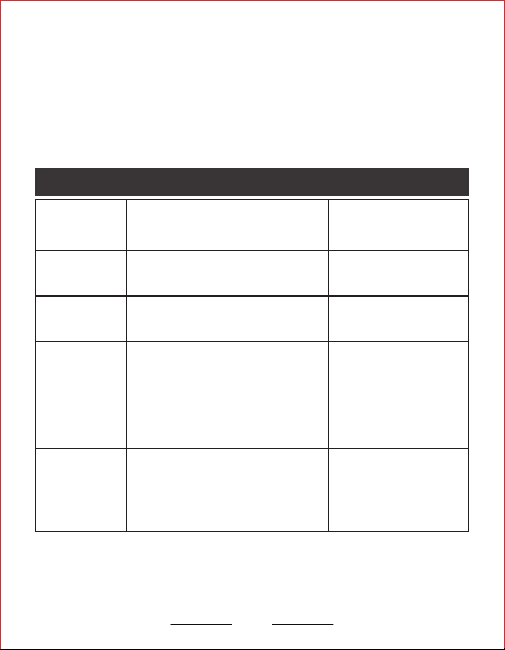
5. Inflation Air Pressure
To ensure safety, before using this device for inflation, please know
the air pressure value required by the inflated item (check the surface
information of the inflated item or query the instruction manual of
the inflated item) to avoid personal injury caused by over-inflation.
Common Items Recommended Inflatable Air Pressure Gauge
Category Types
Recommended air
pressure range
Car Car tires
2.2-2.8 Bar
(32-40psi)
Motorcycle
Bike
Ball
Motorcycle, electric
Motorcycle tires
Folding bicycle tires
12”14”16”bicycle tires
20”22”24”bicycle tires
26”27.5”29”bicycle tires
700c road bike open tire
700c road bike tube tire
Basketball
Football
Volleyball
Rugby
7-9psi
8-16psi
4-5psi
12-14psi
45-50psi
30-50psi
40-50psi
45-65psi
100-130psi
120-145psi
1.8-3.0 Bar
(26-44psi)
06
Note:
The data of the recommended inflation air pressure range is for
reference only. Please refer to the instruction manual of the inflated
item for actual use. (The above data comes from the laboratory)
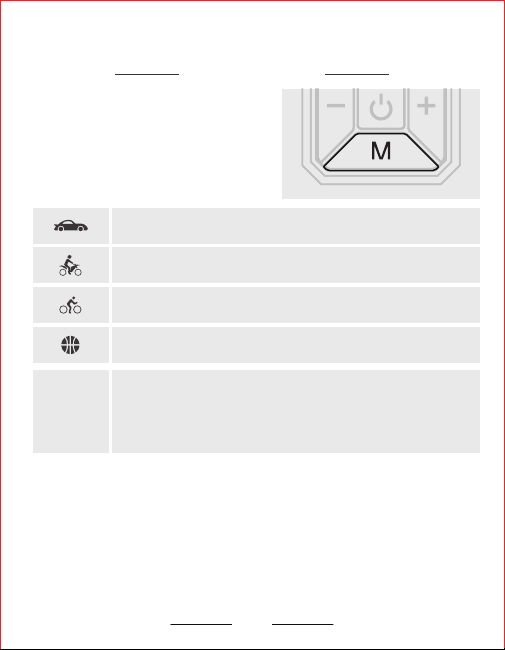
Short press the "M" button to select the
inflation mode: each time you press this
button, you can switch between the five
inflation modes of "car", "motorcycle",
"bicycle", "ball" and " Freedom Mode",
(Long press this key to switch between
PSI, BAR, KPA, Kg/cm2 four air pressure
units.)
6. Preset Inflation Air Pressure
After select the matching inflation mode, the screen displays the default setting value
and flashes three times at a frequency of once per second, and then enters the air
pressure detection state to detect the current air pressure value of the inflated object.
(When the inflated object is not connected, the air pressure value will display "0".)
Mode Selection
Car mode:
Default 36psi (Adjustable range 26-50psi)
Motorcycle mode:
Default 35psi (Adjustable range 26-50psi)
Bicycle mode:
Default 45psi (Adjustable range 30-145psi)
Ball mode:
Default 8psi (Adjustable range 4-16psi)
Freedom Mode:
Lights up without any mode: The factory default preset
pressure value is 35psi, the preset pressure can be
adjusted freely before operation(values can be
memorized)Adjustable range: 3-160psi
07
08
7. Inflation Instructions
Turn on inflation: After the air pressure setting is
completed, short press the "Power" button to
start inflation, and the screen displays real-time
air pressure changes during inflation.
Stop inflation: When the air pressure reaches the
preset value, the air pump will automatically stop
inflation. During the inflation process, you can
also pause the inflation by short pressing the
"Power" button.
Shut down: In the power-on state, press and hold the "Power" button for 2
seconds to shut down.
In order to avoid accidental touch, it will automatically shut down if there is
no operation within 30 seconds when it is turned on.
Caution:
When adjusting the preset air pressure value, the number flashes to
indicate the target air pressure adjustment status, and the number is
always on to indicate the real-time air pressure.
The default value will be restored after the mode is switched or restarted.
When inflating the swimming ring and air bed, just adjust to "ball mode".
1.
2.
3.
After selecting the inflation mode, short
press the "+" key or "-" key to adjust the
preset air pressure value; long press to
quickly adjust the air pressure value.
After the setting is completed, the air
pressure value flashes three times at a
frequency of once per second, and then
the setting is automatically confirmed.
Adjust Presets

Product Name
Model
Size
Operating Temperature
Storage Temperature
Battery Capacity
Working Noise
Charging Input
Charging Time
USB Output
Maximum Pressure
Start Car Voltage
Start Car Current
Jump Starter & Wireless Inflator Pump
X7
220 × 143 × 55.5mm
Charge:0℃~45℃,Discharge:-10℃~45℃
-10℃~50℃
88.8Wh
Less than 80dB away from 1 meter
PD45W 5V/3A 9V/3A 12V/3A 15V/3A 20V/2.25A
≤2 hours(PD45W)
5V/3A 9V/2A 12V/1.5A
160PSI
12V
1500A(3500A Peak)
Basic Parameters
09
10
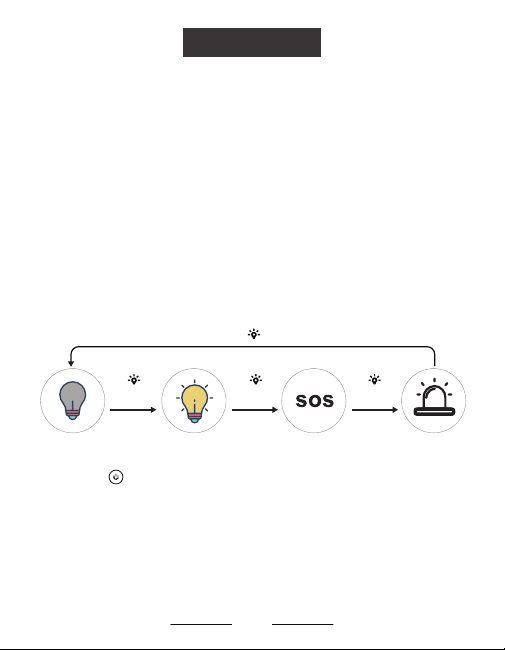
8. Multifunctional Lighting
Special Reminder
75-80dB noise will be generated during inflation.
The inflation air pressure of balloons, toy balls, swimming rings and
other products is less than the range of the air pump, and the inflation
cannot be automatically stopped at the preset air pressure. Please be
careful when using it.
When the equipment continues to work for a long time, the temperature
of the body and the gas tube will increase significantly. Please avoid
touching the air tube with your hands for a long time. If the temperature
is too high, please cool down before continuing to use it. Be careful of
burns when disassembling the gas nozzle after use, there will be slight
air leakage, please disassemble it quickly.
Increased pressure load and lower ambient temperature may cause the
endurance of this device to deteriorate.
As the air pump generates a large amount of heat, please rest for at
least 10 minutes after inflating for 10 minutes before using it.
①
②
③
④
⑤
Long press ” ” for 2 seconds in any mode to turn off the LED lamp function.
Lights out state
Press once Press once
Press once
Lighting mode SOS mode Warning mode
Press once

Usage Notice
Precautions
This product is not a toy, and it is forbidden for children to use it; it
is recommended for users over 16 years of age.
When the product is used for the first time, charge the product for
more than 3 hours.
This product has a built-in non-removable lithium battery. It is
forbidden to throw this product into a fire or throw it away at
will. The lithium battery may catch fire, spontaneously ignite
and explode due to overheating, impact or water. Please avoid
exposure to the sun in the car, or exposed to high temperature
environment.
If the product is swollen, leaking or smells, please stop using it
immediately.
If the product has abnormal noise or high temperature during use,
please stop using it and shut it down immediately.
Please store or use in a dry and clean environment. Avoid
dampness, heavy falls, water immersion and sand intrusion. The
intrusion of sand and dust may cause damage to the product; this
product is also not waterproof, and it is forbidden to wash in
water.
Please keep away from corrosive materials when storing this
product, and the storage temperature should not be lower than
-10℃ or higher than 50℃. Too cold or too hot will shorten the life
of the product and damage the built-in battery.
Please keep this product charged at least once every 3 months.
Do not disassemble the machine by yourself, otherwise it may
cause a safety accident.
11

Inflation Notice
The product has a built-in DC motor, which may generate electric
sparks during operation. Please do not use it in an flammable and
explosive environment.
Before inflating, please confirm the required air pressure value of
the inflated item to avoid personal injury caused by explosion
caused by over-inflation.
When setting the inflation air pressure value, please make sure
that the measurement unit is selected correctly, otherwise it may
cause accidents such as a tyre burst. Common unit conversion:
1bar=14.5psi, 1bar=100kPa.
When inflating objects, please keep this product a safe distance
from children.
Do not bend or step on the inflation tube when inflating, and be
sure to keep the airflow unobstructed.
Operators are not allowed to leave the scene during inflation.
Please observe the inflation process to prevent the inflation air
pressure from being too high due to the unpreset air pressure.
Jump Start Notice
This product can be used to start a 12V battery engine, but cannot
be used to start a 24V battery engine.
Be sure to use the cord clamp provided with the product to start
the vehicle.
It is forbidden to start the car when the power of the product is
lower than 50%, otherwise it will cause damage to the product.
Do not clamp the battery clamps at both ends, otherwise it may
cause a safety accident.
If a startup fails, please try again after at least 1 minute to avoid
damage to the product.
After starting the car, please wait at least 30 minutes before
charging the product.
12
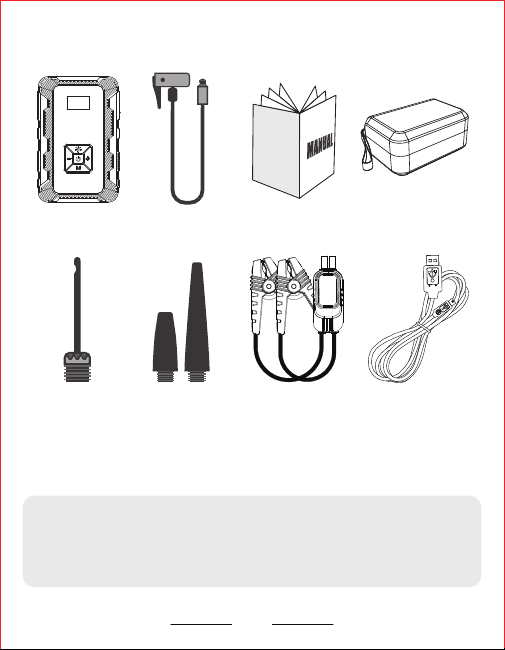
Inflatable
tube ×1
Guide ×1 Storage bag ×1
Gas needle ×1
Product ×1
Gas nozzle ×2 Jumper cable ×1 Charging cable ×1
Packing List
Note: The illustrations of products, accessories, and display interface in
this manual are all schematic diagrams and are for reference only. Since
the product is iteratively upgraded from time to time, the actual product
and the schematic diagram may be different, please refer to the actual
product!
13
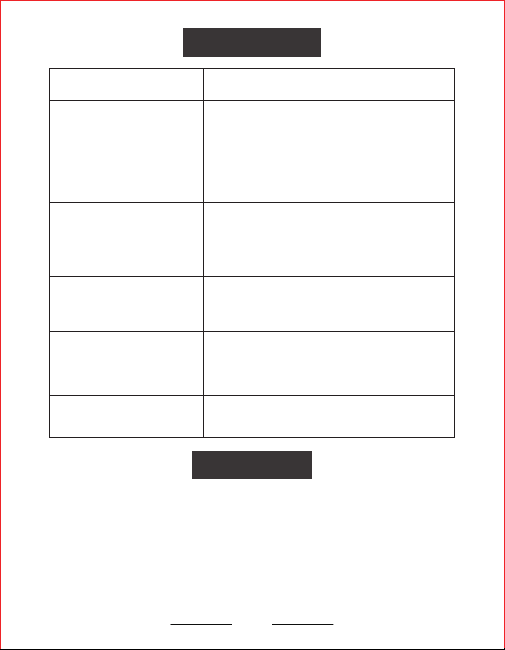
Trouble Shooting
Disclaimer
Elimination MethodProblem
Slow inflation
Has been turned on,
but cannot be inflated
The inflation is normal,
but the display
pressure value is zero
After installing the gas
nozzle tightly, the power
has been automatically
turned off
There is air leakage when
connecting the trachea
1. Check whether the battery power is
sufficient.
2. Check for air leaks in the trachea.
3. Check whether the connecting parts at
both ends of the trachea are tightly
installed.
4. Check whether the tires are flat.
1. Check whether the battery power is
sufficient.
2. Check whether the air pressure of the
inflated item is higher than the preset
value.
Low-pressure inflated objects such as
balloons are not within the measurable
range of this device.
It will automatically shut down if there is no
operation within 30 seconds, just restart it.
Install the trachea tightly.
The company does not assume any responsibility for problems caused
by misoperation beyond the instructions.
If the product is damaged by disassembling and installing by oneself,
our company will not bear any responsibility.
If the use of a mismatched charger causes problems, our company does
not assume any responsibility.
The company does not assume any responsibility for products beyond
the warranty period.
1.
2.
3.
4.
14