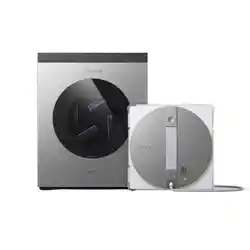
Window Cleaning Robot
U
S
E
R
M
A
N
U
A
L
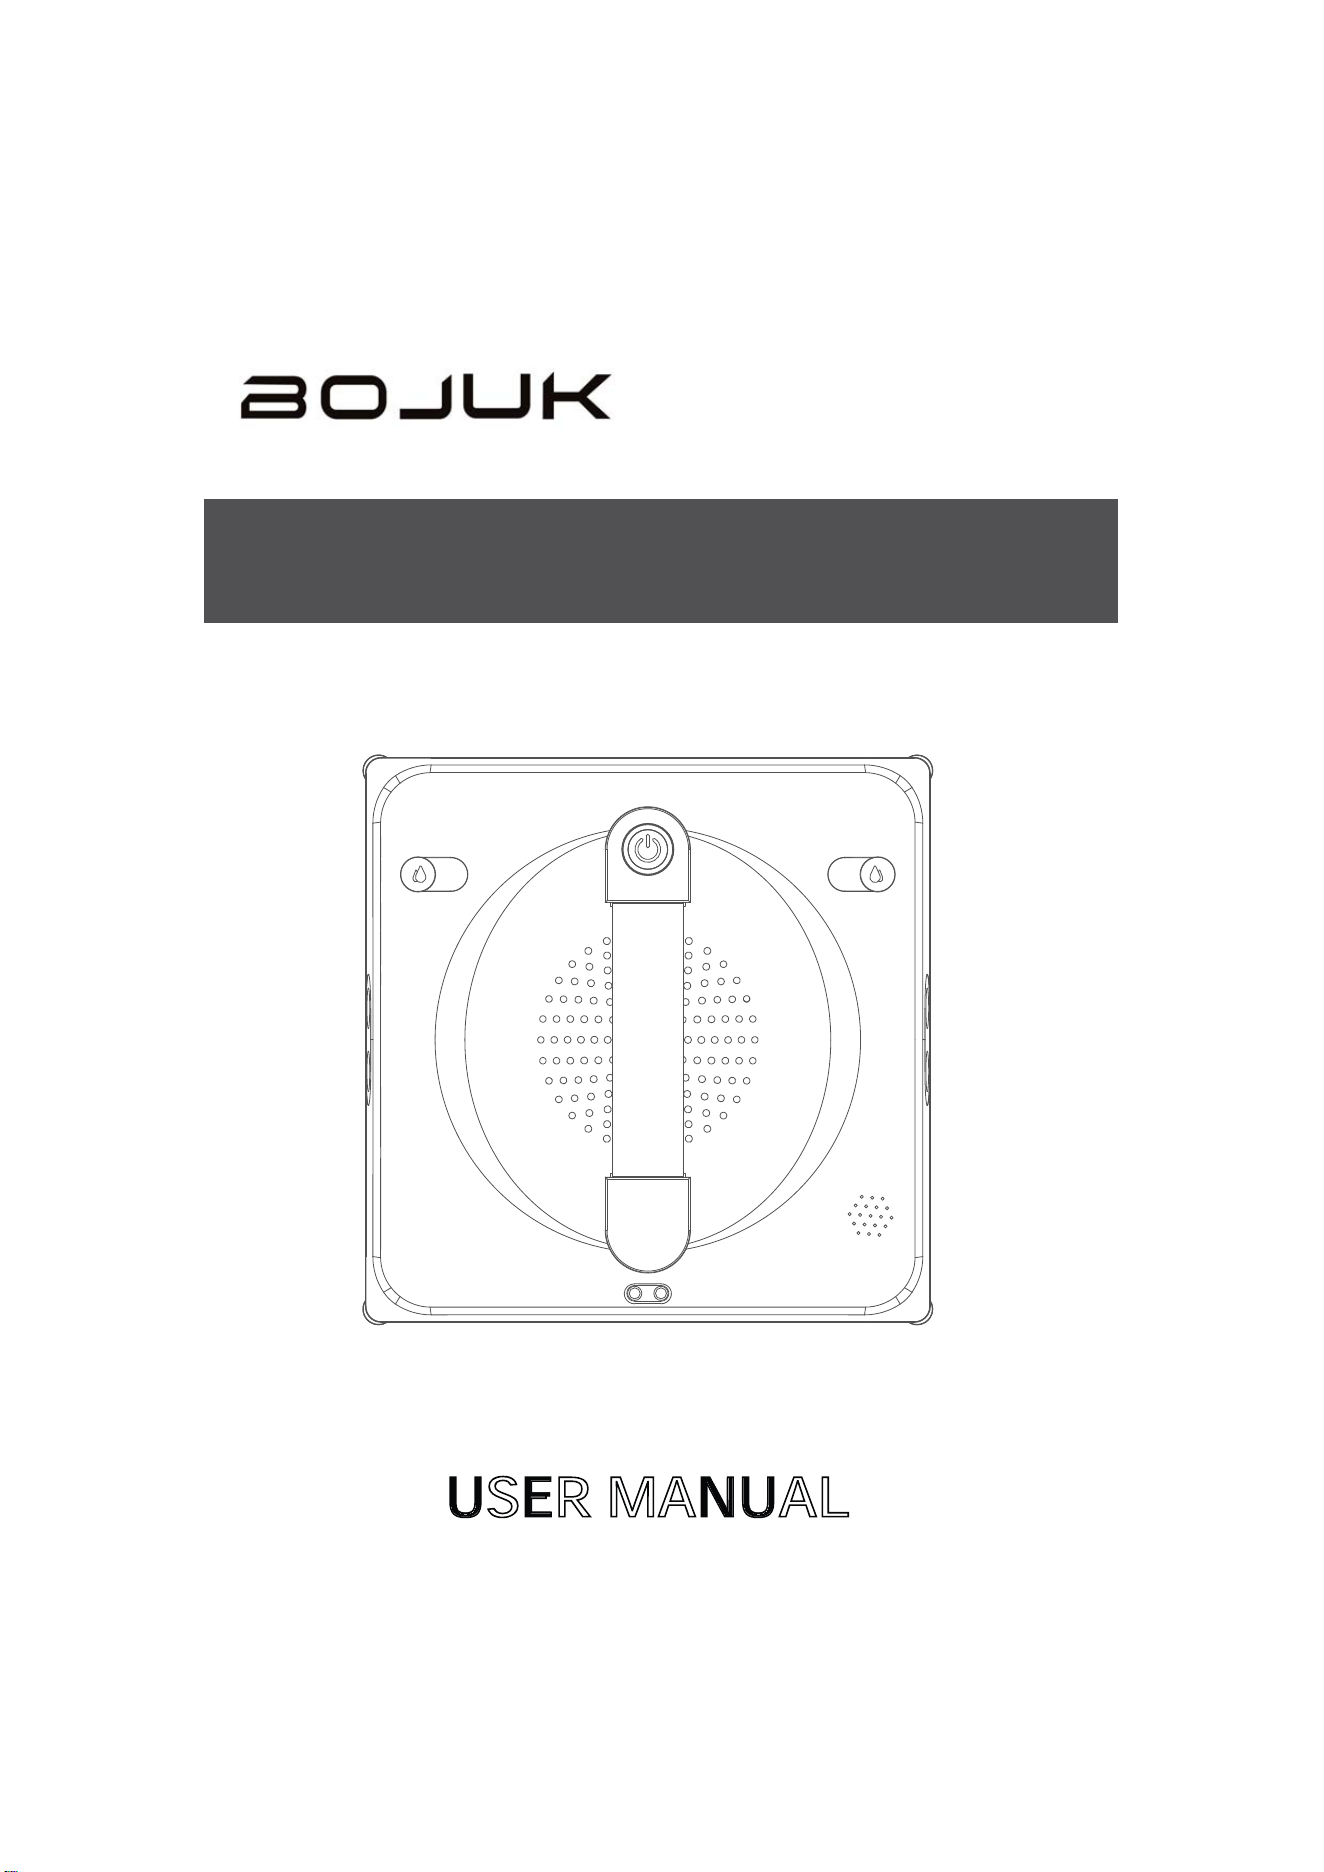
GLC260
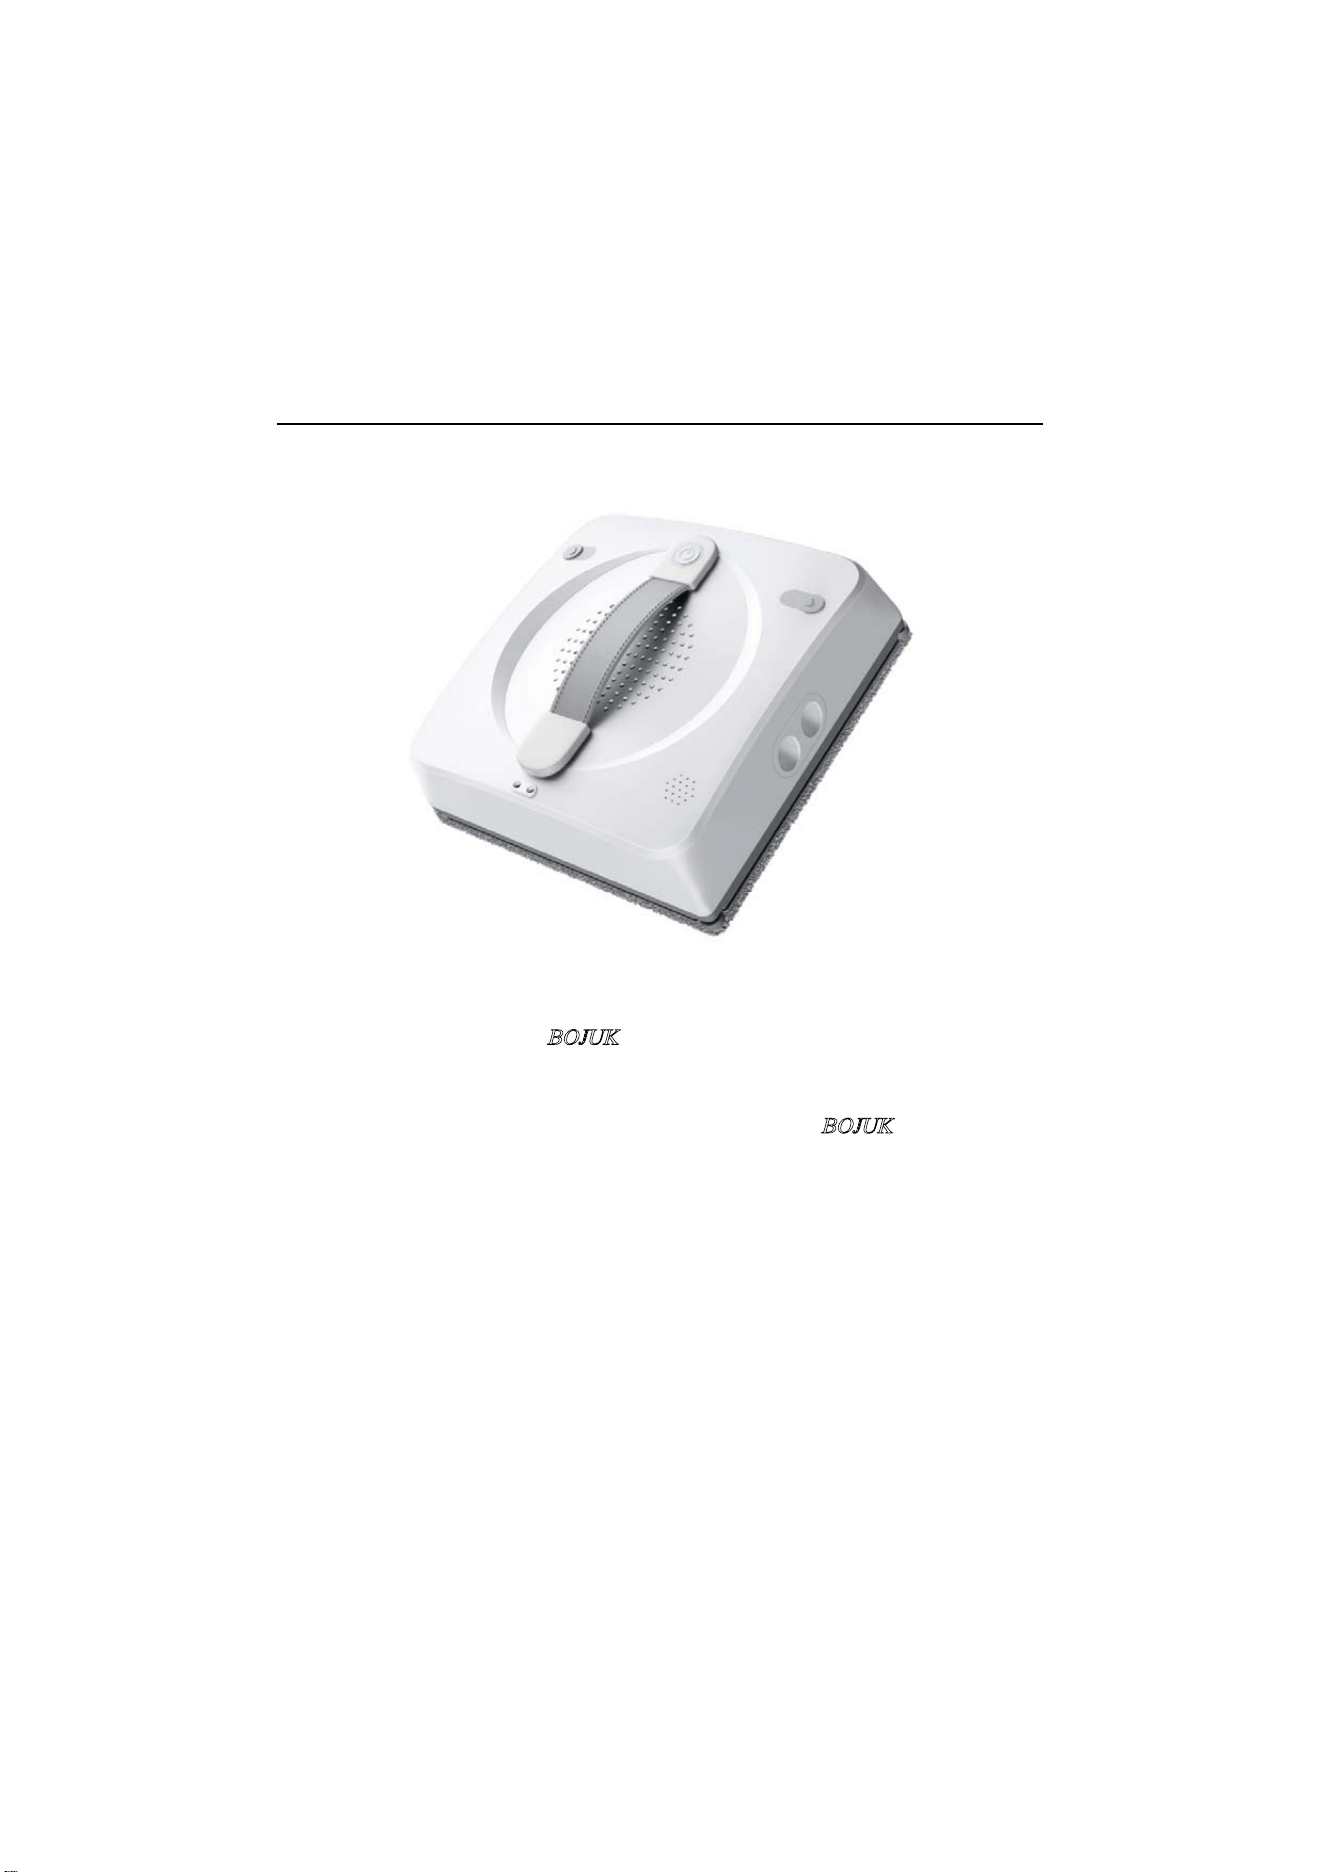
BBOJUK WINDOW CLEANING ROBOT
T
h
an
k
you for purc
h
as
i
ng t
h
e
B
O
J
U
K
Window Cleaning Robot. We are
K
comm
i
tte
d
to prov
idi
ng conven
i
ent an
d
i
nte
llig
ent
h
ome c
l
ean
i
ng so
l
ut
i
ons. P
l
ease
read this manual carefull
y before use to quickly master the operation methods an
d
precautions for the Window Cleaning Robot. The
B
O
J
U
K
technical support
K
team is dedicated to providing you with premium after-sales service. For any inquirie
s
, feel free to contact us anytime:
Email: bojuk-serve@outlook.com
GLC260
GLC260

Important Safety Instructions and Warnings.............................
.
Product Details & Parameters...................................................
.
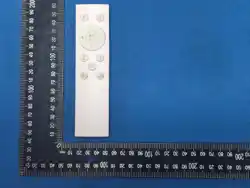
Remote Control..........................................................................
Operation Steps.........................................................................
Cleanin
g Functions....................................................................
.
T
a
b
l
e
o
f
C
o
n
t
e
n
t
s
Troubleshooting..........................................................................
01
03
05
06
09
12
I
.
I
m
p
o
r
t
a
n
t
S
a
f
e
t
y
I
n
s
t
r
u
c
t
i
o
n
s
&
W
a
r
n
i
n
g
s
1
.
A
t
t
t
t
e
n
t
i
o
n
!
M
u
s
t
R
e
a
d
B
e
f
o
f
o
f
o
r
e
U
s
e
1.Do not allow children to operate this product. Please use it only after
you are familiar with the operating procedures and safety risks.
2.This product is suitable for cleaning flat window glass. If the sealant
strips on the window frame are damaged, please pay special attention to
prevent the machine from falling due to insufficient suction during
cleaning.
2
.
S
a
f
e
t
y
P
r
e
c
a
u
t
i
o
n
s
ƽ
Use the original adapter. Using a non-original adapter may cause
product malfunction or damage.
ƽ
Ensure the adapter has sufficient space for ventilation and heat
dissipation during use. Do not wrap the adapter with other objects, as this
increases the risk of overheating.
ƽ
Do not use the adapter in a humid environment.
ƽ
If the adapter malfunctions, please replace the entire adapter. For
assistance and repairs, please contact customer service.
ƽ
Do not use a damaged adapter, charging cable, or plug. Do not
disassemble the adapter.
ƽ
Before cleaning and maintaining the machine, unplug the power plug to
prevent electric shock.
ƽ
Please strictly follow this manual when using the product.
ƽ
Do not get the product wet or leave it in a humid environment for a long
time. Keep the product away from liquids (such as alcohol, water,
beverages, etc.).
ƽ
Do not expose the product to direct sunlight, and keep it away from
heat sources (such as radiators, heaters, microwaves, gas stoves, etc.).
ƽ
Do not place this product in an environment with strong magnetic fields.
ƽ
Store this product out of the reach of children.
ƽ
Operating ambient temperature: 0°C ~ 40°C (32°F ~ 104°F).
ƽ
Do not use this product on broken or uneven glass surfaces.
ƽ
The built-in battery can only be replaced by the manufacturer or
designated dealers/service centers to avoid danger.
ƽ
Before removing or disposing of the battery, ensure the machine is
unplugged and the power is completely cut off.
ƽ
Please operate this product strictly according to the instruction manual.
The manufacturer is not responsible for any property damage or personal
injury caused by improper use.
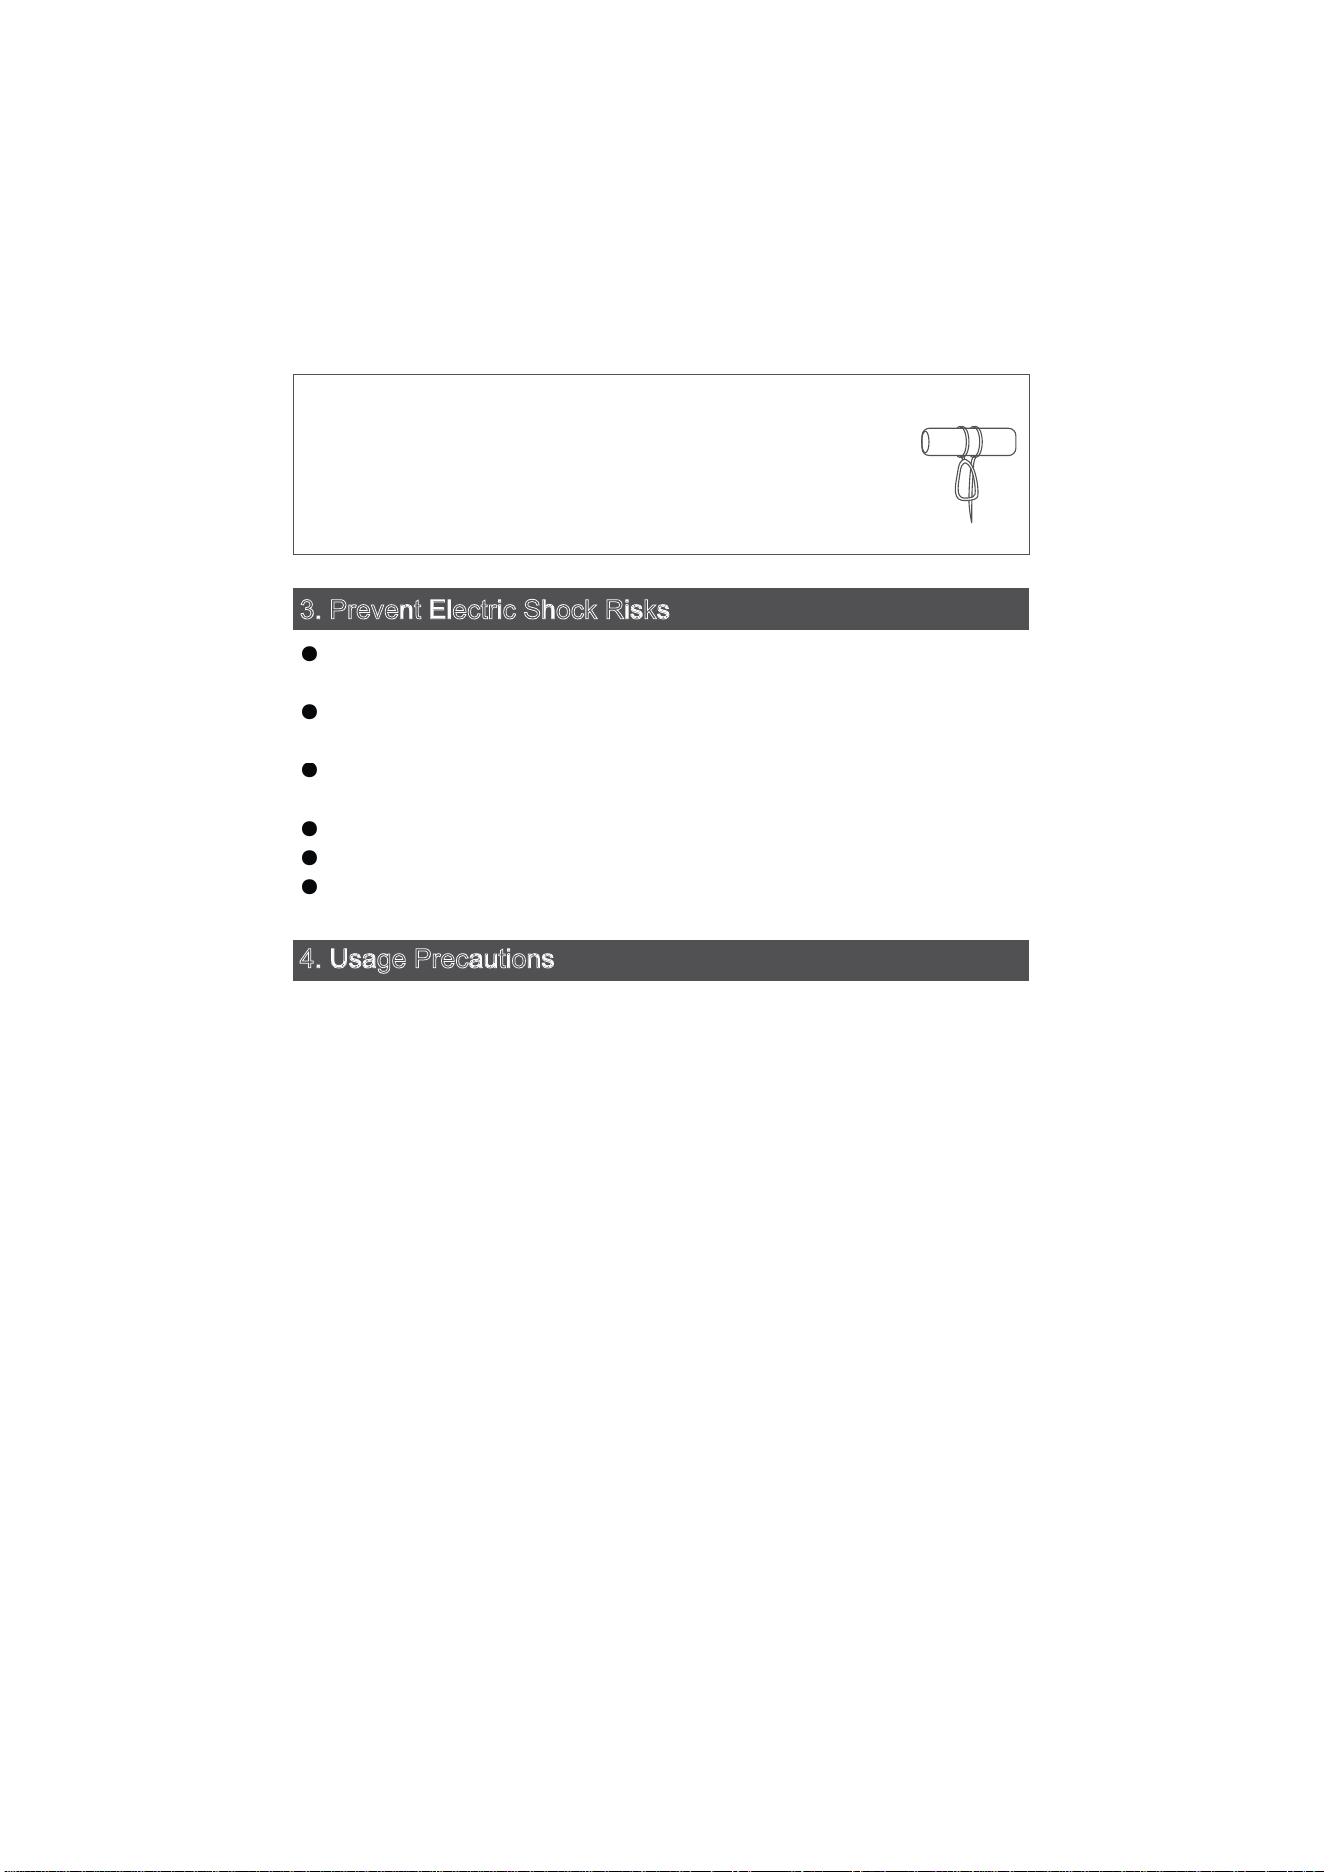
Caution!
It is essential to check that the safety rope is undamaged and that
one end is securely connected to the machine, while the other end
is firmly attached to other fixed objects indoors to prevent it from
falling and injuring people or damaging property.
ƽ
Ensure the power is completely disconnected and the machine is turned
off before cleaning or maintaining the body.
ƽ
Do not drag the power plug via an extension cord; unplug the power
plug correctly by holding the plug itself.
ƽ
Do not attempt to repair the product yourself. Product repairs must be
carried out by an authorized service center or dealer.
ƽ
If the machine or power cord is damaged, do not continue to use it.
ƽ
Do not use water to clean the machine body or the power adapter.
ƽ
Do not use this product in dangerous areas such as near open flames,
3
.
P
r
e
v
e
n
t
E
l
e
c
t
r
i
c
S
h
o
c
k
R
i
s
k
s
bathrooms with running water, swimming pool edges, etc.
4
.
U
s
a
g
e
P
r
e
c
a
u
t
i
o
n
s
1.Before operation, ensure the safety rope is firmly tied to a stable indoor
fixture.
2.Before use, ensure the built-in backup battery is fully charged (green
light is on).
3.Remove all other objects from the glass surface before use. Do not use
this machine to clean cracked glass. Some frosted glass surfaces may be
scratched during cleaning; use with caution.
4.Ensure the cleaning cloth is correctly attached to the bottom of the
machine to prevent air leakage during suction.
5.Turn on the machine first, then place it on the window glass. Confirm the
machine is firmly adhering to the glass surface before letting go.
6.Before turning off the machine, hold the machine securely to prevent it
from falling.
7.Do not spray water directly onto the machine body or the bottom of the
machine; water should only be sprayed onto the cleaning cloth.
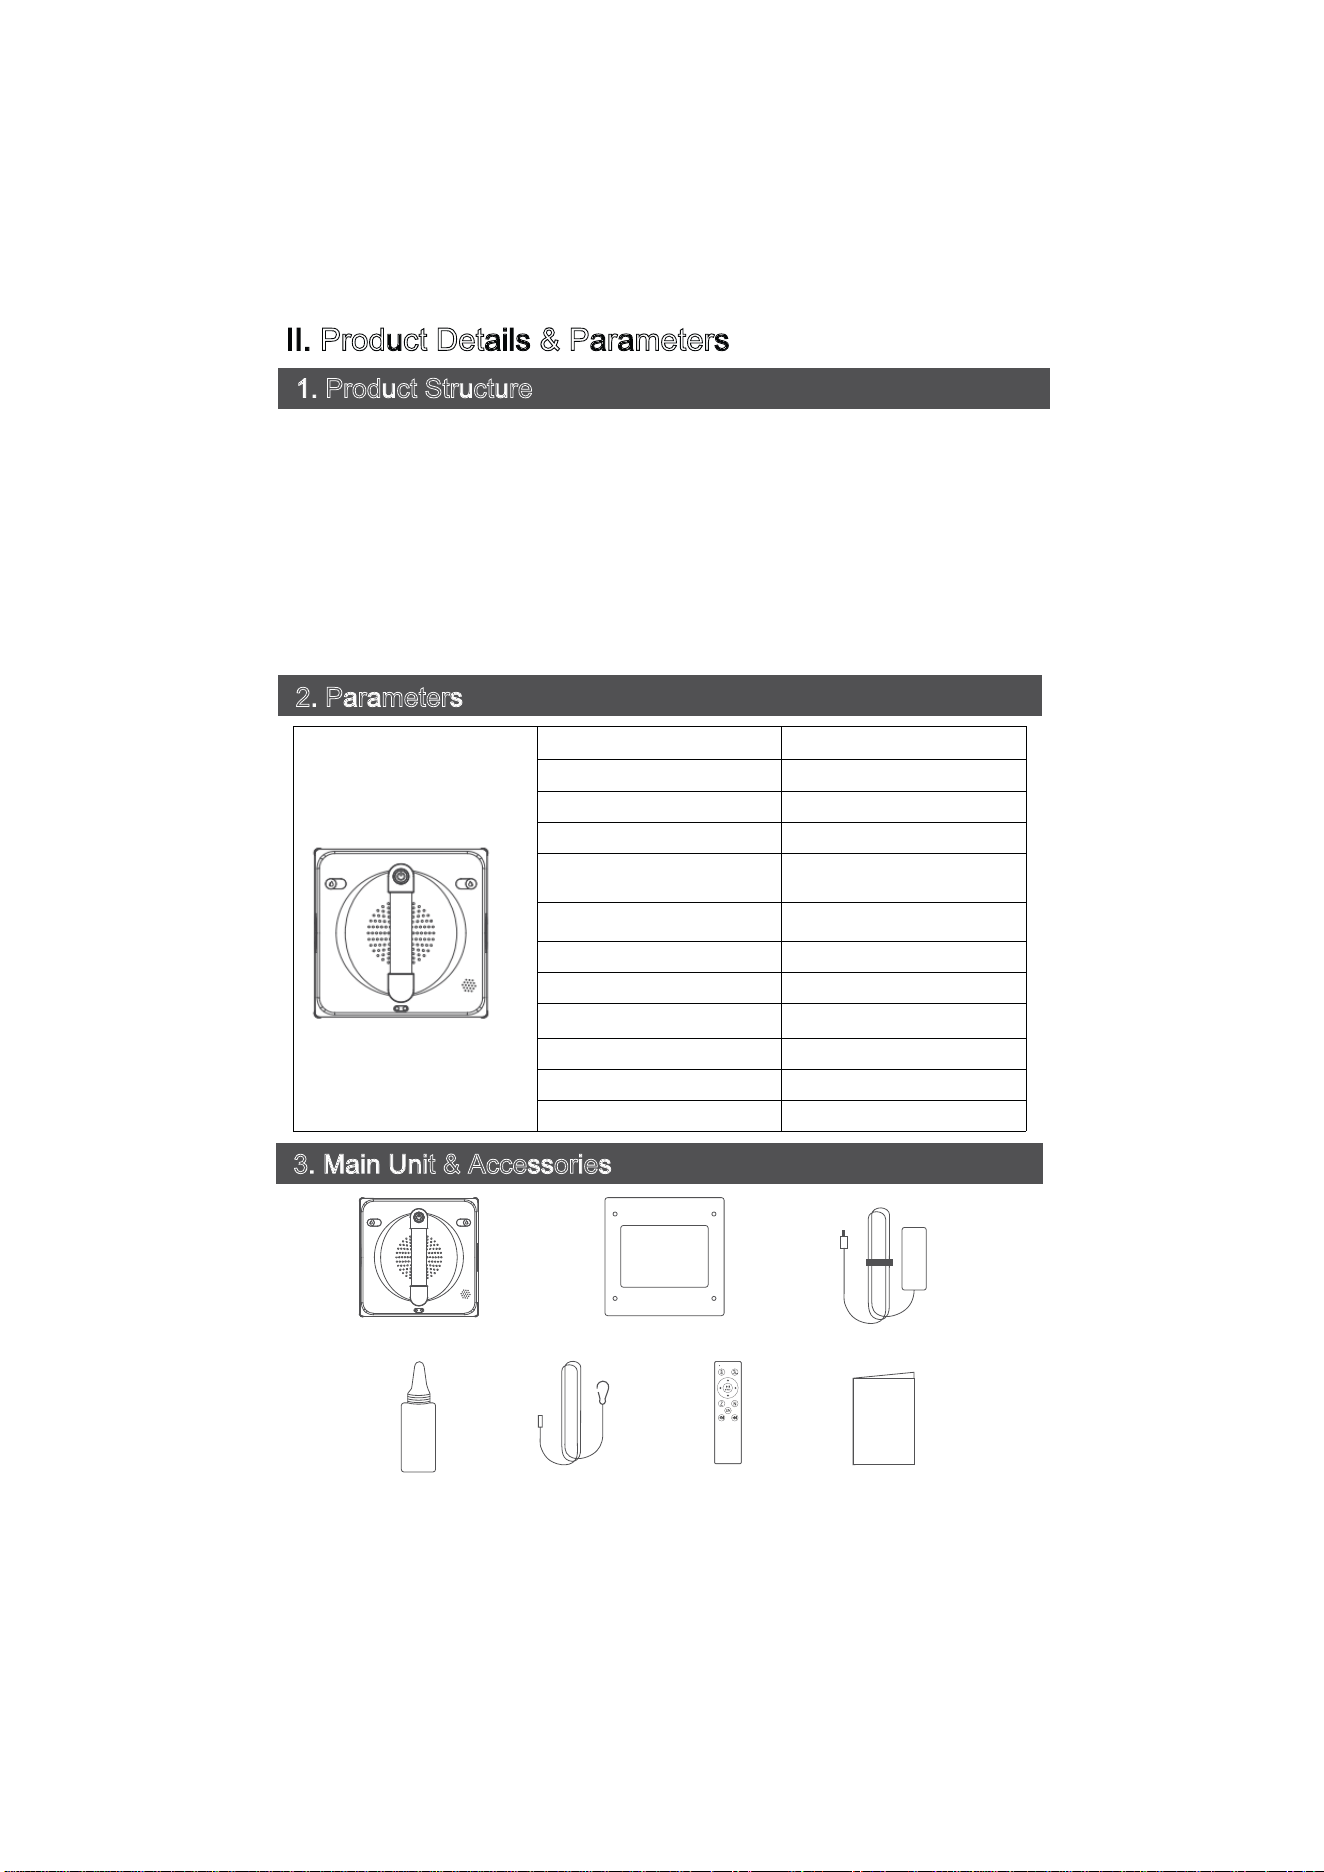
Input Voltage AC100-240V; 50Hz~60Hz
Rated Power 72W
Battery Capacity 600mAh
Charging Time 2 Hours
UPS Power-off Protection
Time
18~20 Minutes
Control Method Wireless Remote Control
Noise 68dB
Frameless Detection Automatic
Fall Prevention Control UPS / Safety Rope
Cleaning Modes 4 Types
Water Spray Method Manual / Automatic
Product Dimensions 215 x 215 x 78 mm
I
I
.
P
r
o
d
u
c
t
D
e
t
a
i
l
s
&
P
a
r
a
m
e
t
e
r
s
s
s
1
.
P
r
o
d
u
c
t
S
t
r
u
c
t
u
r
e
1.The window cleaning robot is equipped with 2 water spray holes. When the
machine cleans to the left, the left side sprays automatically; when it cleans to the
right, the right side sprays automatically.
2.1 Vacuum Motor: Enables the machine to adhere to the glass surface and move
freely on vertical glass surfaces.
3.Built-in UPS (Uninterruptible Power Supply): Prevents the device from falling in
case of a power outage.
4.The robot features Artificial Intelligence (AI) for automatic path planning and
frameless window detection. It automatically cleans the entire window. The
wireless remote control allows for free control of the robot.
2
.
P
a
r
a
m
e
t
e
r
s
s
s
3
.
M
a
i
n
U
n
i
t
&
A
c
c
e
s
s
o
r
i
e
s
M
a
i
n
U
n
i
t
Cleaning Cloths (x6)
Adapter + Power
C
or
d
Water Injection
Bo
ttl
e
S
afety Rope
R
emote
C
ontro
l
U
ser
M
anua
l
4
.
P
r
o
d
u
c
t
D
e
t
a
i
l
D
i
a
g
r
a
m
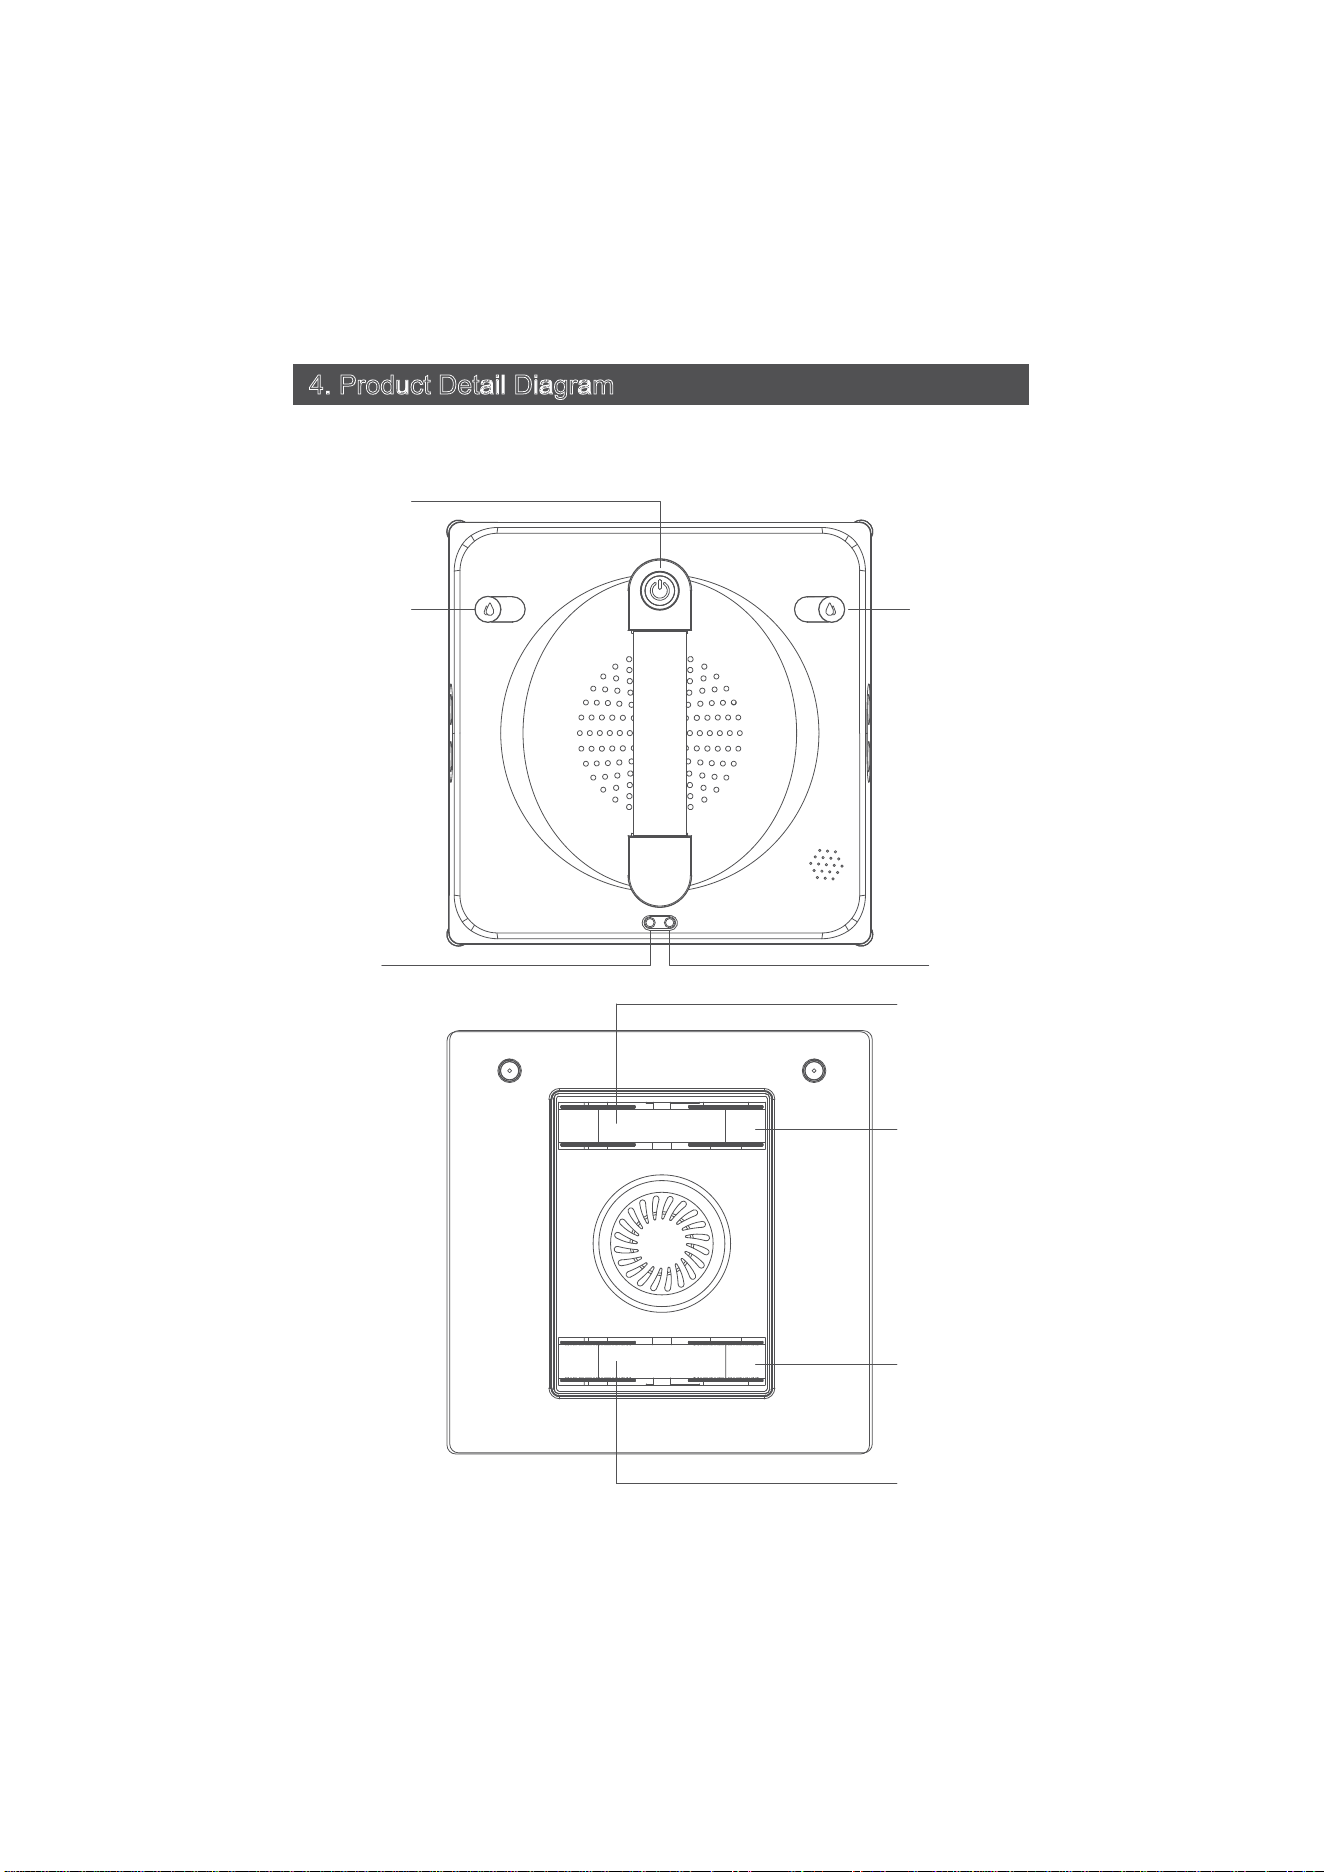
One-key Start
(On/Off
)
Water Tank Inlets
Water Tank Inlet
s
Power Inter
face
Blue Light (Machine Normal
)
Red Light
(
Machine Abnormal/Error
)
Orange Light (Charging)
G
reen Light
(C
harging
C
omplete
)
S
a
f
ety Rope
E
dge/Anti-fall
S
ensor
s
E
dge/Anti-fall
Sensor
s
D
r
i
v
i
ng
T
rea
ds
Driving Treads
I
I
I
.
R
e
m
o
t
e
C
o
n
t
r
o
l
A. Do not charge the remote control batteries. Do not disassemble batteries
or throw them into fire as they may explode.
B. Please use batteries of the same specification (AAA/RL03). Do not mix
different battery types to avoid damaging the circuit. When installing, push
the remote cover down to open. Install the negative end against the spring
first. Reverse installation will not work. Close the cover.
C. Do not mix new and old batteries or different types of batteries.
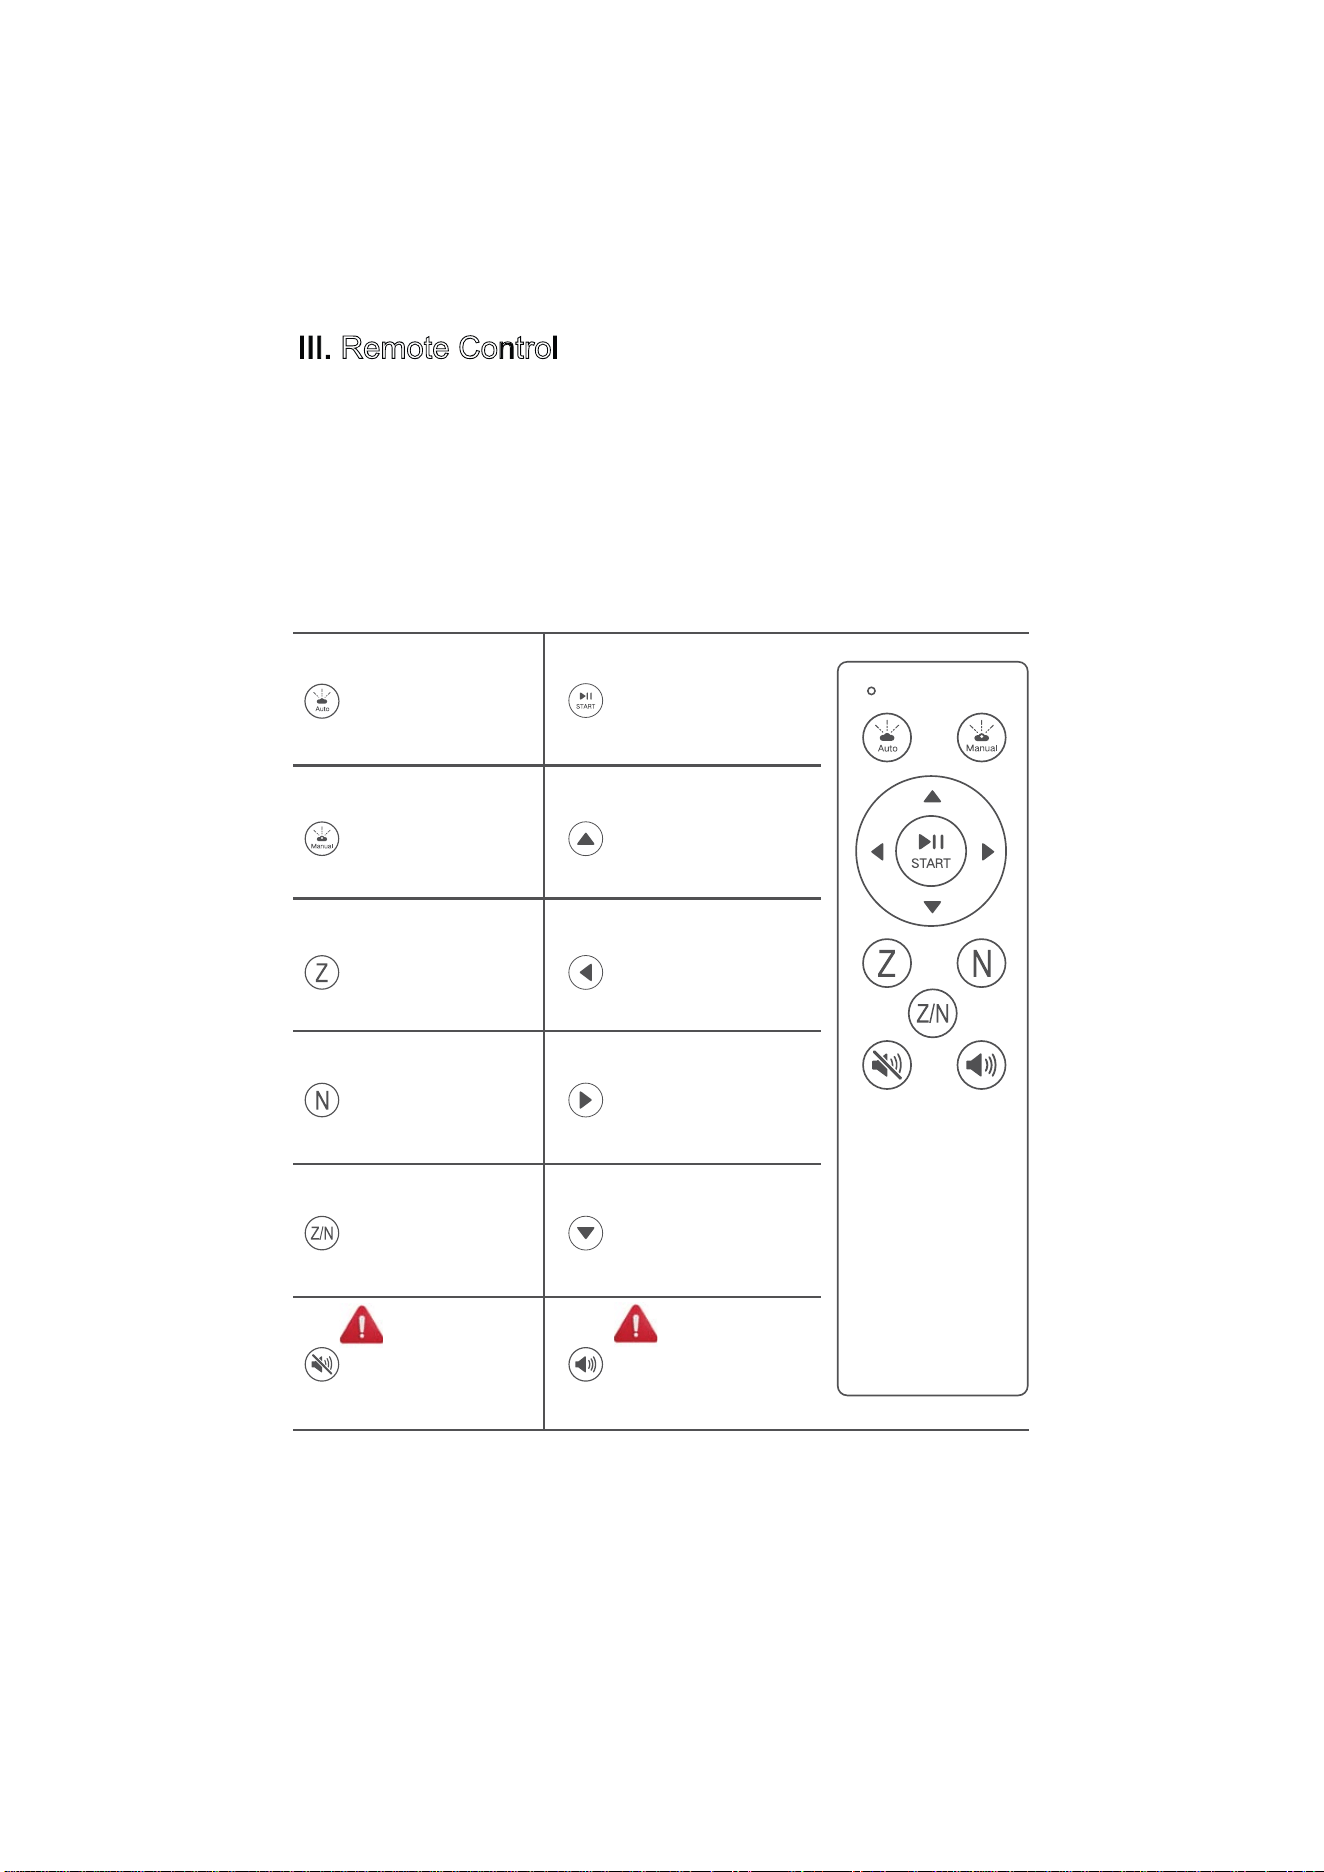
Auto Spray Button
S
hort press to Start
/
P
ause.
Long press (2 seconds)
to start Spot Cleanin
g.
Manual Spra
y
Left/Right Auto
Cleaning Mode
Up/Down Auto
Cleaning Mode
First Left/Right,
then Up/Down
Auto Cleaning
Mode
Manually press and
This model does
not support voice
This model does
not support voice
prompt functions prompt functions
hold to move upwards
Manually press and
hold to move left
Manually press and
hold to move right
Manually press and
hold to move
downwards
I
V
.
O
p
e
r
a
t
i
o
n
S
t
e
p
s
1
.
C
l
e
a
n
i
n
g
C
l
o
t
h
I
n
s
t
a
l
l
a
t
i
o
n
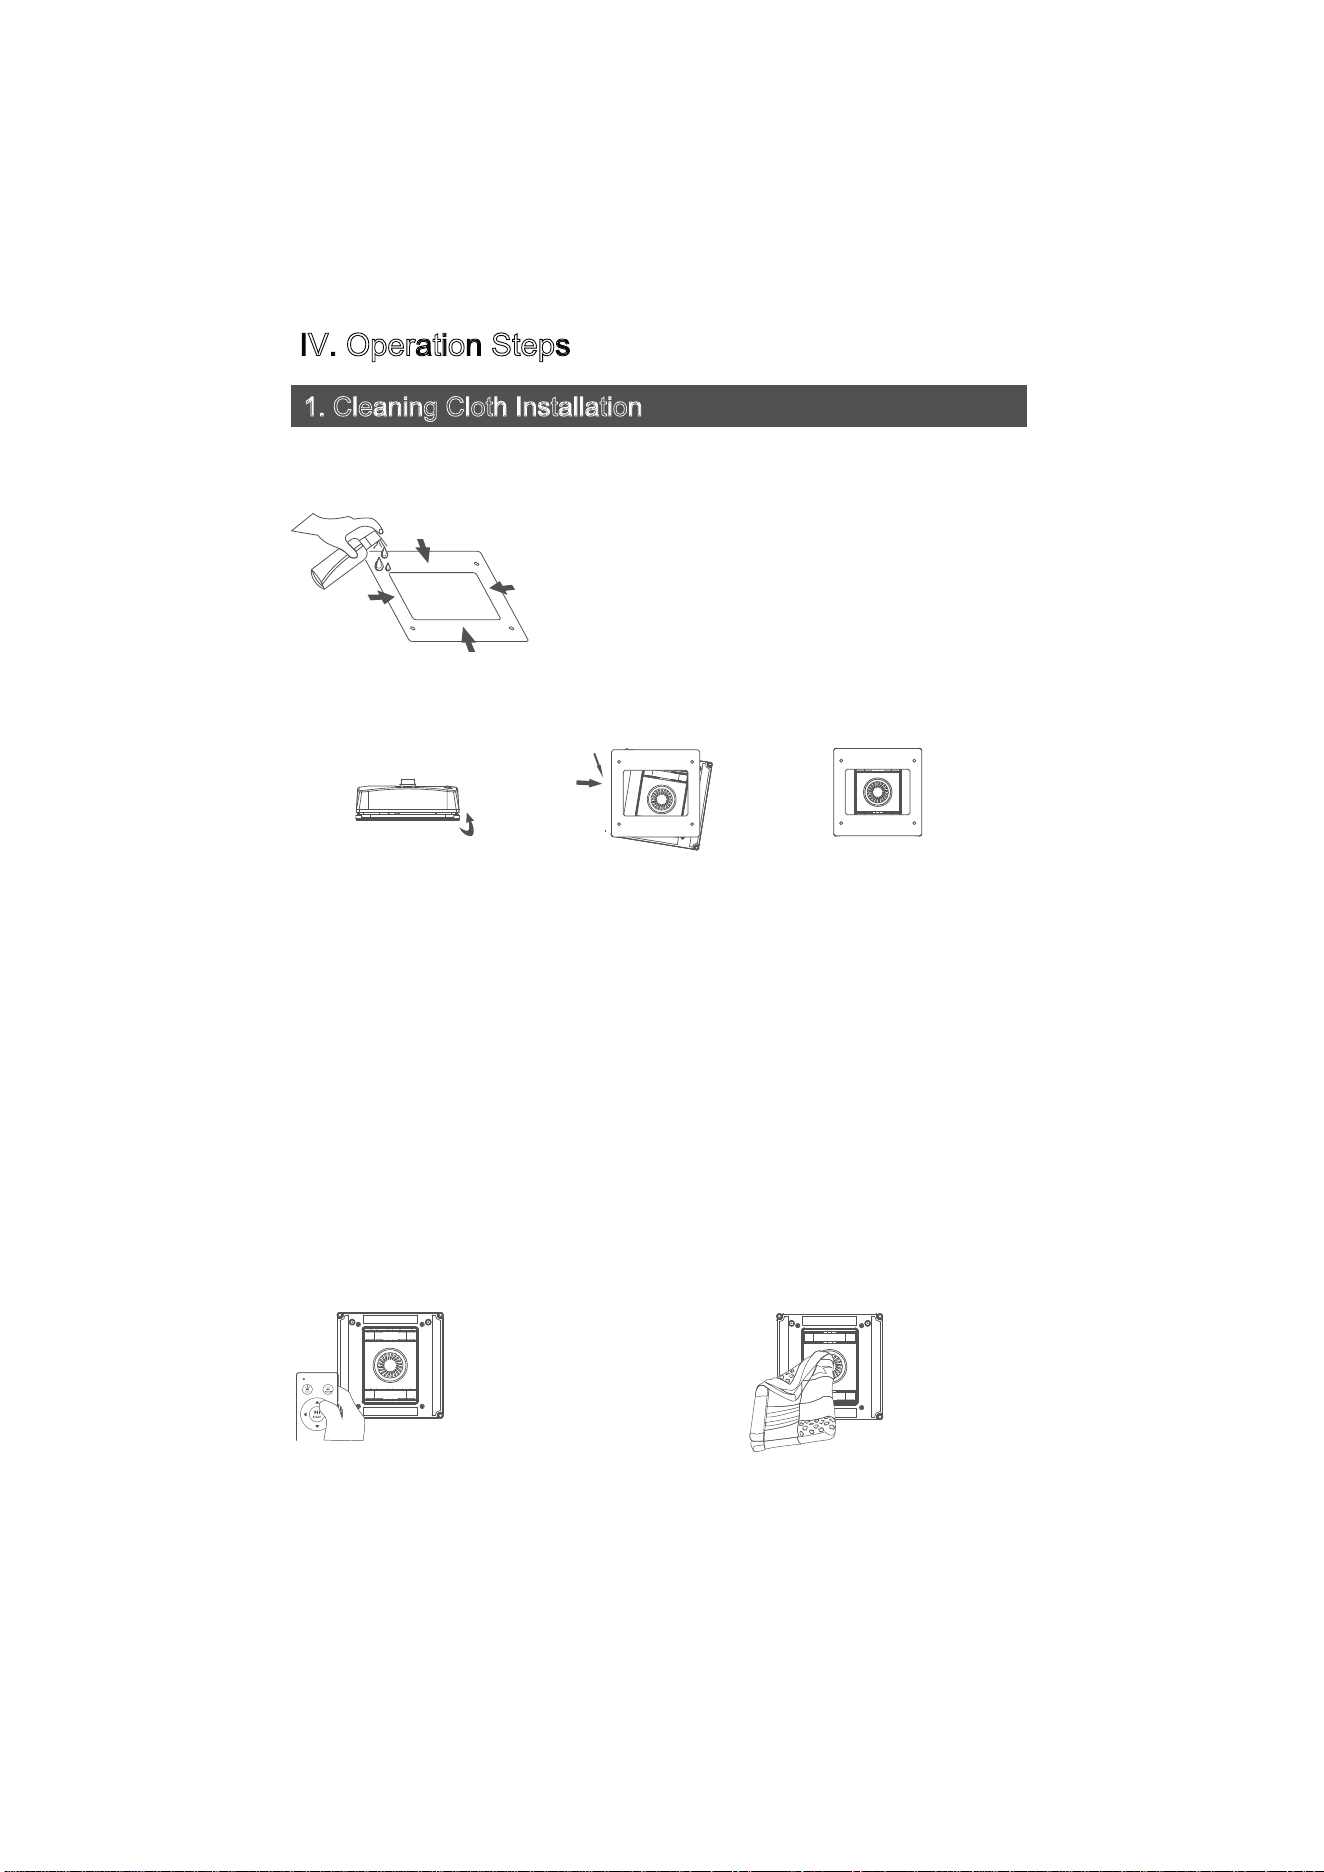
Large spray bottle: Spray 4 times per side.
Small spray bottle: Can spray a few more times
A. Spray Cleaning Fluid: Spray 4 times on each side (Note: The cloth
should be damp, not soaking wet).
until damp, but not dripping wet.
B. Attach the Cloth: Turn the machine over and attach the cleaning cloth
correctly to the bottom. Align the four edges strictly; do not cover the
edge sensors or the bumper wheels.
Note:1: The cleaning cloth must not touch
the sensor wheels.
2: Align the four sides of the cloth with the
four inner sides of the machine body.
Cleaning Steps:
1.Place the dampened cloth on the machine. Select Z/N, Z, or N mode to clean. This
completes one cleaning cycle. (If the glass is not thoroughly clean, proceed to steps 2
and 3. If clean, empty the water tank and store the machine).
2.Remove the machine, change the cloth. Spray cleaning fluid 4 times on each side of
the cloth (damp, not wet). Turn on the power. Long press the UP button on the
remote to clean the driving treads and the four wheels (See Figure 1, Figure 2).
3.Re-attach the machine to the glass and start Z/N, Z, or N mode again.
4.Remove the machine, change the cloth. Spray clean water 4 times on each side.
Turn on power, long press UP to clean the treads again.
5.Attach machine to glass and run Z/N mode for a final dry/polish. Remove machine,
empty water, and store.
Figure 1
Figure 2
Power on the machine and
press and hold the up
button on the remote
control to clean the tracks.
Cleaning the base
2
.
I
n
j
e
c
t
i
n
g
W
a
t
e
r
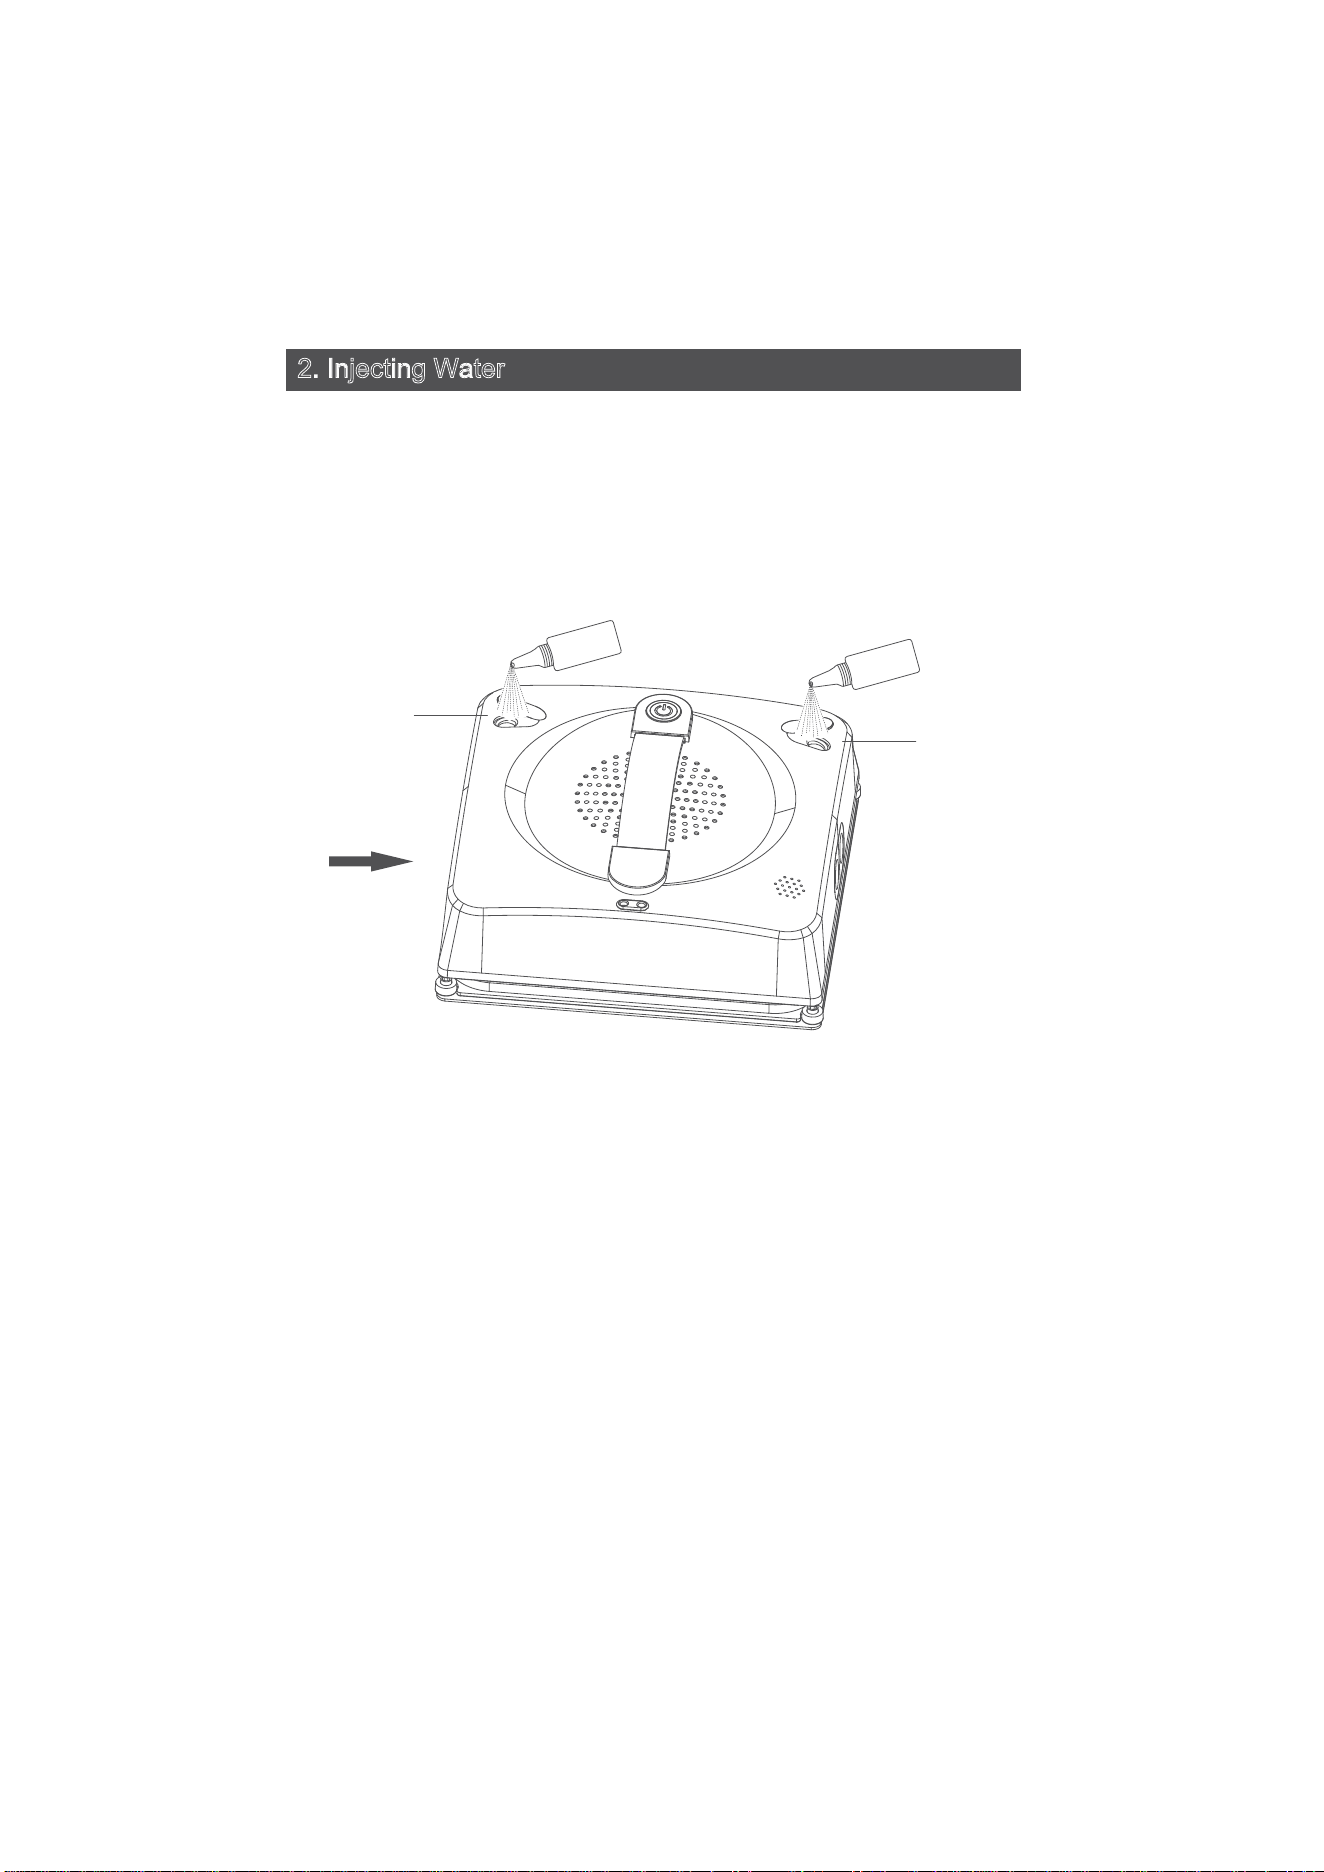
A. Use only clean water or cleaning solution.
B. Open the silicone cap and add detergent or water.
C. Close the silicone cap tightly.
Water Tank Inlets
Water Tank Inlets
Troubleshooting: Robot Not Spraying Water
A. Confirm the spray function switch is turned on.
B. Clean the water beads on the ultrasonic nozzle with a clean soft cloth.
C. Check if there is water in the tank and if the added liquid is clean and
free of impurities.
D. Do not fill the tank completely (80%-90% is sufficient) to maintain
stable air pressure.
3. Connecting the Power Cord
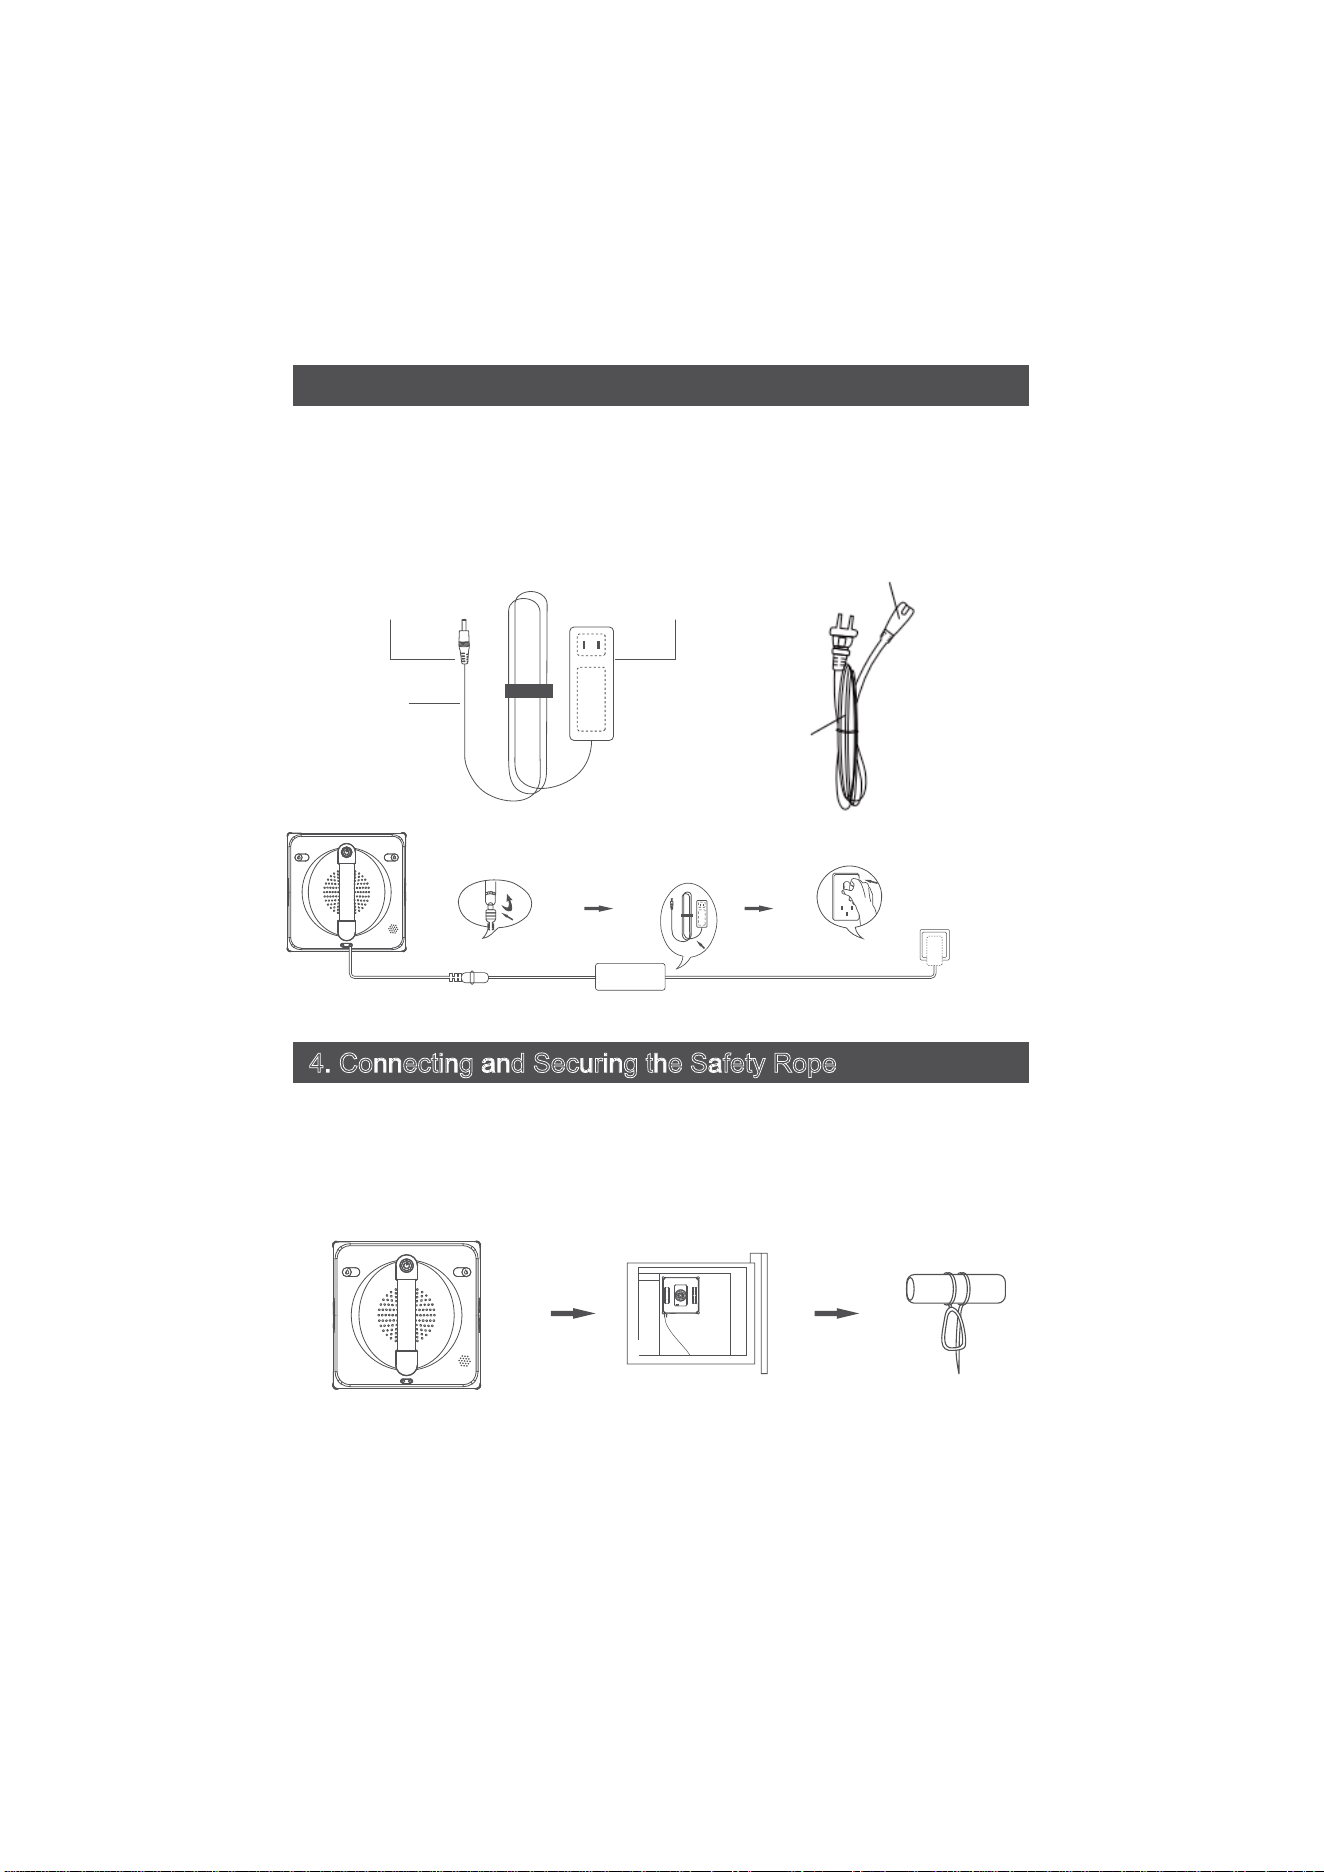
A. Insert the DC plug (A) into the machine's power interface (Figure 1).
B. Connect the DC plug (B) to the adapter (Figure 2).
C. Connect the adapter to the power outlet (Figure 3).
DC plug (A)
DC plug (B)
Adapter
Figure 1
Figure 2
Figure 3
Power cord
Extension cord
Figure 1 Figure 2
4
.
C
o
n
n
e
c
t
i
n
g
a
n
d
S
e
c
u
r
i
n
g
t
h
e
S
a
f
e
t
y
R
o
p
e
A. Check if the safety rope is broken and if the connection to the robot is
secure (Figure 1).
B. Fix the other end of the safety rope to a heavy or fixed object in the
room to ensure the machine will not fall or detach (Figure 2).
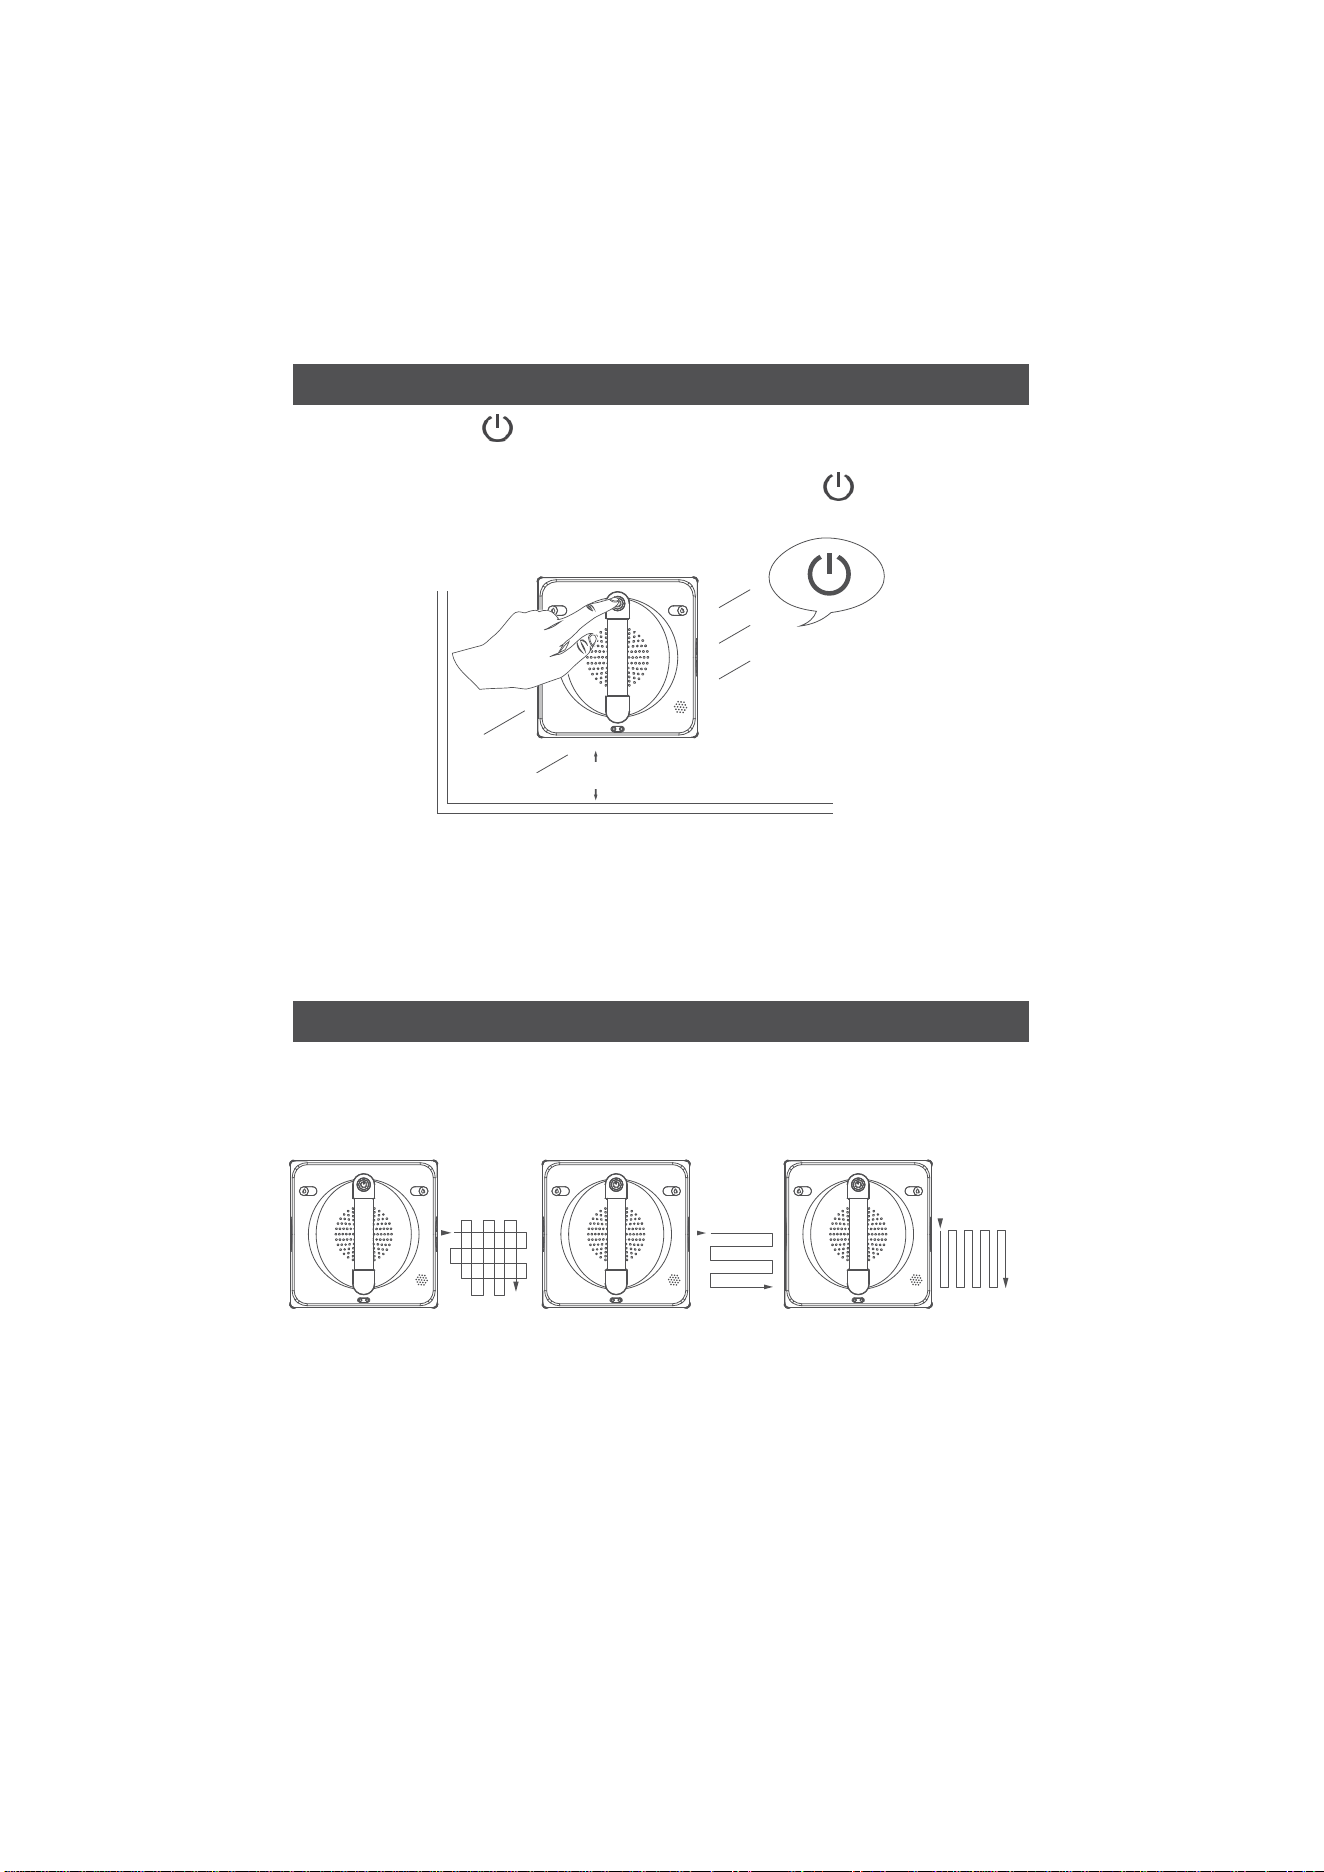
5. Starting the Window Cleaning Robot
A. Long press the on the body for 2 seconds to turn the machine's
power on/off.
B. Place the machine on the glass surface. Press the once (short
press) to start or pause the cleaning program.
Note: Before starting, ensure the machine is placed at least 80mm away
from the window frames or corners.
80mm
V. Cleaning Functions
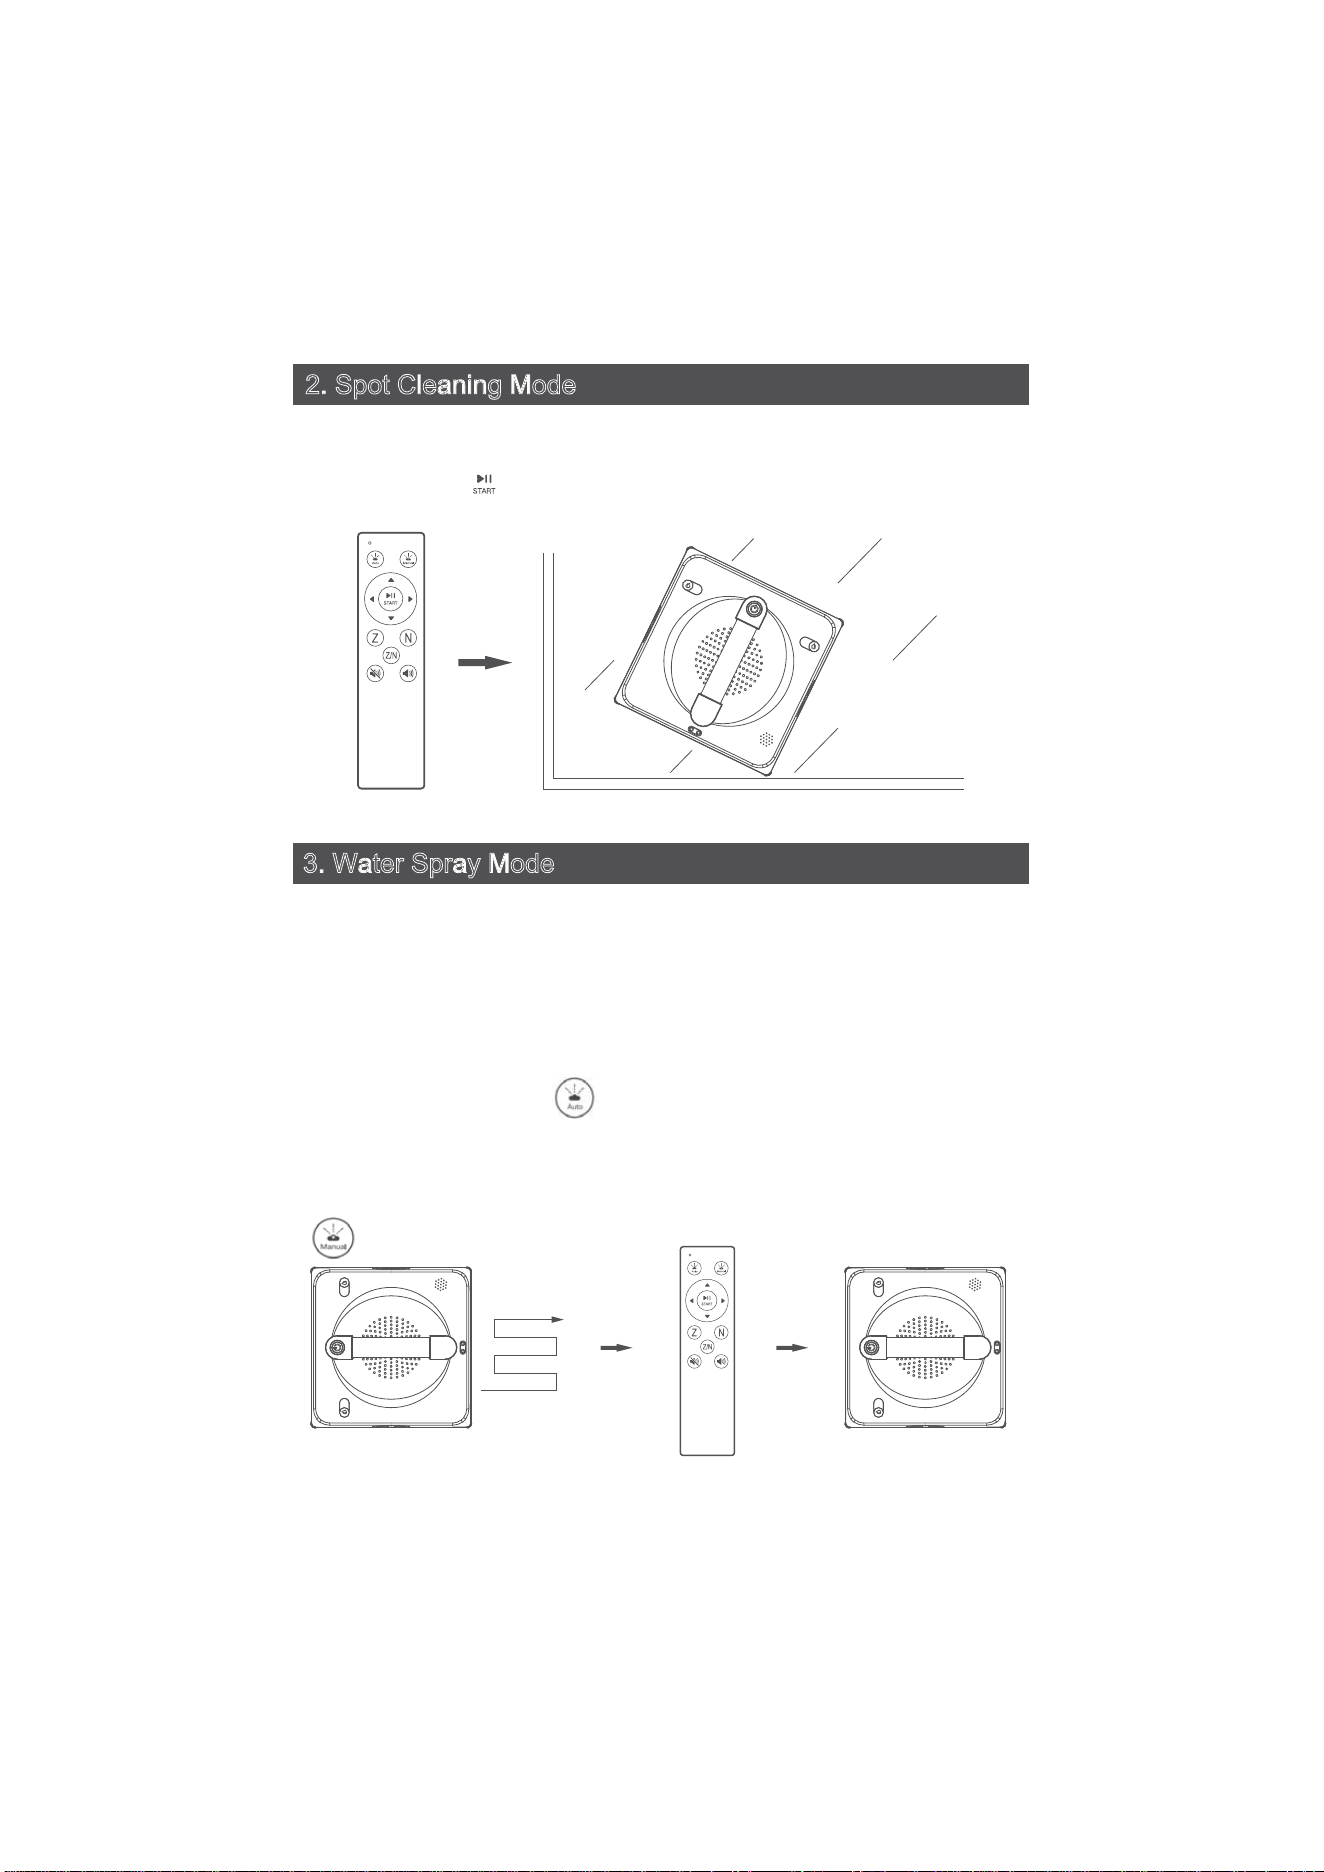
1. Automatic Mode and Manual Mode
Select the three automatic modes on the remote control: Z/N, Z, or N to
automatically clean the window glass.
Z/N Mode
Z Mode
N Mode
2
.
S
p
o
t
C
l
e
a
n
i
n
g
M
o
d
e
A. Use the Up, Down, Left, Right buttons on the remote to move the
machine to the area requiring focused cleaning.
B. Long press the button on the remote for 2 seconds to enter Spot
Cleaning mode.
3
.
W
a
t
e
r
S
p
r
a
y
M
o
d
e
The robot has 2 spray holes.
Moving Left: Left side sprays automatically.
Moving Right: Right side sprays automatically.
Moving Down: Bottom side sprays automatically.
Moving Up: The machine does not spray automatically.
A. Auto Spray Mode: When in "Z", "N", or "Z/N" cleaning mode, the Auto Spray
mode is on by default (intermittent spraying).
B. Turning Off/On: Press the button on the remote.
One "Beep": Auto spray is Closed/Off.
Two "Beeps": Auto spray is Open/On.
C. Manual Spray: When the robot is in "Z" mode (moving forward), press the
button on the remote to spray once per press.
tte
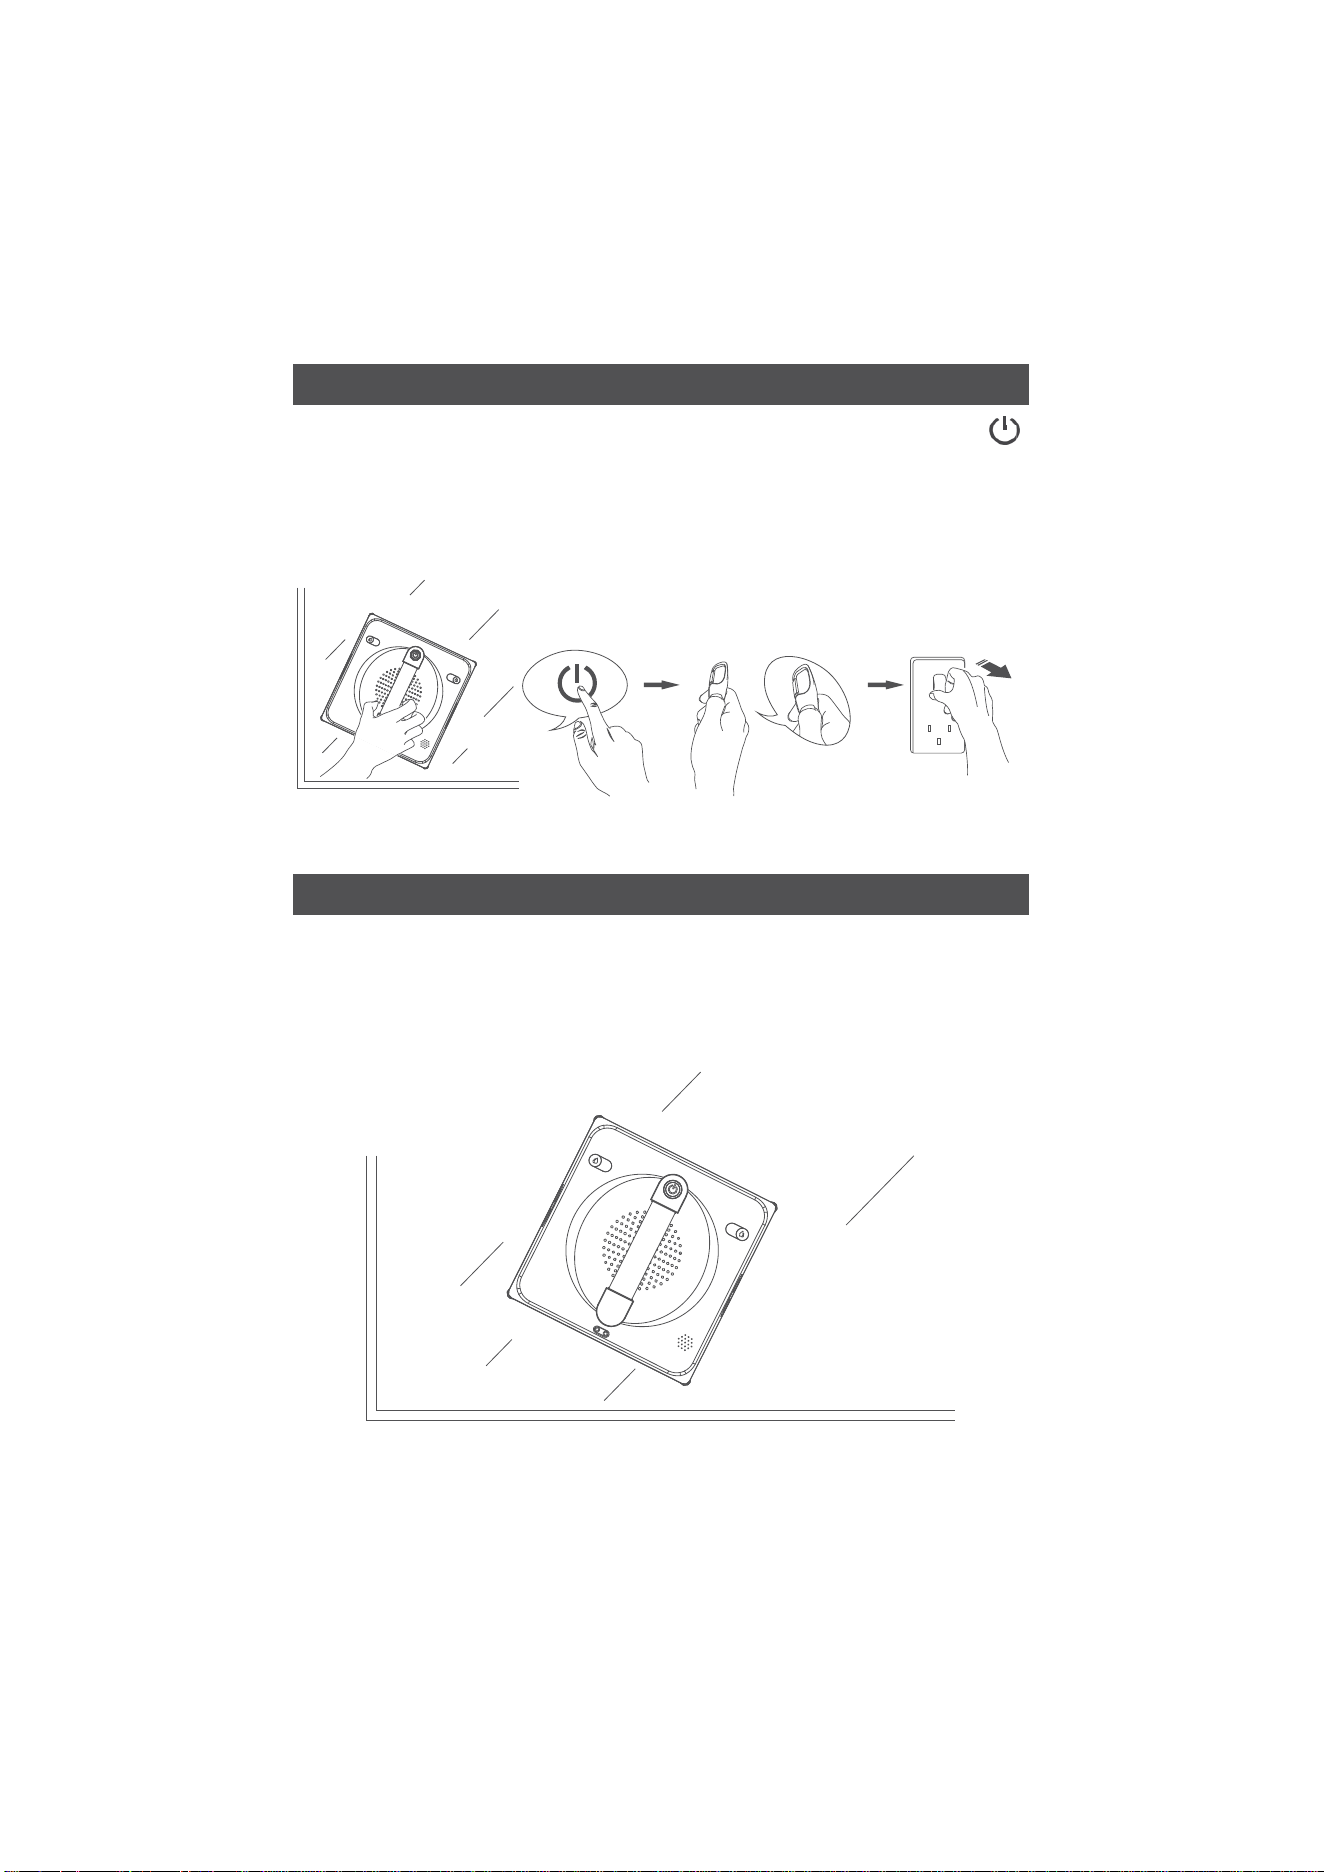
A. When the machine is paused, hold the handle firmly. Long press the
Button on the body for 3 seconds until the fan stops, then remove the
machine.
B. Unfasten the safety rope and carabiner.
4. Finishing Cleaning
C. Disconnect the power supply.
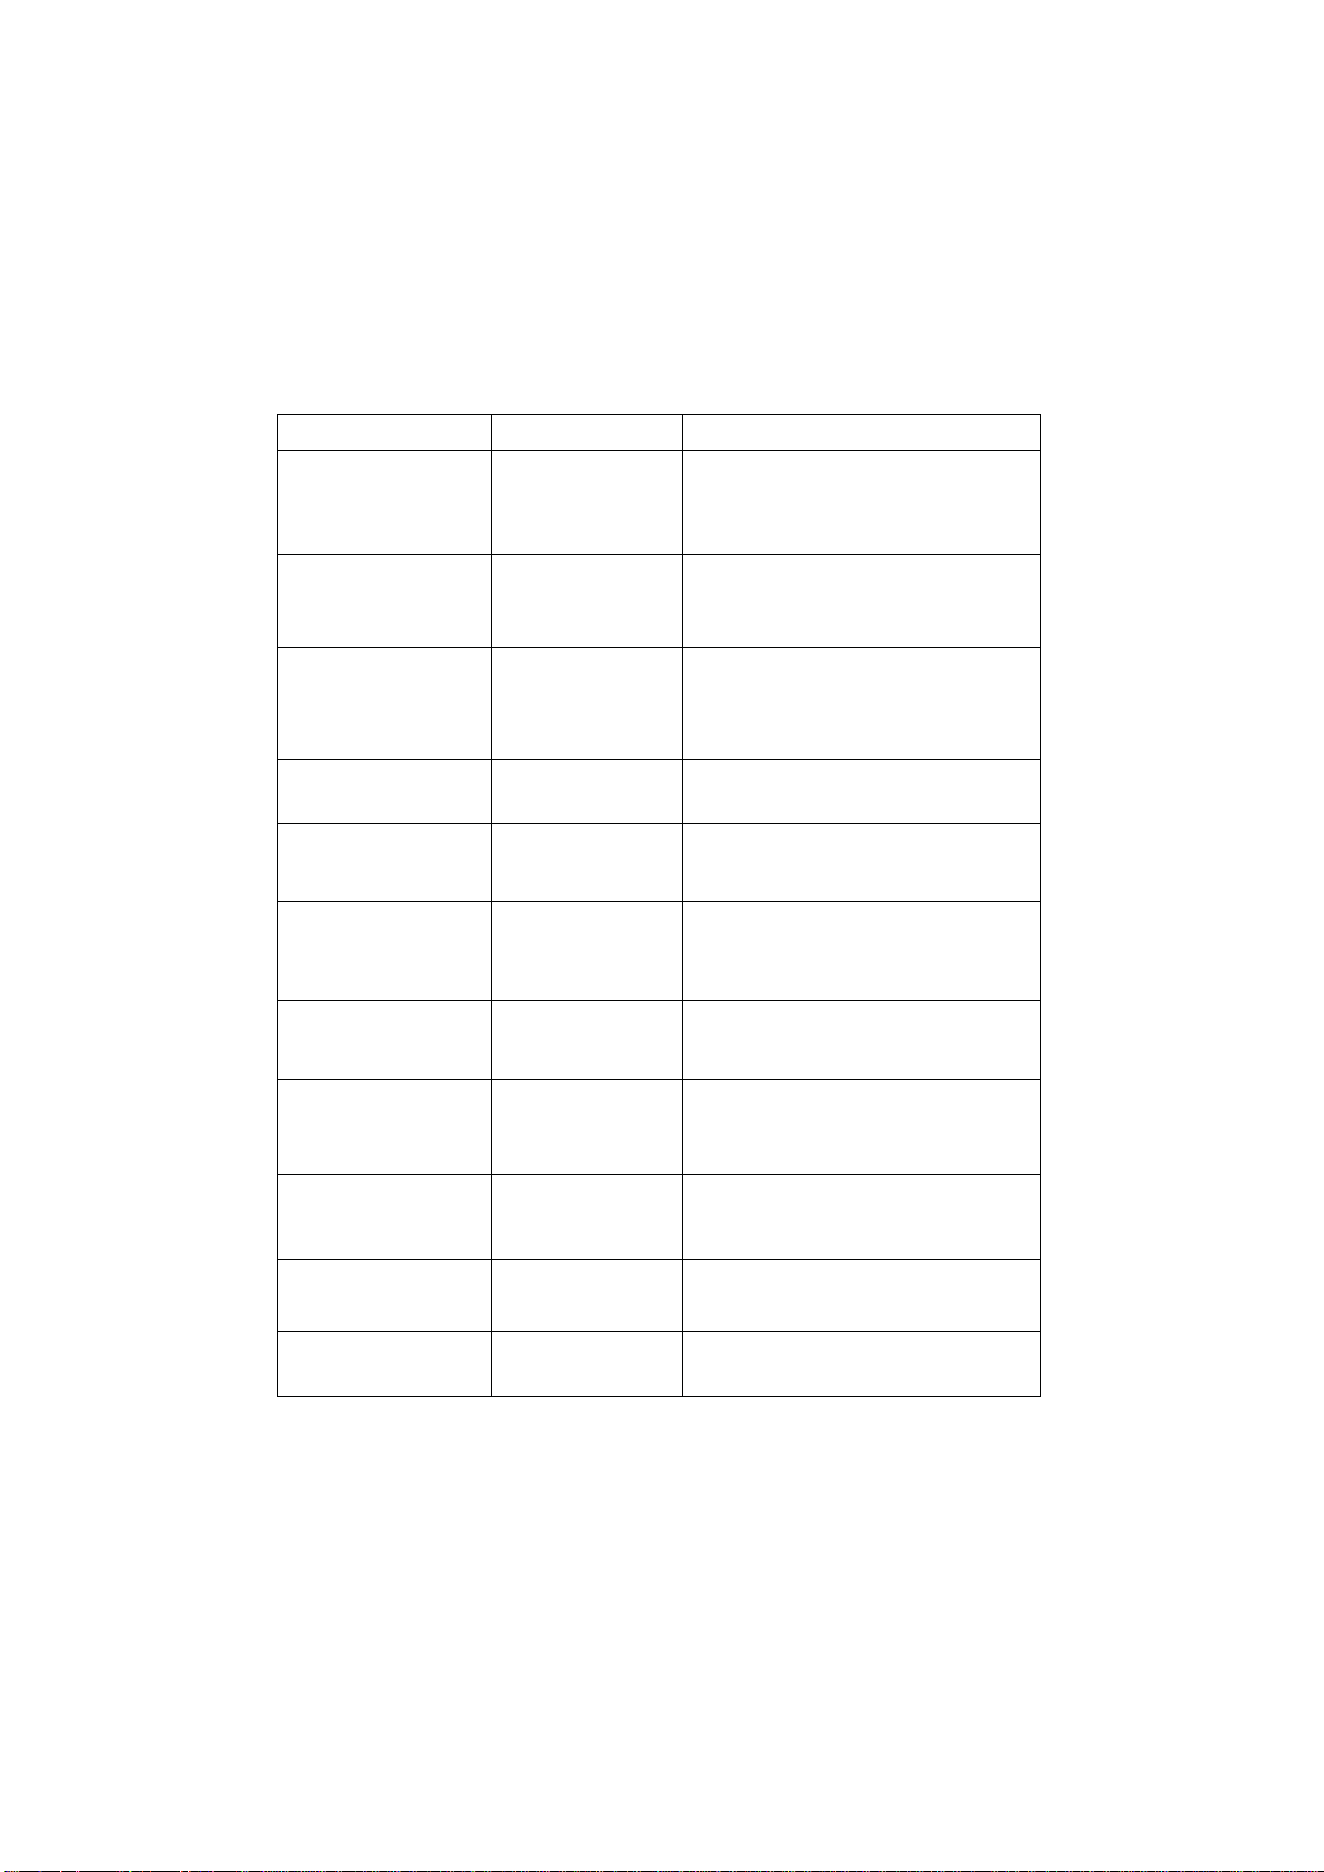
5. Power-off Protection (UPS) Function
A. In the event of a power failure, the device will activate the built-in
battery protection, maintaining suction for approximately 18-20 minutes.
B. During a power outage, the machine will stop moving, stay in place,
emit a warning alarm, and the Red Light will flash alternately.
C. You can use the safety rope to gently pull the device back to reach it.
VVI. Troubleshooting
Fault Status Possible Cause Solution
Machine Slips
Cloth is too wet or
treads are wet.
A. Change to a dry cleaning cloth.
B. Dry the water on the treads with a dry
cloth.
C. Clean the tread wheels.
Movement is not smooth
Glass is too wet or
glass surface is sticky/
gummy.
A. Use remote to manually move (Up/Down/
Left/Right) across the glass once, then
proceed.
B. Clean the tread wheels.
Machine stuck on edge /
stops cleaning
Machine hit the edge
incorrectly (False edge
detection).
A. Use remote to manually move the
machine to an accessible position, then
restart.
B. If remote fails, gently pull the safety rope
to move it to an accessible position.
Red light on, No Alarm
Machine not attached
to glass.
Place the machine on the glass surface so it
adheres.
Beeps twice continuously
during operation
Edge sensors detected
a "frame-out" signal
(loss of surface).
No action required
Squeaking noise during
operation
Too much dust on
edge sensors or tread
wheels.
A. Spray a moderate amount of water on the
glass or cloth.
B. Clean dust off the anti-fall sensors.
C. Clean the tread wheels.
Does not stop at starting
point after cleaning
Friction varies across
different areas of the
glass.
Use the remote control to manually move the
machine to a convenient position for
removal.
Stops at a spot, Red light
flashes
Insufficient Vacuum/
Suction.
A. Check if cloth is installed correctly.
B. Check if glass has gaps/seams.
C. Check if window frame seal/rubber is
uneven.
Cannot start / Fails to
follow path
Anti-fall sensors
abnormal or too much
dust on treads.
A. Check if cloth is installed correctly.
B. Check if anti-fall sensors are damaged.
C. Clean the tread wheels.
Red light flashes, Blue
light off, Continuous alarm
Power Disconnected.
A. Check if power is plugged in.
B. Check if DC plug or extension cable
connections are loose.
Blue & Red lights flash
fast, 3 beeps every
second
Walking Motor
Abnormal.
Contact After-Sales Service.

AAUTOMATIC
WATER SPRAY
WINDOW CLEANING
ROBOT
Warning Statement
This device complies with part 15 of the FCC Rules. Operation is subject to the
following two conditions: (1) This device may not cause harmful interference, and (2)
this device must accept any interference received, including interference that may cause
undesired operation.
Any Changes or modifications not expressly approved by the party responsible for
compliance could void the user's authority to operate the equipment.
Note: This equipment has been tested and found to comply with the limits for a Class B
digital device, pursuant to part 15 of the FCC Rules. These limits are designed to
provide reasonable protection against harmful interference in a residential installation.
This equipment generates uses and can radiate radio frequency energy and, if not
installed and used in accordance with the instructions, may cause harmful interference
to radio communications. However, there is no guarantee that interference will not
occur in a particular installation. If this equipment does cause harmful interference to
radio or television reception, which can be determined by turning the equipment off and
on, the user is encouraged to try to correct the interference by one or more of the
following measures:
-Reorient or relocate the receiving antenna.
-Increase the separation between the equipment and receiver.
-Connect the equipment into an outlet on a circuit different from that to which the
receiver is connected.
-Consult the dealer or an experienced radio/TV technician for help.
This equipment complies with FCC radiation exposure limits set forth for an
uncontrolled environment.