
Technical Support and E-Warranty Certificate www.vevor.com/support
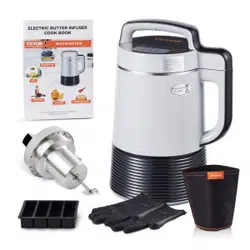
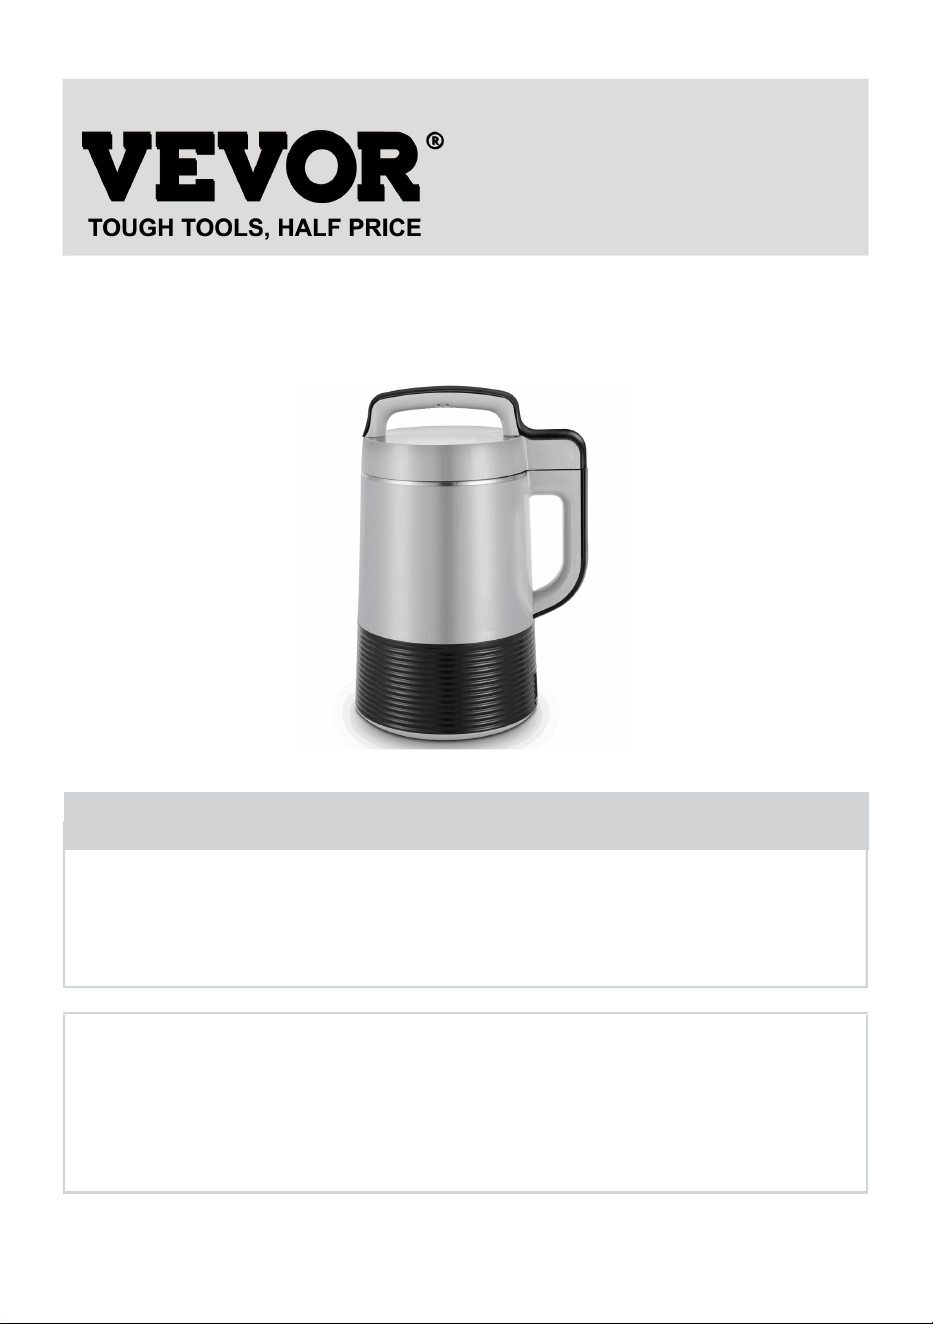
ELECTRIC BUTTER LNFUSER
MODEL:B039-A,B039-B
We continue to be committed to provide you tools with competitive price.
"Save Half", "Half Price" or any other similar expressions used by us only represents an
estimate of savings you might benefit from buying certain tools with us compared to the major
top brands and does not necessarily mean to cover all categories of tools offered by us. You
are kindly reminded to verify carefully when you are placing an order with us if you are
actually saving half in comparison with the top major brands.
- 1 -
MODEL:B039-A,B039-B
Have product questions? Need technical support? Please feel free to
contact us:
Technical Support and E-Warranty Certificate
www.vevor.com/support
NEED HELP? CONTACT US!
This is the original instruction, please read all manual instructions
carefully before operating. VEVOR reserves a clear interpretation of our
user manual. The appearance of the product shall be subject to the
product you received. Please forgive us that we won't inform you again if
there are any technology or software updates on our product.
ELECTRIC BUTTER
LNFUSER

- 2 -
Please read and understand this entire manual before attempting to
assemble, operate or install the product.
Lea y comprenda completamente este manual antes de intentar ensamblar,usar o
instalar el producto.
ANY RISKS FROM THE USE OF THIS MACHINE ARE SOLELY YOUR
RESPONSIBILITY. ANY DAMAGES OR INJURIES ARISING FROM THE USER
OF THIS EQUIPMENT IS YOUR RESPONSIBILITY. BY USING THE INFUSER,
YOU ARE RELEASING ANY AND ALL LIABILITY, INCLUDING BUT NOT
CORPORATIONS INVOLVED IN THE MACHINES SUPPLY CHAIN. THIS
INCLUDES BUT IS NOT LIMITED TO ALL RETAIL OUTLETS, DISTRIBUTORS,
FORWARDERS, OR MANUFACTURERS (ALL PARTIES INVOLVED ). THIS
ALSO INCLUDES INJURY OR DAMAGES OR NEGATIVE CONSEQUENCES
FROM MALFUNCTION OF ALL PARTS OF THE INFUSER OR MISUSE BY THE
USER(YOU). THE INFORMATION PROVIDED IN THIS INFORMATION ON THE
SUBJECTS DISCUSSED. THE SUPPOSED TO BE USED, NOR SHOULD IT BE
USED TO TREAT OR DIAGNOSE AND MEDICAL CONDITION. FOR
DIAGNOSIS OR TREATMENT OF ANY MEDICAL CONDITION, PLEASE
CONSULT A PHYSICIAN. ALL INFORMATION/REFERENCES ARE PROVIDED
FOR INFORMATIONAL PURPOSES ONLY AND ARE NOT ENDORSED BY
ANY MEDICAL ESTABLISHMENTS OR LIABLE FOR ANY SPECIFIC HEALTH
PROBLEMS, ALLERGY PROBLEMS, INJURY, NEGATIVE CONSEQUENCES,
OR DAMAGES ASSOCIATED WITH THE USE OF THE INFUSER OR THE
INFORMATION PROVIDED IN THIS MANUAL.
USE AT YOUR OWN RISK!!!
IMPORTANT SAFEGUARDS
When using electrical appliances, basic safety precautions should always be
followed, including the following:
1. Read all instructions.
2. Do not touch hot surfaces. Use handles or knobs.
3. To protect against electrical hazards, do not immerse the cord, plugs, or

- 3 -
appliance in water or any liquid.
4. Close supervision is necessary when any appliance is used near children.
5. Unplug from the outlet when not in use and before cleaning. Allow to cool
before cleaning the appliance.
6. Do not operate any appliance with a damaged cord or plug or if the
appliance malfunctions or has been damaged in any manner. Return the
appliance to the nearest authorized service facility for examination, repair, or
adjustment.
7. The use of accessory attachments not recommended by the appliance
manufacturer may cause injuries.
8. Do not use outdoors.
9. Do not let the cord touch hot surfaces or hang over the edge of the table or
counter
10. Do not place on or near a hot gas or electric burner or in a heated oven.
11. Extreme caution must be used when moving an appliance containing hot
liquids.
12. Always attach the plug to the appliance first, then plug the cord into the
wall outlet. To disconnect, remove the plug from the wall outlet first, then
unplug the cord from the appliance.
13. Do not use the appliance for other than intended use.
14. This product must ONLY be used on a flat and horizontal surface. The
kettle must be level to ensure proper and safe operation
15. Scalding may occur if the lid is removed during the brewing cycles.
16. Always use in well-ventilated areas.
17. Use caution around the mixing blades. The motor is powerful, and the
blades are sharp! Never touch blades!
18. Never remove the head unit during operation, and make sure it is securely
seated prior to operation
19. Never use solids in the infuser like hard butter sticks –melt first
20. Never submerge any parts in water
21. Do not under or overfill the infuser
22. Do not leave the unit unattended when it is operating or plugged in
23. Turn off the breaker to the power supply before unplugging the power cord,

- 4 -
if the infuser malfunctions.
24. Do not use the infuser for anything other than its intended purpose.
Always inspect all parts of the infuser and power cord for damages before use.
Please do not use it if damages are present.
25. Warning: This appliance generates heat and escaping steam during use.
Proper precautions must be taken to prevent the risk of burns, fires, or other
injuries to persons or damage to property.
SAVE THESE INSTRUCTIONS
HOUSEHOLD USE ONLY
BASIC OPERATION
Connect the power cord below the handle on the base and plug it into the
outlet.
Load the main chamber with ingredients and press the top control unit on
firmly.
Press the “Choose” button to cycle through the available options
Once your desired option is flashing, hit the start button to use the preset time
and temperature settings.
You can also use your own custom settings for time and temperature. While
the desired option is flashing, set your desired time using the “Time” button.
Time increases in 5-minute increments with each button press. The time
range is 30 mins to 12 hours.
Set the desired temperature with the “Temp” button. Temperature increase in
one-degree increments. The temperature range is from 30 ℉ to 250℉.
Once your custom settings are ready, press “Start”.
Machine mixing blades will automatically start when 80% of the set
temperature is reached (Except for the decarb setting). Blades will turn on in
regular, even intervals.
Display will count down the remaining time and will automatically shut off and
display “END”.
To stop the unit at any time, press and hold the start button for 3 seconds.

- 5 -
There are MIN and Max fill lines marked inside the container. Do not Under or
Overfill the infuser.
CAUTION!! The contents and inside of the main container will be very hot
immediately after shutting down and while the unit is operating.
Do NOT submerge either the top or bottom sections in water
SAFETY ALERT!! Tinctures can be made in the infuser by heating
ethanol alcohol which releases HIGHLY FLAMMABLE FUMES. DO NOT
USE FLAMMABLE MATERIALS IN INFUSER.
PREPERATION (DECARBLING)
You will want to use decarboxylated (decarbed)herb for your infused butter in order
to make the active ingredients available.
It is a complicated sounding name for a simple process. The basic idea is to heat
the herb to 240℃(115℃)for 30-45 minutes. The only difficulty is that temperature
control is critical. Some people use their oven with a good quality thermometer.
The Active Gear Guy Infuser has a decarb function that works well for small
amounts. The infuser will heat the herb at the correct temperature and the blades
do not spin during the decarb process.
If you want to do a large amount at one time, then you will want to use the oven
method. Make sure that your oven is operating at the correct temperature. Place
your herb on a baking pan covered in parchment paper in an even layer, then
tightly cover with aluminum foil and place on the center rack.
You do not need to use a grinder. Just crumble your herb up by hand into roughly
even-sized pieces.
DECARB FUNCTION

- 6 -
As discussed in the preparation section, you will need to decarb all of your herbs
before making any type of infusion.
To decarb a small amount(1/2 oz or less) in the infuser, spread an even layer of no
more than 1/2 inch high of herb on the bottom. Press “Choose” until “Decarb” is
flashing, and then set the time and temperature as described in Basic Operation.
You can easily find dozens of decarb procedures, but most generally agree that
your temperature should range between 225℉ and 240℉. Times should be
between 30&45 minutes. Another point of general agreement is that decarbing at
the lower end of the temperature range preserves the herb flavor, while decarbing
at the higher end will minimize the flavor.
You will want to experiment with times and temperature that works best for you. If
you need to decarb a large amount of herb at one time, use the oven method
described earlier but make sure your oven settings match the correct temperatures.
You can easily ruin a batch of herbs by overheating it.
Please note that the mixing blades do not operate in the decarb setting. It is a
heating only operation.
OIL FUNCTION
For many, oil infusions and specifically coconut oil infusions, are becoming the
daily go-to infusion. A coconut oil infusion is very versatile. Oils work well in any
food recipe and as rub-in topical ointments.
Coconut oil is a great oil to use because it has a very high saturated fat
content(90% compared with 60% for butter ). The active ingredients in herbs have
a high affinity for absorption by saturated fat. This means you can easily make
potent mixtures or use much less herb to make your infusions.

- 7 -
Lecithin is the key ingredient in infused coconut oil. Lecithin helps with the
absorption of herb oil into your intestinal walls and is used as an emulsifier. The
small particles in your herb oil are absorbed more easily, making it more potent
and effective. Sunflower Lecithin is a popular type to use.
DIRECTIONS:
For a 1/2 batch-14grams(1/2 oz) decarbed herb with 2-21/2 cups coconut oil.
For a Whole batch-28 grams(1oz) decarbed herb with 4-5 cups coconut oil.
Use 1 tablespoon lecithin for both sizes.
The infuser is preset to run at 160℉for one hour. When the temperature reaches
128℉ the mixing blades will turn on for 20 second intervals as the temperature
continues to 160℉ and then to the end of the cycle. You may also set your own
time and temperature. When the cycle has finished, follow the directions in the
STRAINING section of this manual.
If you are not experienced with using coconut oil infusions, use very small doses at
first and wait a long time (5 hours) to really judge potency. Coconut oil with lecithin
can produce very potent infusions. You can gradually work your way up to the right
levels for you. It is easy to overdo it and it is an unpleasant experience. In general,
the directions we provide here are a good starting point but experimenting a bit
with time, temperature, and potency will give you the best results in the long run.
BUTTER FUNCTION
Butter infused with herb (infused butter) is one of the mainstays in making edibles
and is still probably the most popular infused product. As with coconut oil, it is the
saturated fat in butter that makes it all works. If you like butter and are used to
using it in your recipes, infused butter will work well for you.
DIRECTIONS:

- 8 -
For a 1/2 batch use grams(1/2 oz) decarbed herb with 2-21/2 cups unsalted butter.
For a whole batch use 28 grams(1oz) decarbed herb with 4-5 cups unsalted butter.
Use 1 Tablespoon sunflower lecithin with both batch sizes.
If you use the preset ”butter” option on the infuser it will run for 2 hours at 160℉.
The blades will cycle on for 20 second intervals starting when the temperature
reaches 128℉. You can also set your own custom time and temperature.
When the cycle has finished, follow the directions in the STRAINING section of
this manual.
Many people prefer using clarified butter or ghee instead of regular unsalted butter.
Be sure to try this if you are not satisfied with the results of using butter.
If you are new to edibles start with really small doses and wait a long time(5 hours)
and gradually work up to a comfortable level. It is easy to overdo it with edibles
and it is not a pleasant experience.
Experimentation with all the variables is good to try. Our directions are a good
starting point, but you may create a better taste or potency by trying new settings
on time, temperature, or amount of herb added.
TINCTURE FUNCTION
Tinctures are alcohol-extracted herbal products. The herb liquid tincture contains
high levels of active ingredients that have been leached out into the alcohol to form
a liquid.
Tinctures are usually taken by placing a few drops of highly concentrated liquid
under the user’s tongue. They have become a popular alternative to smoking and

- 9 -
are widely used by medical users who do not wish to smoke the product.
Tinctures are rapidly absorbed by the body and work quickly. Most users rapidly
feel the effects and the effects tend to last for an extended time.
The active ingredients in tinctures break down quickly if exposed to heat or light.
Therefore, tinctures should be kept in airtight, dark containers, and stored away
from heat and light. Unlike other herbal products, tinctures have no telltale odor.
GLYCERIN VS. ALCOHOL TINCTURES
In most tincture formulas, alcohol is the standard solvent. Alcohol is efficient in
extracting the active ingredients so that you can create a potent tincture. The
ethanol content in alcohol increases the speed of absorption, meaning that you will
feel the effects faster.
However, not everyone can or wants to consume alcohol. Glycerin is a great
alternative for those who want to avoid alcohol. Glycerin is in many food products
and is completely safe to consume. It can be made from plant or animal matter and
many prefer plant-based glycerin. Glycerin is often considered a sweetener and
many enjoy a slightly sweet taste for their tincture.
The downside to glycerin-based tinctures is in its potency. Glycerin can only retain
about 1/3 of the active ingredients compared to alcohol. Glycerin tinctures also
have a shorter shelf life. Vegetable glycerin can be stored for a year while alcohol
tinctures can last up to a year.
SAFETY!! HEATING ALCOHOL RELEASES HIGHLY FLAMMABLE FUMES.
DO NOT have any open flame around the prep materials, the infuser unit, or the
finished products if you are making your tincture with ethanol alcohol. If you have
any doubt at all about heating alcohol, use a non-heat method for making your

- 10 -
tincture. There are numerous methods and recipes posted on the internet. Only
use this function if you have done it before and know the risks involved. Please
read the disclaimer in the safety section page marked #3. We also do not
recommend using alcohol and refer people to use Glycerin because of the higher
risk involved.
Glycerin is considered safe to heat but it is still in the alcohol family. Do not take
any unnecessary chances with open flames around Glycerin either.
DIRECTIONS:
For a 1/2 batch-14grams(1/2 oz )decarbed herb with 2-21/2 Cups of vegetable
glycerin or 95% ethanol alcohol(150-190 proof).
For a whole batch-28 grams(1oz )decarbed herb with 4-5 cups of vegetable
glycerin or 95% ethanol alcohol.
The preset tincture function will run for 4 hours at 160℉. The blades will cycle on
for 20 second intervals starting when the temperature reaches 128℉. You can
also set your own custom time and temperature.
When the cycle has finished, follow the directions in the STRAINING section of this
manual.
GUMMIES
Once you have made a tincture, you can use it to make herbal gummies. You do
not do this in the infuser but on your stovetop. Here are the steps.
Ingredients:
1/2 cup Coconut Oil
1/2 cup Water
1 6oz Jello pack
1oz gelatin

- 11 -
1/2 to 1 Tbsp of herbal tincture (As always you will want to experiment with the
amount of herbal product that works for you)
Silicone molds
Steps:
Set you stovetop burner to medium
Put the coconut oil and water in a pot on the burner
Stir vigorously until the water and oil are combined
Add tincture and keep stirring
Slowly pour the Jello into the mix and stir while gradually raising the heat to
medium high.
When the Jello is completely mixed in, start to slowly mix in the gelatin while
stirring continuously.
At this point the mix should be fairly thick and viscous
Carefully pour your mix into the silicone molds
Put the molds in the refrigerator for 20 mins
If you like , powder your gummies with the sugar type of your choice .
COCOA FUNCTION
Infused cocoa is always delicious and is a great way to infuse various herbs. The
herbs are infused into cocoa butter which has a high fat content.
The basic idea is to use the infuser to make infused cocoa butter and then make
the finished product in a double boiler. The infuser settings for this is 11/2 hours at
180℉.
DIRECTIONS:
STUFF YOU NEED:

- 12 -
Herbal Infuser
Double Boiler pan
Silicone Molds or Flat sheet with Wax Paper
1oz herb
2 cups melted cocoa butter (food grade)
2 tsps lecithin(sunflower preferred)
2 cups cocoa powder
1 cup honey
2 tsps real vanilla extract
1/2 tsp salt
Toasted nuts(optional)
Orange or mint extract (optional)
Of course there are many variations and additions you could make to the
ingredients above, but this is a good start.
STEPS:
Place your decarbed herb, melted cocoa butter (it is easy to melt it in the double
boiler)and lecithin in the infuser. Press the “chocolate” button and let run for the
full 1 1/2 hours. You can also manually set your own time and temperature.
Strain this infusion as described in the Straining and Storage section of this
manual.
Place the infusion , honey , vanilla, and salt in the double boiler and mix well while
heating
Slowly add the cocoa powder stirring continuously until fully mixed in. The mixture
should have a “glossy” look to it
Avoid getting any water into the mix! Do not cover the double boiler or
condensation may get into the mix.

- 13 -
At this point you can mix in any extras such as nuts and extracts. Use a small
amount of extract(1/2 tsp)
You can now pour into molds or flat onto a sheet.
It is best to pour out when the mix is still fairly warm.
Place either molds or sheet into the refrigerator for 1/2 hour or more. Now you can
use your chocolate in any recipes you love or by itself.
STRAINING & STORAGE
You will need to strain all of your preparations after they have been mixed and
heated in the infuser(except for decarbed herb)
CAUTION!-The unit and contents will be HOT after the infusion has finished. Use
any normal precautions when handling hot items. We recommend using silicone
gloves, or just allowing things to cool before handling.
Set up a layer of cheesecloth across a metal sieve that drains into suitable
container (preferably glass)
Slowly pour the infused liquids through the cheesecloth.
You can use a soft spatula to gently squeeze excess liquid.
Once most of the liquid is drained through the cheesecloth, gather the cheesecloth
up and gently squeeze out remaining liquid.
There are numerous storage options ranging from one large glass bowl to small
jars or pour in molds such as the one included with your infuser.
You will generally want to store your product in the refrigerator
Tinctures should be stored in dark bottles in cool place.

- 14 -
CLEANING
DO NOT submerge any part of the infuser in water. Especially when plugged into
your electricity outlets.
DO NOT put any part of the infuser in the dishwasher. Hand clean and use clean
function only.
Rinse out the chamber and then fill halfway between the MIN&MAX lines with
water. Add a bit of dish detergent and replace head unit. You can use the clean
function and the blades will come on every 15 seconds to agitate. After cleaning ,
wipe with a towel by hand to dry the units.