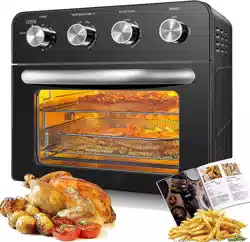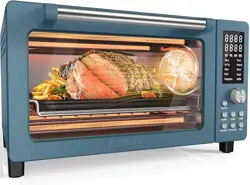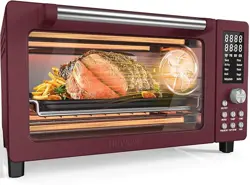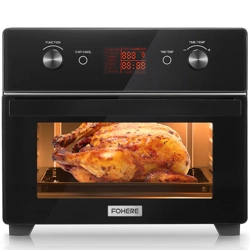
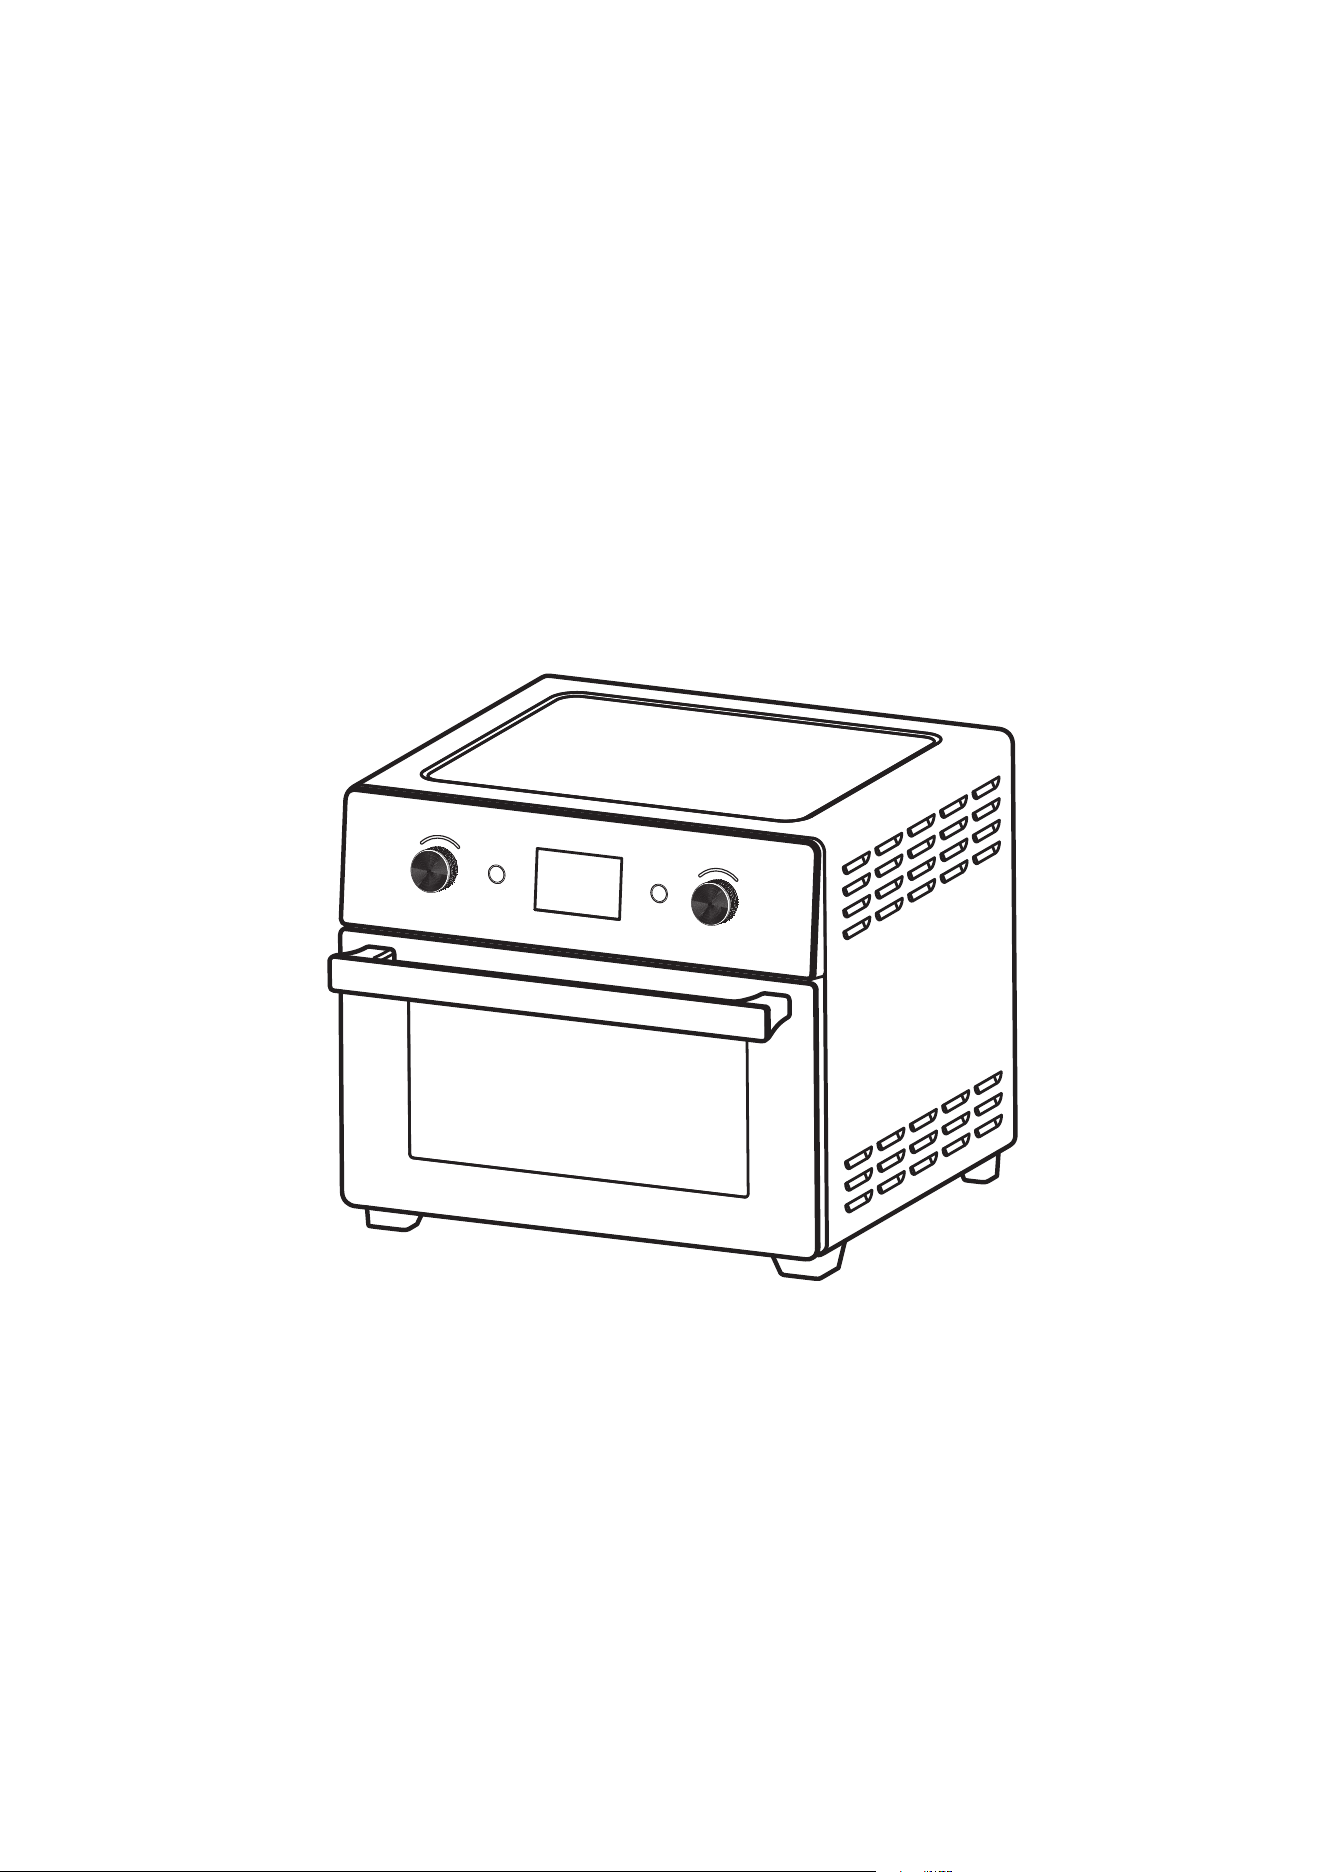
AIR FRYER OVEN
INSTRUCTION MANUAL
MODEL : DN20M-ML
Please read these instructions carefully and retain for future reference.
FUNCTION
START/CANCEL
TIME/TIMP
TIME/TEMP

FUNCTION
START/CANCEL
TIME/TIMP
TIME/TEMP
1 EN
Inhalt
NAME OF PARTS __________________________________________________
IMPORTANT SAFEGUARD __________________________________________
BEFORE USING YOUR OVEN/TOASTER ______________________________
DISPLAY FUNCTION _______________________________________________
OPERATION GUIDE ________________________________________________
OPERATION METHOD IS AS BELOW ___________________________________
FUNCTION DEFAULT PARAMETERS _________________________________
WORKING CONDITION _____________________________________________
END OF WORKING ________________________________________________
DURING STANDBY __________________________________________________
SMART CARE ______________________________________________________
MAINTENANCE AND CLEANING _________________________________________
1
2
3
4
4
5
6
6
7
7
8
8
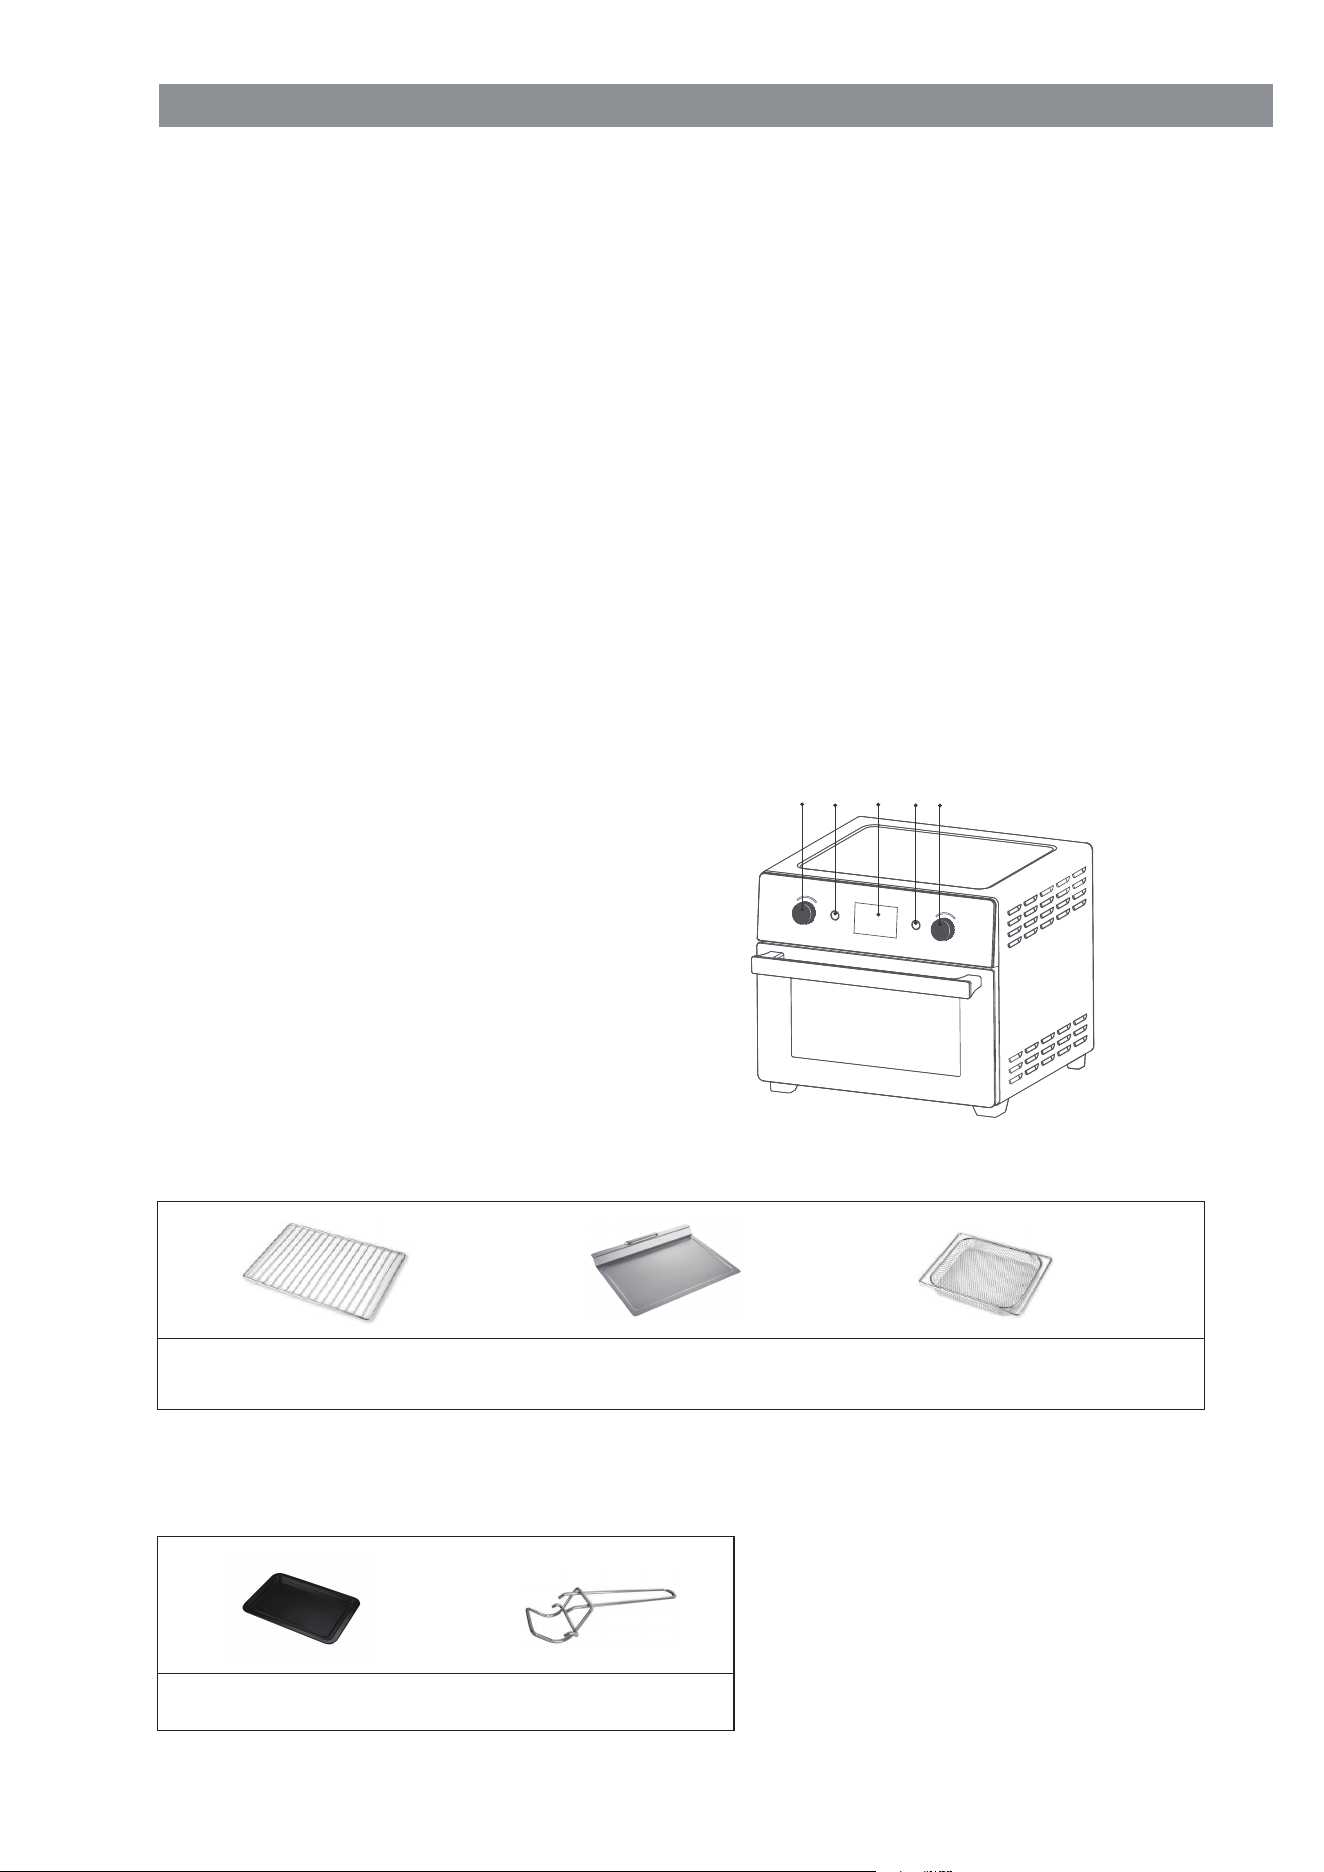
NAME OF PARTS
1.Function Selection Knob
2.“START / CANCEL” Button
3.LED Display
4.“TIME / TEMP” Button
5.“TIME / TEMP” Selection Knob
Chromed wire rack
Crumb tray
Fry basket
STANDARD ACCESSORIES
1 2 3 4 5
Enamel baking tray Tray handle
OPTIONAL ACCESSORIES:

EN 2
IMPORTANT SAFEGUARD
1.
2.
3.
4.
5.
6.
7.
8.
9.
10.
11.
12.
13.
14.
15.
16.
17.
18.
19.
20.
21.
22.
23.
Read all instructions first.
Do not use this oven together with other electric appliance with high-power, in
case of overload.
Do not touch hot surfaces when it’s working or just finished working.
Always wear protective, insulated oven gloves when inserting or removing items
from the hot oven.
Close supervision is necessary when any appliances are used by or near chil-
dren.
Do not use this oven without supervision by adult.
To protect against electric shock, do not immerse cord, plug, or any parts of the
oven in water or other liquid. Please make sure the plug is dry before use.
To protect against electric shock, do not touch,plug into or plug out the plug when
your hand is wet.
To protec
t the power cord, do not hang anything on it or nip it; do not modify the
power cord; do not pull or twist the power cord; please hold the plug steady when
you plug in or plug out.
Do not let cord hang over edge of table or counter, or touch hot surfaces.Do not
use this appliance when the power cord is in a enlacement.
Unplug from outlet when not in use and before cleaning. Allow to cool before
putting on or taking off parts..
This appliance is for household use only. Do not use outdoor or for commercial
use, we will not take any repair responsibility if the user didn’t use this appliance
according to the manual.
When operating the oven keep at least four inches of space on all sides of the
oven to allow for adequate air circulation, and the operating platform should be
fat and dry.
Do not place on or near a hot gas
or electric burner, or in a heated oven or in a
microwave oven.
Do not cover any part of the oven with metal foil.
Oversize foods or metal utensils must not be inserted in a toaster oven as they
may create a fire or risk of electric shock.
Do not place any of the following materials in the oven: cardboard, plastic, paper,
or anything similar.
Please make sure the appliance is unplug and cool before you want to move or
clear it.
The use of accessory attachments not recommended may cause hazard or injury.
Do not put anything on the oven, especial on the glass door when it’s open.
Please use tinfoil to enwrap the food which will produce oil or juice when operat-
ing and put on the bake tray, in case of a fire.
Please make sure the tinfoil unconnected with the heating elements,
in case of a
fire.
Do not move this appliance when it’s operating or when it’s hot or when it has
something inside.
When using electrical appliances, basic precautions should always be followed,
including the following:
Read all instructions first.
Do not use this oven together with other electric appliance with high-power, in
case of overload.
Do not touch hot surfaces when it’s working or just finished working.
Always wear protective, insulated oven gloves when inserting or removing items
from the hot oven.
Close supervision is necessary when any appliances are used by or near chil-
dren.
Do not use this oven without supervision by adult.
To protect against electric shock, do not immerse cord, plug, or any parts of the
oven in water or other liquid. Please make sure the plug is dry before use.
To protect against electric shock, do not touch,plug into or plug out the plug when
your hand is wet.
To protect the power cord, do not hang anything on it or nip it; do not modify the
power cord; do not pull or twist the power cord; please hold t
he plug steady when
you plug in or plug out.
Do not let cord hang over edge of table or counter, or touch hot surfaces.Do not
use this appliance when the power cord is in a enlacement.
Unplug from outlet when not in use and before cleaning. Allow to cool before
putting on or taking off parts..
This appliance is for household use only. Do not use outdoor or for commercial
use, we will not take any repair responsibility if the user didn’t use this appliance
according to the manual.
When operating the oven keep at least four inches of space on all sides of the
oven to allow for adequate air circulation, and the operating platform should be
fat and dry.
Do not place on or near a hot gas or electric burner, or in a heated oven or in a
microwave oven.
Do not cover any part of the oven with metal foil.
Oversize foods
or metal utensils must not be inserted in a toaster oven as they
may create a fire or risk of electric shock.
Do not place any of the following materials in the oven: cardboard, plastic, paper,
or anything similar.
Please make sure the appliance is unplug and cool before you want to move or
clear it.
The use of accessory attachments not recommended may cause hazard or injury.
Do not put anything on the oven, especial on the glass door when it’s open.
Please use tinfoil to enwrap the food which will produce oil or juice when operat-
ing and put on the bake tray, in case of a fire.
Please make sure the tinfoil unconnected with the heating elements, in case of a
fire.
Do not move this appliance when it’s operating or when it’s hot or when it has
something inside.

Please unplug the oven when you see smudginess come out from the food inside
the oven, and do not open the glass door at that time; just open the glass door
after the smudginess moved.
Do not use appliance if you find any damage or even drop down. Please send it
back to the relative repair center for inspection or repair. Do not use the parts
which is not from the original manufacturer.
To disconnect, turn any control to "off", then remove plug from wall outlet.
Do not use appliance for other than intended use.
Use extreme caution when removing tray or disposing of hot grease.
Do not clean with metal scouring pads. Pieces can break off the pad and touch
electrical parts, creating a risk of electric shock.
Oversize foods or metal utensils must not be inserted in a toaster-oven as they
ma
y create a fire or risk of electric shock.
A fire may occur if the toaster-oven is covered or touching flammable material,
including curtains, draperies, walls, and the like, when in operation. Do not store
any item on top of the appliance when in operation.
Extreme caution should be exercised when using containers constructed of other
than metal or glass.
Do not store any materials, other than manufacturers recommended accessories,
in this oven when not in use.
Do not place any of the following materials in the oven: ( that is, paper, card-
board, plastic, and the like).
Do not cover crumb tray or any part of the oven with metal foil. This will cause
overheating of the oven.
Press “Cancel” button to turn off appliance.
3
24.
25.
26.
27.
28.
29.
30.
31.
32.
33.
34.
35.
36.
Please unplug the oven when you see smudginess come out from the food inside
the oven, and do not open the glass door at that time; just open the glass door
after the smudginess moved.
Do not use appliance if you find any damage or even drop down. Please send it
back to the relative repair center for inspection or repair. Do not use the parts
which is not from the original manufacturer.
To disconnect, turn any control to "off", then remove plug from wall outlet.
Do not use appliance for other than intended use.
Use extreme caution when removing tray or disposing of hot grease.
Do not clean with metal scouring pads. Pieces can break off the pad and touch
electrical parts, creating a risk of electric shock.
Oversize foods or metal utensils must not be inserted in a toaster-o
ven as they
may create a fire or risk of electric shock.
A fire may occur if the toaster-oven is covered or touching flammable material,
including curtains, draperies, walls, and the like, when in operation. Do not store
any item on top of the appliance when in operation.
Extreme caution should be exercised when using containers constructed of other
than metal or glass.
Do not store any materials, other than manufacturers recommended accessories,
in this oven when not in use.
Do not place any of the following materials in the oven: ( that is, paper, card-
board, plastic, and the like).
Do not cover crumb tray or any part of the oven with metal foil. This will cause
overheating of the oven.
Press “Cancel” button to turn off appliance.
BEFORE USING YOUR OVEN/TOASTER
1.
2.
3.
4.
5.
Read all of the instruction included in the manual.
Make sure that the oven is unplugged and the Time control is in the “OFF” posi-
tion.
Wash the accessories in hot soapy water or in the dishwasher.
Thoroughly dry all accessories and re-assemble in oven, plug oven into outlet
and you are ready to use your new toaster oven.
After –reassembling your oven, we recommend that you run it at the highest
temperature on the toast function for approximately 15 minutes for eliminate any
packing residue that may remain after shipping. This will also remove all traces of
odor initially present.
Before using your toaster oven for the first time, be sure to:
Please note: Initial start-up operation may result in minimal smell and smoke. This is
normal and harmless. It is due to burning of the protective substance applied to the
heating elements in the factory.
EN
OPERATION GUIDE
1.
2.
3.
“FUNCTION” Function knob: In standby mode, turn clockwise or
counterclockwise to select the corresponding function.
“TIME / TEMP” Function knob: After selecting the corresponding function, turn
clockwise or counterclockwise to adjust the temperature under the default
temperature flashing state display. Press " TIME / TEMP " to switch to the time
flashing status display and set the time.Some menus in preset menus are not
adjustable in temperature and time(Refer to the function default parameters
later).Temperature adjustment with 5°F as a level for addition and subtraction.
“START / CANCEL ” Button: In standby mode, when a function mode is selected,
press this key to enter the working state.At the same time, in the working state,
press this key to pause the work, all settings can be canceled and cleared.You
can also press and hold thi
s key for 3S to cancel and clear all settings.
When the power is just switched on, the system background starts the automatic
timing at 0:00.
Key Function Introduction is as below:
4
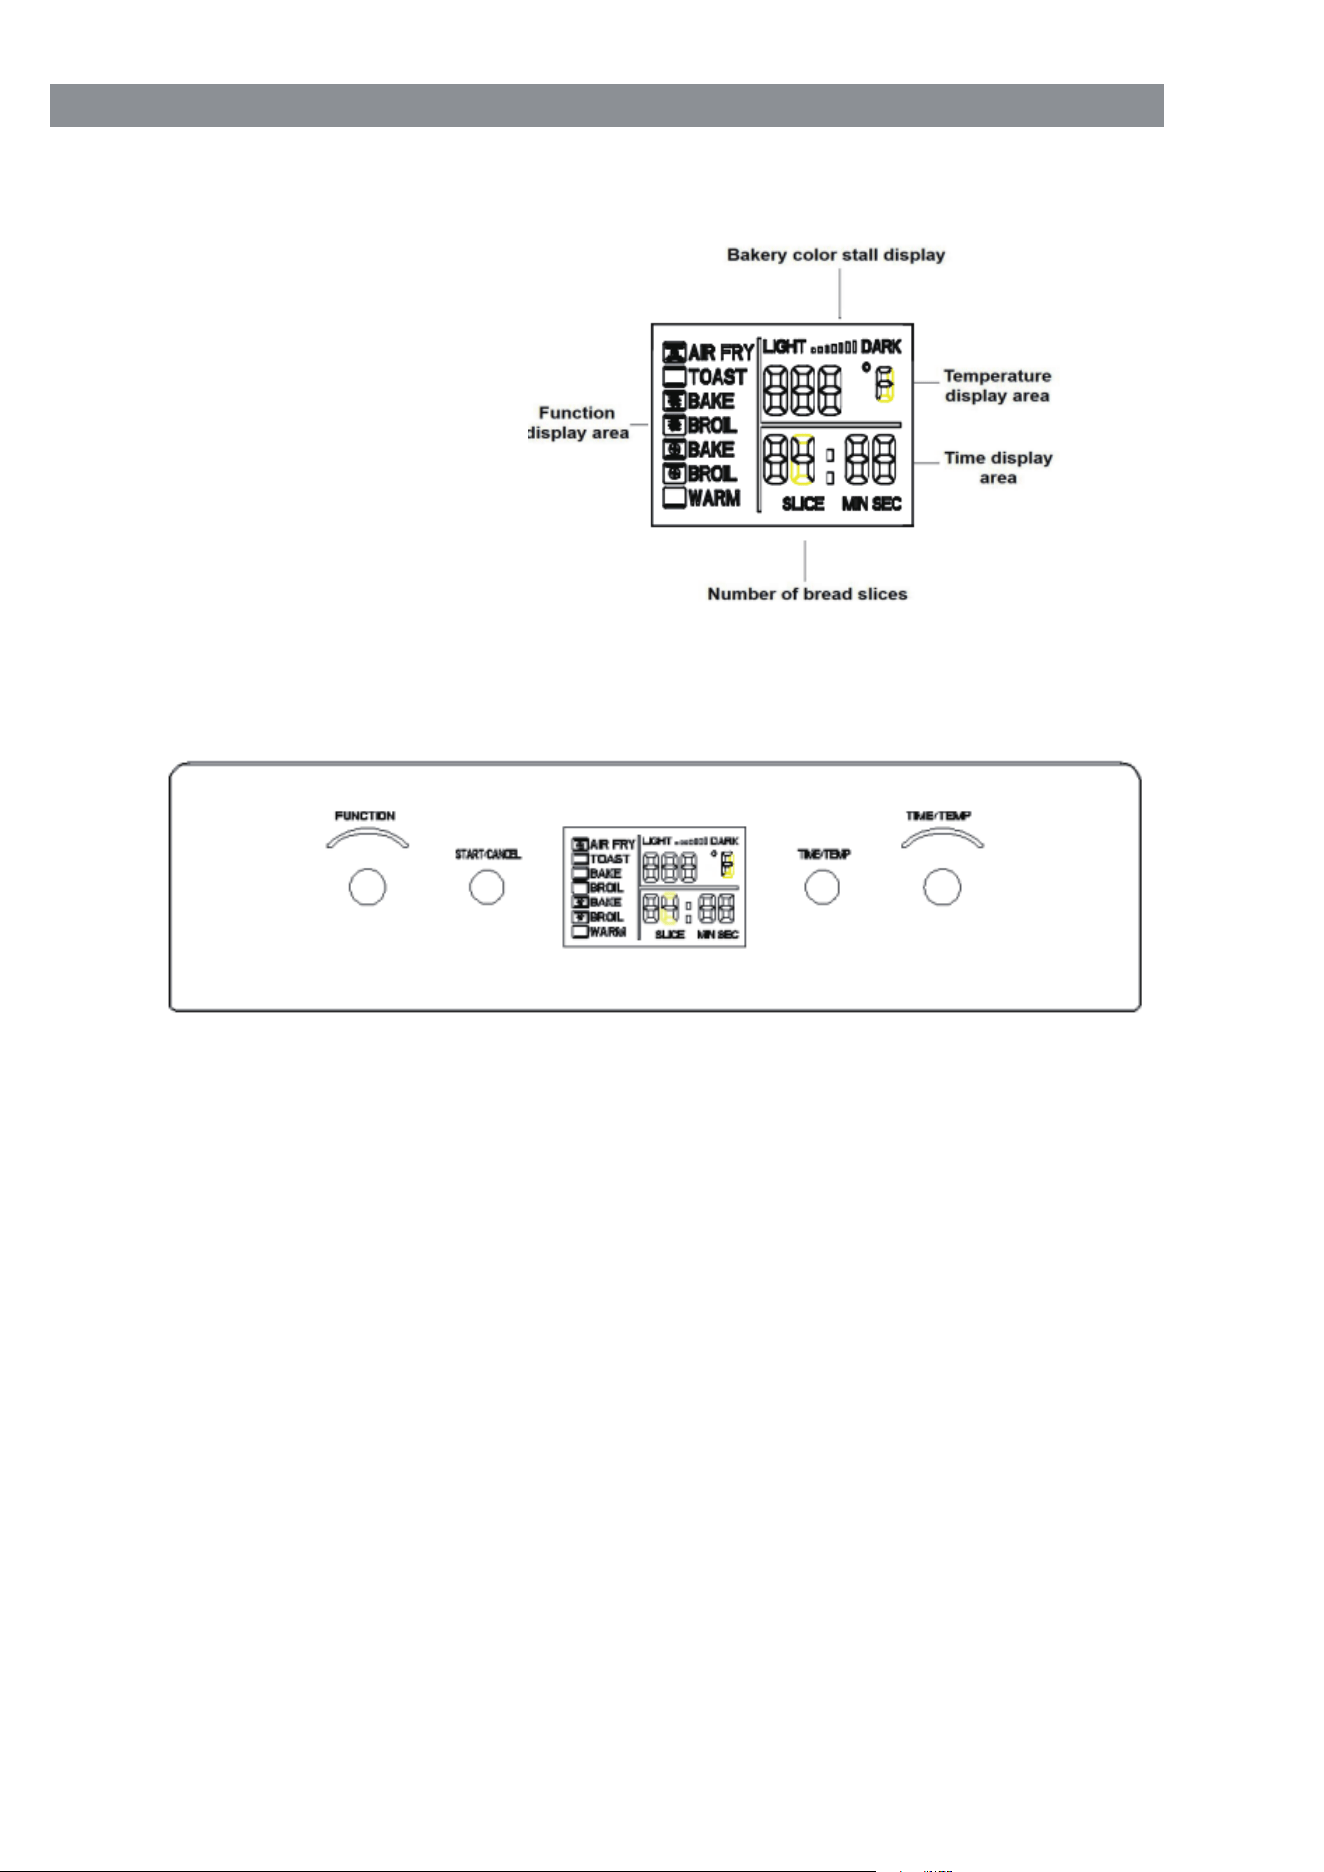
DISPLAY FUNCTION:
1. The display effect is
shown in below figure .
2. The control uses encoder knobs and touch keys, a total of 4 selection keys.Its
definition is shown in below figure.
EN

The preset temperature of the preset program is displayed and blinking to remind
the user whether to adjust. Turn the “TIME / TEM” function knob clockwise or
counterclockwise to adjust to the desired temperature, and then press the " TIME
/ TEMP " key to confirm all Set the temperature to set the time.When the time
display blinks, turn the "TIME / TEMP" function knob clockwise or counterclock-
wise to adjust to the expected time. You can also omit and press "Start / Cancel"
directly to confirm the default temperature and start time.
In the oven operating state, the temperature time allows the user to adjust.After
pressing the "START/CANCEL" key, the temperature in the display screen will be
in flicker state. Rotate the "TIME/TEMP" function knob clockwise or counterclock-
wise to adjust the required temperature, or directly press the (TIM
E/TEMP) key to
set the TIME, the TIME display will flicker, rotate the "TIME/TEMP" function knob
clockwise or counterclockwise to adjust to the desired TIME.
TOAST function, the default time and temperature of the toast are not adjustable,
At the Top of the temperature display position, indicates the color of the
bread slices, and the number of slices ( ) is displayed at the time position.
Select the TOAST fuction, the default color setting is forth gear . Turn the " TIME
/ TEMP " function knob clockwise or counterclockwise to adjust the color setting
of the bread, then press the ‘TIME / TEMP’ button again to switch the number of
bread slices and set the time. hen start the (START / CANCEL) button to work.
The maximum temperature on the display is 450°F and the default time is
displayed.
After the function selection is completed, press the " STA
RT / CANCEL " button
to start working. If you don’t press it, the previous design will automatically fail
after 1 minute, and the time will switch back to the clock display state.
If the function or time key is not selected, but other keys are pressed first, there is
no other effective response, and the clock display will not change to the function
menu preset time display.
As mentioned above, there is no selection or adjustment action. After 1 minute,
the time is switched back to the clock display state.
In the function selection and setting process in the standby state, if the machine
has an internal light, the internal light does not turn on.
When selecting a function gear, the selected gear blinks, other function gears are
not displayed.
OPERATION METHOD IS AS BELOW:
1.
2.
3.
4.
5.
6.
7.
8.
5 EN
LED display sets function gear, temperature, time and stays on.
Time display colon flashes, WARM file is decremented by 1min, others are decre-
mented by 1s.
You can add or subtract time during work. If the temperature is adjustable, you
can add or subtract time. However, you cannot change the menu function during
work. Pressing it has no effect and the buzzer does not sound.Working tempera-
ture and time allow consumers to adjust. After pressing the " START / CANCEL ''
key, the temperature in the display is flashing. Turn the " TIME / TEMP '' function
knob clockwise or counterclockwise to adjust Temperature, or directly press the ("
TIME / TEMP ") key to enter the time setting.When the time display flashes, turn
the " TIME / TEMP " function knob clockwise or counterclockwise to adjust to the
WORKING CONDITION:
1.
2.
3.
6
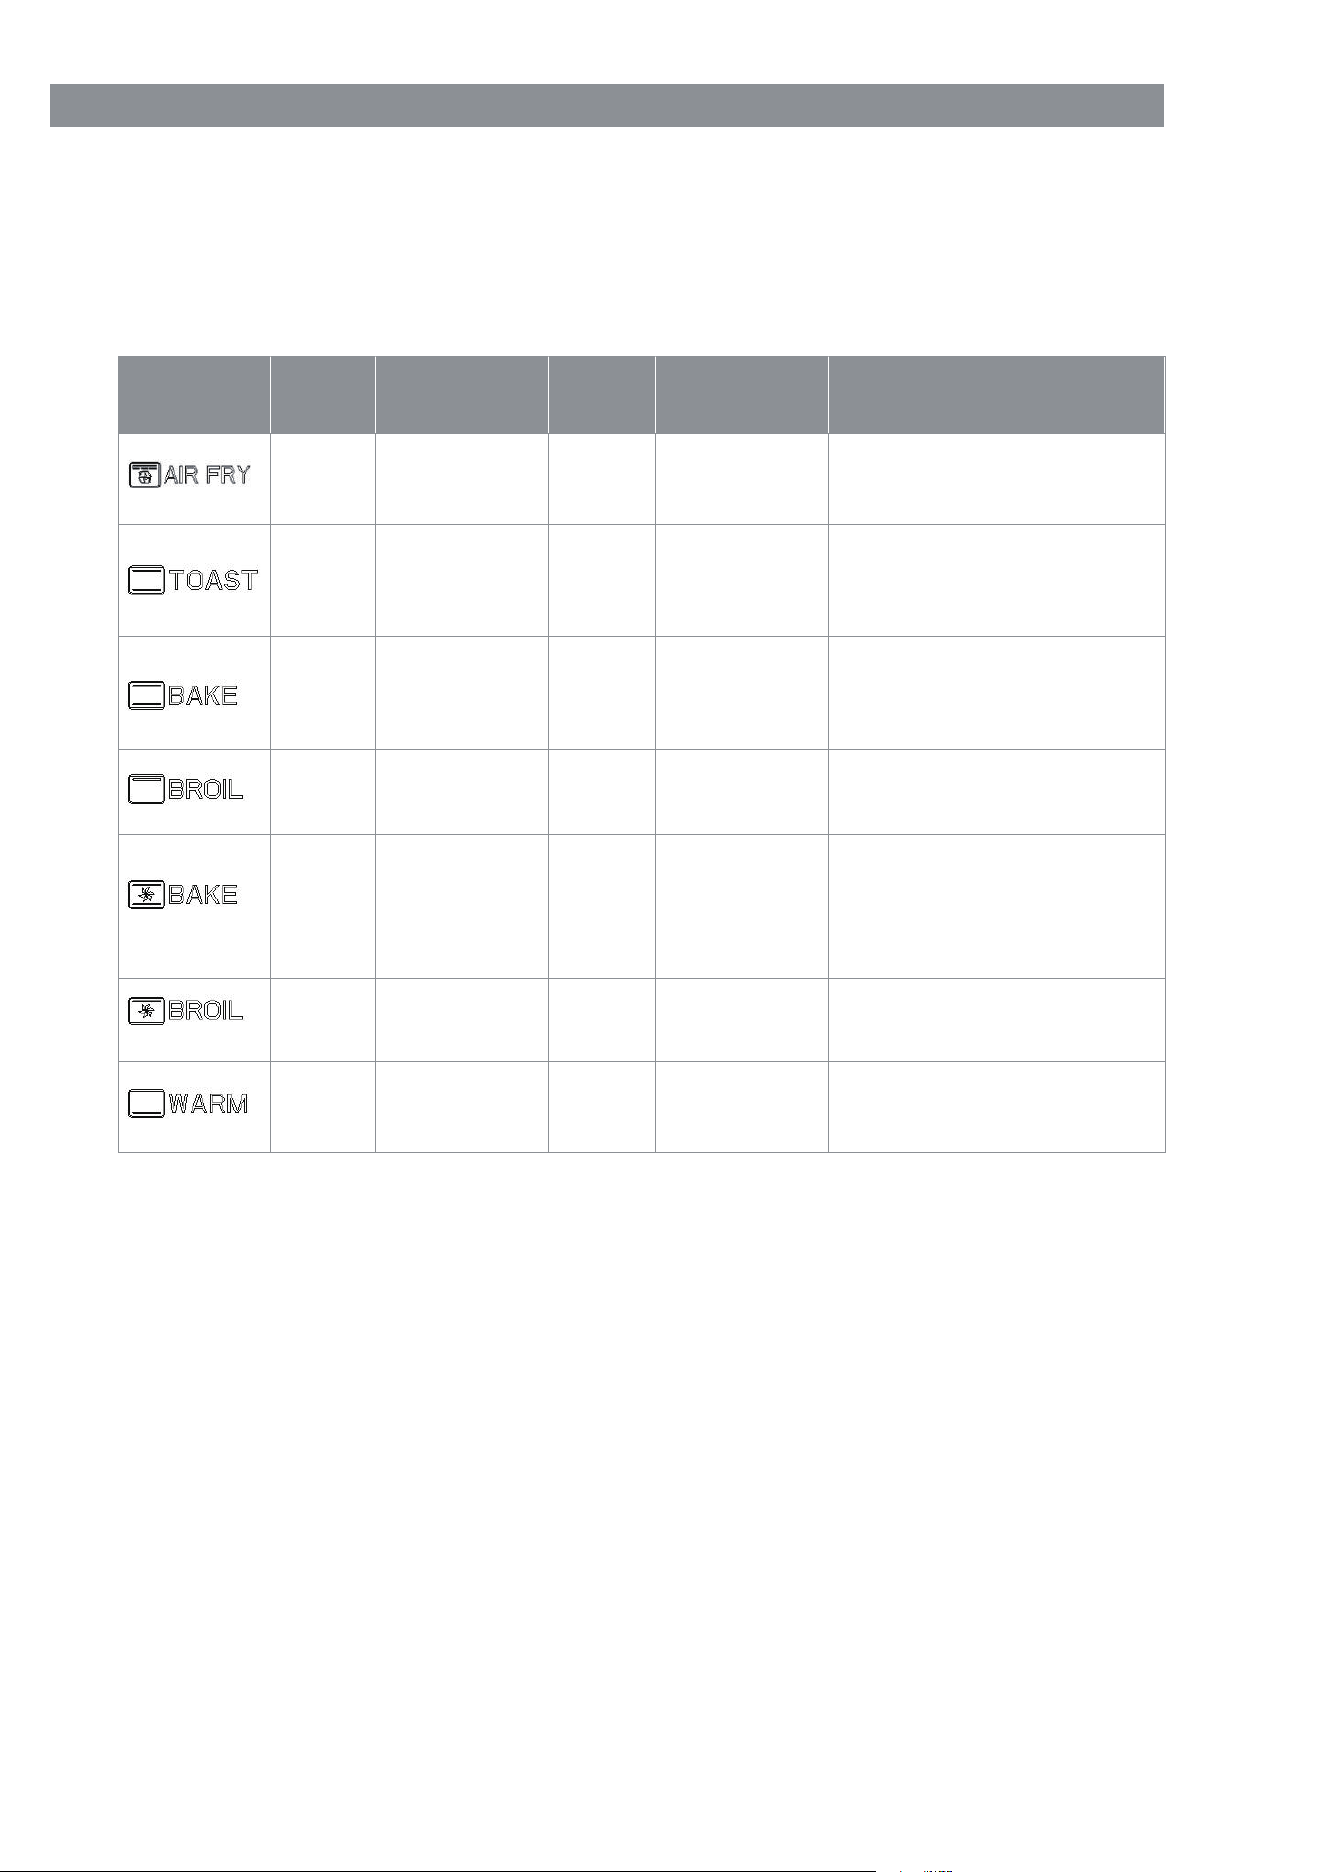
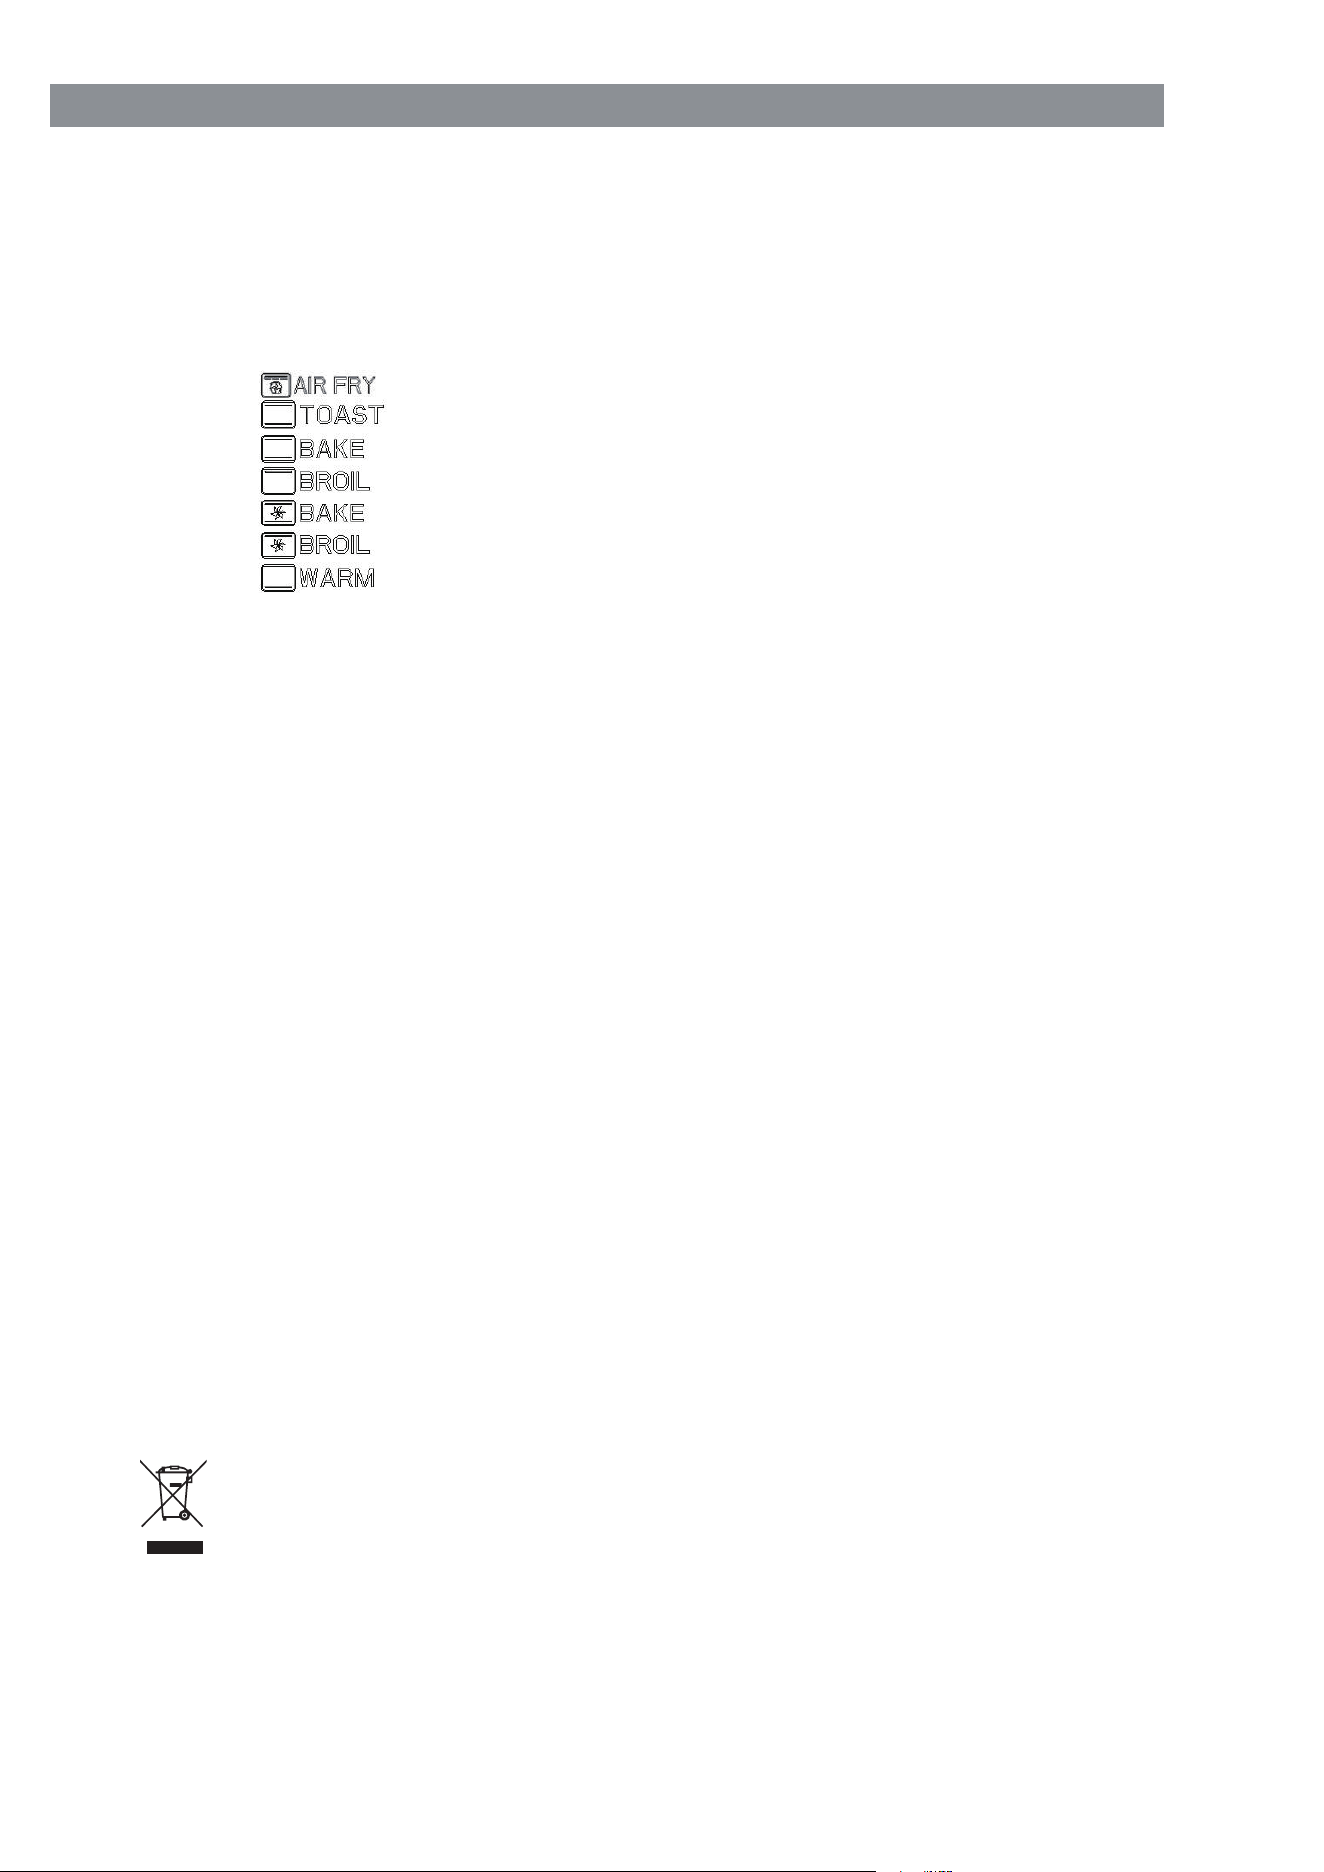
FUNCTION DEFAULT PARAMETERS:
Refer to the following table for the default parameters of the power-on mode and
the default state of the load.
Top heating element
(4PCS) + Hight speed fan
Top heating element
(2PCS) +Bottom heating
element (2PCS)
Top heating element
(2PCS) +Bottom heating
element (2PCS)
Top heating element
(2PCS)
Top heating element
(2PCS) +Bottom heating
element (2PCS) +
Low speed fan
Top heating element
(2PCS) +Low speed fan
Bottom heating
element (2PCS)
150-450°F
\
150-450°F
150-400°F
150-400°F
150-400°F
\
400°F
450°F
400°F
400°F
400°F
400°F
150°F
25Min
/
25Min
10Min
20Min
10Min
30Min
1-120
Min
\
1-120
Min
1-120
Min
1-120
Min
1-120
Min
1-120
Min
Mode
Default
time
Default
temperature
Baking
time
Baking
temperature
Default load
working status
EN
LED display sets function gear, temperature, time and stays on.
Time display colon flashes, WARM file is decremented by 1min, others are decre-
mented by 1s.
You can add or subtract time during work. If the temperature is adjustable, you
can add or subtract time. However, you cannot change the menu function during
work. Pressing it has no effect and the buzzer does not sound.Working tempera-
ture and time allow consumers to adjust. After pressing the " START / CANCEL ''
key, the temperature in the display is flashing. Turn the " TIME / TEMP '' function
knob clockwise or counterclockwise to adjust Temperature, or directly press the ("
TIME / TEMP ") key to enter the time setting.When the time display flashes, turn
the " TIME / TEMP " function knob clockwise or counterclockwise to adjust to the

time.If you do not press the temperature or time key to confirm, the program
cannot be confirmed automatically.During work, you can press " START /
CANCEL " to pause. Press again to resume work. During the pause, the selected
function position is blinking. If there is no other operation, the display will switch
to show the clock time.
If you press the " START / CANCEL " key for more than 3s during work, the
operation of canceling the operation will be executed, all the baking settings will
be cancelled at the same time, and it will switch back to the clock.
5.Lights continue to work during work.
Shows End, the first two digits and the colon are not shown.
Buzzer sounds for 5s.
The internal lights, the lights continue to light.
The corresponding menu icon in the display continues to light.
Within 3 minutes (including) the previous menu related consumer settings are
valid. Just press the "START / CANCEL "key to repeat the previous baking
action. Of course, you can also adjust the settings before working.
If there is no action after 3 minutes, all consumers set remove memories, the
display function icon is no longer displayed, and the time display is switched back
to the clock display(If the internal lighting is off).
After the work is completed, press and hold the" START / CANCEL "button for
more than 3s, it will be regarded as shutdown, which is equivalent to the previous
state.
END OF WORKING:
1.
2.
3.
4.
5.
6.
7.
During standby, press any function knob t
o change the wake-up LED display.
During standby, if you first operate the "FUNCTION" function knob, you will enter
the function setting and confirmation state.
During standby, if you first operate the TIME / TEMP function knob, press " TIME
/ TEMP "and "S TART / CANCEL ", the time will only be displayed.
DURING STANDBY:
1.
2.
3.
time.If you do not press the temperature or time key to confirm, the program
cannot be confirmed automatically.During work, you can press " START /
CANCEL " to pause. Press again to resume work. During the pause, the selected
function position is blinking. If there is no other operation, the display will switch
to show the clock time.
If you press the " START / CANCEL " key for more than 3s during work, the
operation of canceling the operation will be executed, all the baking settings will
be cancelled at the same time, and it will switch back to the clock.
5.
Lights continue to work during work.
4.
7 EN
Touch the "START / CANCEL" key immediately and hold for more than 3 sec-
onds, the program will automatically enter to the self-testing mode.
Full pattern display , keep 3 seconds.
All display patterns are off , keep 1 second.
Display , work for 2 seconds.
Display , work for 2 seconds.
Display , work for 2 seconds.
Display , work for 2 seconds.
Display , work for 2 seconds.
Display , work for 2 seconds.
Display , work for 2 seconds.
Display current temperature value, keep 3 seconds.
The oven buzzer will ring for 2 seconds and display screen will back to original
state after finish self-testing.
If notice of abnormal, the buzzer will continuous ring until the power is unplugged.
In the process of operation, when the temperature sensor is short-circuit or open
circuit, all function of the system will stop working immediately (except the inner
lamp). The buzzer will ring for 3 times and the digital screen will only display“E1"
or“E2" to alert the user.
SMART CARE
1.
2.
3.
4.
5.
6.
7.
8.
9.
10.
11.
12.
13.
14.
Allow the appliance to cool and unplug from outlet before cleaning.
It is important that you clean the appliance after each use to prevent an
accumulation of grease and avoid unpleasant odors.
Do not immerse appliance in water or wash it under waterspout.
Removable wire rack, bake pan can be washed, as normal kitchenware.
Clean outside of appliance with a damp sponge.
Do not use abrasive cleaners or sharp utensils to clean the oven, as scratching
may weaker it and cause shattering.
Let all parts and surfaces dry thoroughly prior to plugging oven in and using.
MAINTENANCE AND CLEANING
1.
2.
3.
4.
5.
6.
7.
Old appliances must be put out of order.
About the latest ways f
or disposal contact at your retailer or at your
local authority.
DISPOSAL:
8EN

Danger: Electrical appliances must only be repaired by authorized specialists,
Because damages can occur by non-authorized repairs. In the case of a repair,
contact your retailer or contact the producer.
FOR HOUSEHOLD USED ONLY
REPAIRS:
9 EN