
Exercise Bike, Magnetic Resistance
Need to speak to a bike expert?
1 (201) 379-4900 · RIF6.com/support · [email protected]

TABLE OF CONTENTS
04
Important Safety Instructions
05
Description of Parts
06
Assembly
13
Operation
15
Cleaning and Maintenance
16
Troubleshooting
16
Specifications
17
FCC Statement
18
Warranty Information
18
Contact Us
EXERCISE BIKE | 4 EXERCISE BIKE | 5
IMPORTANT SAFETY INSTRUCTIONS
• Follow the safety rules below to avoid injury and/or accidents.
• Read through this manual before you assemble or use this equipment. Safe and eective use can only be achieved if the equipment
is assembled, maintained, and used properly. Ensure that all users are informed of all warnings and precautions.
• A complete visual inspection and test of the features and functions of the assembled bike or monitor should be made prior to use.
• Before starting any exercise program, you should consult your doctor to determine if you have any medical or physical condition
that could put your health and safety at risk, or prevent you from using the equipment properly. Your doctor’s advice is essential if
you are taking medication that could aect your heart rate, blood pressure, or cholesterol level.
• Be aware of your body’s signals. Incorrect or excessive exercise can be harmful to your health. Stop exercising if you experience any of
the following symptoms: pain, chest tightness, irregular heartbeat, extreme shortness of breath, lightheadedness, dizziness, or feelings of
nausea. You should consult your doctor before continuing with your exercise program if you do experience any of these conditions.
• Keep children and pets away from the equipment. The equipment is designed for adult use only.
• Set up and use the equipment on a solid, flat level surface with a protective cover for your floor or carpet. The equipment should
have at least 0.2 inch of free space all around to ensure safety.
• Check all nuts and bolts. They must be securely tightened before using the equipment.
• The safety of the equipment can only be maintained if it is regularly examined.
• Always use the equipment as indicated. If you find any defective components while assembling or checking the equipment, or if
you hear any unusual noises coming from the equipment during exercise, stop using the equipment immediately. Do not use the
equipment until the problem has been repaired.
• Wear suitable clothing while using the equipment. Avoid wearing loose clothing that may get caught in the equipment.
• This equipment is not suitable for therapeutic use.
• Take care of yourself when lifting or moving the equipment to avoid injuring your back. Always use proper lifting techniques and
seek assistance if necessary.
• This equipment is designed for home and indoor use only. It is not intended for commercial use.
• Only manufacturer-supplied components shall be used to maintain or repair the equipment.
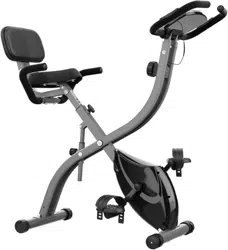
PARTS DESCRIPTION
Front Stabilizer Bar
Pedal
Tension Knob
Digital Monitor
Heart Rate Sensor
Mobile Phone Holder
Front Handlebars
Backrest
Backrest Rack
Rear Handlebars
Pin-Lock
Saddle
Knob
Rear Stabilizer Bar
EXERCISE BIKE | 6 EXERCISE BIKE | 7
ASSEMBLY ASSEMBLY
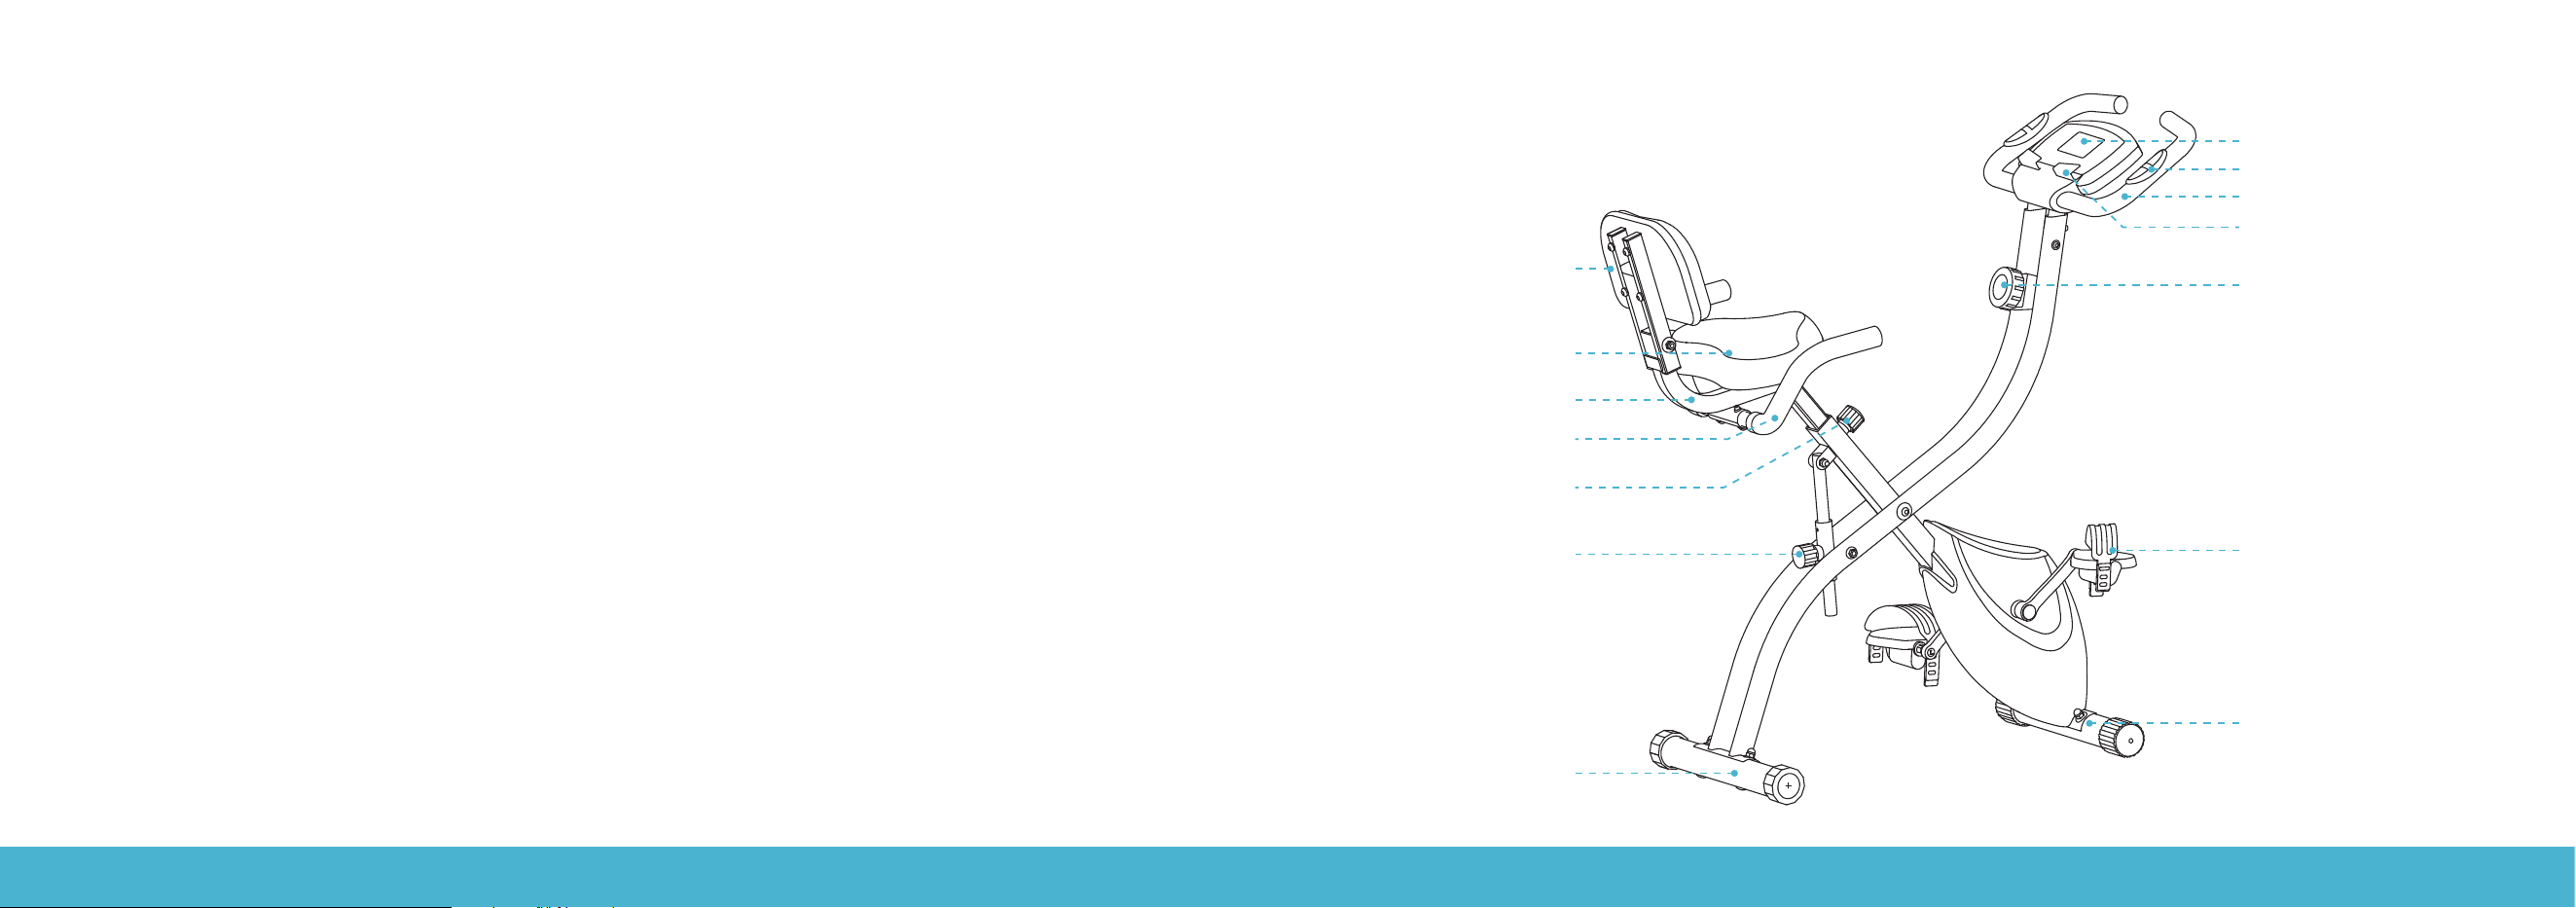
No. Description Spec Qty
1 Front Handlebars (with Monitor) 1
2 Monitor Connector 1
3 Screw M6×16 4
4 Curved Washer Ø6 2
5 Flat Washer Ø6 2
6 Monitor Connector 1
7 Main Frame 1
8 Knob 1
9 Pin-Lock 1
10 Nut M8 4
11 Curved Washer Ø8 6
12 Rear Stabilizer Bar 1
13 Bolt M8×62 4
No. Description Spec Qty
14 Front Stabilizer Bar 1
15 (L&R) Pedal 2
16 Saddle Post 1
17 Flat Washer Ø8 5
18 Nylon Nut M8 5
19 Bolt M8×45 2
20 Saddle 1
21 Backrest 1
22 Spring Washer Ø8 4
23 Screw M8×45 4
24 Backrest Rack 1
25 Rear Handlebars 1
26 Bolt M8×40 2
1
21
20
16
17
18
6
3
2
4
5
5
3
7
10
15R
11
14
13
13
10
11
12
15L
26
11
25
9
18
8
17
23
22
19
24
Parts list
EXERCISE BIKE | 8 EXERCISE BIKE | 9
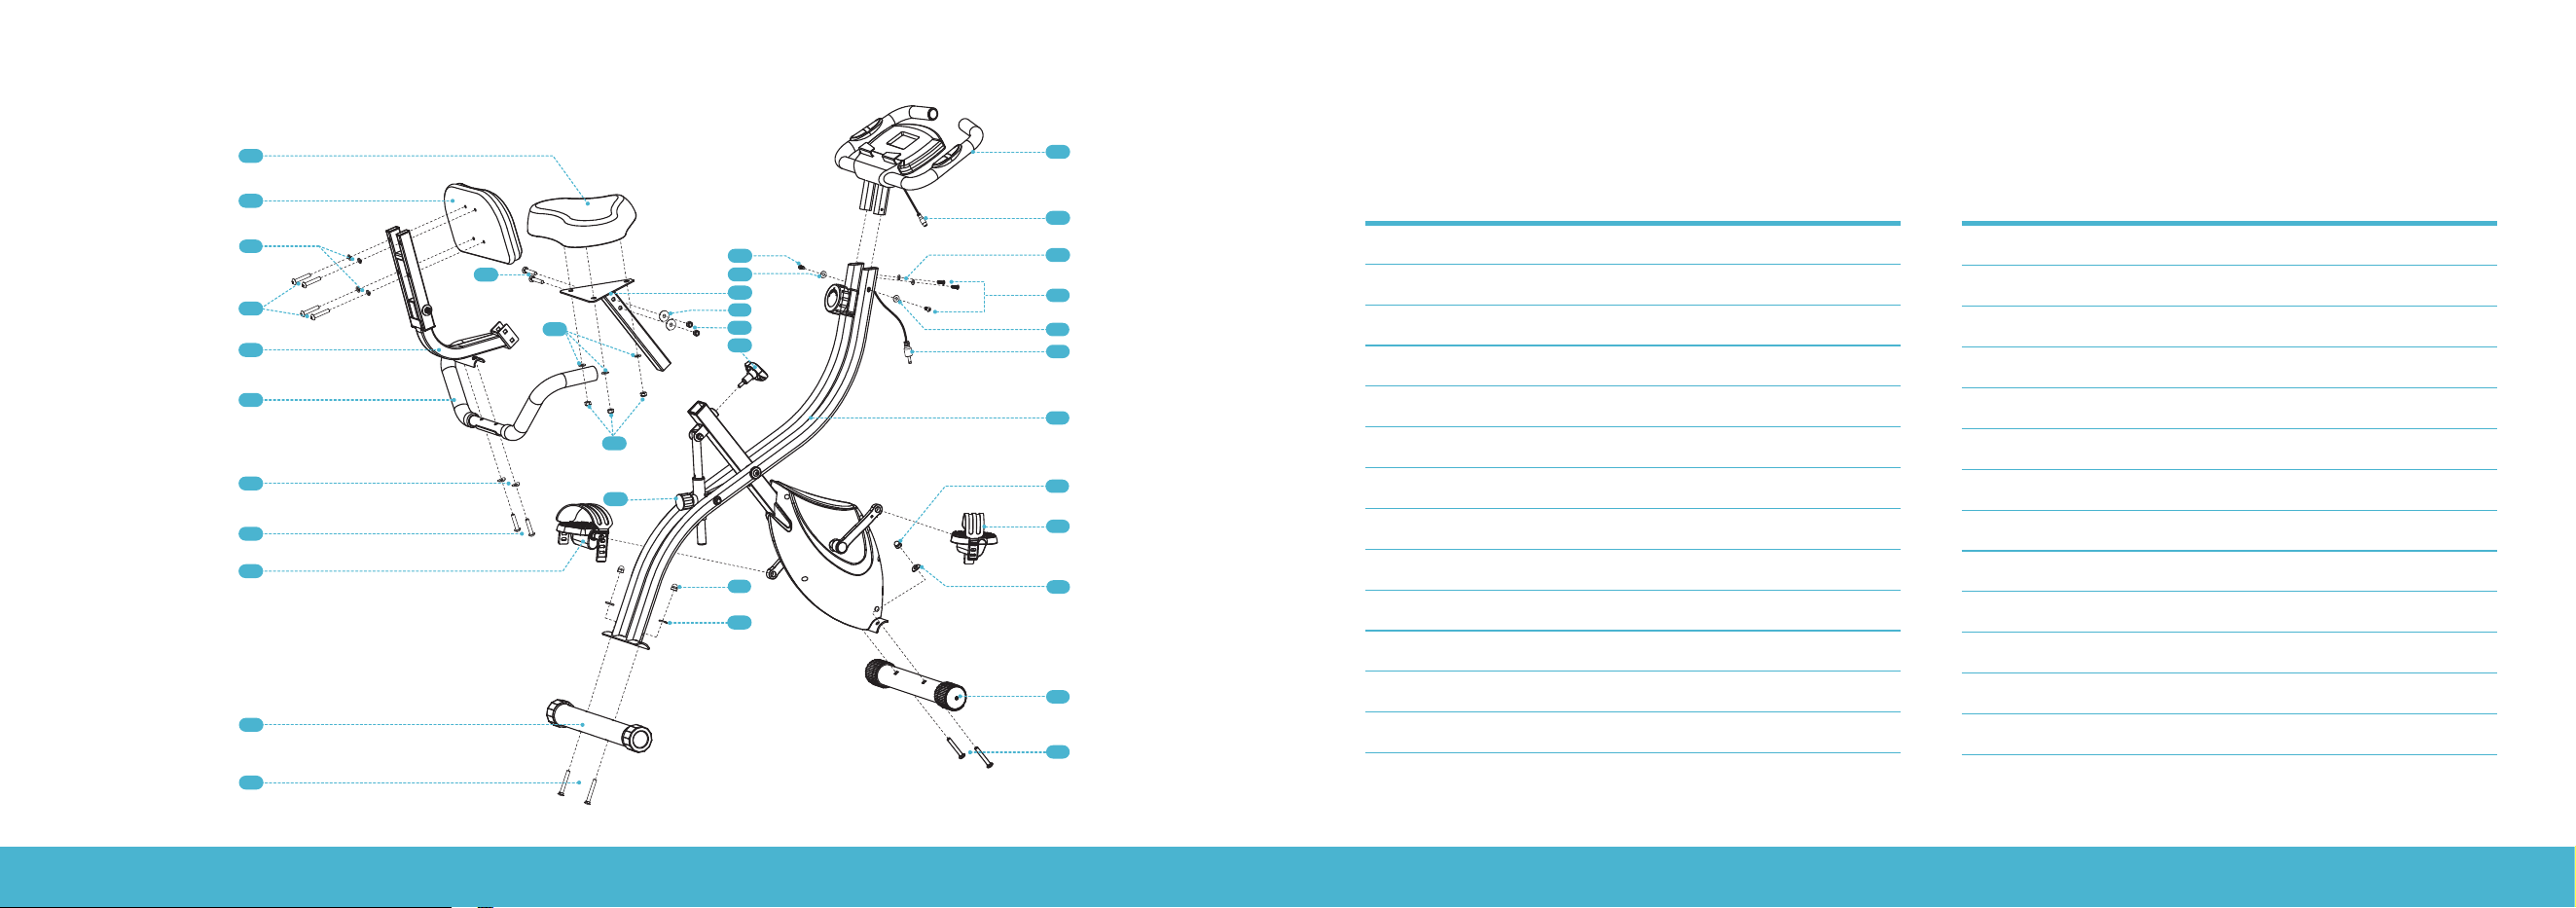
ASSEMBLY
Take the Main Frame (7) out from the carton and fix the Pin-
Lock (9) to it.
Attach the Front and Rear Stabilizer Bars (12 & 14) to the Main
Frame using two sets of Nuts (10), Washers (11), and M8 × 62
Bolts (13). Please note that the stabilizer bar with wheels is for
the front.
7
7
9
13
11
11
10
12
14
13
10
9
Pin-Lock
10
Nut
11
Curved Washer (Ø8)
12
Rear Stabilizer Bar
13
Bolt (M8 × 62)
14
Front Stabilizer Bar
ASSEMBLY
Tools Needed
Allen Wrench (L5) Spanner (S13 & 15)
CAUTION: This product is HEAVY. It should be assembled by 2 people to avoid injuries.

EXERCISE BIKE | 10 EXERCISE BIKE | 11
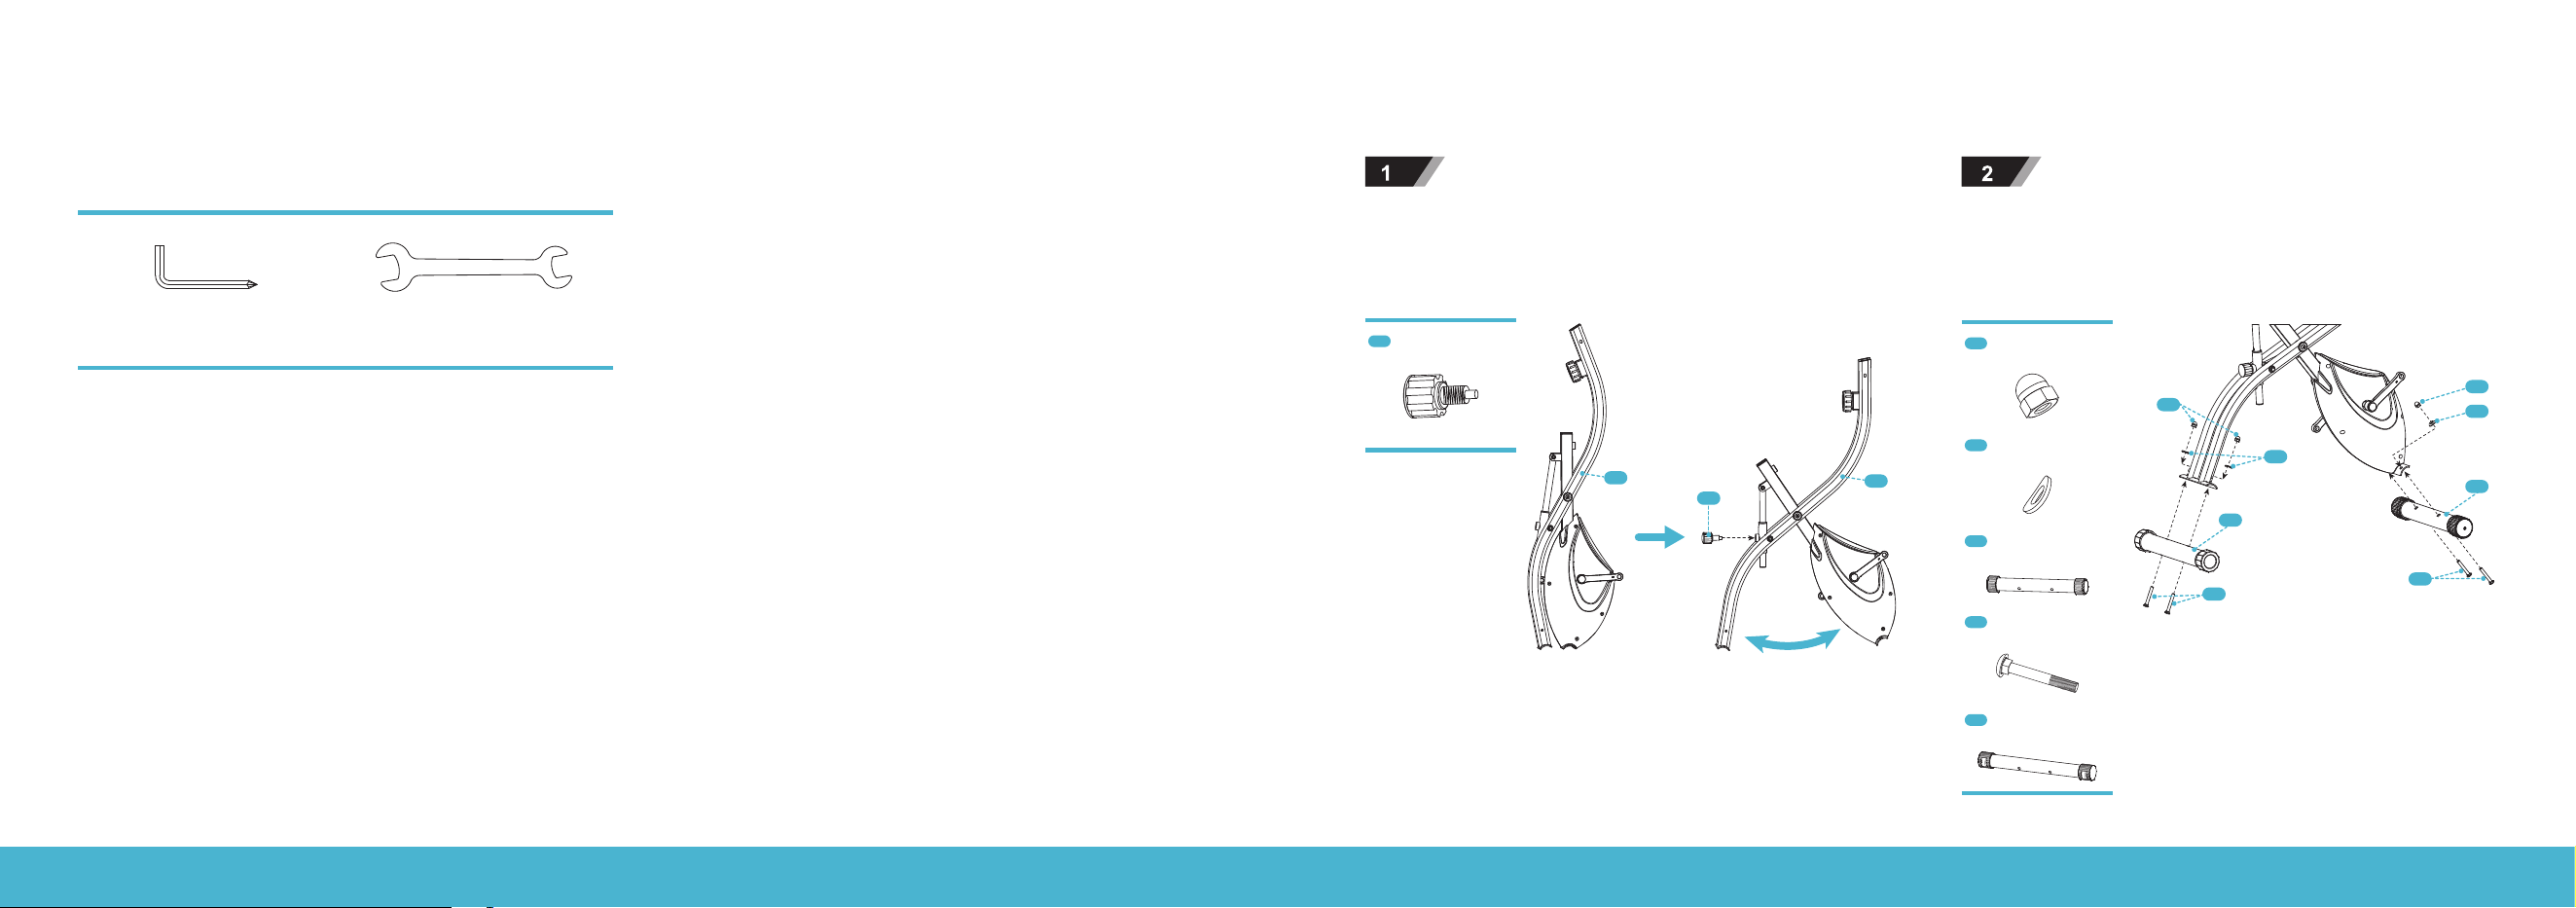
ASSEMBLY
Attach the Saddle (20) to the Saddle Post (16) and tighten with
three sets of Flat Washers (17) and Nylon Nuts (18).
4A Attach the Backrest Rack (24) to the Saddle Post (16) with
two sets of Bolts (19), Flat Washers (17), and Nylon Nuts (18),
then tighten them with the Spanner (S13 &15).
4B Fix the Backrest (21) to the Backrest Rack (24) with four
sets of Bolts (23) and Spring Washers (22).
17
16
18
20
24
17 18
16
19
22
23
23
21
22
16
Saddle Post
17
Flat Washer (Ø8)
18
Nylon Nut (M8)
20
Saddle
19
Bolt (M8 × 45)
21
Saddle
22
Spring Washer (Ø8)
23
Screw (M8 × 45)
24
Backrest Rack
ASSEMBLY
Attach the Rear Handlebars (25) to the Backrest Rack (24) and tighten with two sets of Bolts (26) and Curved Washers (11) using the
Allen Wrench (L5). Insert the Saddle Post (16) to the Main Frame (7), and adjust to your desired height, then tighten with the Knob(8).
24
25
11
26
16
7
8
8
Knob
11
Curved Washer (Ø8)
25
Rear Handlebars
26
Bolt (M8 × 40)

EXERCISE BIKE | 12 EXERCISE BIKE | 13
Attach the Front Handlebars (1) to the Main Frame and tighten
with four Screws (3), two Flat Washers (5), and two Curved
Washers (4) using the Allen Wrench (L5). Then connect the
Cable Connectors (2 and 6).
7
Connect the Left and Right Pedals (15L &15R) marked with "L"
and "R" to the corresponding crank arm respectively. Note that
the right pedal should be threaded on clockwise while the left
pedal should be threaded on anti-clockwise.
ASSEMBLY
1
2
2
4
5
3
6
6
3
15L
15R
1
Front Handlebars
3
Screw (M6 × 16)
4
Curved washer (Ø6)
5
Flat Washer (Ø6)
15
Left and Right Pedals
Using the Digital Monitor
1. Specifications
TIME (TMR) .............................. 00:00 - 99:59 MIN
SPEED (SPD) .................................. 0.0 - 99.9 MPH
DISTANCE (DST) ..................... 0.00 - 999.9 MILE
ODO (Total distance) .................0.0 - 9999 MILE
CALORIES (CAL) ........................0.0 - 9999 KCAL
PULSE (PUL) ....................................40 - 240 BPM
2. Mode Button
This button allows you to select and lock on to a particular function. When the abbreviation of this function appears, press the
MODE button. The result of this function will be scanned and displayed. When you hold the MODE button for over 4 seconds, all
values except ODO will reset to zero.
3. Auto On/O
The monitor turns on when the MODE button is pressed or when the monitor receives a signal input from the speed sensor. The
monitor turns o when the speed sensor has no signal input or when no button is pressed for about 4 minutes.
4. Functions
- TIME: When "TMR" appears, press the MODE button to display the exercise time.
- SPEED: When "SPD" appears, press the MODE button to display the current speed.
- DISTANCE: When "DIST" appears, press the MODE button to display the distance of each workout.
- ODO: Press the MODE button until the pointer advances to ODO. The total distance of the total workout will be displayed.
- PULSE: When "PULSE" appears, press the MODE button to display your current heart rate in beats per minute (BPM). To get a
more accurate reading, place your palms on the contact pads and wait for 30 seconds.
- CALORIES: When "CAL" appears, press the MODE button to display the calories burned.
- SCAN: Automatically display the functions above.
5. Batteries
This monitor uses two AAA batteries. You can replace them at the back of the unit. Do not mix old batteries with new batteries or
dierent types of batteries.
OPERATION

EXERCISE BIKE | 14 EXERCISE BIKE | 15
Resistance Adjustment
Pedaling resistance is controlled by the tension knob located under the handlebar.
To increase resistance, turn the tension knob clockwise. To decrease resistance, turn
the tension knob anti-clockwise.
WARNING: Do not dismount the bike or remove your feet from the pedals until the
pedals have completely stopped. When the bike is not in use, you should turn the
resistance to the highest level to keep the flywheel immobile for safety.
Saddle Adjustment
Properly adjust the saddle to ensure maximum exercise eciency and comfort. To adjust the saddle height, turn the Pin-Lock
loose, slide the saddle post up or down to the required height and tighten the knob.
OPERATION
Preventing Rust
After each use, raise the handlebar post and saddle post to the highest settings to allow any
moisture to evaporate. Use an absorbent cloth to wipe all areas where moisture can settle.
Protecting Your
Bike’sFinish
After each ride, protect your bike’s finish by wiping it down with a damp cloth. You may use a bike
cleaner, but do not use degreasers or harsh cleaning products. Make sure the pedals are completely
stopped before cleaning your bike.
Check the Pedals
Check the pedals weekly to ensure that they are completely tightened. If the pedals have become
loose, tighten them with the supplied wrench to ensure that they are securely attached.
Replace the Batteries
Replace the batteries on the monitor every 6 months.
CLEANING AND MAINTENANCE

EXERCISE BIKE | 16 EXERCISE BIKE | 17
TROUBLESHOOTING FCC STATEMENT
Rattling Handlebars
orSaddle Post
Make sure that the knobs are firmly tightened.
Discomfort while
riding or sitting
If you experience saddle discomfort while sitting on or riding your bike, refer to the Saddle
Adjustment section to adjust your saddle. Be sure to re-tighten the knob after making your
adjustment and before riding your bike.
Saddle Pain
Check to ensure that the saddle is centered and level. Adjust the level as necessary using
the outside bolts. Remember that it does take time for a body to acclimate to the saddle.
Apadded gel saddle cover and/or cycling shorts can make your ride more comfortable.
Digital Monitor
Failure
The digital monitor shows that it is not counting. Check whether the signal line of the digital
monitor is connected well.
SPECIFICATIONS
User weight limit: .................................. 264.6 Ib
Battery type: ...........................................AAA × 2
Operating temperature: .................32°F–104°F
Storage temperature: ......................14°F–140°F
This equipment has been tested and found to comply with the limits for a Class B digital device, pursuant to part 15 of the FCC
Rules. These limits are designed to provide reasonable protection against harmful interference in a residential installation.
This equipment generates, uses, and can radiate radio frequency energy, and if not installed and used in accordance with the
instructions, may cause harmful interference to radio communications. However, there is no guarantee that interference will
not occur in a particular installation. If this equipment does cause harmful interference to radio or television reception which
can be determined by turning the equipment o and on, the user is encouraged to try to correct the interference by one or
more of the following measures:
– Reorient or relocate the receiving antenna.
– Increase the separation between the equipment and receiver.
– Connect the equipment into an outlet on a circuit dierent from that to which the receiver is connected.
– Consult the dealer or an experienced radio/TV technician for help.

EXERCISE BIKE | 18
CONTACT US
RIF6 oers a 12-month warranty on all of our products purchased new and unused from RIF6 or an authorized
reseller, with an original proof of purchase and where a defect has arisen, wholly or substantially, as a result of faulty
manufacturing, parts or workmanship during the 12-month warranty period. The warranty does not apply where
damage is caused by other factors, including but without limitation to: (a) normal wear and tear; (b) abuse, mishandling,
accident or failure to follow operating instructions; (c) exposure to liquid or infiltration of foreign particles; (d) servicing
or modification of the product other than by RIF6. These are our general terms for the warranty service, but we always
urge our customers to reach out to us with any issue, regardless of warranty terms. If you experience an issue with an
RIF6 product, please contact us at [email protected], and we will do our best to resolve it for you.
WARRANTY INFORMATION
WARNING
This manual covers all items with the model number:
RIF110516N
Keep all plastic bags away from children.

EXERCISE BIKE | 20
learn more at rif6.com
