Technical Support and E-Warranty Certificate www.vevor.com/support
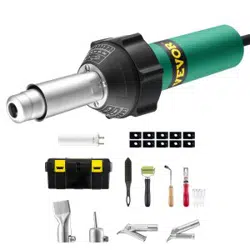
PLASTIC WELDING KIT
MODEL: HOT-100W
We continue to be committed to provide you tools with competitive price.
"Save Half", "Half Price" or any other similar expressions used by us only represents an
estimate of savings you might benefit from buying certain tools with us compared to the major
top brands and doses not necessarily mean to cover all categories of tools offered by us. You
are kindly reminded to verify carefully when you are placing an order with us if you are
actually saving half in comparison with the top major brands.

- 1 -
MODEL:HOT-100W
Have product questions? Need technical support? Please feel free to
contact us:
CustomerService@vevor.com
NEED HELP? CONTACT US!
This is the original instruction, please read all manual instructions
carefully before operating. VEVOR reserves a clear interpretation of our
user manual. The appearance of the product shall be subject to the
product you received. Please forgive us that we won't inform you again if
there are any technology or software updates on our product.
PLASTIC WELDING KIT
- 2 -
Warning-To reduce the risk of injury, user must read
instructions manual carefully.
This device complies with Part 15 of the FCC Rules. Operation is
subject to the following two conditions:(1)This device may not cause
harmful interference, and (2)this device must accept any
interference received, including interference that may cause
undesired operation.
This product is subject to the provision of European Directive
2012/19/EC. The symbol showing a wheelie bin crossed
through indicates that the product requires separate refuse
collection in the European Union. This applies to the product
and all accessories marked with this symbol. Products
marked as such may not be discarded with normal domestic
waste, but must be taken to a collection point for recycling
electrical and electronic devices

- 3 -
SAFETY & HANDLING PRECAUTIONS
Once the welding iron is plugged in and the switch is turned on, the
temperature will reach 660°-930° F (348° to 498°C) Mishandling may
cause, but is not limited to burns, blindness and/or fire.
WARNING
● Wear safety glasses and heat resistant gloves while using this welding
iron.
● Keep long hair and clothing from coming into contact with the hot welding
iron.
● Do not immerse this welding iron in water.
● Do not use in damp or wet locations.
● When repair is completed, turn the power off and make sure the welding
iron is cool before moving or storing it.
● Repairing plastics creates high temperatures.Please be aware of
potential burning from hot plastics as well.
● This product was designed for plastic repair. Do not use this product for
any other use.
● This Plastic Welding Kit should be used with the original plastic welding
rods and stainless steel mesh only. Use of any other products could yield
unfavorable results.
● Never diassemble, there are no user serviceable parts inside.
● Unplug this unit after each use.
● When unplugging your welding iron, hold and pull the plug itself, do not
unplug by pulling on the cord.
SPECIFICATIONS

- 4 -
MODEL NO.: HOT-100W
POWER SOURCE: AC120V 60Hz
POWER CONSUMPTION: 100W
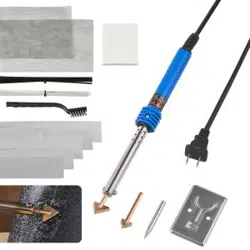
PARTS LIST
1. Sandpaper *1
2. Triangle welder head and small head 1 each
3. 10 black plastic sticks and 10 translucent ones
4. 1 metal support
5. 1 wire brush
6. 5 pieces of Aluminum repair patch 50MM*250MM
7. Repair two pieces of mesh
OPERATION
● Plug welding iron into 110/120V AC outlet.
● Welding Iron will take about 5 minutes to reach operating temperature.
Place the iron on it's stand on a flat surface while it heats up to prevent any
accidental burning.Do NOT touch any part of the iron besides the handle or
cord.
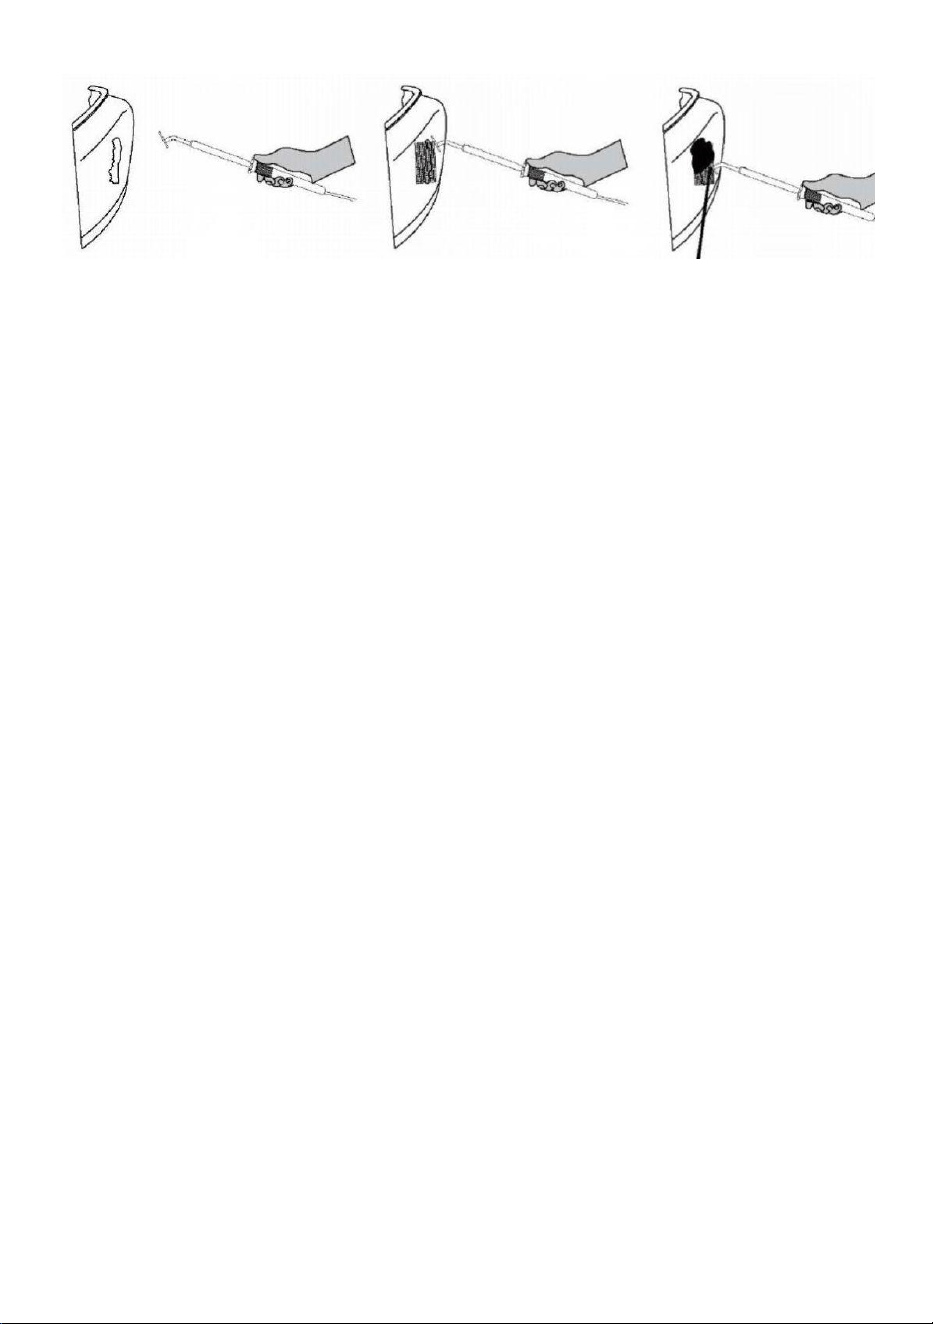
● Cut the stainless steel mesh to the proper size and shape required by
your specific job.
● the steel mesh into the area being repaired until the parent material can
be seen penterating the mesh.
● Melt the plastic filler rod into the surface of the mesh and into the edges
of the repair. To cover the repair, build up the repair to the required depth.
● Allow the repaired area to cool completely. Where required, the repaired
area can now be sanded for finishing.
- 5 -
Made In China
VEVOR STORE INC
9448 RINCHMOND PL #E RANCHO CUCAMONGA, California, 91730
United States of America

- 6 -


MODÈLE:HOT100W
KITDESOUDUREPLASTIQUE
Assistancetechniqueetcertificatdegarantieélectroniquewww.vevor.com/support
«Économisezlamoitié»,«Moitiéprix»outouteautreexpressionsimilaireutiliséeparnousnereprésente
qu'uneestimationdeséconomiesquevouspourriezréaliserenachetantcertainsoutilscheznousparrapport
auxgrandesmarquesetnecouvrepasnécessairementtouteslescatégoriesd'outilsquenousproposons.Nous
vousrappelonsdebienvouloirvérifiersoigneusementlorsquevouspassezunecommandecheznous
sivouséconomisezréellementlamoitiéparrapportauxgrandesmarques.
Nouscontinuonsànousengageràvousfournirdesoutilsàdesprixcompétitifs.
Machine Translated by Google

Machine Translated by Google

BESOIND'AIDE?CONTACTEZNOUS!
Ils'agitdelanoticed'utilisationd'origine.Veuillezlireattentivementtouteslesinstructionsdu
manuelavantdel'utiliser.VEVORseréserveledroitd'interpréterclairementnotremanueld'utilisation.
L'apparenceduproduitdépendduproduitquevousavezreçu.Veuilleznousexcuser,nousne
vousinformeronsplusencasdemiseàjourtechnologiqueoulogicielledenotreproduit.
MODÈLE:HOT100W
Vousavezdesquestionssurnosproduits?Vousavezbesoind'assistancetechnique?N'hésitezpasà
nouscontacter:
KITDESOUDUREPLASTIQUE
1
Machine Translated by Google
Cetappareilestconformeàlapartie15desrèglesdelaFCC.Son
fonctionnementestsoumisauxdeuxconditionssuivantes:(1)Cetappareil
nedoitpasprovoquerd'interférencesnuisibleset(2)Cetappareildoit
acceptertouteinterférencereçue,ycomprislesinterférencespouvant
entraînerunfonctionnementindésirable.
Ceproduitestsoumisauxdispositionsdeladirectiveeuropéenne2012/19/
CE.Lesymbolereprésentantunepoubelleàroulettesbarréeindiquequele
produitdoitfairel'objetd'unecollectesélectivedesdéchetsdansl'Union
européenne.Celas'appliqueauproduitetàtouslesaccessoiresmarquésde
cesymbole.Lesproduitsmarquéscommetelsnepeuventpasêtrejetésavec
lesdéchetsménagersnormaux,maisdoiventêtredéposésdansunpointde
collectepourlerecyclagedesappareilsélectriquesetélectroniques.
AvertissementPourréduirelerisquedeblessure,l'utilisateurdoitlire
attentivementlemanueld'instructions.
2
Machine Translated by Google

AVERTISSEMENT
résultatsdéfavorables.•
Nejamaisdémonter,iln'yaaucunepièceréparableparl'utilisateuràl'intérieur.•
Débranchezcetappareilaprèschaque
utilisation.•Lorsquevousdébranchezvotreferàsouder,tenezettirezsurlaficheellemême,ne
fer.
débrancherentirantsurlecordon.SPÉCIFICATIONS
•Évitezquelescheveuxlongsetlesvêtementsn'entrentencontactaveclasoudurechaude.
PRÉCAUTIONSDESÉCURITÉETDEMANIPULATION
•Nepasimmergerceferàsouderdansl'eau.•Nepas
utiliserdansdesendroitshumidesoumouillés.•
Unefoislaréparationterminée,couperl'alimentationets'assurerquelesoudageestterminé.
fer.
Unefoisleferàsouderbranchéetl'interrupteurallumé,le
Leferestfroidavantdeledéplaceroudele
ranger.•Laréparationdesplastiquescréedestempératuresélevées.Veuillezentenircompte
risquedebrûluredûauxplastiqueschauds.•
Ceproduitaétéconçupourlaréparationdesplastiques.N'utilisezpasceproduitpour
latempératureatteindra660°930°F(348°à498°C)Unemauvaisemanipulationpeut
touteautre
utilisation.•Cekitdesoudageplastiquedoitêtreutiliséaveclekitdesoudageplastiqued'origine
provoquer,sanstoutefoiss’ylimiter,desbrûlures,lacécitéet/ouunincendie.
tigesettreillisenacierinoxydableuniquement.L'utilisationdetoutautreproduitpourraitentraîner
•Portezdeslunettesdesécuritéetdesgantsrésistantsàlachaleurlorsquevousutilisezcetappareildesoudage.
3
Machine Translated by Google

2.Têtedesoudeusetriangulaireetpetitetête1dechaque
3.10bâtonsenplastiquenoirset10bâtonstranslucides
corde.
•Coupezlamailleenacierinoxydableàlatailleetàlaformeappropriéesrequisespar
4.1supportmétallique
6.5piècesdepatchderéparationenaluminium50MM*250MM
5.1brossemétallique
7.Réparerdeuxmorceauxdetreillis
votretravailspécifique.•
letreillisenacierdanslazoneàréparerjusqu'àcequelematériauparentpuisse
delaréparation.Pourcouvrirlaréparation,construisezlaréparationjusqu'àlaprofondeurrequise.•Laissez
lazoneréparéerefroidircomplètement.Sinécessaire,laréparation
êtrevupénétrerlemaillage.•Fairefondrela
tigederemplissageenplastiquedanslasurfacedumaillageetdanslesbords
OPÉRATION
lazonepeutmaintenantêtreponcéepourlafinition.
•Branchezleferàsoudersuruneprisesecteur110/120V.•Le
feràsouderprendraenviron5minutespouratteindresatempératuredefonctionnement.
Placezlefersursonsupportsurunesurfaceplanependantqu'ilchauffepourévitertoute
1.Papierdeverre*1
brûlureaccidentelle.NEtouchezAUCUNEpartieduferàl'exceptiondelapoignéeou
CONSOMMATIONÉLECTRIQUE:100W
LISTEDESPIÈCES
SOURCED'ALIMENTATION:120VCA60Hz
MODÈLEN°:HOT100W
4
Machine Translated by Google

5
9448RINCHMONDPL#ERANCHOCUCAMONGA,Californie,91730
lesétatsunisd'Amérique
MAGASINVEVORINC
FabriquéenChine
Machine Translated by Google

6
Machine Translated by Google


MODELL: HOT-100W
KUNSTSTOFF-SCHWEISSSATZ
Technischer Support und E-Garantie-Zertifikat www.vevor.com/support
„Sparen Sie die Hälfte“, „Halber Preis“ oder andere ähnliche Ausdrücke, die wir verwenden, stellen nur eine
Schätzung der Ersparnis dar, die Sie beim Kauf bestimmter Werkzeuge bei uns im Vergleich zu den großen
Topmarken erzielen können, und bedeuten nicht unbedingt, dass sie alle von uns angebotenen Werkzeugkategorien
abdecken. Wir möchten Sie freundlich daran erinnern, bei Ihrer Bestellung bei uns sorgfältig zu prüfen, ob
Sie im Vergleich zu den großen Topmarken tatsächlich die Hälfte sparen.
Wir sind weiterhin bestrebt, Ihnen Werkzeuge zu wettbewerbsfähigen Preisen anzubieten.
Machine Translated by Google

Machine Translated by Google

Brauchen Sie Hilfe? Kontaktieren Sie uns!
Sie haben Fragen zu unseren Produkten? Sie benötigen technischen Support? Dann kontaktieren
Sie uns gerne:
MODELL: HOT-100W
Dies ist die Originalanleitung. Bitte lesen Sie alle Anweisungen sorgfältig durch, bevor Sie
das Gerät in Betrieb nehmen. VEVOR behält sich eine klare Auslegung unserer Bedienungsanleitung
vor. Das Erscheinungsbild des Produkts richtet sich nach dem Produkt, das Sie erhalten
haben. Bitte verzeihen Sie uns, dass wir Sie nicht erneut informieren, wenn es Technologie- oder
Software-Updates für unser Produkt gibt.
KUNSTSTOFF-SCHWEISSSATZ
- 1 -
Machine Translated by Google

Dieses Gerät entspricht Teil 15 der FCC-Bestimmungen. Der Betrieb
unterliegt den folgenden beiden Bedingungen: (1) Dieses Gerät darf keine
schädlichen Störungen verursachen und (2) dieses Gerät muss alle
empfangenen Störungen akzeptieren, einschließlich Störungen, die einen
unerwünschten Betrieb verursachen können.
Dieses Produkt unterliegt den Bestimmungen der europäischen Richtlinie
2012/19/EU. Das Symbol einer durchgestrichenen Mülltonne weist darauf hin,
dass das Produkt in der Europäischen Union einer getrennten Müllentsorgung
unterliegt. Dies gilt für das Produkt und alle mit diesem Symbol gekennzeichneten
Zubehörteile. So gekennzeichnete Produkte dürfen nicht im normalen Hausmüll
entsorgt werden, sondern müssen an einer Sammelstelle für das Recycling
von elektrischen und elektronischen Geräten abgegeben werden.
Warnung: Um das Verletzungsrisiko zu verringern, muss der Benutzer die
Bedienungsanleitung sorgfältig lesen.
- 2 -
Machine Translated by Google

WARNUNG
SICHERHEITS- UND HANDHABUNGSVORKEHRUNGEN
Eisen.
• Tauchen Sie diesen Schweißkolben nicht in Wasser. •
Verwenden Sie ihn nicht an feuchten oder nassen
Orten. • Schalten Sie nach Abschluss der Reparatur das Gerät aus und stellen Sie sicher, dass das Schweißgerät
Sobald der Schweißkolben eingesteckt und der Schalter eingeschaltet ist,
Bügeleisen abgekühlt ist, bevor Sie es
transportieren oder verstauen. • Bei der Reparatur von Kunststoffen entstehen hohe Temperaturen.
Eisen.
ziehen Sie den Stecker, indem Sie am Kabel ziehen.SPEZIFIKATIONEN
• Vermeiden Sie, dass lange Haare und Kleidung mit dem heißen Schweißgerät in Berührung kommen.
Nur Stangen und Edelstahlgewebe. Die Verwendung anderer Produkte kann zu
• Tragen Sie eine Schutzbrille und hitzebeständige Handschuhe bei der Verwendung dieses Schweißgeräts.
Temperatur erreicht 660°-930° F (348° bis 498°C) Falsche Handhabung kann
mögliche Verbrennungen durch heiße Kunststoffe. • Dieses
Produkt wurde für die Reparatur von Kunststoffen entwickelt. Verwenden Sie dieses Produkt nicht für
ungünstige Ergebnisse. •
Niemals auseinanderbauen, es gibt keine vom Benutzer zu wartenden Teile im Inneren. • Ziehen
Sie dieses Gerät nach jedem Gebrauch aus der
Steckdose. • Wenn Sie Ihren Schweißkolben aus der Steckdose ziehen, halten Sie den Stecker fest und ziehen Sie ihn heraus.
Ursache ist unter anderem Verbrennungen, Blindheit und/oder Feuer.
jede andere
Verwendung. • Dieses Kunststoffschweißset sollte mit dem Original-Kunststoffschweißgerät verwendet werden.
- 3 -
Machine Translated by Google

6. 5 Stück Aluminium-Reparaturflicken, 50 mm x 250 mm.
5. 1 Drahtbürste
Ihre spezifische
Aufgabe. • das Stahlgewebe in den zu reparierenden Bereich einarbeiten, bis das Grundmaterial
7. Reparieren Sie zwei Netzstücke
• Schmelzen Sie den Kunststoff-Füllstab
in die Oberfläche des Netzes und in die Kanten
der Reparatur. Um die Reparatur abzudecken, bauen Sie die Reparatur bis zur erforderlichen
Tiefe auf. • Lassen Sie den reparierten Bereich vollständig abkühlen. Falls erforderlich,
3. 10 schwarze und 10 durchsichtige Plastikstäbe
Kabel.
4. 1 Metallträger
• Schneiden Sie das Edelstahlgewebe auf die richtige Größe und Form, die erforderlich ist
Stellen Sie das Bügeleisen während des Aufheizens auf den Ständer auf einer ebenen Fläche, um
1. Schleifpapier *1
2. Dreieckschweißkopf und kleiner Kopf je 1
versehentliches Verbrennen. Berühren Sie KEINE Teile des Bügeleisens außer dem Griff oder
BETRIEB
Der Bereich kann jetzt zum Abschluss geschliffen werden.
• Stecken Sie den Schweißkolben in eine 110/120-V-
Wechselstromsteckdose. • Der Schweißkolben benötigt etwa 5 Minuten, um die Betriebstemperatur zu erreichen.
LEISTUNGSAUFNAHME: 100W
TEILELISTE
STROMQUELLE: AC120V 60Hz
MODELL NR.: HOT-100W
- 4 -
Machine Translated by Google

- 5 -
9448 RINCHMOND PL #E RANCHO CUCAMONGA, Kalifornien, 91730
Vereinigte Staaten von Amerika
VEVOR STORE INC
In China hergestellt
Machine Translated by Google

- 6 -
Machine Translated by Google


MODELLO: HOT-100W
"Risparmia la metà", "Metà prezzo" o qualsiasi altra espressione simile da noi utilizzata rappresenta
solo una stima del risparmio che potresti ottenere acquistando determinati utensili con noi rispetto ai
principali marchi principali e non necessariamente intende coprire tutte le categorie di utensili da noi
offerti. Ti ricordiamo cortesemente di verificare attentamente quando effettui un ordine con noi se
stai effettivamente risparmiando la metà rispetto ai principali marchi principali.
Continuiamo a impegnarci per fornirvi strumenti a prezzi competitivi.
KIT PER SALDATURA PLASTICA
Supporto tecnico e certificato di garanzia elettronica www.vevor.com/support
Machine Translated by Google

Machine Translated by Google

HAI BISOGNO DI AIUTO? CONTATTACI!
- 1 -
Hai domande sui prodotti? Hai bisogno di supporto tecnico? Non esitare a contattarci:
MODELLO:HOT-100W
Questa è l'istruzione originale, si prega di leggere attentamente tutte le istruzioni del
manuale prima di utilizzare. VEVOR si riserva una chiara interpretazione del nostro manuale
utente. L'aspetto del prodotto sarà soggetto al prodotto ricevuto. Vi preghiamo di
perdonarci se non vi informeremo di nuovo se ci sono aggiornamenti tecnologici o software sul
nostro prodotto.
KIT PER SALDATURA PLASTICA
Servizio [email protected]
Machine Translated by Google

Questo dispositivo è conforme alla Parte 15 delle Norme FCC. Il funzionamento
è soggetto alle due condizioni seguenti: (1) Questo dispositivo non può
causare interferenze dannose e (2) Questo dispositivo deve accettare
qualsiasi interferenza ricevuta, comprese le interferenze che possono causare
un funzionamento indesiderato.
Questo prodotto è soggetto alle disposizioni della Direttiva Europea 2012/19/
CE. Il simbolo raffigurante un bidone della spazzatura barrato indica che il
prodotto richiede la raccolta differenziata dei rifiuti nell'Unione Europea. Ciò si
applica al prodotto e a tutti gli accessori contrassegnati con questo simbolo. I
prodotti contrassegnati come tali non possono essere smaltiti con i normali
rifiuti domestici, ma devono essere portati in un punto di raccolta per il riciclaggio
di dispositivi elettrici ed elettronici
Attenzione: per ridurre il rischio di lesioni, l'utente deve leggere attentamente il
manuale di istruzioni.
- 2 -
Machine Translated by Google

AVVERTIMENTO
Una volta collegato il saldatore e acceso l'interruttore, il
il ferro è freddo prima di spostarlo o riporlo. •
La riparazione della plastica crea alte temperature. Si prega di essere consapevoli di
PRECAUZIONI PER LA SICUREZZA E LA MANIPOLAZIONE
ferro.
• Non immergere questo saldatore in acqua. •
Non utilizzare in luoghi umidi o bagnati. •
Una volta completata la riparazione, spegnere l'alimentazione e assicurarsi che il saldatore
• Evitare che i capelli lunghi e gli indumenti entrino in contatto con la saldatura calda
ferro.
scollegare tirando il cavo.SPECIFICHE
• Indossare occhiali di sicurezza e guanti resistenti al calore durante l'utilizzo di questa saldatura
solo barre e maglia in acciaio inossidabile. L'uso di altri prodotti potrebbe dare origine a
risultati sfavorevoli. •
Non smontare mai, non ci sono parti riparabili dall'utente all'interno. • Scollegare
questa unità dopo ogni utilizzo. • Quando
si scollega il saldatore, tenere e tirare la spina stessa, non
causa, ma non si limita a ustioni, cecità e/o incendio.
qualsiasi altro
utilizzo. • Questo kit di saldatura plastica deve essere utilizzato con il kit di saldatura plastica originale
la temperatura raggiungerà 660°-930° F (348°-498° C) Una manipolazione errata potrebbe
potenziale bruciatura anche da plastiche calde. •
Questo prodotto è stato progettato per la riparazione di plastica. Non utilizzare questo prodotto per
- 3 -
Machine Translated by Google

7. Riparare due pezzi di rete
essere visto penetrare nella maglia. •
Sciogliere la bacchetta di riempimento in plastica nella superficie della maglia e nei bordi
della riparazione. Per coprire la riparazione, costruire la riparazione fino alla profondità richiesta.
• Lasciare raffreddare completamente l'area riparata. Ove necessario, la riparazione
6. 5 pezzi di toppa di riparazione in alluminio 50MM*250MM
5. 1 spazzola metallica
il tuo lavoro specifico.
• la rete d'acciaio nell'area da riparare finché il materiale di base non può
4. 1 supporto metallico
• Tagliare la maglia di acciaio inossidabile nella misura e nella forma appropriate richieste da
3. 10 bastoncini di plastica neri e 10 traslucidi
corda.
2. Testa saldatrice triangolare e testa piccola 1 ciascuna
Posizionare il ferro sul suo supporto su una superficie piana mentre si riscalda per evitare qualsiasi
bruciature accidentali. NON toccare nessuna parte del ferro oltre all'impugnatura o
1. Carta vetrata *1
• Collegare il saldatore alla presa CA da 110/120 V. • Il
saldatore impiegherà circa 5 minuti per raggiungere la temperatura di esercizio.
OPERAZIONE
Ora è possibile carteggiare l'area per la finitura.
CONSUMO ENERGETICO: 100W
FONTE DI ALIMENTAZIONE: AC120V 60Hz
MODELLO NUMERO: HOT-100W
ELENCO DELLE PARTI
- 4 -
Machine Translated by Google

- 5 -
9448 RINCHMOND PL #E RANCHO CUCAMONGA, California, 91730
Negozio VEVOR INC
Made in China
Stati Uniti d'America
Machine Translated by Google

- 6 -
Machine Translated by Google

MODELO:HOT100W
KITDESOLDADURADEPLÁSTICO
Soportetécnicoycertificadodegarantíaelectrónicawww.vevor.com/support
Seguimoscomprometidosabrindarleherramientasaprecioscompetitivos.
"Ahorrelamitad","mitaddeprecio"ocualquierotraexpresiónsimilarqueutilicemossolorepresenta
unaestimacióndelahorroquepodríaobteneralcomprarciertasherramientasconnosotrosencomparación
conlasprincipalesmarcasynonecesariamentesignificaquecubratodaslascategoríasdeherramientas
queofrecemos.Lerecordamosque,alrealizarunpedidoconnosotros,verifiquecuidadosamentesi
realmenteestáahorrandolamitadencomparaciónconlasprincipalesmarcas.
Machine Translated by Google

Machine Translated by Google

¿NECESITAAYUDA?¡CONTÁCTENOS!
Estassonlasinstruccionesoriginales,leaatentamentetodaslasinstruccionesdelmanual
antesdeutilizarelproducto.VEVORsereservaunainterpretaciónclaradenuestromanualde
usuario.Laaparienciadelproductoestarásujetaalproductoquerecibió.Perdónenosporno
informarlenuevamentesihayactualizacionesdetecnologíaosoftwareennuestroproducto.
MODELO:HOT100W
¿Tienepreguntassobreelproducto?¿Necesitaasistenciatécnica?Nodudeenponerseencontacto
connosotros:
KITDESOLDADURADEPLÁSTICO
Serviciodeatenciónal[email protected]
1
Machine Translated by Google

EstedispositivocumpleconlaParte15delasNormasdelaFCC.Su
funcionamientoestásujetoalasdoscondicionessiguientes:(1)Estedispositivo
nopuedecausarinterferenciasperjudicialesy(2)Estedispositivodebeaceptar
cualquierinterferenciaquereciba,incluidaslasinterferenciasquepuedan
causarunfuncionamientonodeseado.
Advertencia:Parareducirelriesgodelesiones,elusuariodebeleer
atentamenteelmanualdeinstrucciones.
EsteproductoestásujetoalasdisposicionesdelaDirectivaEuropea2012/19/
CE.Elsímboloquemuestrauncontenedordebasuratachadoindicaqueel
productorequiereunarecogidaselectivaderesiduosenlaUniónEuropea.
Estoseaplicaalproductoyatodoslosaccesoriosmarcadosconestesímbolo.
Losproductosmarcadoscomotalesnopuedendesecharseconlosresiduos
domésticosnormales,sinoquedebenllevarseaunpuntoderecogidapara
reciclardispositivoseléctricosyelectrónicos.
2
Machine Translated by Google

ADVERTENCIA
PRECAUCIONESDESEGURIDADYMANIPULACIÓN
hierro.
•Nosumerjaestesoldadorenagua.•Noloutilice
enlugareshúmedosomojados.•Cuando
finalicelareparación,apagueelaparatoyasegúresedequeelsoldadorestéfuncionando.
Unavezqueelsoldadorestáenchufadoyelinterruptorestáencendido,el
Elhierrosedejaenfriarantesdemoverloo
guardarlo.•Lareparacióndeplásticosgeneraaltastemperaturas.Tengaencuenta
hierro.
Desconectetirandodelcable.ESPECIFICACIONES
•Evitequeelcabellolargoylaropaentrenencontactoconlasoldaduracaliente.
varillasymalladeaceroinoxidableúnicamente.Elusodecualquierotroproductopodríaprovocar
•Usegafasdeseguridadyguantesresistentesalcalormientrasutilizaestaherramientadesoldadura.
Latemperaturaalcanzarálos660°930°F(348°a498°C).Unmanejoinadecuadopuede
resultadosdesfavorables.
•Nuncadesarme,nohaypiezasqueelusuariopuedarepararenelinterior.•
Desenchufeestaunidaddespuésde
cadauso.•Aldesenchufarsusoldador,sostengaytiredelenchufe,no
Tambiénexistelaposibilidaddequemaduraspor
plásticoscalientes.•Esteproductofuediseñadopararepararplásticos.Noutiliceesteproductopara
causa,peronoselimitaa,quemaduras,cegueray/oincendio.
cualquierotro
uso.•Estekitdesoldaduradeplásticodebeusarseconelkitdesoldaduradeplásticooriginal.
3
Machine Translated by Google

6.5piezasdeparchedereparacióndealuminio50MM*250MM
5.1cepillodealambre
sutrabajoespecífico.•
lamalladeaceroeneláreaqueseestáreparandohastaqueelmaterialoriginalpueda
7.Reparardospiezasdemalla.
•Derretirlavarilladerellenodeplásticoen
lasuperficiedelamallayenlosbordes.
delareparación.Paracubrirlareparación,amplíelareparaciónhastalaprofundidadrequerida.•Deje
queeláreareparadaseenfríeporcompleto.Cuandoseanecesario,lasuperficiereparada
3.10palitosdeplásticonegrosy10translúcidos
cable.
4.1soportemetálico
•Cortelamalladeaceroinoxidablealtamañoylaformaadecuadosrequeridos
Coloquelaplanchasobresusoportesobreunasuperficieplanamientrassecalientaparaevitarquesedañe.
1.Papeldelija*1
2.Cabezaldesoldadortriangularycabezalpequeño1decadauno
quemadurasaccidentales.NOtoqueningunapartedelaplanchaademásdelmangoo
OPERACIÓN
Ahorasepuedelijareláreaparadarleelacabado.
•EnchufeelsoldadorenunatomadeCAde110/120V.•El
soldadortardaráunos5minutosenalcanzarlatemperaturadefuncionamiento.
CONSUMODEENERGÍA:100W
LISTADEPIEZAS
FUENTEDEALIMENTACIÓN:CA120V60Hz
N.ºDEMODELO:HOT100W
4
Machine Translated by Google

5
9448RINCHMONDPL#ERANCHOCUCAMONGA,California,91730
EstadosUnidosdeAmérica
TIENDAVEVORINC
Hechoenchina
Machine Translated by Google

6
Machine Translated by Google


MODEL: HOT-100W
„Oszczędź połowę”, „Połowa ceny” lub inne podobne wyrażenia używane przez nas stanowią
jedynie szacunkowe oszczędności, jakie możesz uzyskać kupując u nas określone narzędzia w
porównaniu z głównymi markami i niekoniecznie oznaczają one objęcie wszystkich kategorii narzędzi
oferowanych przez nas. Uprzejmie przypominamy, aby dokładnie sprawdzić, czy składając u
nas zamówienie faktycznie oszczędzasz połowę w porównaniu z głównymi markami.
Nadal staramy się oferować Państwu narzędzia w konkurencyjnych cenach.
ZESTAW DO SPAWANIA PLASTIKU
Wsparcie techniczne i certyfikat gwarancji elektronicznej www.vevor.com/support
Machine Translated by Google

Machine Translated by Google

Masz pytania dotyczące produktu? Potrzebujesz wsparcia technicznego? Skontaktuj się z
nami:
MODEL: HOT-100W
To jest oryginalna instrukcja, przed użyciem należy uważnie przeczytać wszystkie
instrukcje. VEVOR zastrzega sobie jasną interpretację naszej instrukcji obsługi. Wygląd
produktu będzie zależał od produktu, który otrzymałeś. Prosimy o wybaczenie, że nie
poinformujemy Cię ponownie, jeśli w naszym produkcie pojawią się jakiekolwiek aktualizacje
technologiczne lub oprogramowania.
- 1 -
POTRZEBUJESZ POMOCY? SKONTAKTUJ SIĘ Z NAMI!
Obsługa [email protected]
ZESTAW DO SPAWANIA PLASTIKU
Machine Translated by Google

- 2 -
Ten produkt podlega postanowieniom Dyrektywy Europejskiej 2012/19/WE.
Symbol przedstawiający przekreślony kosz na śmieci na kółkach oznacza, że
produkt wymaga oddzielnej zbiórki odpadów w Unii Europejskiej. Dotyczy to
produktu i wszystkich akcesoriów oznaczonych tym symbolem. Produktów
oznaczonych w ten sposób nie można wyrzucać razem ze zwykłymi odpadami
domowymi, ale należy je oddać do punktu zbiórki w celu recyklingu urządzeń
elektrycznych i elektronicznych.
Ostrzeżenie: Aby zminimalizować ryzyko obrażeń, użytkownik powinien uważnie
przeczytać instrukcję obsługi.
To urządzenie jest zgodne z częścią 15 przepisów FCC. Jego działanie
podlega następującym dwóm warunkom: (1) To urządzenie nie może
powodować szkodliwych zakłóceń i (2) to urządzenie musi akceptować
wszelkie odbierane zakłócenia, w tym zakłócenia, które mogą
powodować niepożądane działanie.
Machine Translated by Google

- 3 -
Po podłączeniu spawarki i włączeniu przełącznika,
żelazo należy schłodzić przed przenoszeniem lub
przechowywaniem. • Naprawa tworzyw sztucznych powoduje powstawanie wysokich temperatur. Należy pamiętać o
ŚRODKI OSTROŻNOŚCI DOTYCZĄCE BEZPIECZEŃSTWA I POSTĘPOWANIA
żelazo.
• Nie zanurzaj spawarki w wodzie. • Nie
używaj jej w miejscach wilgotnych lub
mokrych. • Po zakończeniu naprawy wyłącz zasilanie i upewnij się, że spawarka jest
• Nie dopuszczaj do kontaktu długich włosów i ubrań z gorącym materiałem spawalniczym.
żelazo.
odłączaj ciągnąc za przewód.DANE TECHNICZNE
• Podczas korzystania z tego urządzenia spawalniczego należy nosić okulary ochronne i rękawice odporne na ciepło.
tylko pręty i siatka ze stali nierdzewnej. Użycie innych produktów może spowodować
niekorzystnych skutków. •
Nigdy nie rozbieraj urządzenia, ponieważ wewnątrz nie ma żadnych części, które mogłyby
być naprawiane przez użytkownika. • Odłączaj
urządzenie od zasilania po każdym użyciu. • Podczas odłączania spawarki trzymaj i ciągnij za samą wtyczkę, nie
powodować, ale nie wyłącznie, oparzenia, ślepotę i/lub pożar.
jakiegokolwiek innego
zastosowania. • Ten zestaw do spawania tworzyw sztucznych powinien być używany z oryginalnym zestawem do spawania tworzyw sztucznych
temperatura osiągnie 660°-930° F (348° do 498° C) Niewłaściwe obchodzenie się może
potencjalne oparzenia od gorących plastików. •
Ten produkt został zaprojektowany do naprawy plastików. Nie używaj tego produktu do
OSTRZEŻENIE
Machine Translated by Google

7. Napraw dwa kawałki siatki
widać, jak wnika w siatkę. • Rozpuść
plastikowy pręt wypełniający w powierzchni siatki i w jej krawędziach
naprawy. Aby pokryć naprawę, należy zwiększyć głębokość naprawy do wymaganej głębokości. • Pozostawić
naprawiany obszar do całkowitego ostygnięcia. W razie potrzeby naprawiany obszar
6. 5 sztuk aluminiowej łatki naprawczej 50MM*250MM
5. 1 szczotka druciana
Twojej konkretnej pracy.
• siatka stalowa w obszarze podlegającym naprawie, aż do momentu, gdy materiał macierzysty będzie mógł
4. 1 wspornik metalowy
• Przytnij siatkę ze stali nierdzewnej do odpowiedniego rozmiaru i kształtu wymaganego przez
3. 10 czarnych plastikowych patyczków i 10 przezroczystych
sznur.
2. Głowica spawalnicza trójkątna i mała po 1 szt.
przypadkowego oparzenia. NIE dotykaj żadnej części żelazka poza uchwytem lub
Aby zapobiec powstawaniu osadów, podczas nagrzewania należy ustawić żelazko na podstawce na płaskiej powierzchni.
1. Papier ścierny *1
• Podłącz lutownicę do gniazdka prądu zmiennego 110/120 V. •
Nagrzewanie lutownicy do temperatury roboczej trwa około 5 minut.
DZIAŁANIE
Teraz można przeszlifować powierzchnię celem wykończenia.
POBÓR MOCY: 100W
ŹRÓDŁO ZASILANIA: AC120V 60Hz
NR MODELU: HOT-100W
LISTA CZĘŚCI
- 4 -
Machine Translated by Google

- 5 -
9448 RINCHMOND PL #E RANCHO CUCAMONGA, Kalifornia, 91730
SKLEP VEVOR INC.
Wyprodukowano w Chinach
Stany Zjednoczone
Machine Translated by Google

- 6 -
Machine Translated by Google


MODEL: HEET-100W
KUNSTSTOF LASSET
Technische ondersteuning en e-garantiecertificaat www.vevor.com/support
"Bespaar de helft", "halve prijs" of andere soortgelijke uitdrukkingen die wij gebruiken, geven alleen een schatting
van de besparingen die u kunt behalen door bepaalde gereedschappen bij ons te kopen in vergelijking met de grote
topmerken en doseringen betekenen niet noodzakelijkerwijs dat ze alle categorieën gereedschappen dekken die wij
aanbieden. Wij herinneren u eraan om zorgvuldig te controleren of u daadwerkelijk de helft bespaart in
vergelijking met de grote topmerken wanneer u een bestelling bij ons plaatst.
Wij streven er voortdurend naar om u gereedschappen tegen concurrerende prijzen te leveren.
Machine Translated by Google

Machine Translated by Google

HULP NODIG? NEEM CONTACT MET ONS OP!
Heeft u vragen over het product? Heeft u technische ondersteuning nodig? Neem dan gerust
contact met ons op:
MODEL:WARM-100W
Dit is de originele instructie, lees alle handleidingen zorgvuldig door voordat u het product
gebruikt. VEVOR behoudt zich een duidelijke interpretatie van onze gebruikershandleiding voor.
Het uiterlijk van het product is afhankelijk van het product dat u hebt ontvangen. Vergeef ons
dat we u niet opnieuw zullen informeren als er technologie- of software-updates voor ons product zijn.
KUNSTSTOF LASSET
- 1 -
Machine Translated by Google
Dit apparaat voldoet aan Deel 15 van de FCC-regels. De werking is
onderworpen aan de volgende twee voorwaarden: (1) Dit apparaat mag
geen schadelijke interferentie veroorzaken, en (2) dit apparaat moet alle
ontvangen interferentie accepteren, inclusief interferentie die ongewenste
werking kan veroorzaken.
Dit product is onderworpen aan de bepalingen van de Europese richtlijn
2012/19/EG. Het symbool met een doorgestreepte afvalbak geeft aan dat het
product in de Europese Unie gescheiden afvalinzameling vereist. Dit geldt voor
het product en alle accessoires die met dit symbool zijn gemarkeerd. Producten
die als zodanig zijn gemarkeerd, mogen niet met het normale huishoudelijke
afval worden weggegooid, maar moeten worden ingeleverd bij een inzamelpunt
voor recycling van elektrische en elektronische apparaten.
Waarschuwing: om het risico op letsel te verkleinen, moet de gebruiker de
gebruiksaanwijzing zorgvuldig lezen.
- 2 -
Machine Translated by Google

WAARSCHUWING
ongunstige resultaten. • Nooit
demonteren, er zitten geen door de gebruiker te onderhouden onderdelen in. • Haal de stekker van
dit apparaat na elk gebruik uit het stopcontact. •
Wanneer u de stekker van uw lasapparaat uit het stopcontact haalt, moet u de stekker zelf vasthouden en eruit trekken, niet
ijzer.
trek de stekker uit het stopcontact door aan het snoer te trekken.SPECIFICATIES
• Zorg ervoor dat lang haar en kleding niet in contact komen met het hete lasmateriaal.
VEILIGHEIDS- EN BEHANDELINGSVOORZORGSMAATREGELEN
• Dompel dit lasapparaat niet onder in water. • Gebruik
het apparaat niet op vochtige of natte plaatsen. •
Wanneer de reparatie is voltooid, schakelt u de stroom uit en zorgt u ervoor dat het lasapparaat
ijzer.
ijzer moet afkoelen voordat u het verplaatst of
opbergt. • Het repareren van kunststoffen creëert hoge temperaturen. Houd er rekening mee
Zodra het lasapparaat is aangesloten en de schakelaar is ingeschakeld,
potentiële verbranding door hete kunststoffen. •
Dit product is ontworpen voor het repareren van kunststoffen. Gebruik dit product niet voor
temperatuur zal 660°-930° F (348° tot 498°C) bereiken. Onjuiste behandeling kan
oorzaak, maar niet beperkt tot, brandwonden, blindheid en/of brand.
elk ander
gebruik. • Deze kunststof lasset moet worden gebruikt met de originele kunststof lasset.
alleen staven en roestvrijstalen gaas. Gebruik van andere producten kan leiden tot
• Draag een veiligheidsbril en hittebestendige handschoenen tijdens het lassen.
- 3 -
Machine Translated by Google

onbedoeld verbranden. Raak GEEN enkel deel van het strijkijzer aan, behalve het handvat of
3. 10 zwarte plastic stokjes en 10 doorschijnende
koord.
• Snijd het roestvrijstalen gaas op de juiste maat en vorm die vereist is door
4. 1 metalen steun
6. 5 stuks aluminium reparatiepatch 50MM*250MM
5. 1 staalborstel
7. Repareer twee stukken gaas
uw specifieke klus. •
het stalen gaas in het te repareren gebied totdat het moedermateriaal kan
van de reparatie. Om de reparatie te bedekken, bouwt u de reparatie op tot de vereiste
diepte. • Laat het gerepareerde gebied volledig afkoelen. Indien nodig, de gerepareerde
zichtbaar zijn als het gaas binnendringt.
• Smelt de plastic vulstaaf in het oppervlak van het gaas en in de randen
WERKING
Het oppervlak kan nu worden geschuurd voor de afwerking.
• Sluit het lasapparaat aan op een stopcontact van
110/120 V. • Het duurt ongeveer 5 minuten voordat het lasapparaat op bedrijfstemperatuur is.
Plaats het strijkijzer op de standaard op een vlakke ondergrond terwijl het opwarmt om te voorkomen dat er
1. Schuurpapier *1
2. Driehoek laskop en kleine kop 1 elk
STROOMVERBRUIK: 100W
ONDERDELENLIJST
STROOMBRON: AC120V 60Hz
MODEL NR.: HOT-100W
- 4 -
Machine Translated by Google

- 5 -
9448 RINCHMOND PL #E RANCHO CUCAMONGA, Californië, 91730
Verenigde Staten van Amerika
VEVOR WINKEL INC
Gemaakt in China
Machine Translated by Google

- 6 -
Machine Translated by Google


MODELL: HOT-100W
"Spara halva", "halva priset" eller andra liknande uttryck som används av oss representerar bara
en uppskattning av besparingar du kan dra nytta av att köpa vissa verktyg hos oss jämfört med de stora
toppmärkena och doser behöver inte nödvändigtvis täcka alla kategorier av verktyg som erbjuds av
oss. Du påminns vänligen om att noggrant kontrollera när du gör en beställning hos oss om du
faktiskt sparar hälften i jämförelse med de främsta stora varumärkena.
Vi fortsätter att vara engagerade i att ge dig verktyg till konkurrenskraftiga priser.
PLASTSvetssats
Teknisk support och e-garanticertifikat www.vevor.com/support
Machine Translated by Google

Machine Translated by Google

Har du produktfrågor? Behöver du teknisk support? Kontakta oss gärna:
MODELL: HOT-100W
Detta är den ursprungliga instruktionen, läs alla instruktioner noggrant innan du
använder den. VEVOR reserverar sig för en tydlig tolkning av vår användarmanual. Utseendet
på produkten är beroende av den produkt du fått. Ursäkta oss att vi inte kommer att
informera dig igen om det finns någon teknik eller mjukvaruuppdateringar på vår produkt.
- 1 -
BEHÖVER HJÄLP? KONTAKTA OSS!
PLASTSvetssats
Machine Translated by Google
Denna enhet uppfyller del 15 av FCC-reglerna. Driften är föremål för
följande två villkor: (1) Den här enheten får inte orsaka skadliga
störningar och (2) den här enheten måste acceptera alla mottagna
störningar, inklusive störningar som kan orsaka oönskad funktion.
Denna produkt omfattas av bestämmelserna i det europeiska direktivet 2012/19/
EC. Symbolen som visar en soptunna korsad anger att produkten kräver separat
sophämtning i EU. Detta gäller för produkten och alla tillbehör märkta med denna
symbol. Produkter märkta som sådana får inte slängas tillsammans med vanligt
hushållsavfall, utan måste lämnas till en insamlingsplats för återvinning av
elektriska och elektroniska apparater
Varning - För att minska risken för skada måste användaren läsa instruktionerna
noggrant.
- 2 -
Machine Translated by Google

VARNING
• Sänk inte ned detta svetsjärn i vatten. •
Använd inte på fuktiga eller våta platser.
• När reparationen är klar, stäng av strömmen och kontrollera svetsningen
orsaka, men är inte begränsad till brännskador, blindhet och/eller eld.
någon annan
användning. • Denna plastsvetssats ska användas med den ursprungliga plastsvetsningen
potentiell förbränning från het plast också. •
Denna produkt är designad för plastreparation. Använd inte denna produkt för
temperaturen kommer att nå 660°-930° F (348° till 498°C) Felhantering kan
• Använd skyddsglasögon och värmebeständiga handskar när du använder denna svetsning
ogynnsamma resultat. •
Ta aldrig isär, det finns inga delar inuti som användaren kan reparera. • Koppla ur
enheten efter varje användning. • När du
kopplar ur ditt svetsjärn, håll och dra i själva pluggen, gör det inte
endast stavar och rostfritt stålnät. Användning av andra produkter kan ge resultat
• Se till att långt hår och kläder inte kommer i kontakt med den heta svetsningen
järn.
koppla ur genom att dra i sladden.SPECIFIKATIONER
När svetsjärnet är anslutet och strömbrytaren slås på,
strykjärnet är svalt innan det flyttas eller
förvaras. • Reparation av plast skapar höga temperaturer. Var uppmärksam på
järn.
SÄKERHETS- OCH HANTERINGSÅTGÄRDER
- 3 -
Machine Translated by Google

ditt specifika jobb.
• stålnätet in i området som repareras tills modermaterialet kan
• Anslut svetsjärn till 110/120V AC-uttag. • Det
tar cirka 5 minuter för svetsjärn att nå driftstemperatur.
DRIFT
området kan nu slipas för efterbehandling.
2. Triangelsvetshuvud och litet huvud 1 vardera
oavsiktlig bränning. Rör INTE vid någon del av strykjärnet förutom handtaget eller
1. Sandpapper *1
Placera strykjärnet på dess stativ på en plan yta medan det värms upp för att förhindra eventuella
• Skär det rostfria nätet till rätt storlek och form som krävs
4. 1 metallstöd
3. 10 svarta plastpinnar och 10 genomskinliga
sladd.
ses tränga in i nätet. • Smält
plastpåfyllningsstaven in i nätytan och in i kanterna
7. Reparera två bitar nät
av reparationen. För att täcka reparationen, bygg upp reparationen till önskat djup.
• Låt det reparerade området svalna helt. Vid behov repareras
5. 1 stålborste
6. 5 stycken aluminium reparationslapp 50MM*250MM
STRÖMFÖRBRUKNING: 100W
STRÖMKÄLLA: AC120V 60Hz
MODELLNR: HOT-100W
DELLISTA
- 4 -
Machine Translated by Google
- 5 -
9448 RINCHMOND PL #E RANCHO CUCAMONGA, Kalifornien, 91730
VEVOR STORE INC
Tillverkad i Kina
Amerikas förenta stater
Machine Translated by Google

- 6 -
Machine Translated by Google