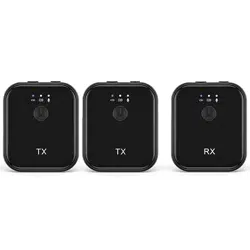
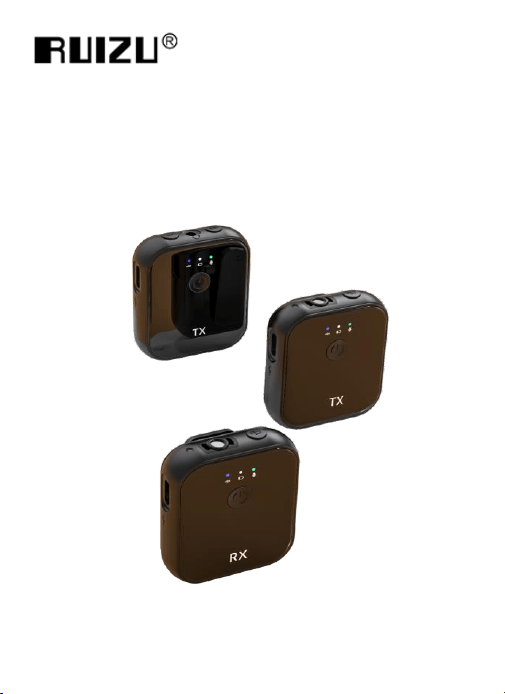
Bluetooth Lav Mic
T2
User Manual
1
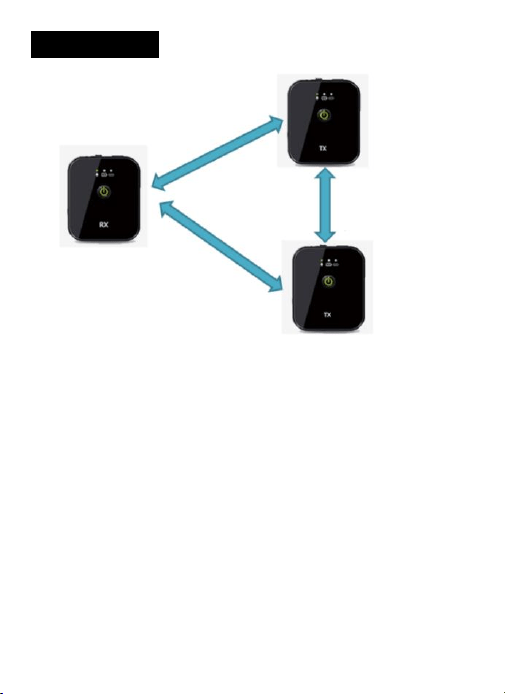
Dual Channel
● The receiver (Rx) can connect two transmitters (TX) at the same
time. The three devices are interconnected, and all channels
maintain 48K high fidelity sampling rate
● The two transmitters can upload voice to the receiver while the
receiver send audio to two transmitters at the same time
● The two transmitters are also interconnected. They can hear each
other's voice. Dual channels data transfer among receiver and
transmitters, three devices can hear each other.

2
Caring for Your RUIZU Product
● Please store & use this product in normal temperature environment
● Don’t drop or hit the machine violently, otherwise it will cause
serious damage or failure to work normally
● Don’t disassemble, repair and modify this product
● Don’t use it in humid and high temperature environment, don’t put
this product in water or any liquid, don’t expose this product to
sunlight or put it in waste bins, and don’t put it in fire.
● If it isn’t used for a long time, please charge/discharge the product
every month
● Fail to follow all the instructions may result in mechanic’s damage
● Warranty does not apply to human errors
How to Charging the System
※ Charge via wall charger(Not Included Here)
※ Charge by connecting the system to computer through USB cable
Please note the requirement for the charger
※ Input AC110-240V 50/60Hz 100mA , Output DC5.0V, 500mA-1A

3
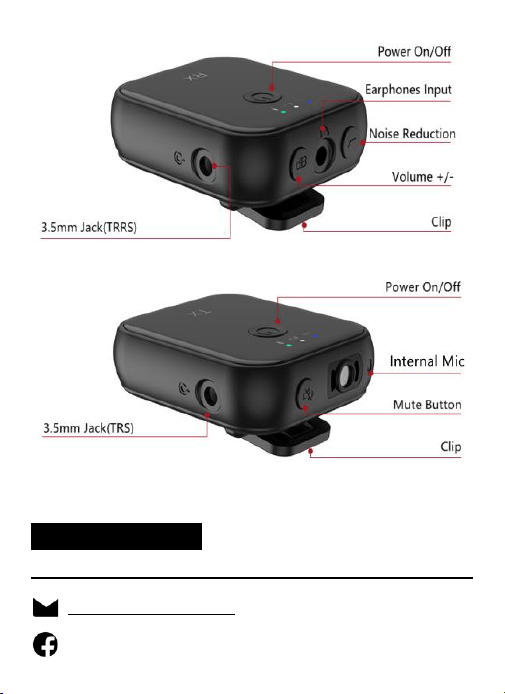
Power Button
※ Power On/Off
● Press the power button for 3 seconds to turn on/off the system
※ Power Check
After the TX/RX are powered on and connected, short press the
power button once to check the power of high, medium or low
Charging Status
The middle light in RX/TX in different status shows the charging
status.
● Low Power: In red color and flash every 250ms
● Charging: In red color and non-flash
● Fully Charged: In white color and non-flash
※ TX Monitor
After TX and RX are connected, the monitoring function is ready to
use. Plug the earphone in, it will work.
※ External Mic
Switch internal and external Mic by double click TX’s power button
after TX and RX connected, yellow led on when external Mic working,
and green led for internal Mic.

4
Pairing
Reminder: The lav mics have been paired before we dispatch them to
you, you don’t need to pair them again. Power them on and they will
work.
How to pair TX and RX by manual
When TX and RX are powered on.
A. Press the TX’s mute button 3s, the left indicator in blue will flash
B. Press the RX’s volume button 3s, the left indicator in blue will flash
C. Both the left indicators in TX and RX won’t flash and always are on,
then paired successfully
Volume Button
Volume Adjust: Short press the volume button, the volume will
change cyclically from three levels: medium, high, and low.
Mute Button
Open or close the mute function of TX: Short press once the mute
button when the TX is turned on
Noise Reduction Button
Short press once to close or open the noise reduction function

5
Indicator Lights in RX
● Power on: The middle light is always on in white
● Connecting: The left light flashes quickly in blue
● Connected: The left light is always on in blue
● Non- Connected: The left light flashes slowly in blue
● Noise Reduction is On: The right light flashes slowly
● Noise Reduction is Off: The right light is always on
● Medium Volume: The right light is always on in green
● High Volume: The right light is always on in red
● Low Volume: The right light is always on in yellow
Indicator Lights in TX
● Power on: The middle light is always on in white
● Pairing: The left light flashes quickly in blue
● Connected: The left light is always on in blue
● Non- Connected: The left light flashes slowly in blue
● Mute On: The right light is always on in red
● Internal Mic on: The right light is always on in yellow
● External Mic on: The right light is always on in green
● TX1 identity: The middle light flashes slowly 30s in green every
1000ms after it is turned on
● TX2 identity: The middle light flashes slowly 30s in green every
2000ms after it is turned on

6
Specification:
Product Name
Wireless Lavalier Microphone System
Bluetooth Version
Bluetooth 5.1
Latency
10ms
Polar Pattern
Omnidirectional Microphone
Frequency
50-18KHz
Maximum SPL (Mic)
100dB SPL(1KHz@1m)dBu
Max. Input Level(3.5mm)
-38dB
Microphone Preamp Gain
20dB
Equivalent Noise Level
>25dBA
Digital Audio
Support USB Audio upstream
Sampling Rate
48KHz
Charging Port
Type-C
Power Requirements
In-built rechargeable lithium-ion
battery charged via USB 5V, 0.3A
Analog Inputs
3.5mmTRRS(lav microphone input)
Analog Outputs
3.5mm TRS
Battery working Time
>7 Hours
Charging Time
2 Hours
Working Range Up to
50 Meters/164 FT(line of sight)

7
FCC Statement
This equipment has been tested and found to comply with the limits
for a Class B digital device, pursuant to part 15 of the FCC Rules.
These limits are designed to provide reasonable protection against
harmful interference in a residential installation. This equipment
generates, uses and can radiate radio frequency energy and, if not
installed and used in accordance with the instructions, may cause
harmful interference to radio communications. However, there is no
guarantee that interference will not occur in a particular installation. If
this equipment does cause harmful interference to radio or television
reception, which can be determined by turning the equipment off and
on, the user is encouraged to try to correct the interference by one or
more of the following measures:
• Reorient or relocate the receiving antenna.
• Increase the separation between the equipment and receiver.
• Connect the equipment into an outlet on a circuit different
from that to which the receiver is connected.

8
• Consult the dealer or an experienced radio/TV technician for
help.
Caution: Any changes or modifications to this device not explicitly
approved by manufacturer could void your authority to operate this
equipment.
This device complies with part 15 of the FCC Rules. Operation is
subject to the following two conditions: (1) This device may not cause
harmful interference, and (2) this device must accept any interference
received, including interference that may cause undesired operation.
RF Exposure Information
The device has been evaluated to meet general RF exposure
requirement. The device can be used in portable exposure condition
without restriction.
