
CORDLESS VACUUM CLEANER
USER MANUAL
Model: S14

If you have any questions, please contact the corresponding email address of each country
2
EN
CONTENTS
1. IMPORTANT SAFETY WARNING 3
1.1 Precautions When Using - - - - - - - - - - - - - - - - - - - - - - - - - - - - - - - - - 3
1.2 Notes on the Battery Pack - - - - - - - - - - - - - - - - - - - - - - - - - - - - - - - - 3
1.3 Notes on Charging - - - - - - - - - - - - - - - - - - - - - - - - - - - - - - - - - - - - - 4
1.4 Storage and Maintenance Precautions - - - - - - - - - - - - - - - - - - - - - - - - - 5
2. PACKAGE CONTENT 6
3. OVERVIEW & ACCESSORIES 7
3.1 Overview - - - - - - - - - - - - - - - - - - - - - - - - - - - - - - - - - - - - - - - - - - 7
3.2 OLED Color Screen Real-time Animation Display- - - - - - - - - - - - - - - - - - - - 8
3.3 Accessories - - - - - - - - - - - - - - - - - - - - - - - - - - - - - - - - - - - - - - - - - 10
4. ASSEMBLING & WALL MOUNTING 11
4.1 Product Assembling - - - - - - - - - - - - - - - - - - - - - - - - - - - - - - - - - - - - 11
4.2 Wall-Mount Plate- - - - - - - - - - - - - - - - - - - - - - - - - - - - - - - - - - - - - - 11
5. HOW TO USE 12
5.1 Start to Work - - - - - - - - - - - - - - - - - - - - - - - - - - - - - - - - - - - - - - - - 12
5.2 Select Cleaning Mode - - - - - - - - - - - - - - - - - - - - - - - - - - - - - - - - - - - 12
6. CHARGING METHODS 13
6.1 Charging Methods - - - - - - - - - - - - - - - - - - - - - - - - - - - - - - - - - - - - - 13
6.2 Battery Indicator- - - - - - - - - - - - - - - - - - - - - - - - - - - - - - - - - - - - - - 13
6.3 Abnormal Indicator - - - - - - - - - - - - - - - - - - - - - - - - - - - - - - - - - - - - 14
7. MAINTENANCE 15
7.1 Main Body Cleaning - - - - - - - - - - - - - - - - - - - - - - - - - - - - - - - - - - - - 15
7.2 Dust Cup Cleaning - - - - - - - - - - - - - - - - - - - - - - - - - - - - - - - - - - - - - 15
7.3 Filter Cleaning - - - - - - - - - - - - - - - - - - - - - - - - - - - - - - - - - - - - - - - 16
7.4 Brush Roller Cleaning - - - - - - - - - - - - - - - - - - - - - - - - - - - - - - - - - - - 16
7.5 Aromatherapy tablet replacement- - - - - - - - - - - - - - - - - - - - - - - - - - - - 17
8. SPECIFICATION 17
9. TROUBLESHOOTING 18
10. WARRANTY 19

If you have any questions, please contact the corresponding email address of each country
3
EN
1. IMPORTANT SAFETY WARNING
ATTENTION: Before using this machine, please read all instructions
in the manual and cautionary markings on the machine carefully.
① This Honiture machine is not intended for use by persons (including children) with reduced
physical, sensory or reasoning capabilities, or lack of experience and knowledge, unless they
have been given supervision or instruction concerning use of the machine by a person respon-
sible for their safety.
② Use only as described in this Honiture Operating Manual. If the machine is not working as
it should, if it has received a sharp blow, if it has been dropped, damaged, left outdoors, or
dropped into water, do not use and contact the Honiture Support Team.
③ Suitable for dry locations ONLY. Do not install, charge or use this machine outdoors, in a
bathroom or within 10 feet (3 meters) of a pool. Do not use on wet surfaces and do not expose
to moisture, rain or snow.
④ When using this machine, please keep hair, loose clothing, ngers, and all parts of the body
away from openings and moving parts. Do not point the hose, aluminium alloy tube or other
accessories at your eyes or ears or put them in your mouth.
⑤ Do not use to pick up hard objects, such as glass slag, needles,nails, etc.
⑥ Do not touch the charger with wet hands to avoid electric shock.
⑦ Use only Honiture recommended accessories and replacement parts.
⑧ Do not use without the dust cup and lter(s) in place.
⑨ When removing or replacing a motorized brush bar, be careful not to pull the power button
until the cleaner head has been reassembled.
⑩ Do not water or spill liquid onto the vacuum cleaner. If that happens, it will increase the risk
of electric shock.
⑪ Use extra care when cleaning on stairs.
⑫ Please do not use the vacuum cleaner to suck the detergent, kerosene, soot, wet dust, water,
sewage, matches and otheritems.
⑬ Please do not use a vacuum cleaner to suck up small particles such as cement, gypsum
powder, wall powder, or large objects such as toy paper balls, otherwise it will cause the
vacuum cleaner to block and the motor to burn out.
① Do not throw the battery pack away, and it should be safely disposed in accordance with
local regulations.
② Do not use a battery pack or machine that is damaged or modied. Damaged or modied
1.1 Precautions When Using
1.2 Notes on the Battery Pack
If you have any questions, please contact the corresponding email address of each country
4
EN
batteries may exhibit unpredictable behavior resulting in re, explosion or risk of injury.
③ Do not incinerate batteries or expose to high temperatures, as they may explode.
④ The battery is a sealed unit and under normal circumstances poses no safety concerns. In
the unlikely event that liquid leaks from the battery, do not touch the liquid as it may cause
irritation or burns, and observe the following precautions:
・ Skin contact – can cause irritation. Wash with soap and water.
・ Inhalation – can cause respiratory irritation. Expose to fresh air and seek medical advice.
・ Eye contact – can cause irritation. Immediately ush eyes thoroughly with water for at least
15 minutes. Seek medical attention.
・ Disposal – wear gloves to handle the battery and dispose of immediately, following local
ordinances or regulations.
⑤ When the battery pack is not in use, keep it away from paper clips, coins, keys, nails, screws
or other small metal objects that could make a connection from one terminal to another.
① Before use, check the charger cord for signs of damage or ageing. A damaged or entangled
charger cord increases the risk of re and electric shock.
② Never modify the charger in any way.
③ The charger has been designed for a specic voltage. Always check that the mains voltage is
the same as that stated on the rating plate.
④ Unplug the charger when not in use for extended periods.
⑤ When your vacuum cleaner is fully charged , needs to be cleaned or repaired, please unplug
the charger in time and do not pull the power cord directly.
⑥ Do not pull the cord to disconnect from a socket, grasp the plug and pull to disconnect.
⑦ Don't wrap the cod around the charger when storing.
⑧ Please fully recharge the battery, when rst used or used after long time storage. If the
product is not used for long time, please make sure the battery is recharged and used each
three months at least.
⑨ If smoke or re occurs during charging, unplug the charger immediately, and use a re
extinguisher to put out the re . Do not use water to extinguish the re, it will increase the risk
of electric shock.
⑩ Follow all charging instructions and do not charge the battery pack or the machine outside
of the temperature range specied in the instructions. Charging improperly or at a temperature
outside of the specied range may damage the battery and increase the risk of re.To ensure
maximum battery life, Honiture recommends the following:
・ When not in use the machine should be stored at room temperature. Recommended range:
64° F (18° C) to 82° F (28° C).
・ The ambient temperature range for operation and charging should be 50° F (8° C) to 86° F
(35° C).
1.3 Notes on Charging
If you have any questions, please contact the corresponding email address of each country
5
EN
① Please store the product under cool and dry environment. Please avoid long-time sunshine
on the product.
② The charger must be removed from the socket before removing the battery, cleaning or
maintaining the appliance.
③ Please use dry cloth to clean the vacuum cleaner. Please do not use gas or liquid that can
make the surface cracked or color faded.
④ Do not apply any fragrance or scented product to the lter(s) of this machine. The chemicals
in such products are known to be ammable and can cause the machine to catch re.
⑤ Do not carry out any maintenance other than that shown in this manual, or advised by the
Honiture Support Team.
⑥ Do not disassemble the machine as incorrect reassembly may result in an electric shock or
re. Contact the Honiture Support Team when a service or repair is required.
1.4 Storage and Maintenance Precautions
SAVE THESE INSTRUCTIONS
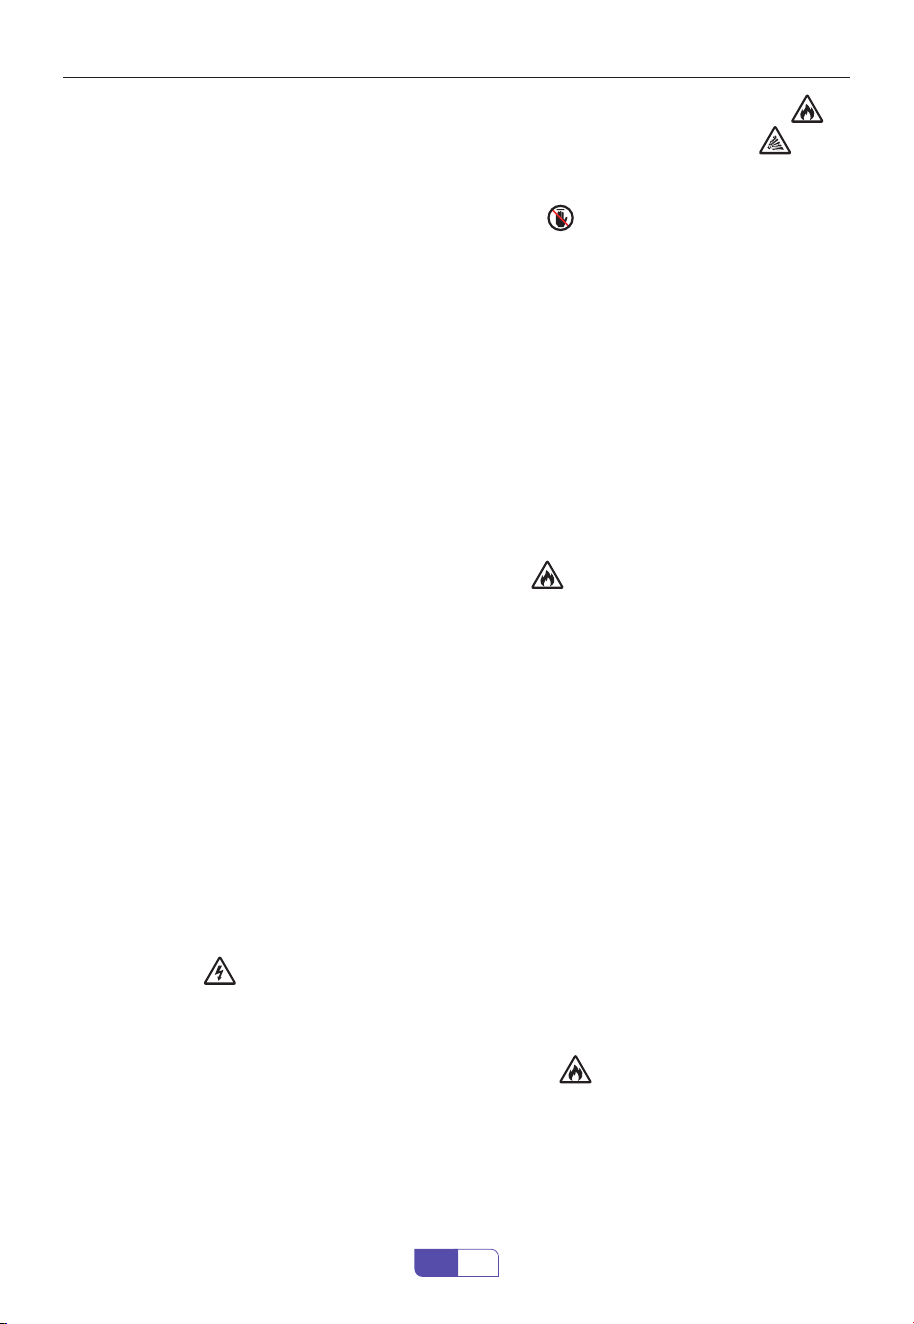
Do not use near open
ames.
Do not pick up burning
objects.
Do not store near heat
sources.
Do not put hands near
the brush bar when the
machine is in use.
Do not pick up water or
liquids.
Do not place on or near
the cooker.

If you have any questions, please contact the corresponding email address of each country
6
EN
2. PACKAGE CONTENT
Please check and conrm the accessories and parts according to the following sheet before
using.
Part Name Quantity
Main Body 1
Adjustable Extension Tube 1
Motorized Brush Head 1
2 in 1 Roller Brush 1
Long Crevice Nozzle 1
2 in 1 Upholstery Brush 1
Hair Cleaning Tool 1
Filter Replacement 1
Aromatherapy Tablet 1
Wall Mount Plate 1
Charger 1
Battery Pack 1
User Manual 1
If you have any questions, please contact the corresponding email address of each country
7
EN
3. OVERVIEW & ACCESSORIES
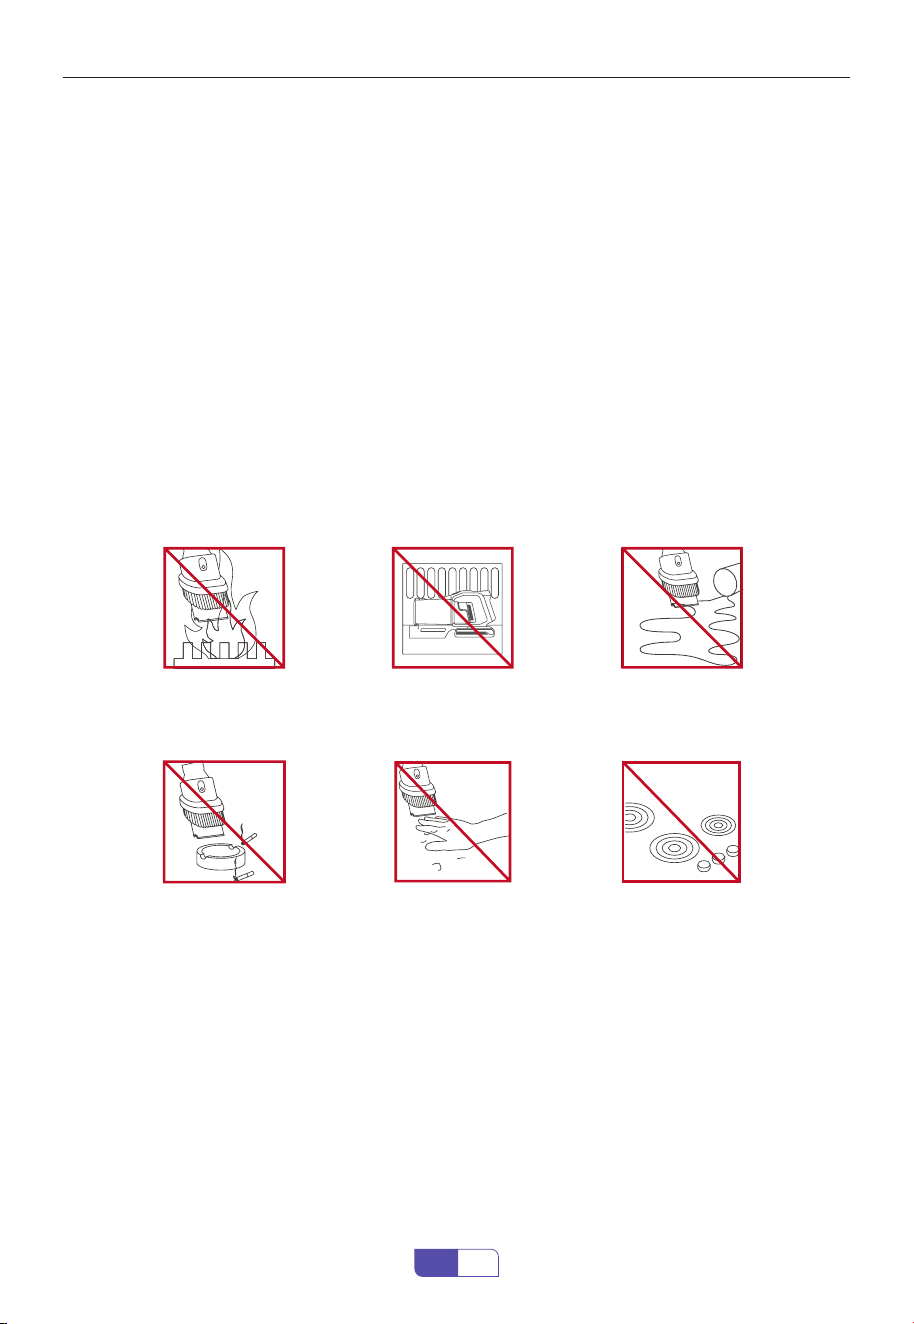
3.1 Overview
①
②
③
④
⑤
⑥
⑦
⑧
⑨
⑩
⑪
⑬
⑭
⑮
⑫
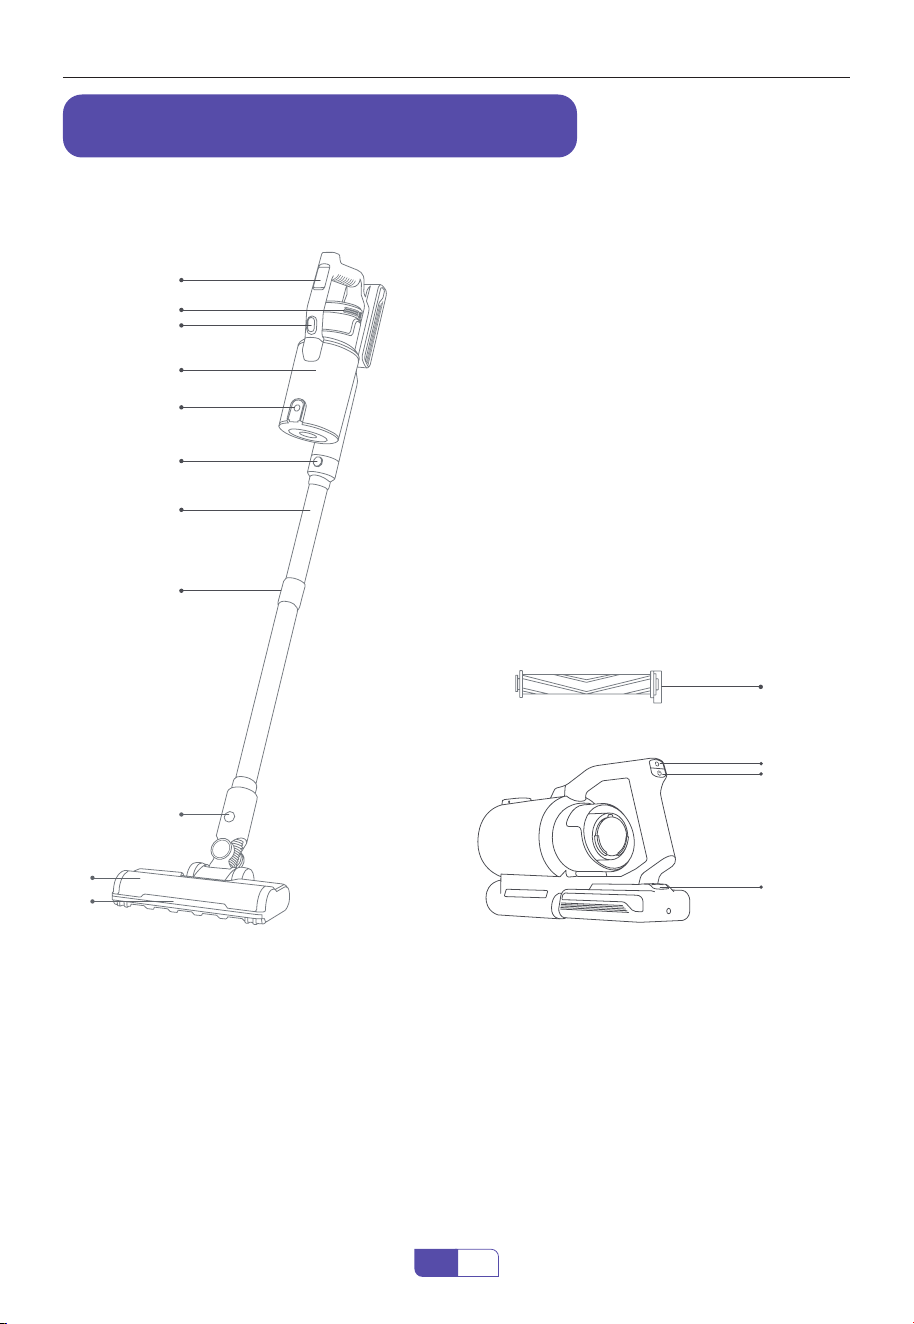
1. Animated Display
2. Fragrance Purication
3. Dust Tank Release Button
4. Dust Cup
5. Dust Release Button
6. Main Body Removal Button
7. Adjustable Extension Tube
8. Tube Telescopic Button
9. Motorized Brush Head Release Button
10. Motorized Brush Head
11. LED Light
12. 2 in 1 Roller Brush
13. Speed Control Button
14. Switch Button
15. Battery Pack Release Button

If you have any questions, please contact the corresponding email address of each country
8
EN
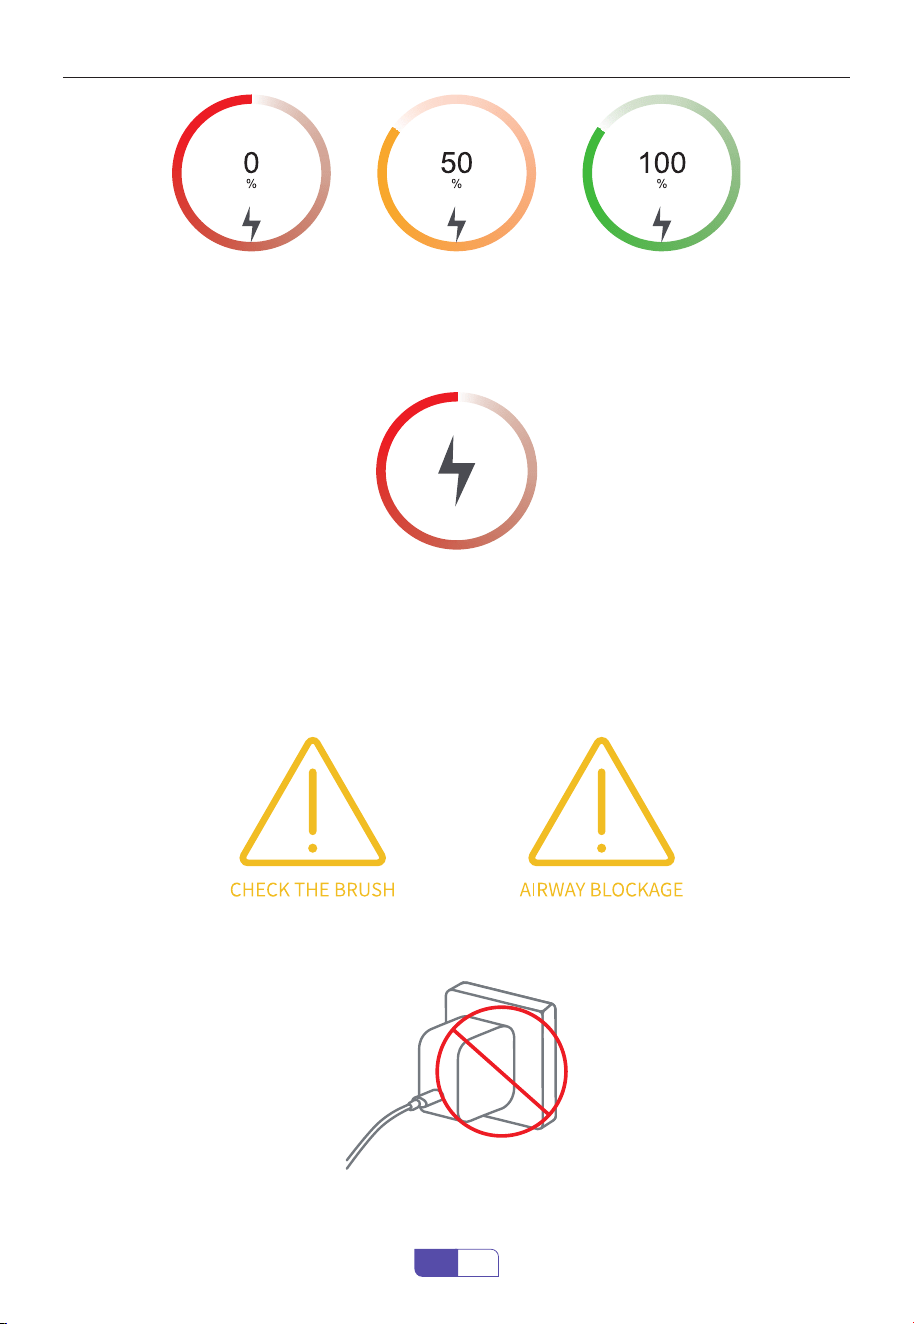
3.2 OLED Color Screen Real time Animation Display
① Charging Reminder
② Green Percentage
③ Mint Blue Percentage
④ Deep Blue Percentage
Check the charging status by the digital screen, which displays the progress in percentage,
indicating how much power is left. The battery is fully charged when it goes to 100%.
This product runs in Eco mode.
This product runs in Mid mode.
This product runs in Max mode.
If you have any questions, please contact the corresponding email address of each country
9
EN
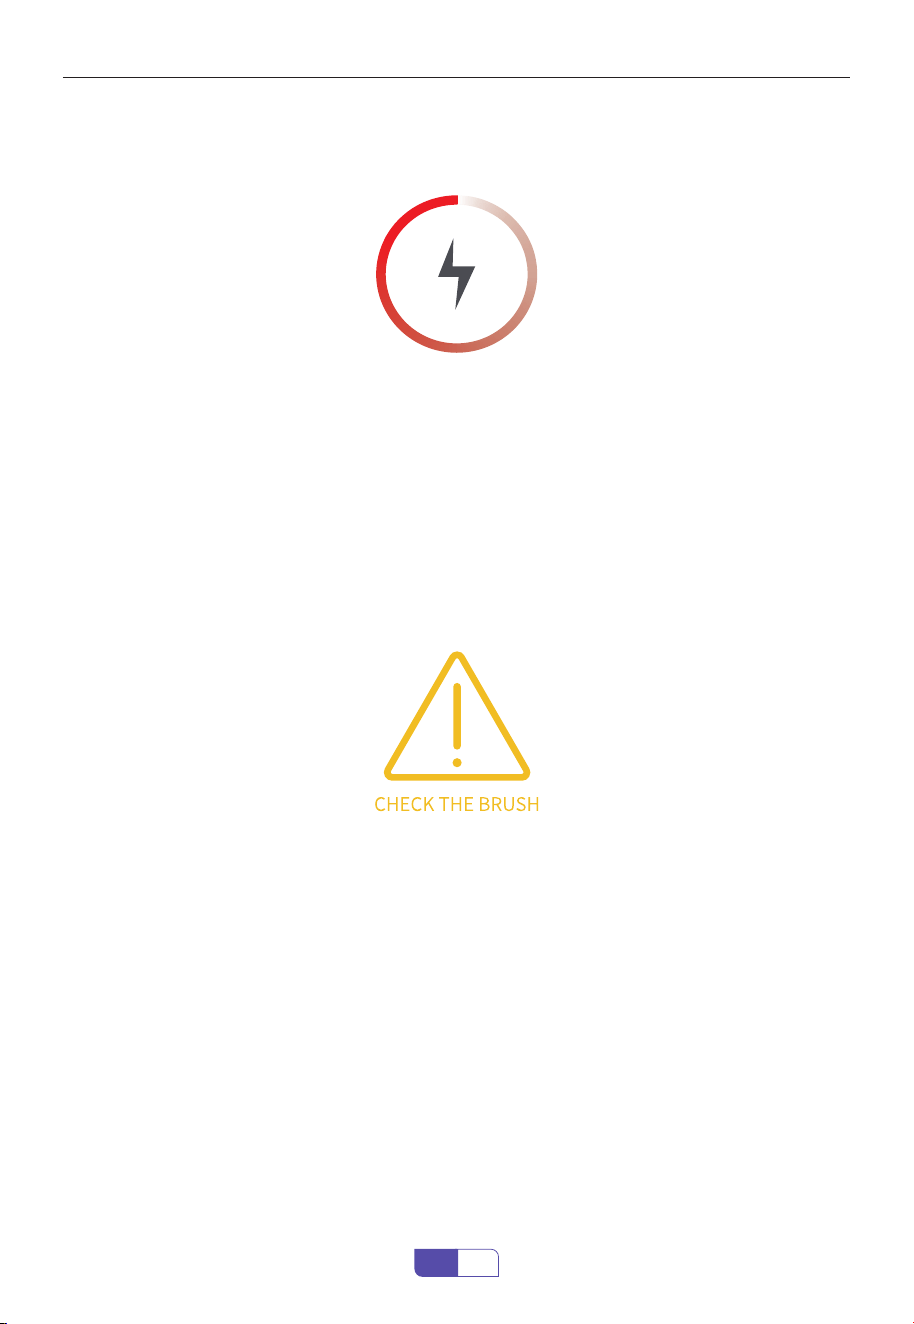
⑤ Low Power O Prompt
⑥ Error Reporting Floor Brush Blocking
⑦ Error Reporting Airway Blockage
When the red Lightning indicator appears on the screen, the product must be charged as soon
as possible, indicating that the power is below 10% and will be turned o after 10s.
When some foreign objects or too much hair gets stuck in the brush roller, and the screen
displays the error reporting.
When the airway from aluminum tube to the lter is blocked for 5s, the machine stops running
and the screen display error reporting lasts for 1min30s (error reporting animation cycle 3
times) and then goes out, or turns o and restarts to go out.
△ Solution:
(1) Clean the Brush Roller
(2) Avoid picking up large rubbish, such as pebbles
(3) Empty the Dust Cup,Contact Honiture Support for replacement
(4) Contact Honiture Support for replacement
△ Solution:
(1) Empty the Dust Cup
(2) Align the dust bae to correct hole
(3) Clean or change the Filter and reinstall correctly
(4) Dry out Filter Sponge or HEPA Filter
(5) Clean the Extension Tube and Motorized Brush Head

If you have any questions, please contact the corresponding email address of each country
10
EN
⑧ Error Reporting When using the Wrong Adapter
Input voltage/current mismatch, screen plays error reporting animation for 60s and then goes
out, or goes out when the adapter is unplugged.
3.3 Accessories
① 2 in 1 Retractable Brush
⑤ 2 in 1 Roller Brush
③ Hair Cleaning Tool
② Long Crevice Nozzle
④ Wall Mount Plate
Brush retractable design can help
you remove dust and hair from both
upholstered furniture and hard surface
furniture.
Remove dust, debris and hair from hard
oors, carpets and velvet.
Remove hair, rubbish and micro dust on the
brush shaft to keep the brush head clean.
Remove dust on hard to reach area like
windows, bed feet, gaps between tables
and chairs, etc.
Hold the vacuum on wall-mount plate for
easy storage and battery charging.
If you have any questions, please contact the corresponding email address of each country
11
EN
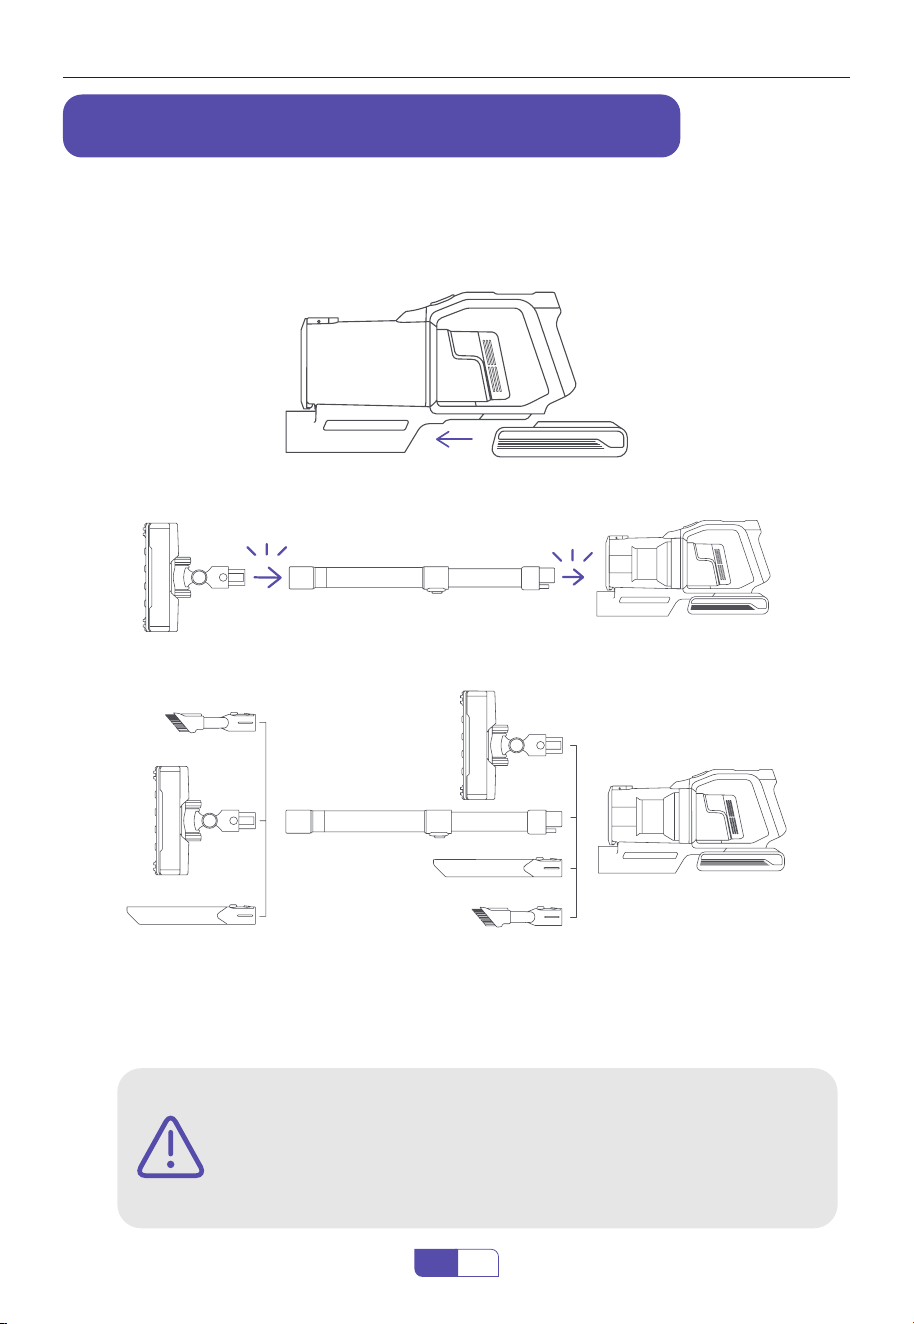
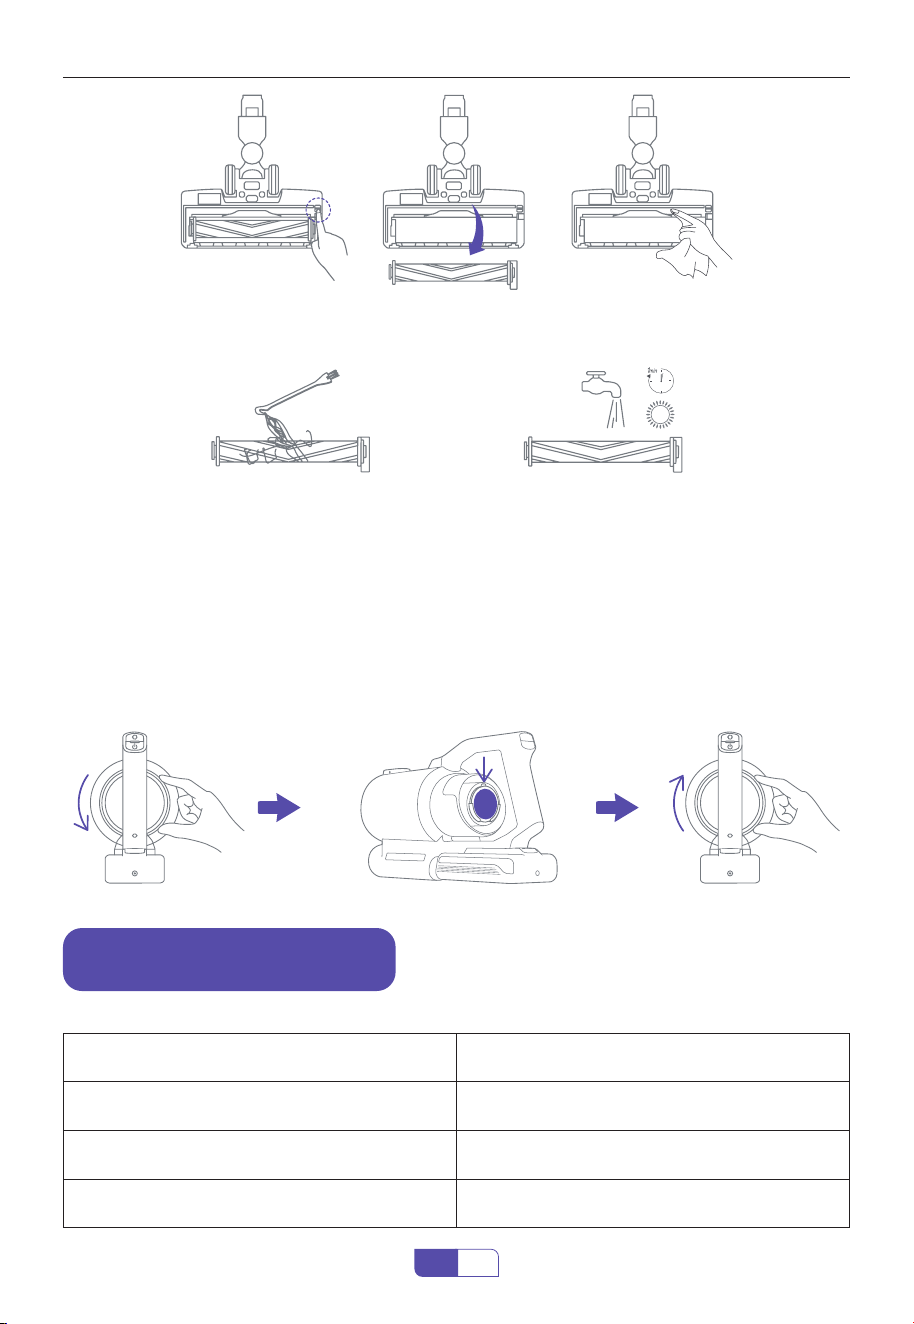
The vacuum cleaner cannot stand on its own. Fix the wall-mount plate to the wall securely with
the screws provided by Honiture.
4.1.1 Install the Battery Pack
4.1.2 Install the Extension Tube
4.1.3 Install Desired Cleaning Accessory
4. ASSEMBLING & WALL MOUNTING
4.1 Product Assembling
4.2 Wall Mount Plate
click
click
Please make sure there is no gas, water or electrical cables and wires
behind the mounting area.
To avoid the dock dropping down, please make sure it must be installed
rmly.
WARNING
If you have any questions, please contact the corresponding email address of each country
12
EN
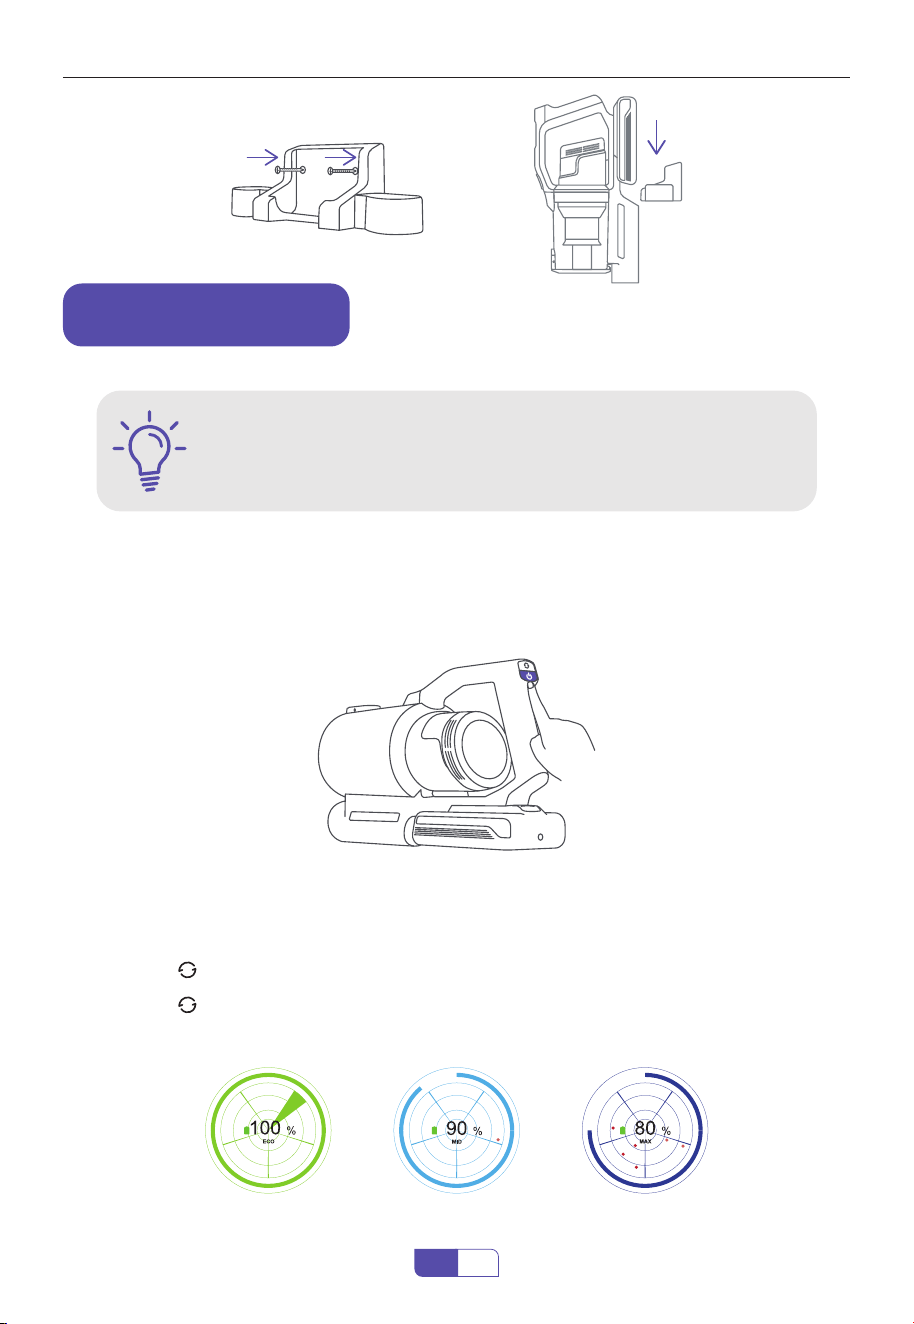
The battery is fully charged, and xed in place.
The dust cup and lters are cleaned, dried, and xed in place.
WARNING
5. HOW TO USE
5.1 Start to Work
5.2 Select Cleaning Mode
Press the switch button, the appliance will start to work. Press the speed control button to
adjust the power as you need.
・ Boot into "Eco" Mode
・ Press the " " Button Set to "Mid" Mode
・ Press the " " Button Again Switch to "Max" Mode
Attention: The product has a memory function, a boot will show you the most recent mode.
Eco Mode Mid Mode Max Mode
If you have any questions, please contact the corresponding email address of each country
13
EN
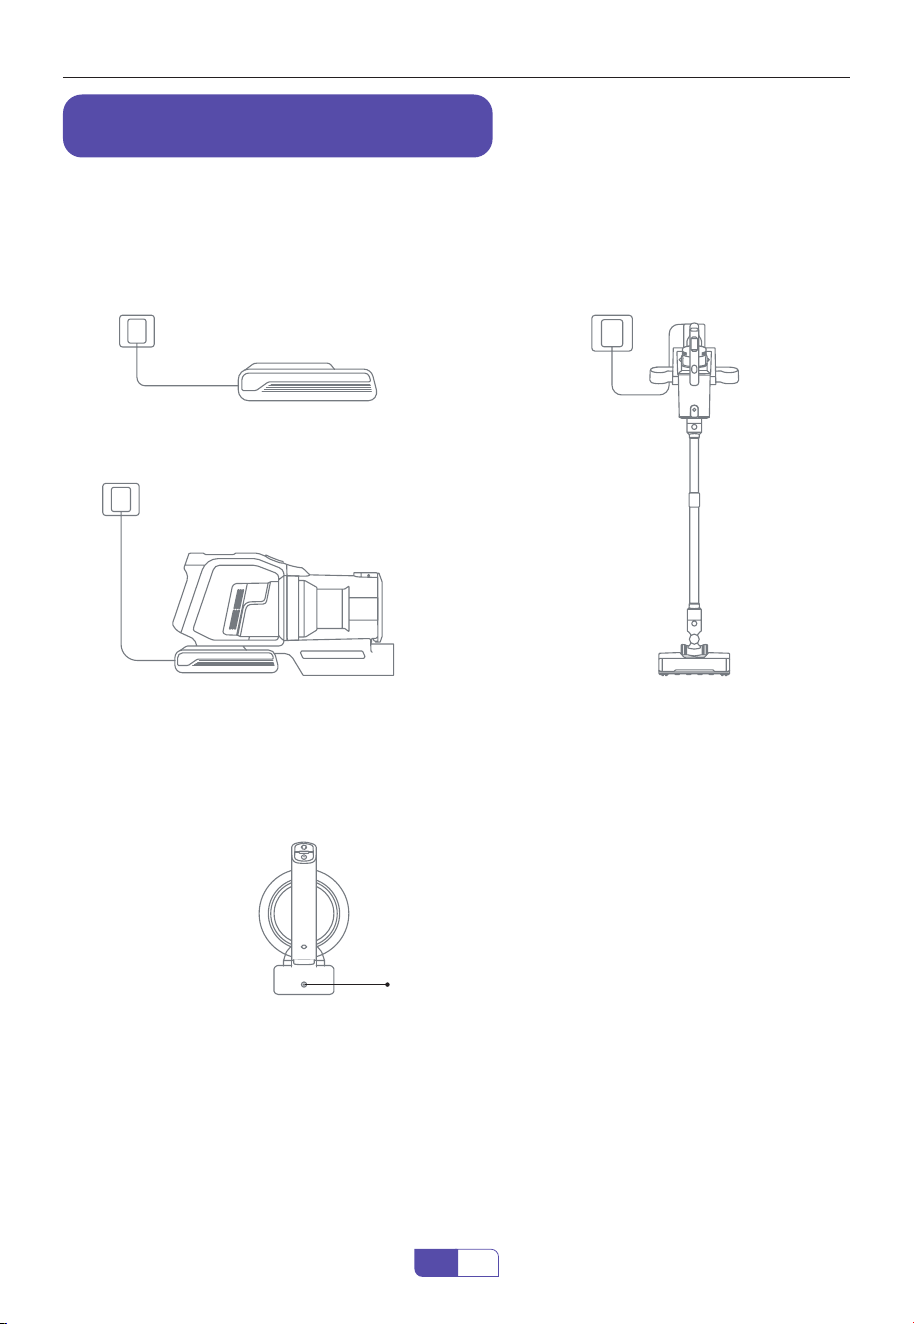
6. CHARGING METHODS
① Remove the Battery Pack and Charge it
Separately
③ Hang on the Wall Mount to Charge
② Connect the Main Body to Charge
Blue light blinking (Charging)
Blue light (Fully Charged)
The battery indicator will be blinking in blue when being charged and turn blue when the
battery is fully charged.
・ The number represents the remaining power.
・ When the battery is charging, the battery charging animation on the display will change color
according to the battery power, and the power indicator light will continue to ash.
・ After the battery is fully charged, the battery charging animation on the display will show
100%, the display will automatically turn o after 1 hour, and the power indicator light will stop
ashing and remain blue.
6.1 Charging Methods
6.2 Battery Indicator
6.2.1 Charging Indicator
If you have any questions, please contact the corresponding email address of each country
14
EN
・ When the battery power is lower than 30%, the display will show a low power shutdown
prompt. At this time, the vacuum cleaner should be charged as soon as possible, so as not to
shut down within a few minutes when it is used next time.
・ When the ground brush is blocked, the display starts an animation to remind you to check
the ground brush.
・ When the host unit is blocked, the display will start an animation to remind you of the airway
blockage and show you how to clean the vacuum cleaner.
・ When using an adapter not provided by Honiture, screen plays error message animation for
60s and then goes out,or goes out when the adapter is unplugged.
6.2.2 Low Battery Level Indicator
6.3 Abnormal Indicator

If you have any questions, please contact the corresponding email address of each country
15
EN
・ Press the dust cup release button to empty the dust.
・ When using, if the garbage in the dust cup exceeds MAX Line, please empty it in time.
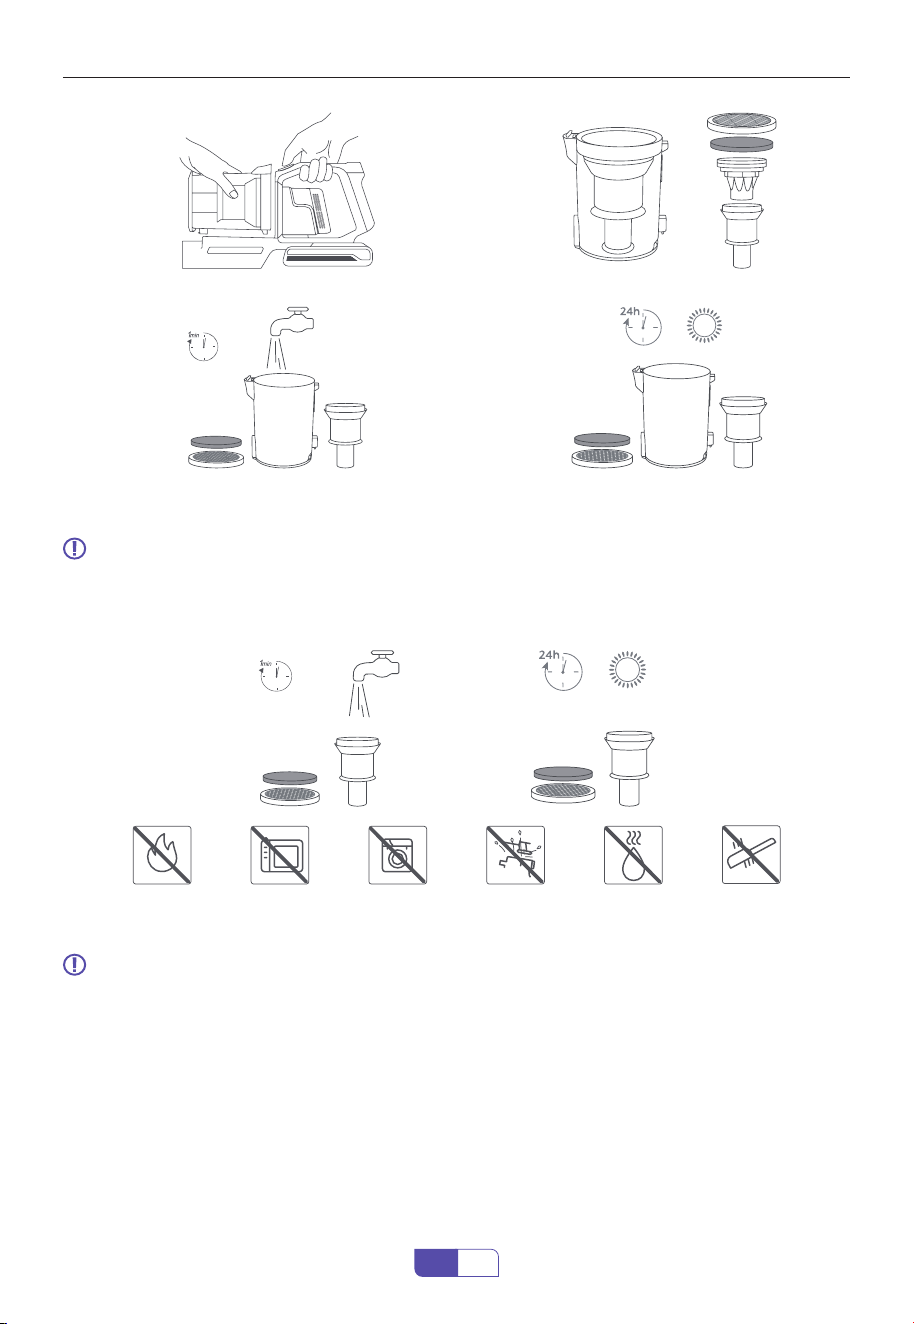
・ Press the dust cup release button to remove the dust cup, take out the sponge, HEPA lter
and the stainless steel lter in turn.
7.2.1 Empty the Dust Cup
7.2.2 Clean the Dust Cup
7. MAINTENANCE
Please clean it regularly to prolong the service life of the vacuum cleaner.
・ Turn o the power before cleaning the body.
・ Please use a neutral detergent, wipe the body with half-wet cloth.
・ Please avoid sun exposure and store in a cool and dry place.
7.1 Main Body Cleaning
7.2 Dust Cup Cleaning
MAX
If you have any questions, please contact the corresponding email address of each country
16
EN
①
②
③ ④
7.3 Filter Cleaning
7.4 Brush Roller Cleaning
Note: Wash the lters with cold water at least once every month.
・ Filter sponge and HEPA lter can be rinsed with water to remove dust.
・ Please ensure the lters are completely dry before reassembly.
Note: After long periods of use, the bristle may be jammed by hair or similar build-up.
It's recommended to clean the brush roller periodically to ensure ecient operation and
maintain suction.
・ Remove the brush roller, gently clean the motored brush window and suction mouth.
If you have any questions, please contact the corresponding email address of each country
17
EN
7.5 Aromatherapy tablet replacement
Open the air vent lid Remove the old aromatherapy tablet and attach the new one Snap the lid
back on.
Tip: Once the fragrance has disappeared, add a drop of your favourite essential oil to the aroma-
therapy tablet.
・ Remove the debris wrapped around the roller with Honiture Hair Cleaning Tool,then ush
with water.
・ Insert the brush roller into the motored brush window,push down the cover until it securely
in place. (Please make sure the brush roller is completely dry before using.)
8. SPECIFICATION
Product Cordless Vacuum Cleaner
Model S14
Rated Voltage 25.9V
⎓
Cleaning Modes Eco/Standard/Boost

If you have any questions, please contact the corresponding email address of each country
18
EN
9. TROUBLESHOOTING
ISSUE CAUSE SOLUTION
The vacuum cleaner
can not work
(1) Out of power
(2) Battery Pack not installed in place
(3) The Motorized Brush Head is
blocked with hair and other debris
(4) Auto protection for overheating
Switch Button can not work
(5)Switch Button can not work
(1) Charge the vacuum cle aner
(2) Battery Pack installed in place
(3) Clean the Motorized Brush Head
(4) Restart after cooling down
(5) Contact Honiture Support for
replacement
Weak suction
(1) Dust Cup is full of garbage
(2) Dust bae misaligned
(3) Filter are clogged or not installed in
place
(4) Filter Sponge or HEPA Filter not dry
(5) Extension Tube and Motorized
Brush Head is blocked with hair or
other debris
(6) Low power
(1) Empty the Dust Cup
(2) Align the dust bae to correct hole
(3) Clean or change the Filter and
reinstall correctly
(4) Dry out Filter Sponge or HEPA Filter
(5) Clean the Extension Tube and
Motorized Brush Head
(6) Charge the vacuum cleaner
Charging indicator
does not light up or
ash abnormally
(1) Battery Pack is dead or broken
(2) Charger is not correctly connected
(3) Charger is wrong
(1) Change the Battery Pack
(2) Make sure the Charger are fully
plugged in socket and Battery Pack
(3) Use the Charger provided by
Honiture
Insucient running
time after charging
(1) Insucient charging time
(2) Battery aging
(3) Motorized Brush Head or is blocked
with hair or other debris
(4) Charger is wrong
(1) Vacuum cleaner fully charged
(2) Change the Battery
(3) Clean the Motorized Brush Head
(4) Use the Charger provided by
Honiture
The Roller Brush stops
rotating
(1) Brush Roller are blocked with hair,
pebbles or other debris
(2) Dust Cup is full of dust
(1) Clean the Brush Roller
(2) Avoid picking up large rubbish,
such as pebbles
(3) Empty the Dust Cup Contact
Honiture Support for replacement
(4) Contact Honiture Support for
replacement

If you have any questions, please contact the corresponding email address of each country
19
EN
10. WARRANTY
・ Your Honiture machine has a 2-year warranty against original defects in material and
workman- ship, when used for private household purposes in accordance with the Honiture
Instruction Manual.
・ This warranty provides, at no extra cost to you, all labor and parts necessary to ensure your
machine is in proper operating condition during the warranty period.
According to the requirements outlined in this instruction manual, subject to the following
conditions and exclusions.
Only applies to purchases made from authorized retailers of Honiture .
This warranty will only be valid if the machine is used in the country in which it was sold.
Please keep your proof of purchase. To make a claim under our Limited Warranty, you need to
provide your original purchase receipt with the purchase date and order number on it.
All work will be carried out by Honiture or its authorized agency.
Any replaced defective parts will become the property of Honiture.
Service under this warranty will not extend the period of this warranty.
If your machine is not functioning properly, or you still have any questions after reading this
manual carefully, please feel free to contact us, we will try our best to provide you with a
satisfac- tory solution.
Honiture shall not be liable for costs, damages or repairs incurred as a result of:
・ Machines purchased from an unauthorized dealer.
・ Careless operation or handling, misuse, abuse and/or lack of maintenance or use not in
accor- dance with the Honiture Instruction Manual.
・ The machines are used for commercial or rental purposes in addition to normal domestic
use. Use of parts not in accordance with the Honiture Instruction Manual.
・ Use of parts and accessories other than those produced or recommended by Honiture.
・ External factors unrelated to product quality and use, like accidental water damage. Repairs
or alterations carried out by unauthorized parties or agents.
・ Normal wear and tear, including Dust Cup, Belt, Filter, HEPA, Brush Roller, and Power Cord (or
where external damage or abuse is diagnosed), carpet or oor damage due to use not in accor-
dance with manufacturer's instructions or failure to turn the brush roller o when necessary.
・ Reduction in battery discharge time due to battery age or use.
The 2 Year Limited Warranty
WHAT IS COVERED?
WHAT IS NOT COVERED?
HOW TO CLAIM?
If you have any questions, please contact the corresponding email address of each country
20
EN
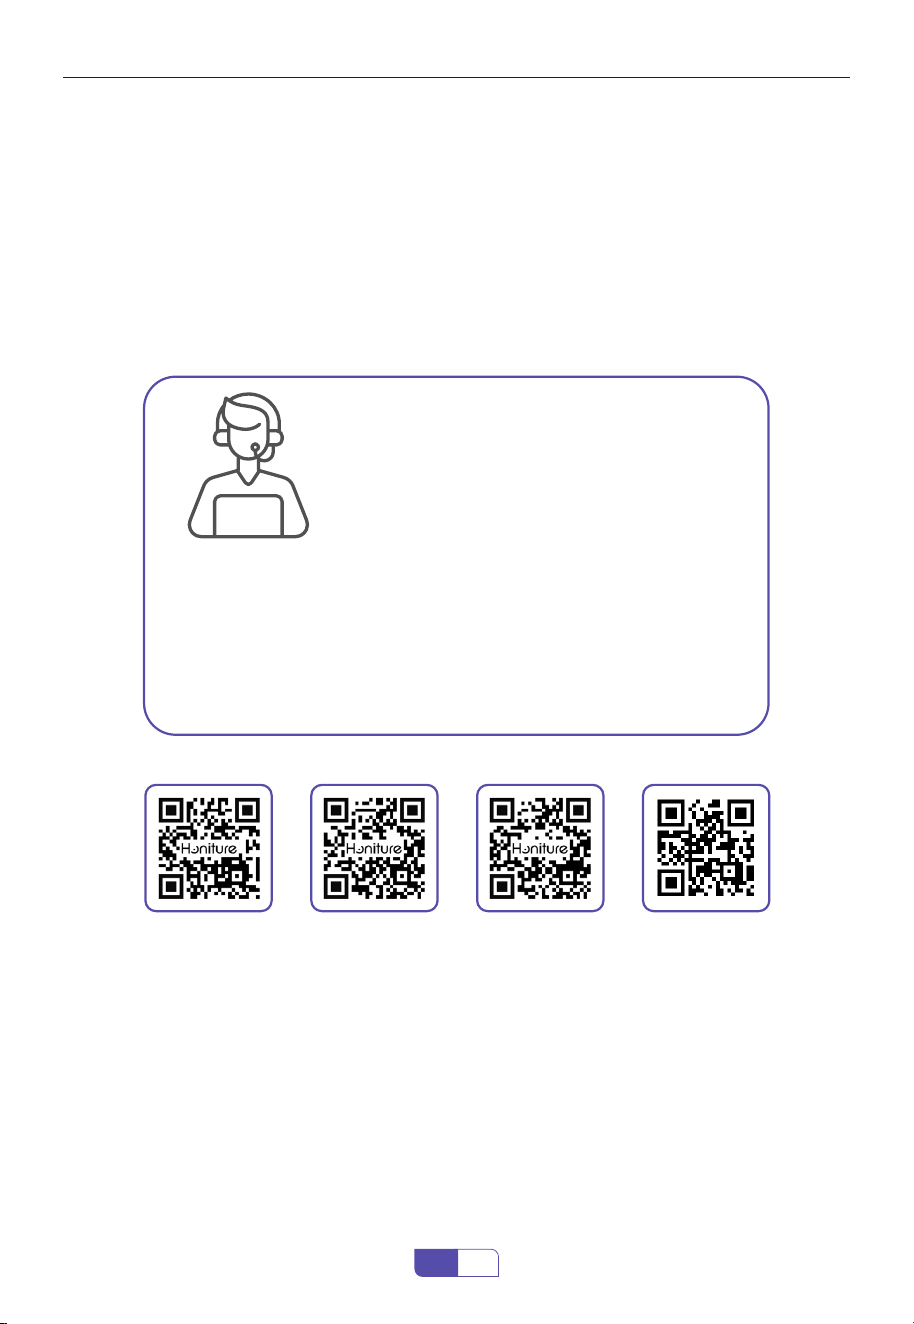
E-mail our Customer Service:
Honiture is here to help and we are glad to serve you.
The United States:
support US@honiture.com
The United Kingdom:
support UK@honiture.com
Canada:
support CA@honiture.com
Australia:
support au@honiture.com
US UK CA AU

Contact Information
Made in China
H
o
nit
u
r
e
