Loading ...
Loading ...
Loading ...

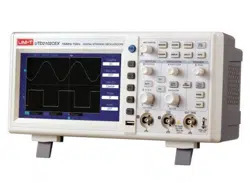
UTD2000 Series User Manual
16
1. Use horizontal SCALE knob to change gear position settings of horizontal time base and
observe the changes of state information. Turn horizontal SCALE knob to change
“SEC/DIV” time base gear position, and you can find that corresponding changes have
taken place in the time base gear position display of corresponding channel in the status
bar. Horizontal scanning rate steps up in the multiple of 1, 2 and then 5 from 2ns to 50s.
2. Use horizontal POSITION knob to adjust the horizontal position of the signal in the
waveform window. Horizontal POSITION knob controls the trigger position of the input
signal. When applying to trigger position and turning horizontal POSITION knob, it is
possible to observe the horizontal movement of waveform along with POSITION knob
turning.
3. Press HORI MENU to enter Zoom menu. On this menu, press F1 to turn on time
extension, press F1 again to turn off time extention and go back to main time base. Users
can also set trigger holdoff time on this menu.
1.8 Introduction to the Trigger System
As shown in Figure 1-8, there is one knob and four keys in trigger menu control area.
Practices below will gradually guide you to be familiar with the setting.
Figure 1-8 Trigger Control Area and Trigger Menu on the Panel
(1) Turn trigger level knob LEVEL to change trigger level. Please refer to the trigger marking
on the screen to indicate the trigger level line. The trigger level line should move up/down
accordingly. The trigger level value will change accordingly.
(2) Press TRIG MENU to change the trigger setting.
Press F1 to select “Edge” trigger.
Press F2 to select CH1 for “Source”.
Press F3 to select AC for “Trigger coupling”.
Press F4 to select AUTO for “Trigger mode”.
Press F5 to select RISING for “Slope type”.
(3) Press SET TO ZERO to set vertical and horizontal position of waveform to zero, then
the position of trigger level will be on the vertical center of the range of trigger signal.
(4) Press DEFAULT to display “Factory Setting” window, press SELECT to execute factory
setting, press MENU to stop factory setting and close the window.
(5) Press HELP to display “HELP” window, press HELP again to close the window.
Loading ...
Loading ...
Loading ...