Loading ...
Loading ...
Loading ...
UTD2000 Series User Manual
12
frequency defaults at 1kHz.
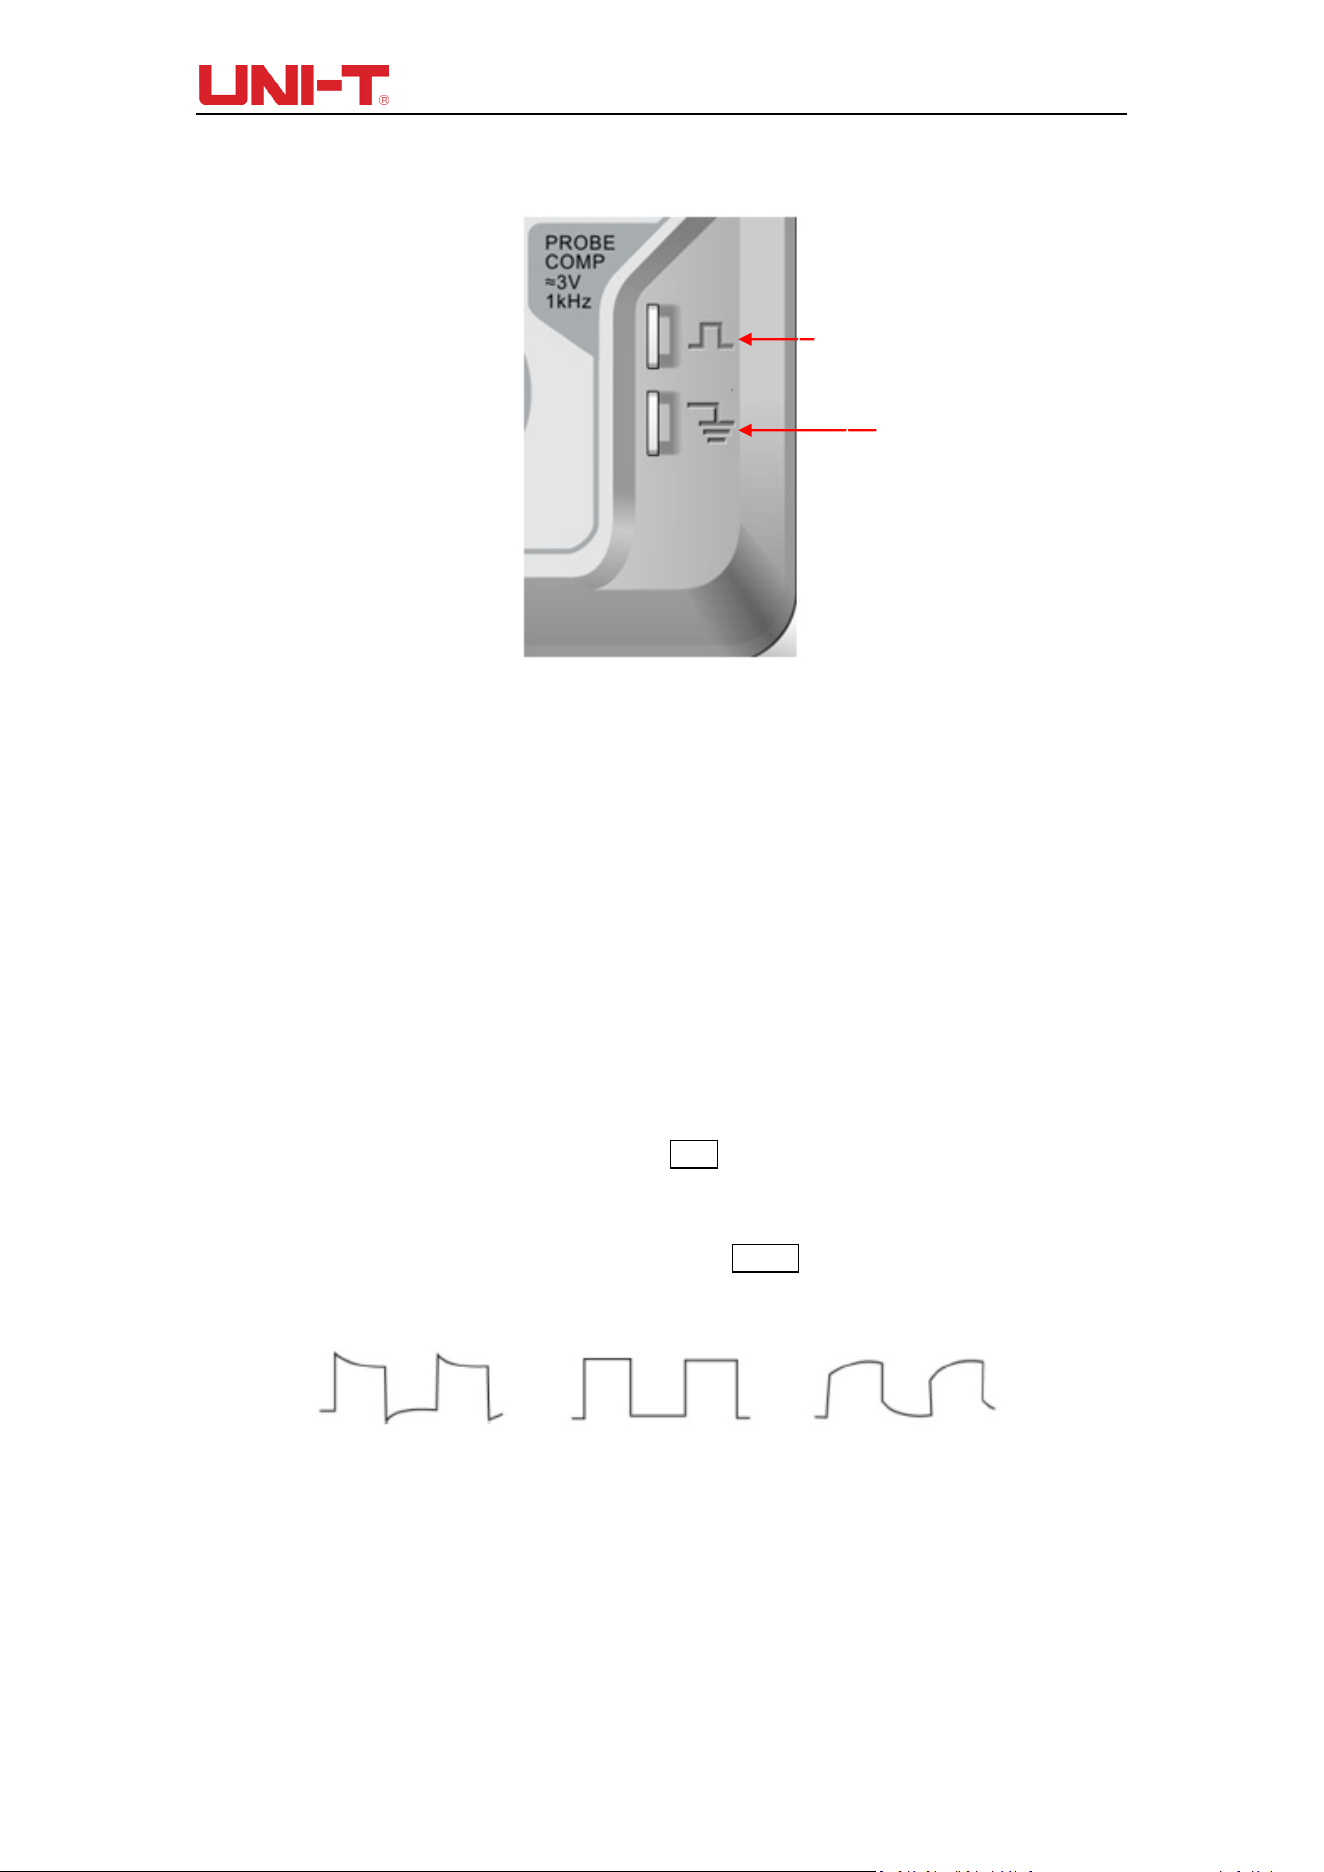
(4) Function Check
Press AUTO (auto setting) button, square wave appears on the display screen, the wave
range is about 3Vpp and the frequency is 1kHz. Go back to step 3 and check other
channels in a same way. If the actual displayed waveform is different from above figure,
please go to next step “Probe Compensation”.
(5) Probe Compensation
When connecting the probe with any input channel for the first time, it is required to make
adjustment for this item, matching the probe with input channel. Probe without being
compensated and corrected will lead to measurement error or mistake. In case of
adjustment of probe compensation, follow the following steps:
Set the probe menu attenuation coefficient as 10×, place the switch on the probe
at 10× and connect DSO probe with CH1. If hook-shape head of probe is used,
please make sure that it contacts the probe. Connect the probe to the probe
compensator of DSO, connect the grounding clamp to the “Grounding terminal” of
probe compensator, turn on CH1 and press AUTO.
Observe displayed waveform
Figure 1-5 Probe Compensation and Correction
If screen displays “under-compensation” or “over-compensation” for waveform as
shown in above figures, use screwdriver with nonmetal handle to adjust the
variable capacitance on the probe until screen displays “correct compensation” for
waveform as shown in the above figure.
Over-compensation
Correct compensation
Under-compensation
Probe Compensation Siganl Tip
Ground Terminal
Loading ...
Loading ...
Loading ...