
Loading ...
Loading ...
Loading ...
To adjust the seat
1. Fold the seat forward and remove the seat
adjustment knob (A).
A
B
2. Loosen the seat adjustment knob (B).
3. Move the seat until it is in a position where you can
push the brake and clutch pedals down.
4. Align one of the holes in the seat pan with the hole in
the seat and install the seat adjustment knob (A).
5. Tighten the 2 seat adjustment knobs fully.
To adjust the seat height
The seat height can be adjusted into 2 positions, upper
position and lower position. The seat is installed in the
upper position from the factory.
1. Fold the seat forward.
2. Remove the 2 bolts (A) and the 2 nuts (B).
C
D
A
A
B
WARNING:
The seat and seat pan
comes loose when you remove the bolts
and the nuts.
3. Align the holes in the seat pan with the holes for the
upper position (C) or the lower position (D). Install
the bolts and the nuts.
4. Tighten all bolts fully.
To connect the battery
WARNING: Risk of electrical shock and
burn injuries. Do not use metal wristbands
or other metal accessories. Metal items that
touch the battery terminals can cause burn
injuries, electrical shock, and short circuit of
the battery.
Note: If it is after the year and month that is written on
the battery label, charge the battery. Charge the battery
for a minimum of 1 hour at 6–10 A.
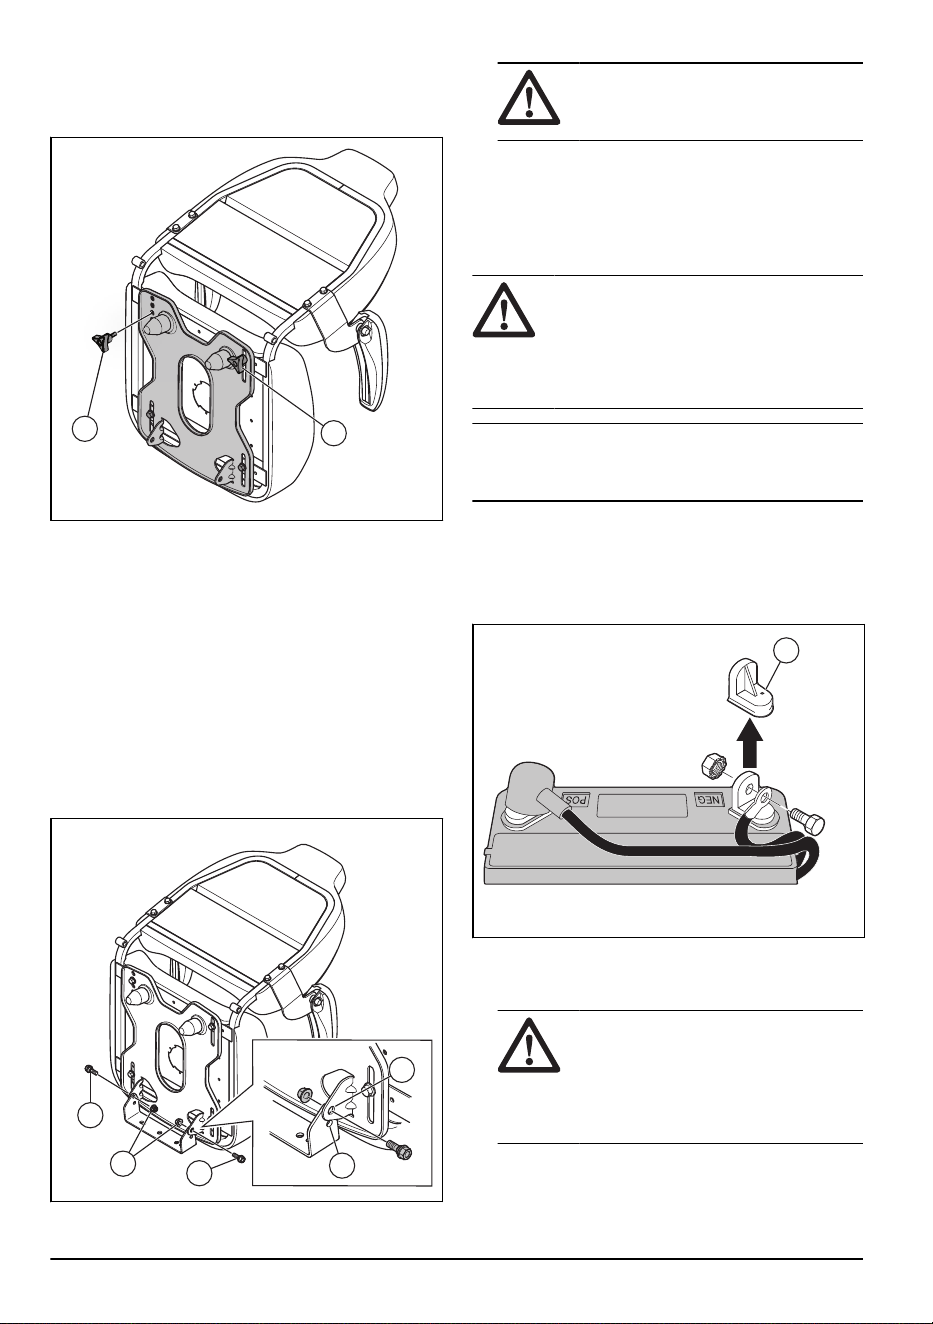
1. Find the battery location below the seat or the
engine cover.
2. Lift the seat pan or the engine cover to the raised
position.
3. Remove the 2 terminal caps (A) and discard them.
A
4. Connect the red battery cable to the positive (+)
terminal and tighten the bolt and nut as shown. Move
the terminal cover on the terminal.
WARNING:
Risk of sparks. The red
battery cable must be connected to the
positive terminal before the black battery
cable is connected to the negative
terminal. This is to prevent sparks and
accidental grounding.
5. Connect the black cable to the negative (-) terminal
and tighten the bolt and nut fully.
12
2231 - 003 - 22.09.2023
Loading ...
Loading ...
Loading ...